1. UNITS 2. RECIPE MANAGEMENT 3. PRODUCTS WITH SALES FORMATS
Inventory control is essential for managing your business.
REVO handles inventory units and decreases stock as products are sold in your establishment, but it requires initial configuration and ongoing maintenance by the administrator.
Before you begin, take two quick steps:
1. Create a warehouse: Go to Settings / WAREHOUSES and click + New to create it. Give it a name, such as "Main Warehouse". If you already have a warehouse, you can edit it. Learn more here.
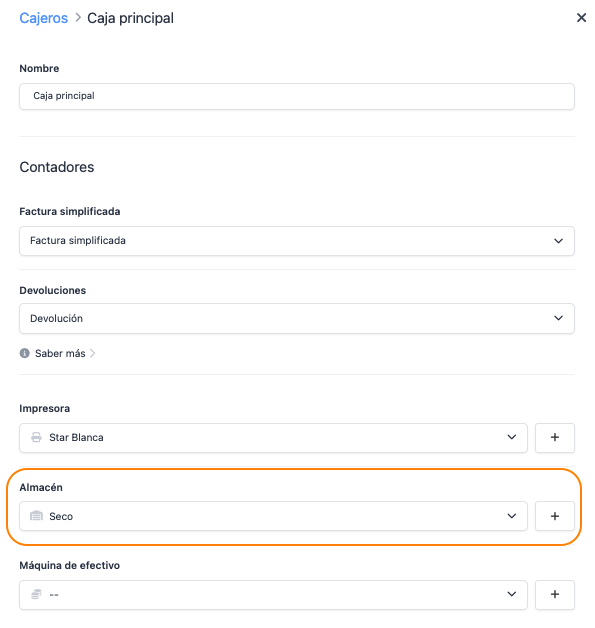
2. Link the warehouse to a cashier: Go to Settings / CASHIERS and edit the current settings to link the warehouse to the cashier who will deduct the inventory.
1. UNITS
This method applies to products you buy and sell by units, such as soft drinks. It is the simplest to manage.
In the following example, we will activate inventory control for the Coca-Cola product.
1. Go to the product page and activate inventory control.
2. Ensure that the selected unit is Units.
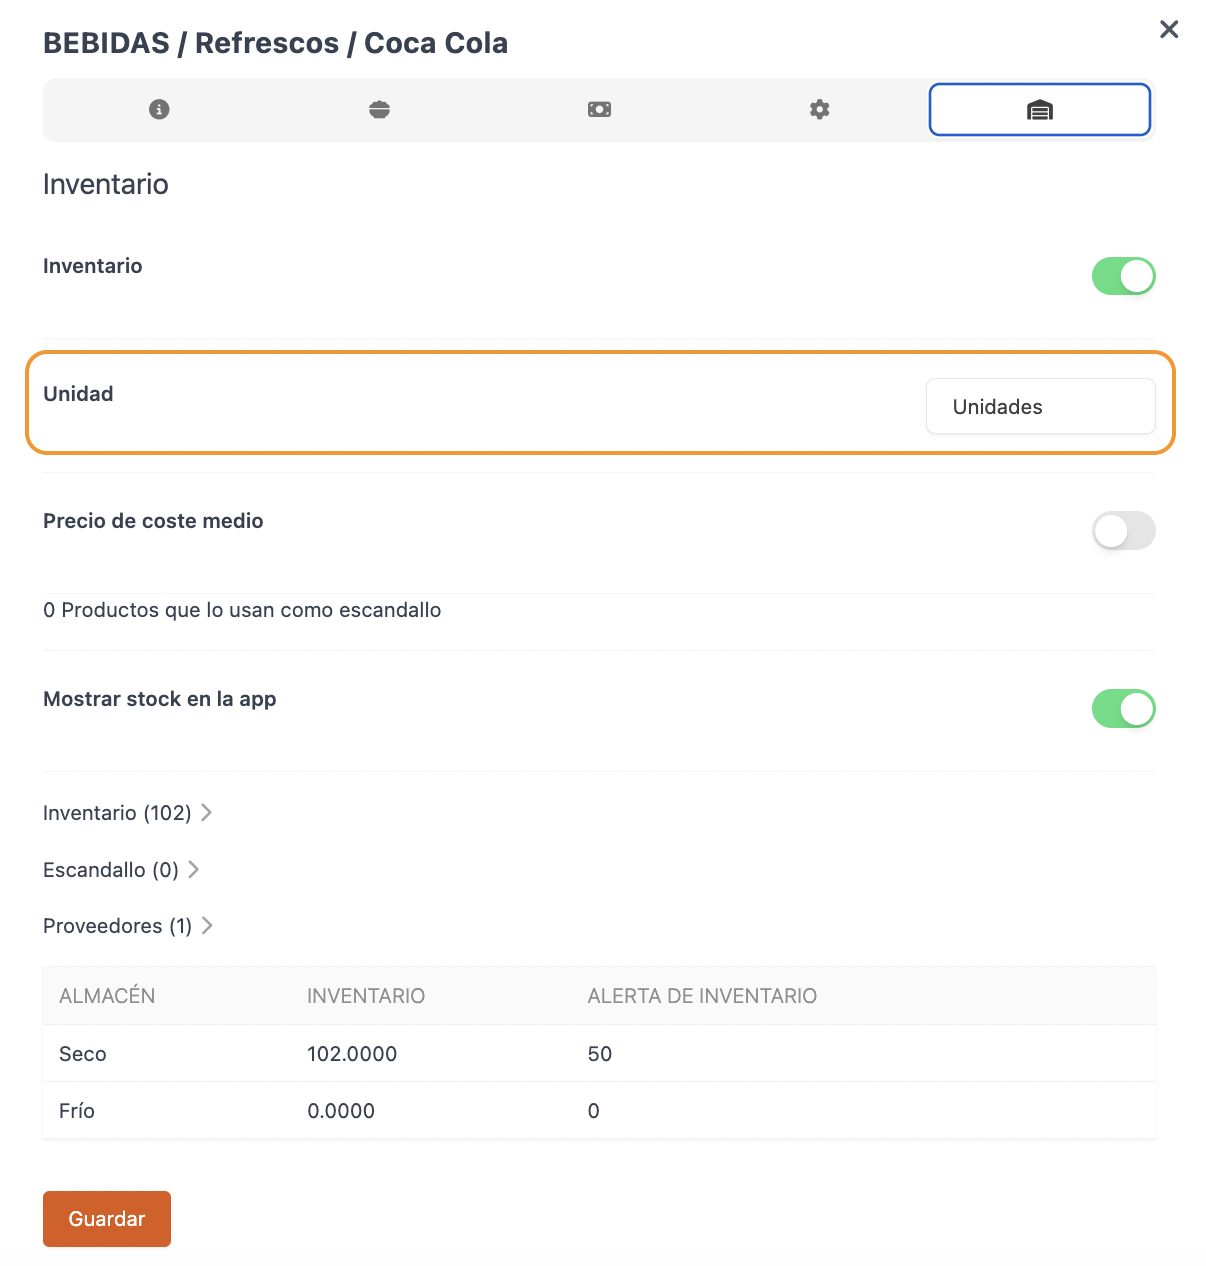
3. Access Inventory (102) to update the stock.

- Name: Select the warehouse.
- Unit: Ensure that the unit matches that on the product page.
- Inventory: Add the stock.
- Default: Indicate the number of units you want by default. When the stock falls below this number, it will appear in the To Restock column.
- Inventory Alert: Indicate the stock level at which you want the system to notify you that you need to restock.
REVO checks daily for low-stock products and sends an email. It is essential to have your email in your REVO account profile. You can check it here: User Profile and activate Notifications.
Once this is done, every time a Coca-Cola is sold, one unit will be automatically deducted from the inventory.
HOW TO CREATE CUSTOM UNITS
Revo XEF includes basic units for inventory control, but if these don’t suit you, you can easily create new ones.
For example, if you want to control wine bottles by litres, create a unit called 75 cl Wine Bottle.
1. Go to Purchase Orders / UNITS.
2. Click + New and fill in the information.
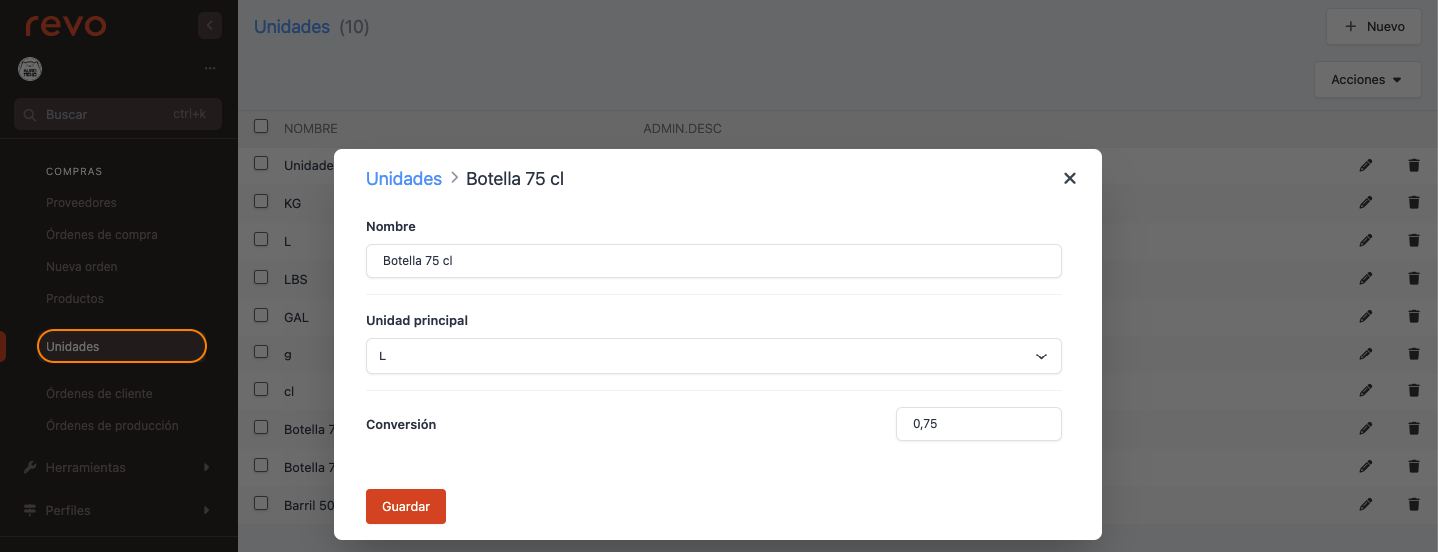
- Name: Enter a name. Example: Bottle.
- Main Unit: Select the main unit. Example: L.
- Conversion: Enter the conversion. Example: 0.75.
3. Click Save.
2. ITEMS DISTRIBUTION
In some cases, you need to break down a product into its components to have complete inventory control, meaning a product is made up of several ingredients. For example, a prawn onigiri that includes rice, prawns, and seaweed.
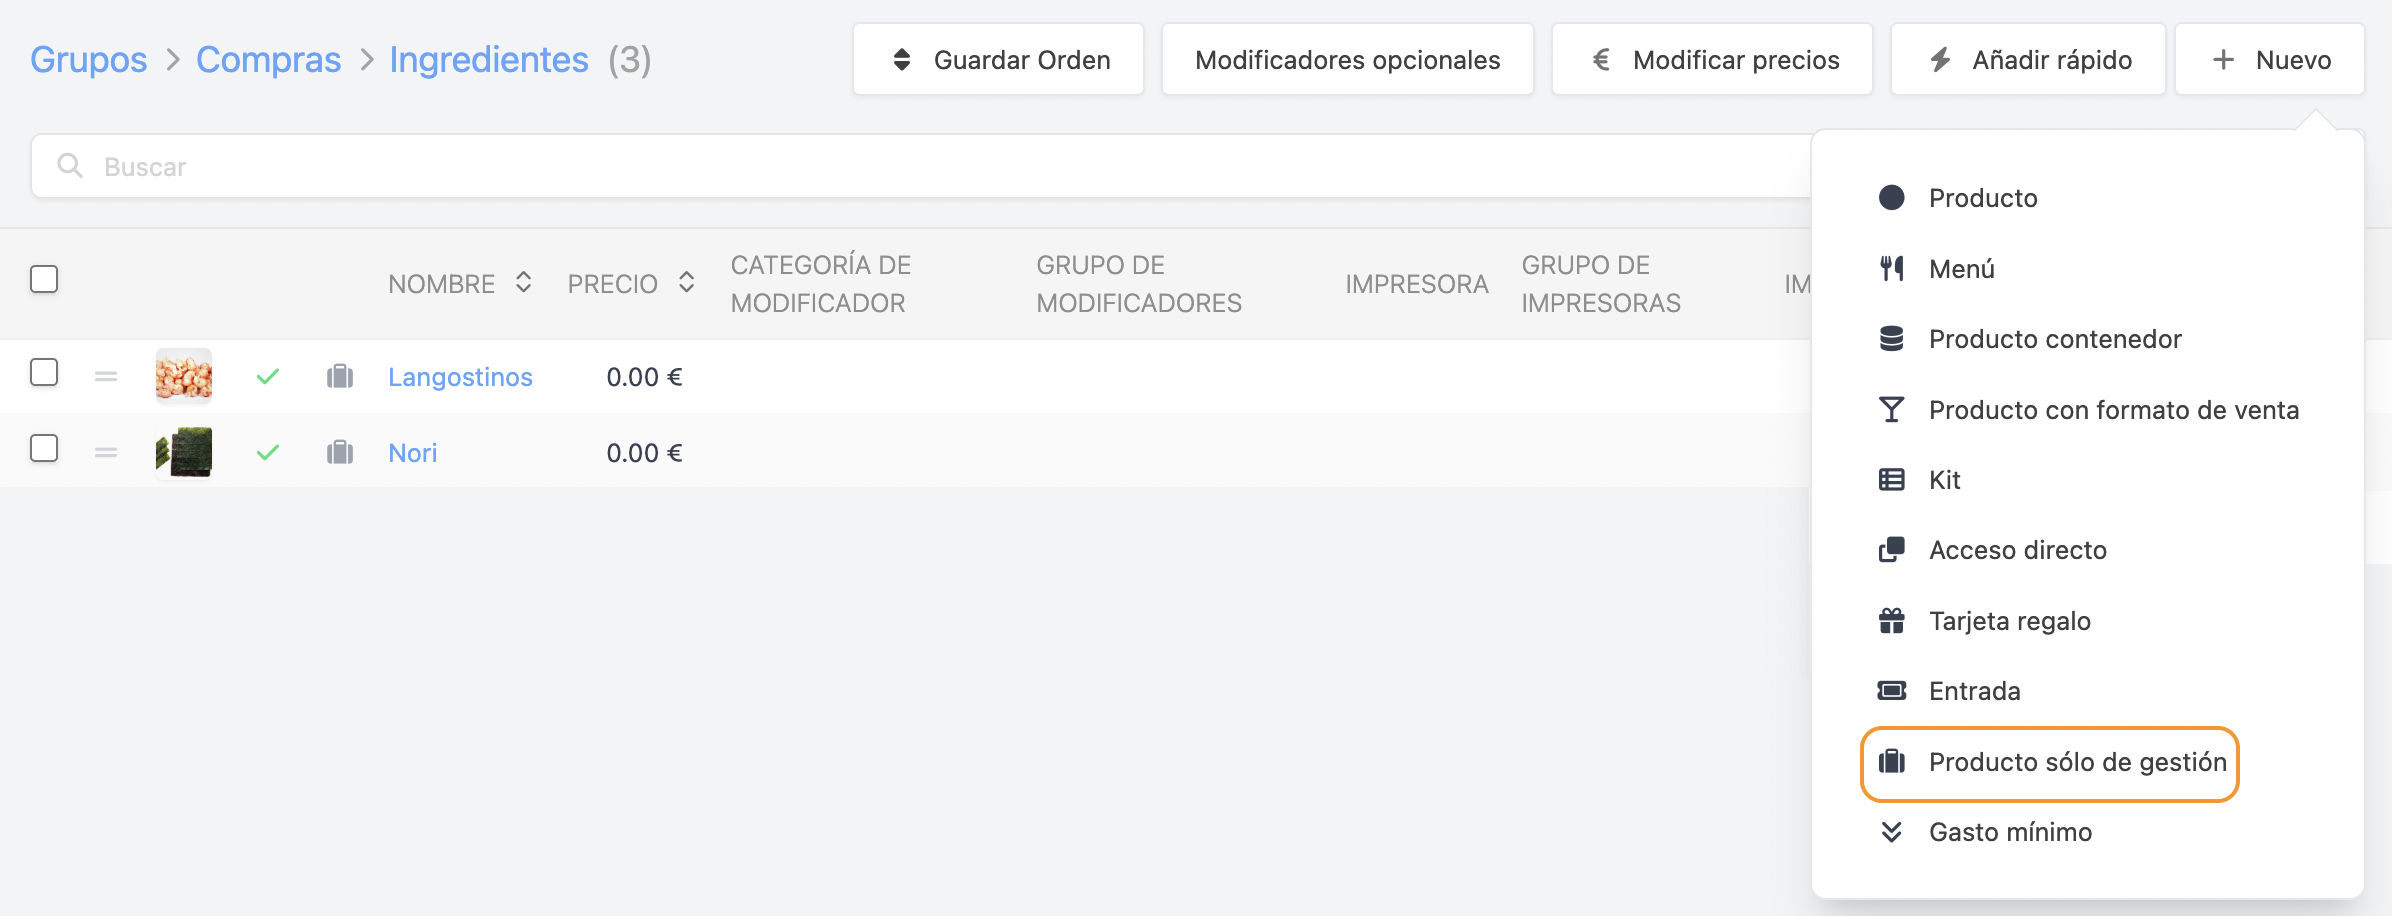
First, we recommend going to Groups and creating a hidden (inactive) group with all the ingredients that will be part of the recipe. We hide the group so that it isn’t visible in the REVO app, but the ingredients exist to manage the recipes. These products used solely for inventory management are called management-only products.
Activate inventory control for each of them, specify the correct units, and enter the corresponding stock.
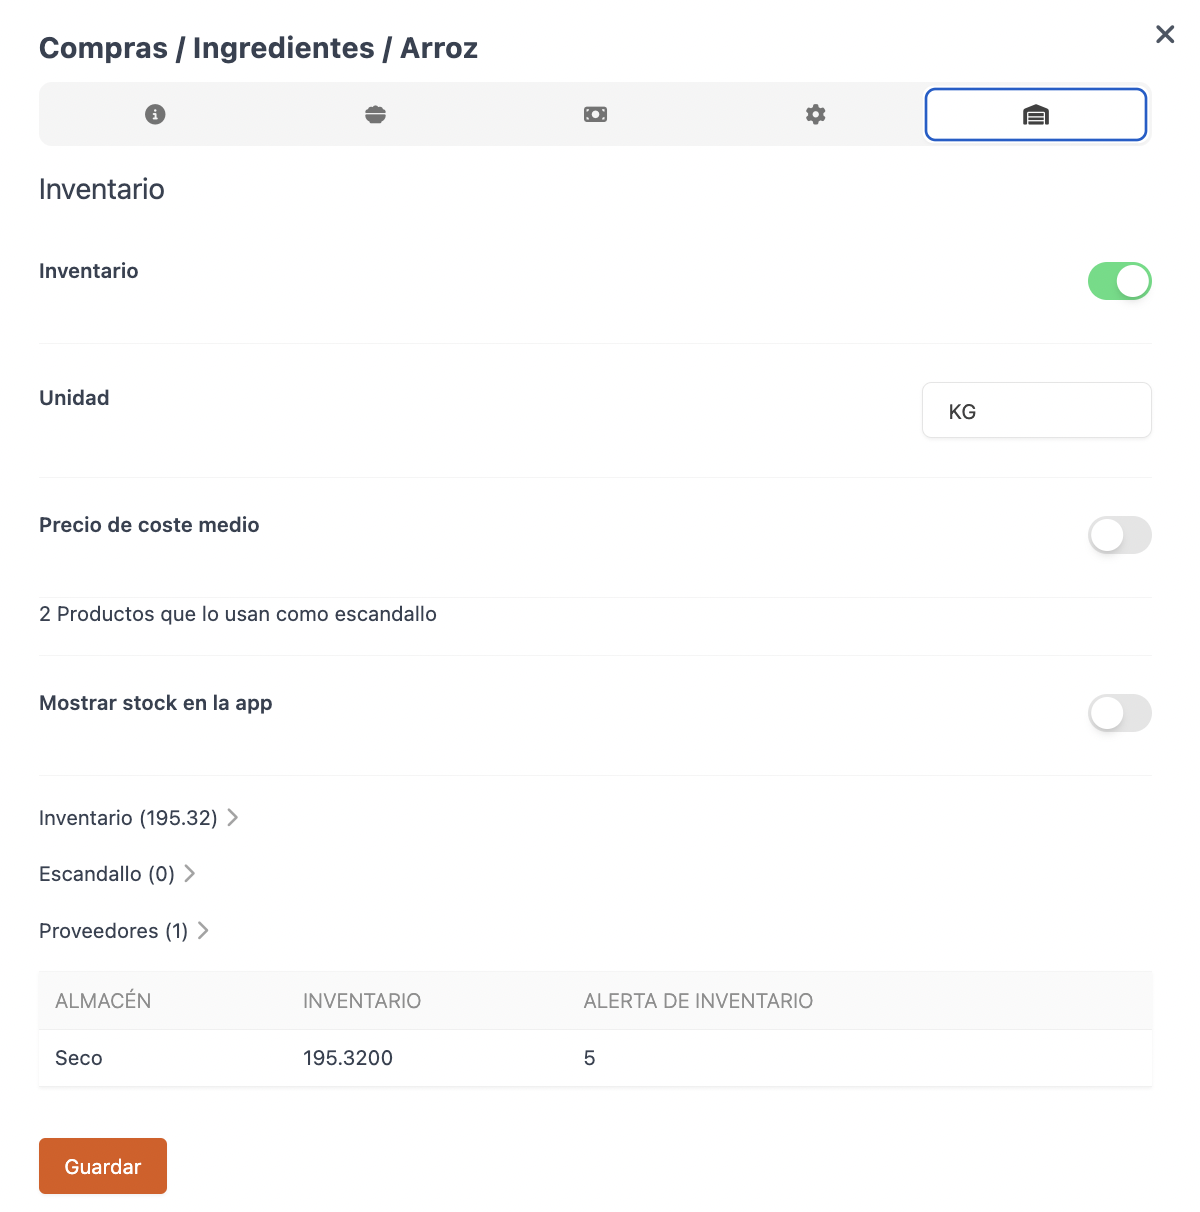
Then, go to the "Onigiri" product, access the inventory tab, and select Inventory.
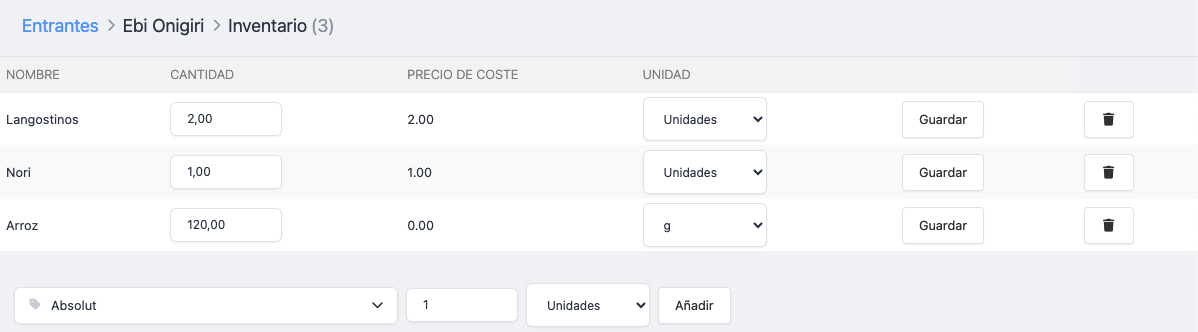
Select the product from the dropdown, add the quantity, indicate the unit, and click + Add. For example, add 120 grams of rice.
It’s important to understand that in this case, you control the inventory of the ingredients, not the final product. So when you sell an onigiri, the ingredients will be deducted, not the onigiri itself.
3. PRODUCTS WITH SALES FORMATS
REVO allows you to sell products in different formats, improving the organisation and management of inventory. For each format, you can set the price, the quantity to be deducted, the unit, the tariffs, and a group of mixes if necessary.
First, you need to create the sales formats in Sales Formats. Learn more here.
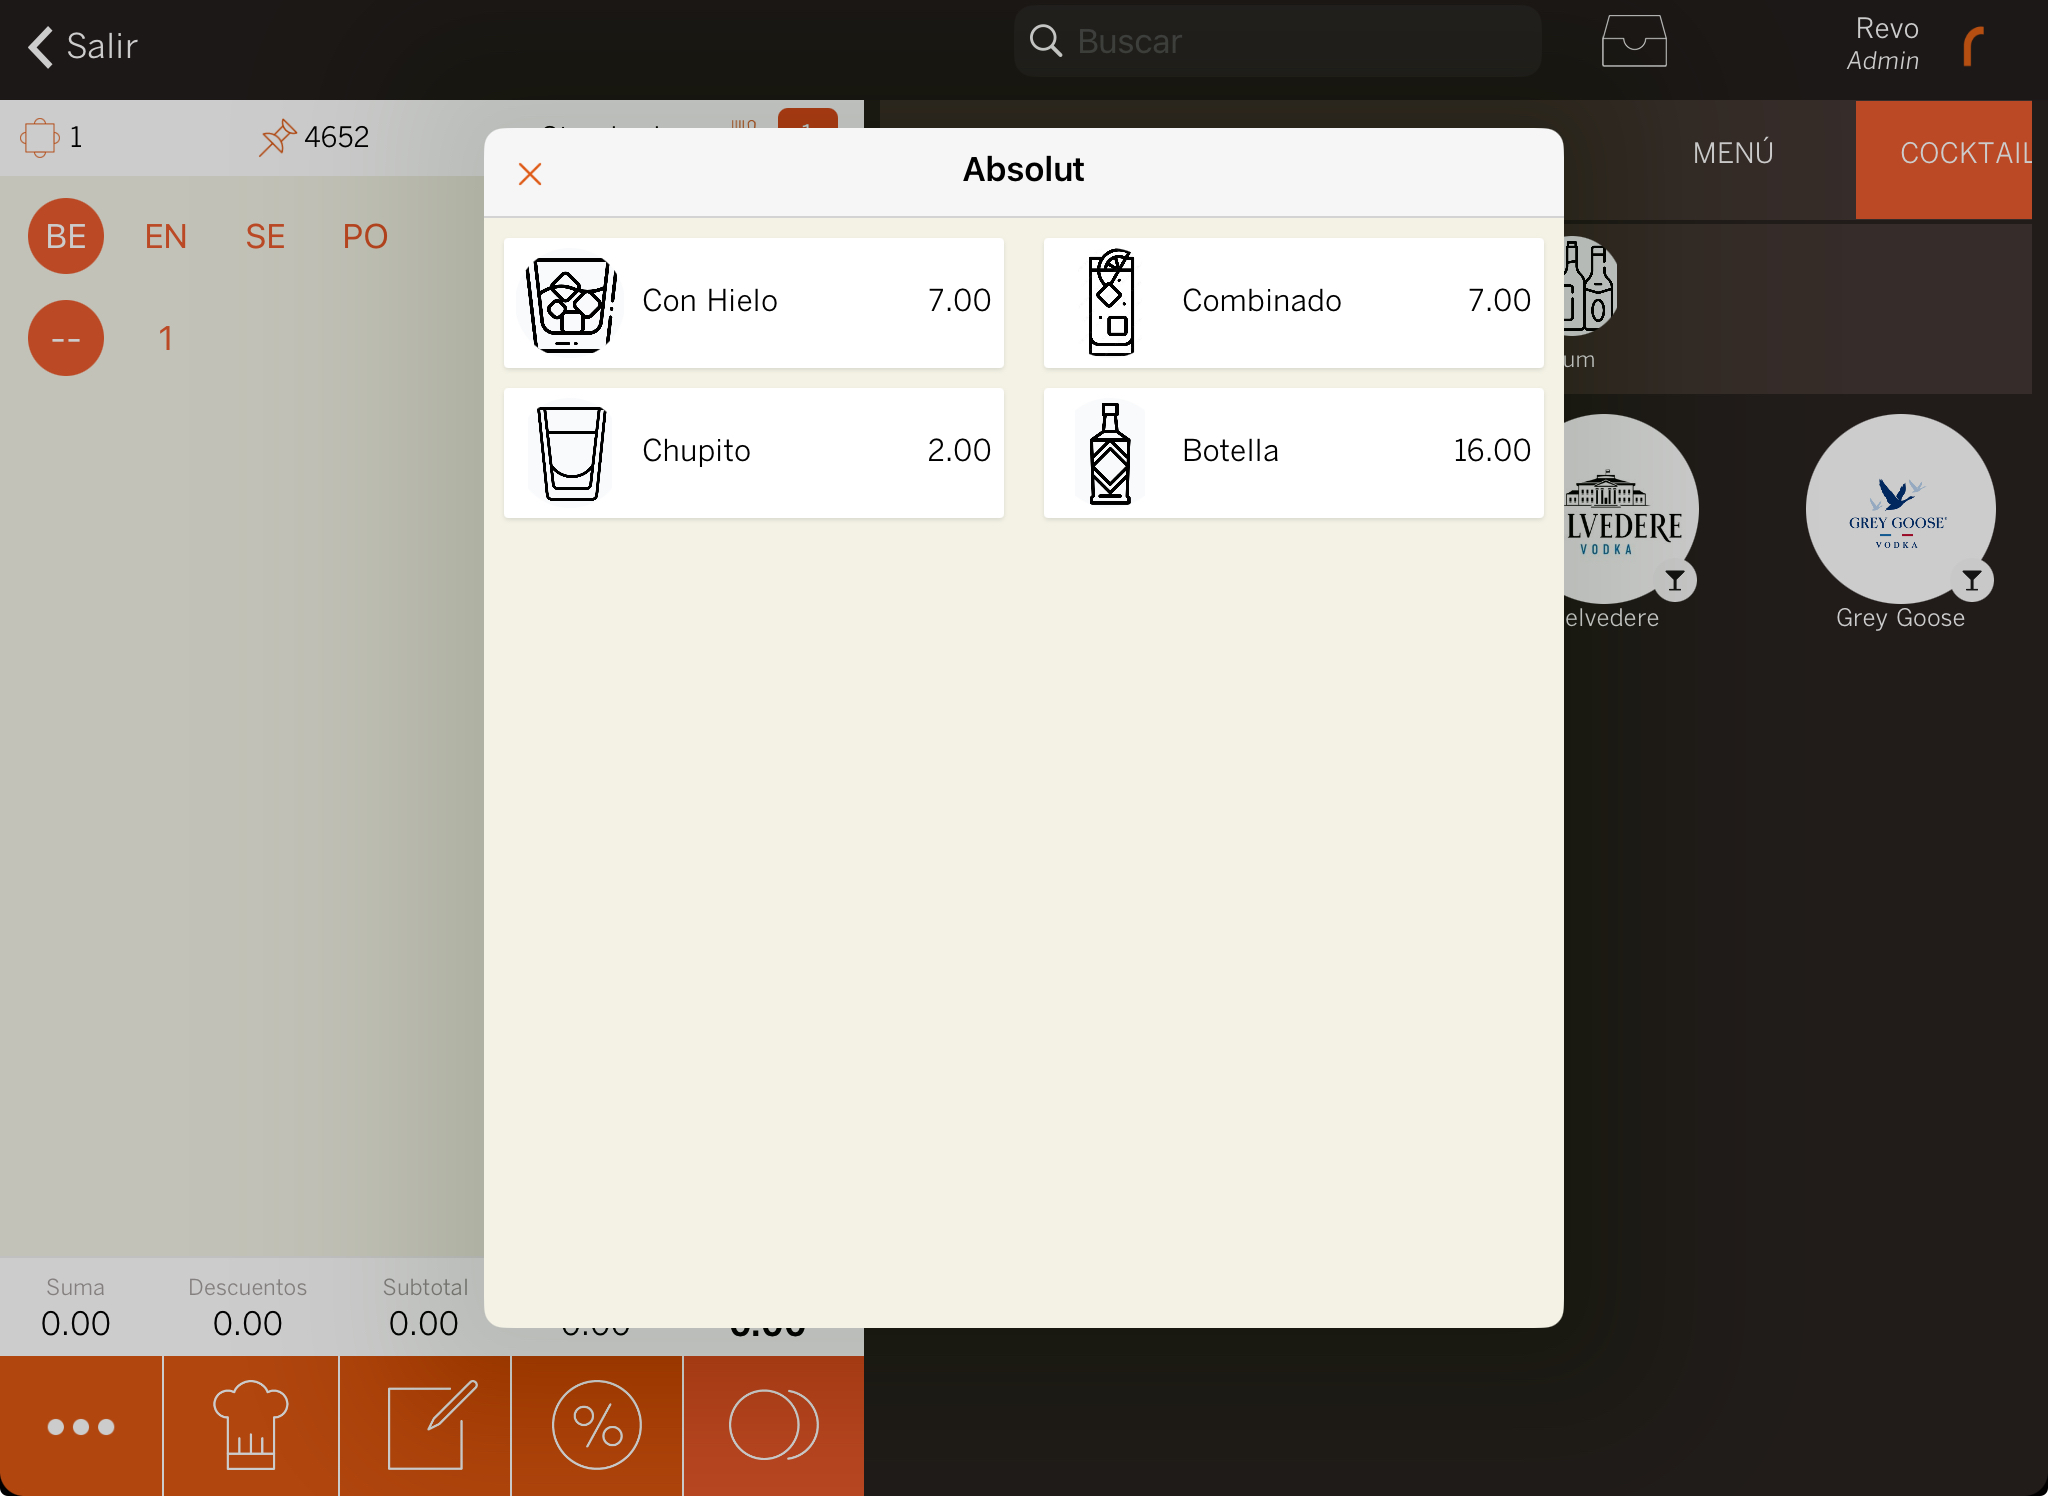
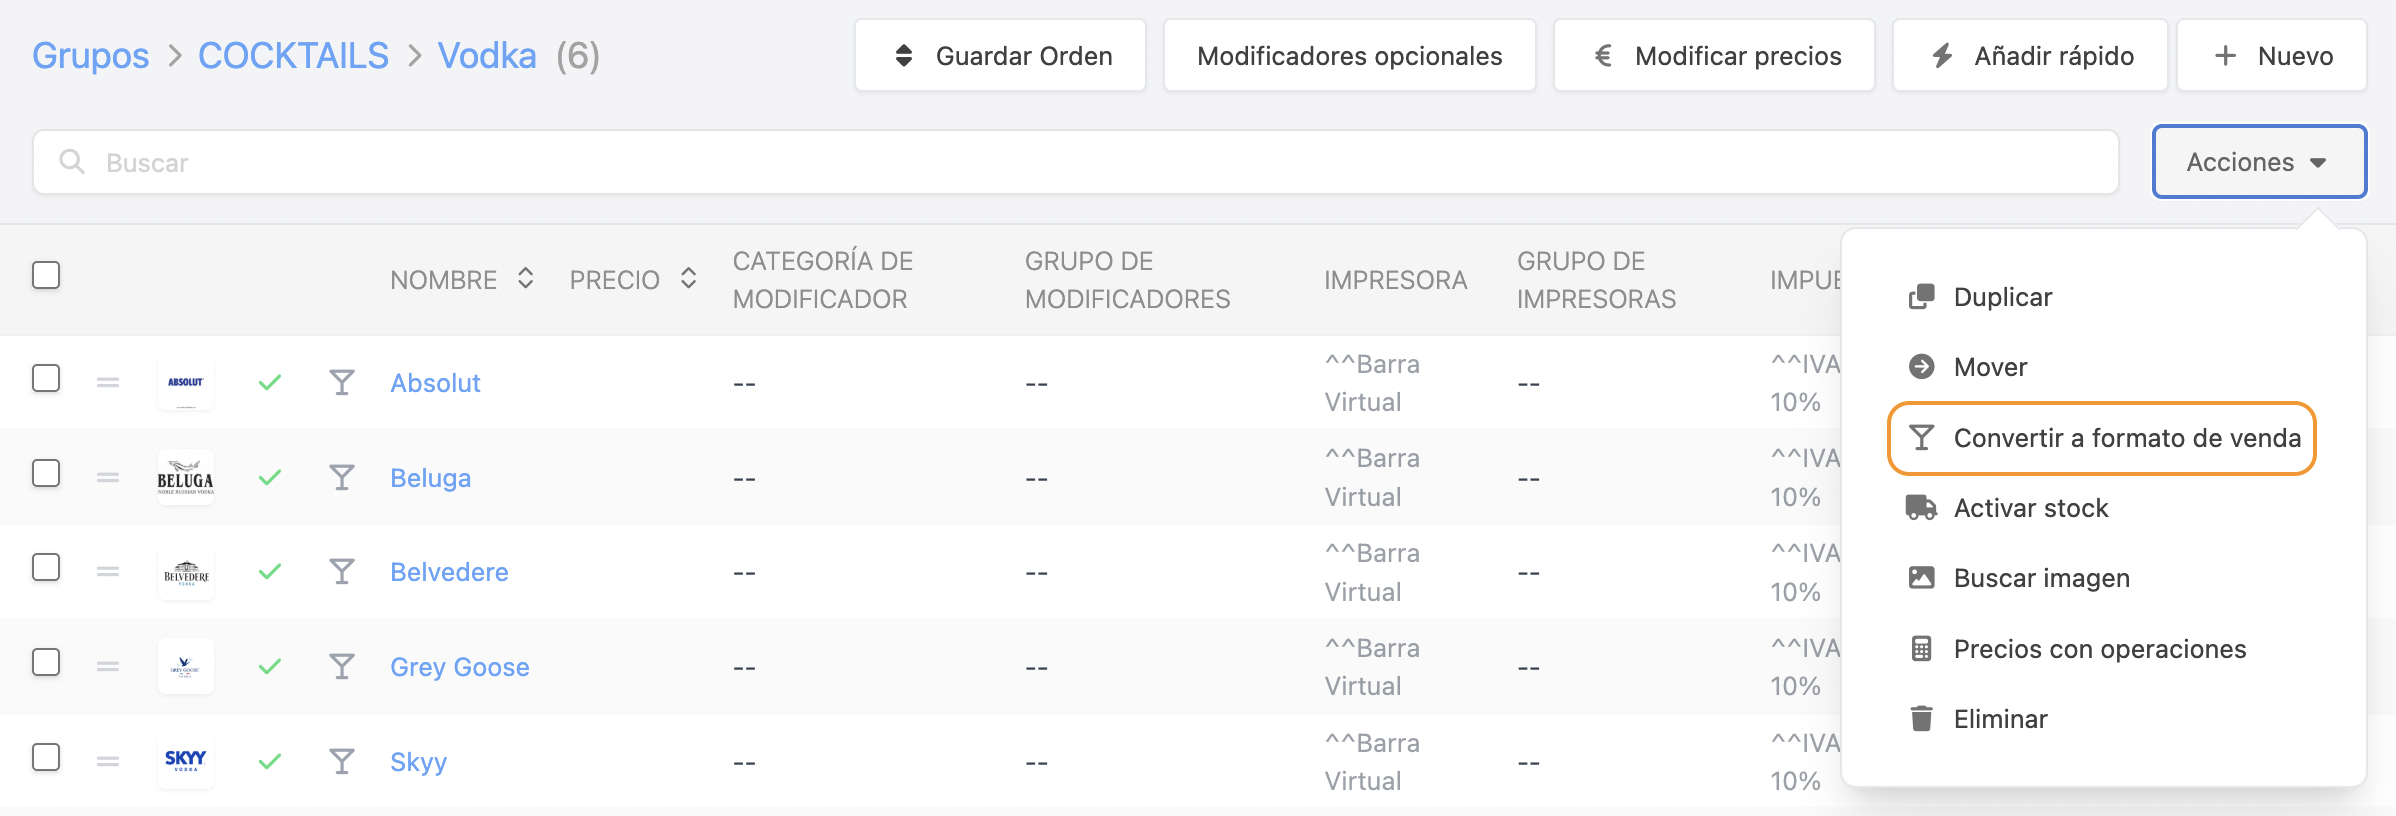
For example, for a bottle of vodka, create sales formats: with ice, mixed, shot, and bottle. Then create the product with sales format: vodka, and assign the previously created formats.
1. Go to Groups and select the Category where you want to create the product with a sales format.
2. Click + New and select Product with Sales Format.
Add the name and, in the pricing tab, access Sales Formats.
Before entering the sales formats, save the product.

Here you will see the following fields:
- Name: Select the sales format from the dropdown menu. They must have been created beforehand.
- Price: Price of each sales format.
- Quantity: Quantity to be deducted from inventory for each sales format. Example: 75 cl bottle when selling a bottle, 5 cl with ice, 5 cl as a mix, and 3 cl as a shot.
- Unit: The main unit should be consistent with the format units (for example: L and cl).
- Tariffs: Select the tariff for the products. The tariff must have been created beforehand. Learn how here.
- Mix Group: Here, you can select a mix group if the sales format is combined with other products. Example: a vodka and soda mix.
In the app, when you select the product with a sales format, the following screen will appear: