Once the group is created, create the categories.
1. Access the back-office.
2. Go to Catalogue / GROUPS and enter the group by clicking on the name.
3. Click on + New and fill in the following screen:
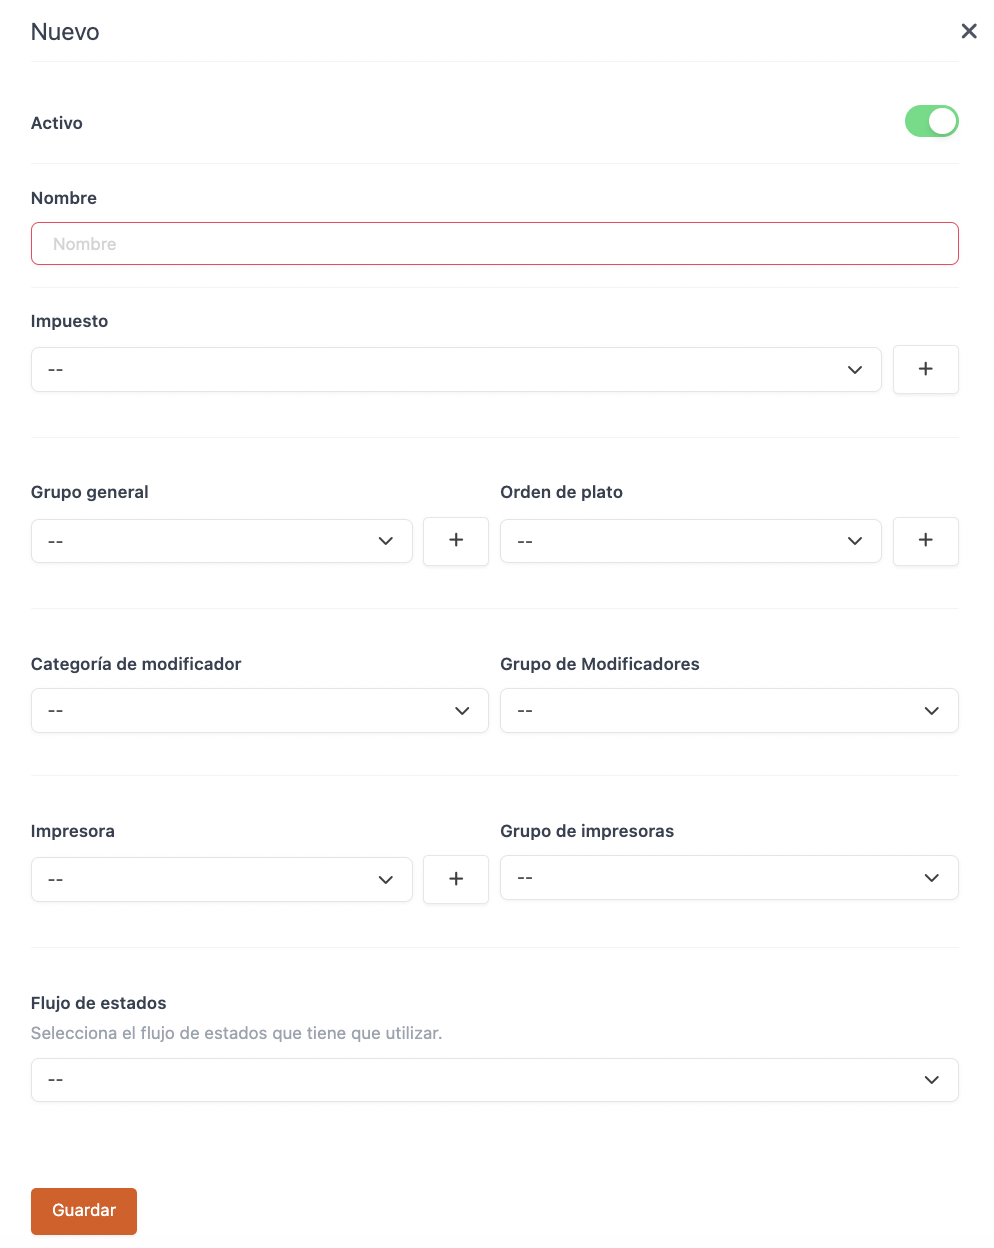
-
Active: Activate to make the category visible in the app. Otherwise, this category and its products will not be visible.
-
Name: Enter the name of the category.
-
Tax: Select the tax for this category. If you're using the same tax as in the group, leave it as (--).
By clicking on , you can create a new tax. More information here.
-
General Group: If you've already configured it in the group, you don't need to do it again in the category or product unless it's different. If you don't want to use general groups, leave it as --.
By clicking on , you can create a new one. More information here.
-
Dish Order: Select a default order for the entire category. This speeds up order-taking in the app. Recommended for drinks and desserts.
By clicking on , you can create a new one. More information here.
-
Modifier Category: Choose a modifier for the entire category. It will appear when selecting products from this category.
By clicking on , you can create a new one. More information here.
-
Modifier Groups: Select a modifier group for the entire category. It will appear when selecting products from this category.
By clicking on , you can create a new one. More information here.
-
Printer: Choose the printer for order tickets. You must first configure the printers.
By clicking on , you can create a new one. More information here.
-
Printer Group: Select a group if you want to print on multiple printers simultaneously. You must first configure the group.
By clicking on , you can create a new one. More information here.
-
State flow: Selects the KDS 2 state flow to be used.
4. Click Save to confirm the changes.