1. GENERAL SCREEN 2. HOW TO CREATE A WAREHOUSE 3. STOCK MOVEMENT
Warehouses are essential for managing the inventory of your products. By default, a warehouse is already created, but you need to associate it with a cashier so that stock units are deducted when they are sold.
1. GENERAL SCREEN
1. Access the back-office of Revo XEF.
2. Go to Settings / WAREHOUSES.

-
Stock Movement: Click to add, move, or take inventory of a product.
-
+ New: Create a new warehouse.
-
: Search for warehouses.
-
Actions: Delete one or more selected warehouses.
-
: Select all or multiple warehouses.
-
Name: Name of the warehouse.
-
: Refill from another warehouse the products that are below the default alert threshold or that are negative.
This option is only available if you have more than one warehouse.
-
: Edit the warehouse.
-
: Delete a warehouse.
Before deleting, you must remove the products from the warehouse.
2. HOW TO CREATE A WAREHOUSE
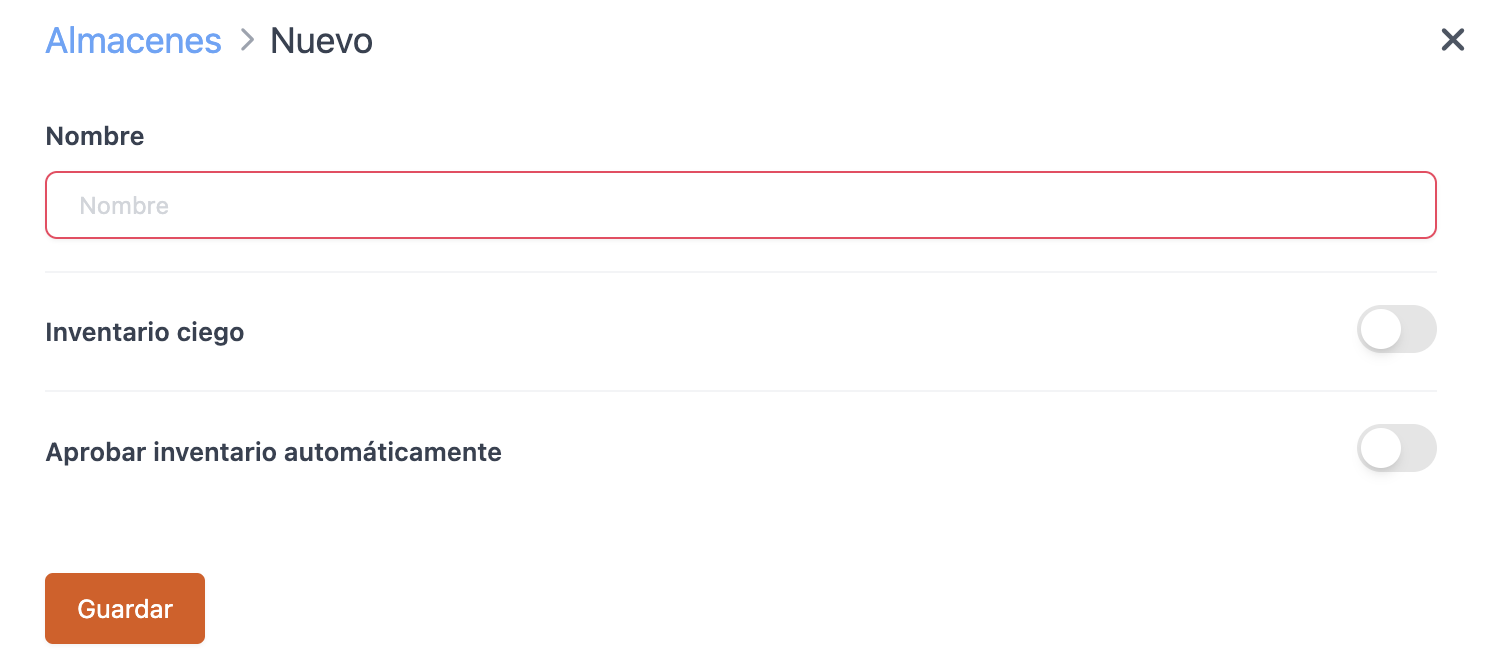
1. Click on + New and complete the information:

-
Name: Enter a name for the warehouse.
-
Blind Inventory: Turn this on so that during inventory, the existing units are not shown. This way, the employee will conduct the inventory without knowing this data.
-
Automatically Approve Inventory: Turn this on so that units entered in Revo STOCK automatically update products when pressing the to confirm changes.
If this option is turned off, inventories will be pending approval in the Inventories list, and you can approve or reject them manually.
2. Click on Save.
3. Go to Settings / CASHIERS, edit the cashier and associate the warehouse. Then, click on Save to apply the changes. You can find more information here.
3. STOCK MOVEMENT
ADD STOCK
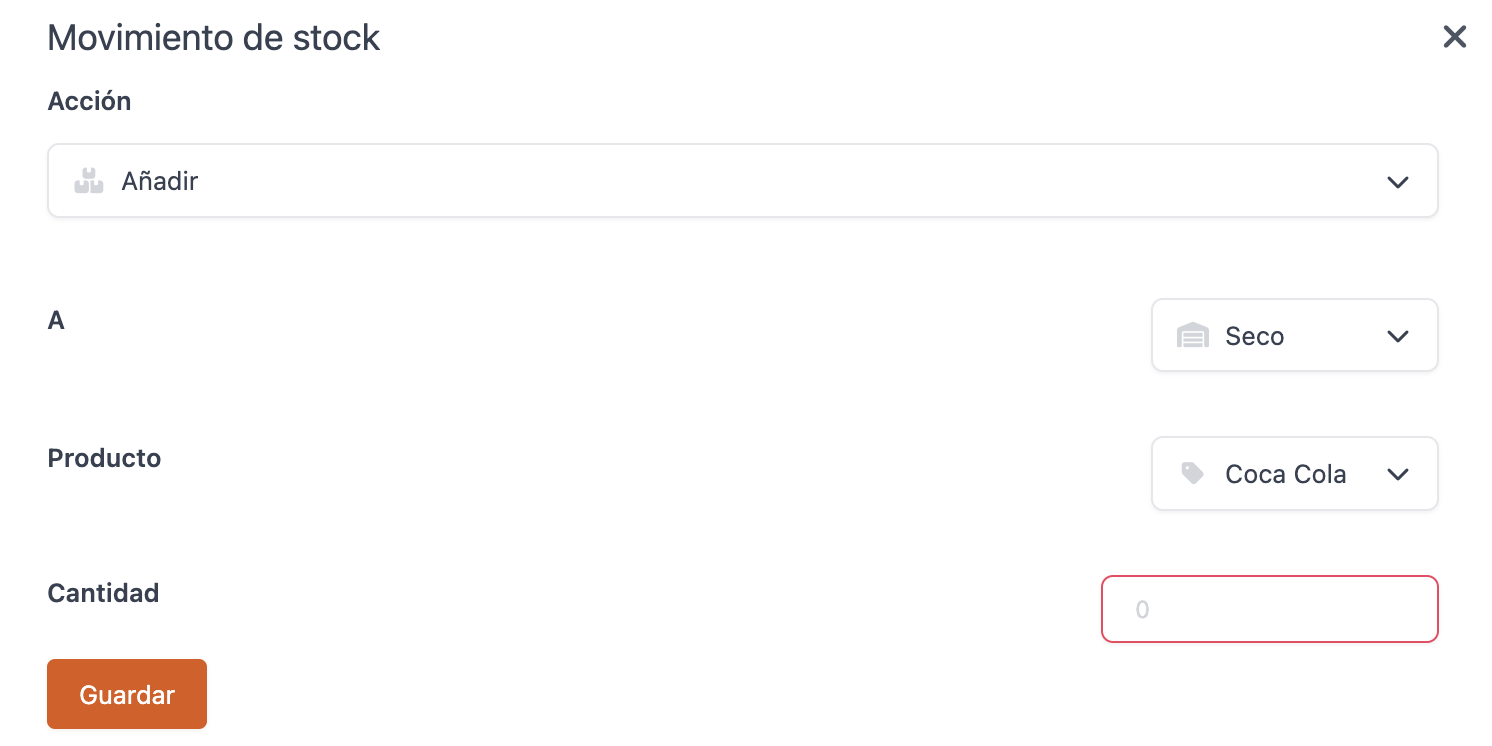
1. Click on Stock Movement.
2. Fill in the information:

-
Action: Add.
-
To: Choose the warehouse to which you will add stock.
-
Product: Select the product from the dropdown menu.
-
Quantity: Specify the quantity to add.
3. Click on Save.
MOVE STOCK
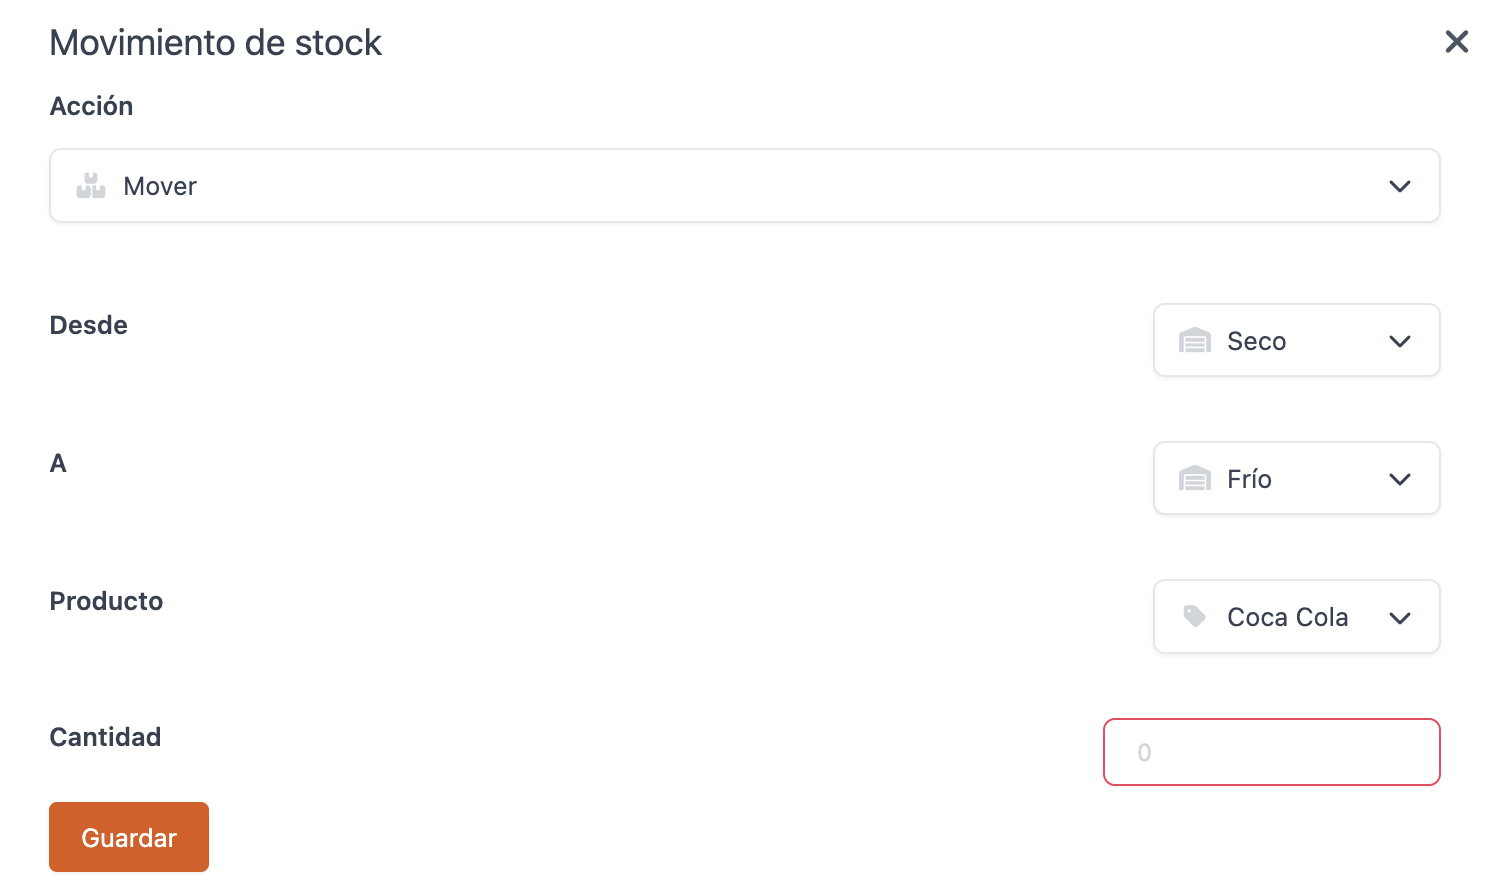
1. Click on Stock Movement.
2. Fill in the information:

-
Action: Move.
-
From: Select the source warehouse.
-
To: Select the destination warehouse.
-
Product: Select the product from the dropdown menu.
-
Quantity: Specify the quantity to move.
3. Click on Save.
UPDATE INVENTORY
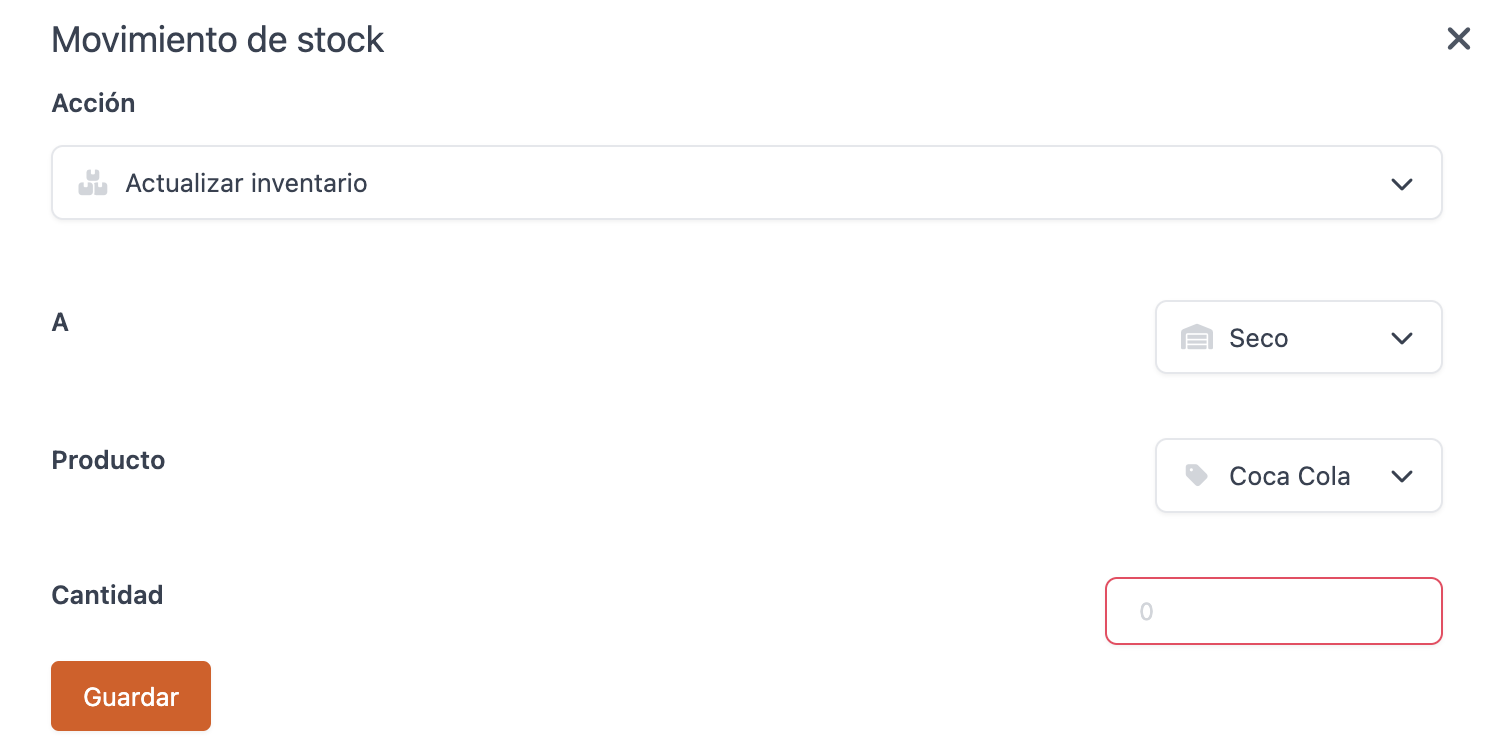
1. Click on Stock Movement.
2. Fill in the information:

-
Action: Update Inventory.
-
To: Select the warehouse to update.
-
Product: Select the product from the dropdown menu.
-
Quantity: Specify the quantity to update.
3. Click on Save.
