1. CREATE A MODIFIER GROUP 2. ASSIGN A MODIFIER GROUP 3. OMIT A MODIFIER GROUP
A modifier group is the combination of two or more modifiers. Just like modifiers, groups can also be assigned to a product or category, affecting all products in the category.
For example, if you need a barbecue to first ask for the number of people and then for the type of meat, it's best to create a modifier group.
1. CREATE A MODIFIER GROUP
First, create the modifiers individually. Then:
1. Go to Catalog / MODIFIER GROUPS.
2. Click on +New.
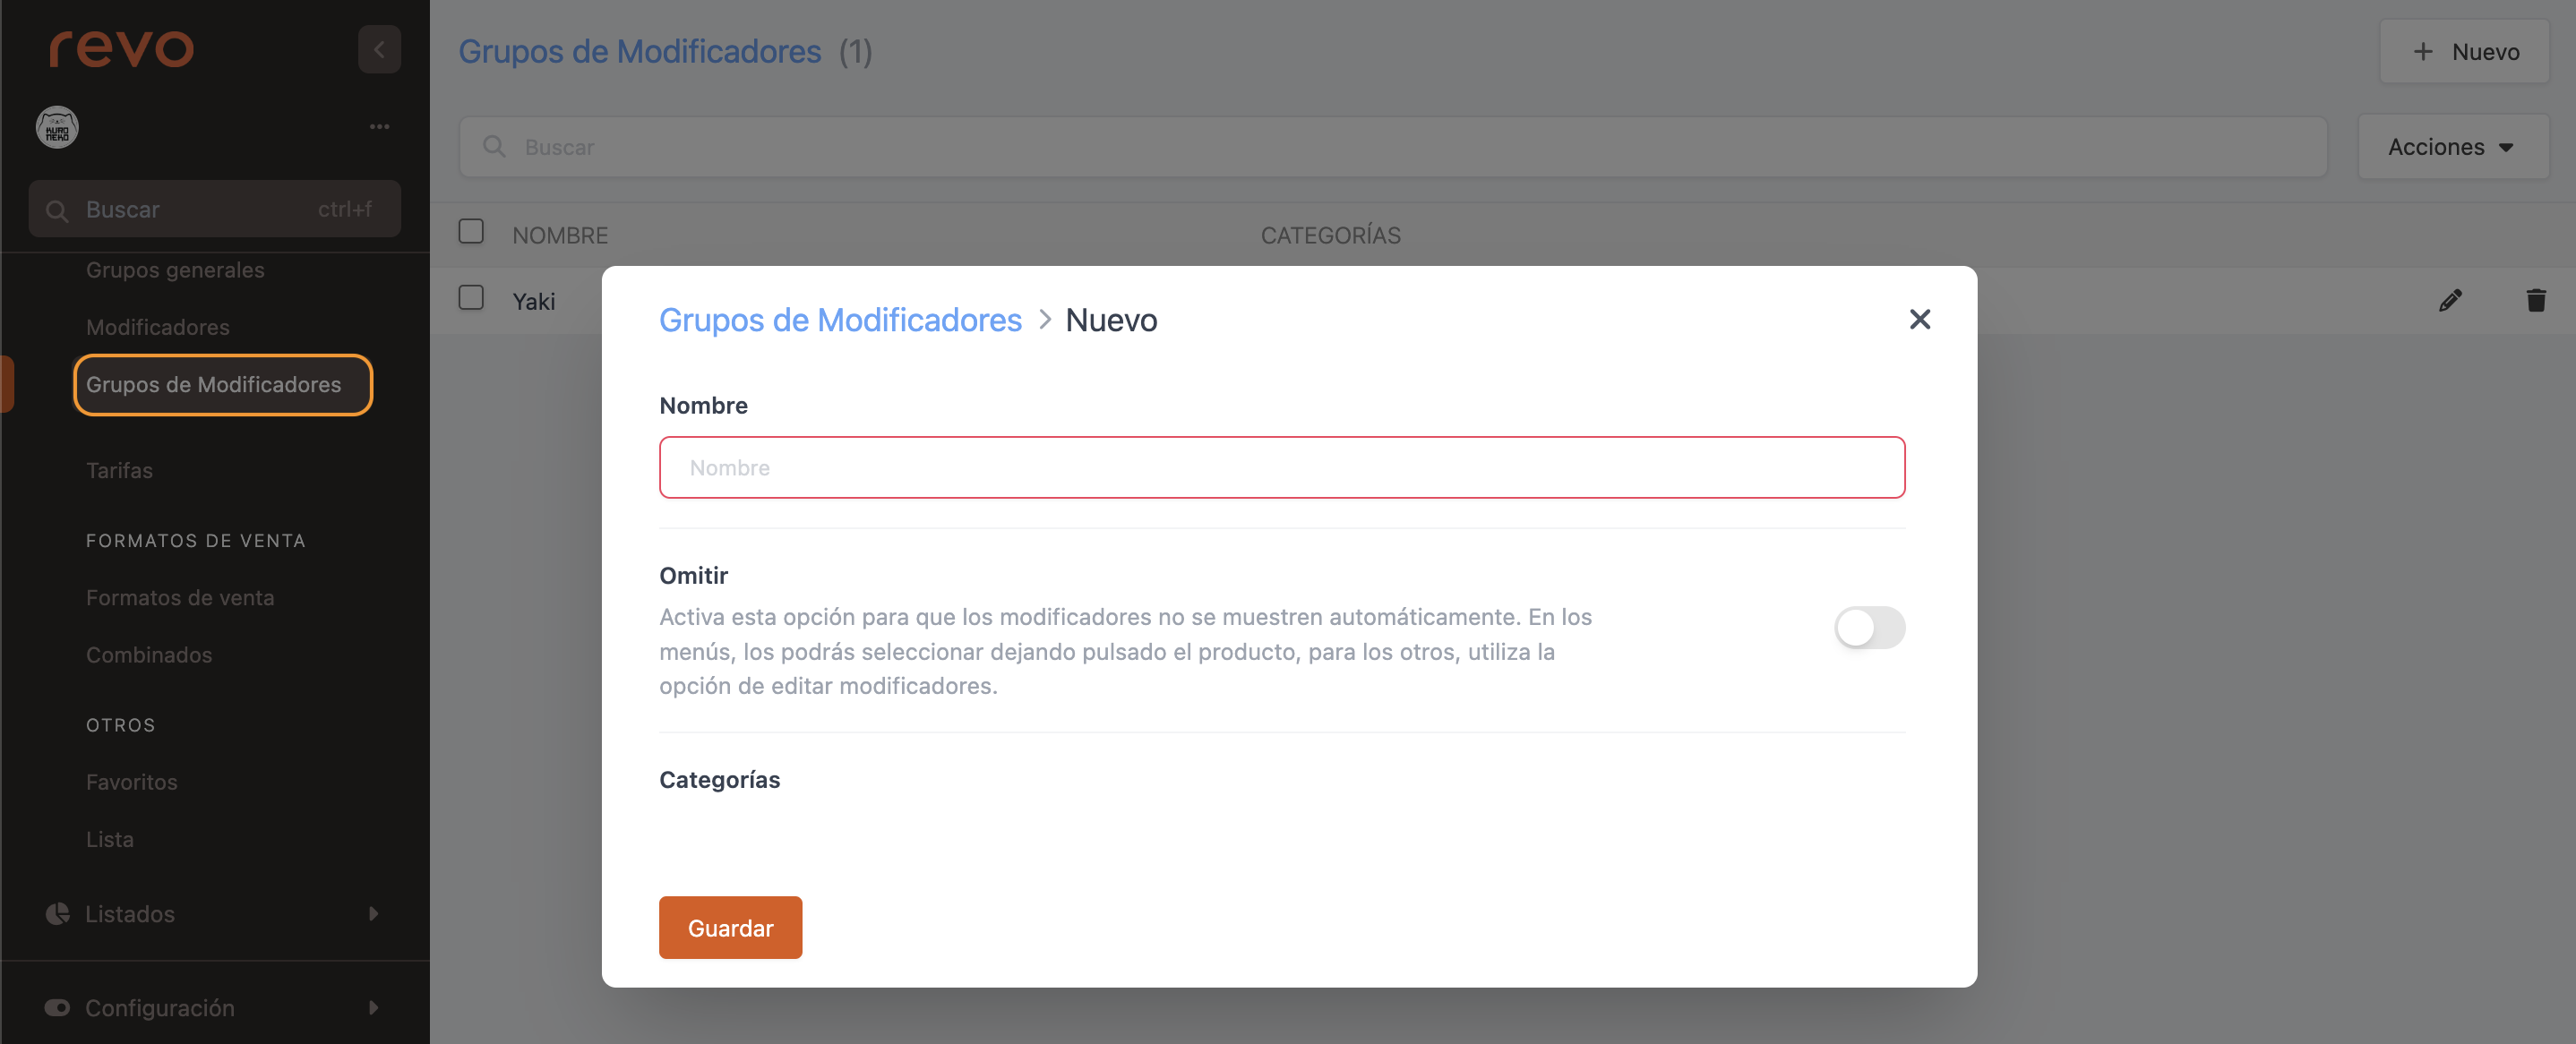
-
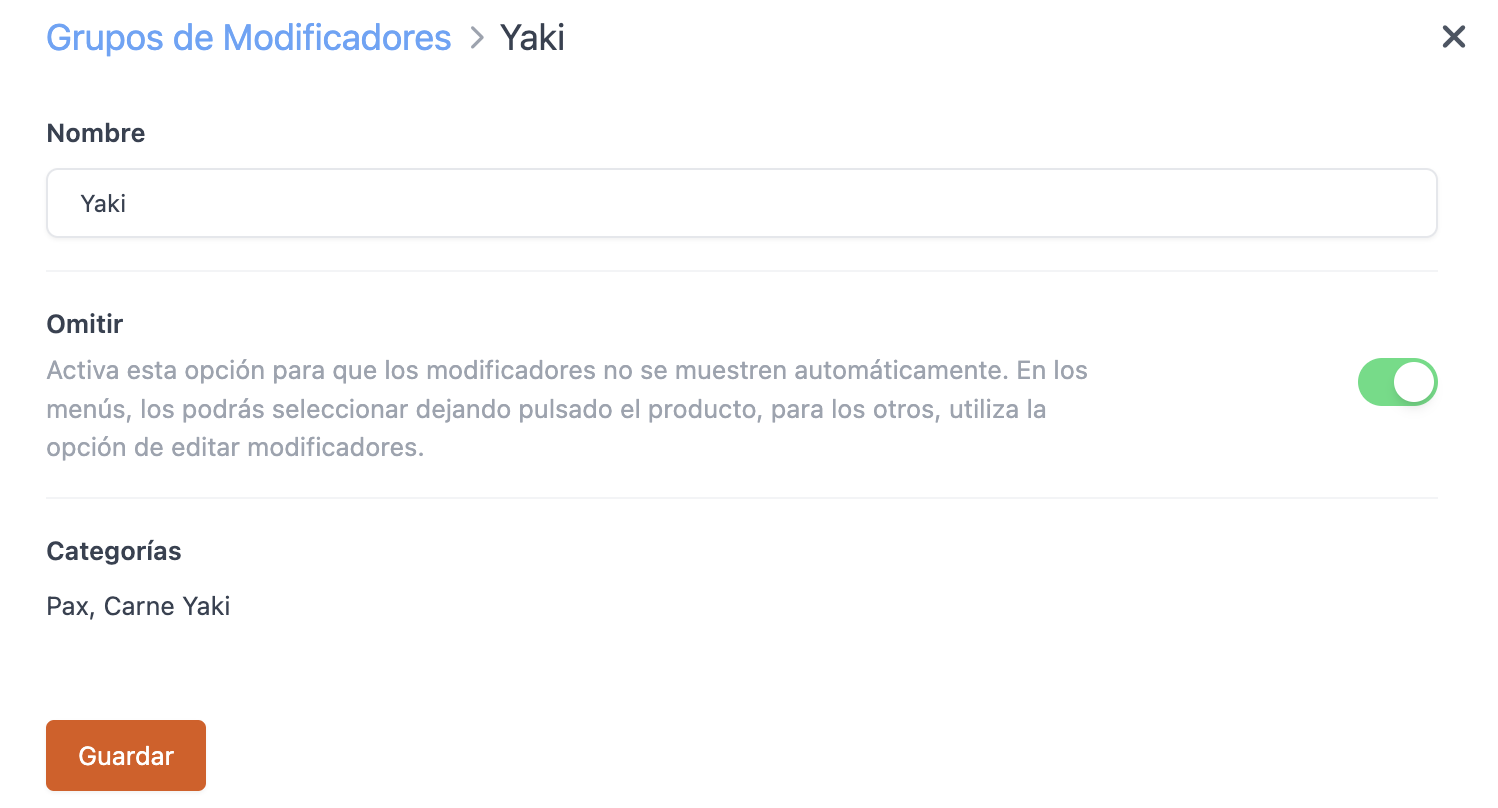
Name: Enter a name for the modifier group.
-
Skip: Activate this option so that the modifiers are not displayed automatically.
3. Click Save.
4. Click on --, and add the modifiers from the list by clicking Add:
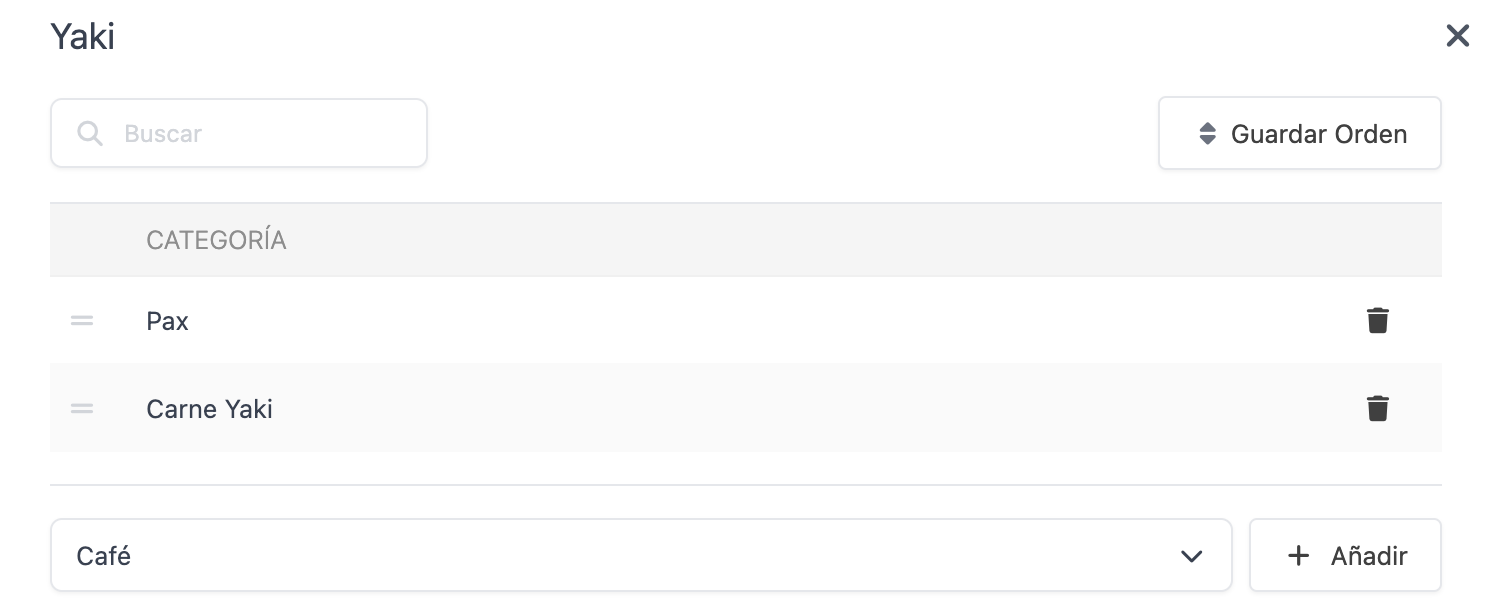
This order is what you'll see in the app. You can modify it by dragging with the . Then, save the order to apply the changes.
2. ASSIGN A MODIFIER GROUP
Now that you have created the modifier group, all you need to do is assign it to a category or product. Go to Groups, choose the category or product, edit it, and assign the modifier group created in Settings > Modifier Group.
In this example, we will assign a modifier group to a product.
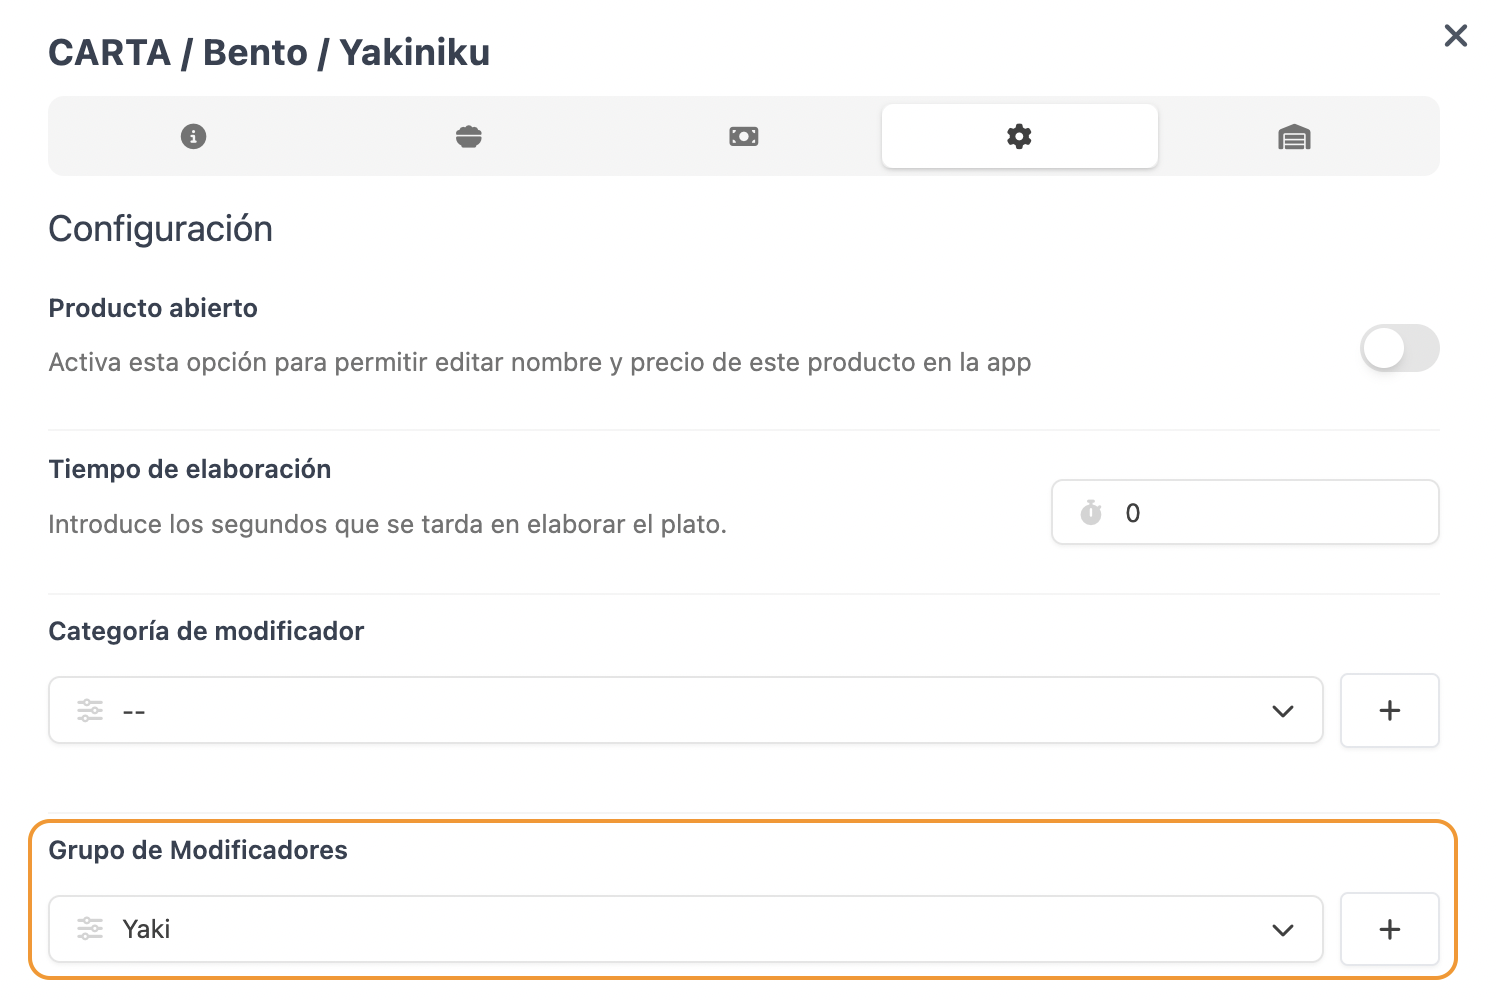
Save and the modifier group is now associated.

3. OMIT A MODIFIER GROUP
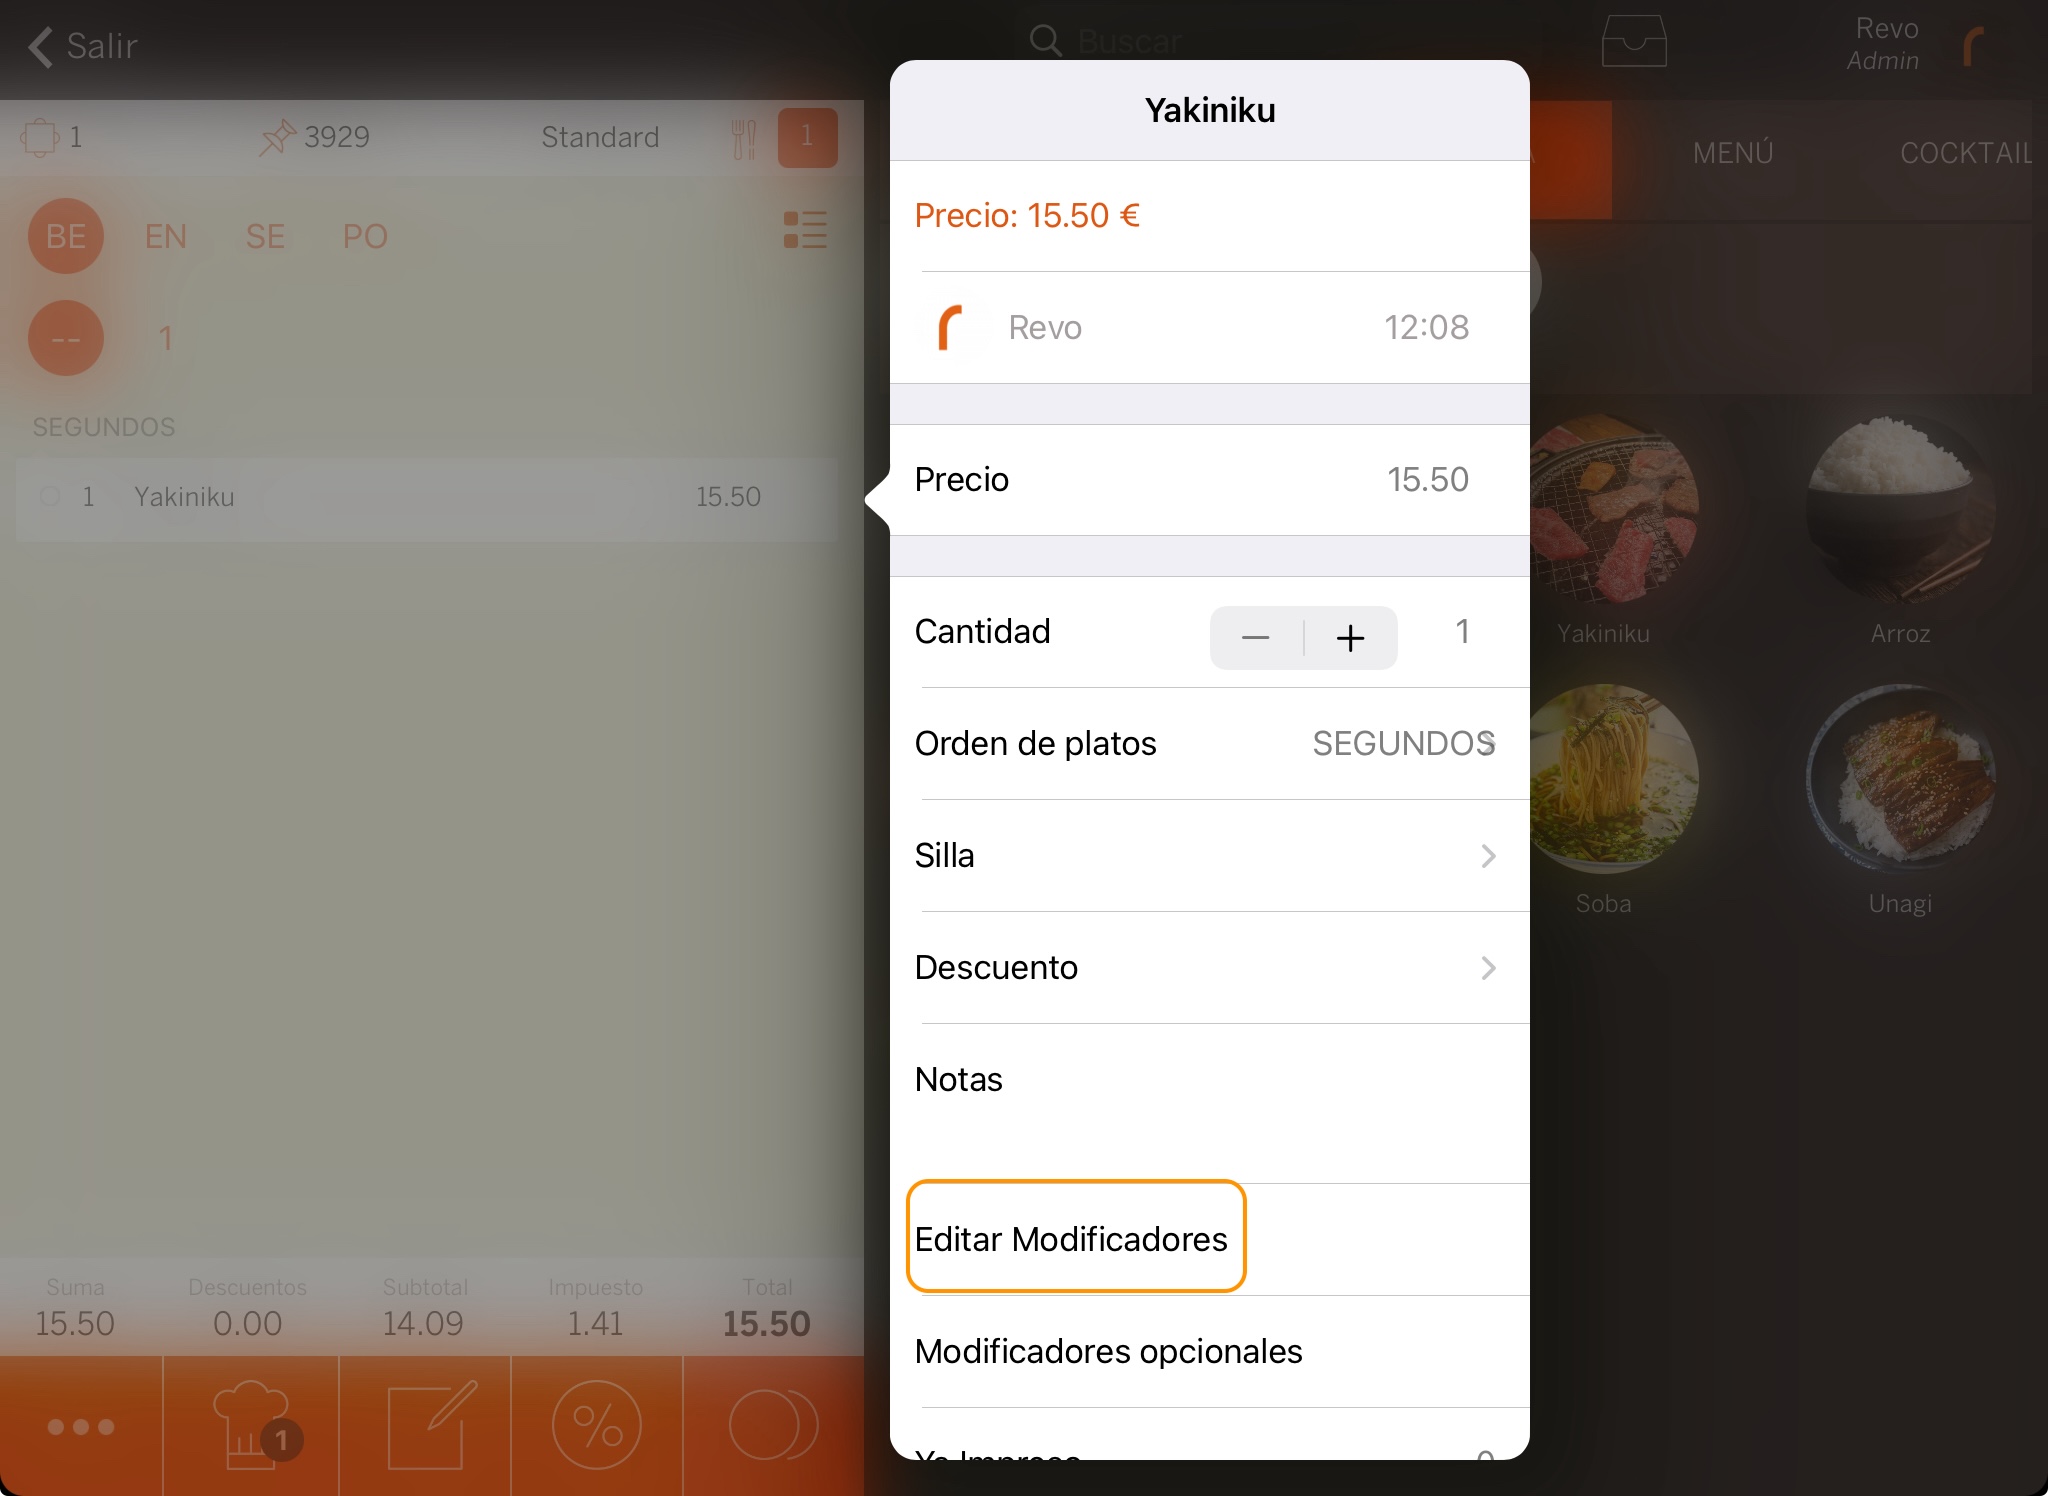
If a category or product has a modifier group assigned, they appear when you tap on the product, displaying a window with the variants. You can omit a modifier group by selecting a product. Follow these steps:
1. Go to Catalog / MODIFIER GROUPS.
2. Edit the modifier group by clicking on the pencil icon.
3. Activate Skip.
-
For products, edit them by tapping on the added product and selecting Edit modifiers.
-
For menu products, select them by holding down for a few seconds.