From Configuration / ORDER CONFIGURATION, you can set up everything related to your orders. Here are all the options:
ORDERS:
-
Dish order: Activate this option to choose the order of the dishes.
-
Merge identical products: Choose between always, never, or group always, except if they are from different workers.
-
Round: Activate to round prices to .X0 or .X5 in tables with percentages.
-
Negative quantities: Activate to use negative quantities for products (-1, -2, etc.).
-
Print all dish orders: Activate to print all dish orders without asking.
-
Print alphabetically: Activate to print products in alphabetical order.
For menu items, you also need to enable the as regular products option explained below. -
Maintain printed bill status: Activate to keep the printed bill status until you close the order.
-
Ask for the number of diners: If you choose yes, the screen to select the number of diners will appear when clicking on an empty table.
-
Chair management: Choose between different options:
- No: Service not active
- Chair management: Icons of the diners will appear when opening a new order. Check the article on how to use diner management in the app for more information.
-
Rates: Icons of the rates will appear when opening or editing a new order.
-
Chair management in menus: Choose if you want to manage chairs in menus.
-
Shift closure restriction: Apply restrictions to close the shift. This does not affect if you use Auto cash control.
- No: No restrictions.
- Open orders: You cannot close the shift if there are open orders.
- User's open orders: You cannot close the shift if you have your own open orders.
-
Open orders in the last open shift: You cannot close the shift if there are open orders from the last open shift.
For example, if you have pending orders from a previous shift and close the shift, you must close them before properly closing the current shift.
-
Default product: Choose the product that will be automatically added when opening a new order. It will be multiplied by the selected number of diners. For example: Cover charge.
-
Strategy for out-of-stock products: Choose how you want to manage out-of-stock products.
-
Ticket audit: Activate to audit ticket printing. You can review them in the ticket audit list.
-
Ask for cancellation reason when removing a product: Enable to show a screen with different cancellation reasons when removing a product from an order.
-
Automatically apply tariffs: Enable to automatically apply the same tariff to new products in orders, with the same tariff for all products.
-
Mandatory general group: Enable to make the general group mandatory for products.
-
Confirm zero payments: Enable to confirm zero-amount payments.
-
Enable optional modifiers: Enable to use optional modifiers.
APPEARANCE:
-
Show square icons: Enable to see icons in the app as squares instead of circles.
-
Add the name of the sale format: Enable to add the name of the sale format to the ticket.
-
Change message when charging: Choose when to display the change message when closing an order. For example, in an order of €9.50, you enter €10 and it indicates to return €0.50.
-
Table view accessories: Select the accessories to show on each table in the table plan.
-
Content accessories: Select the accessories to show in the order content.
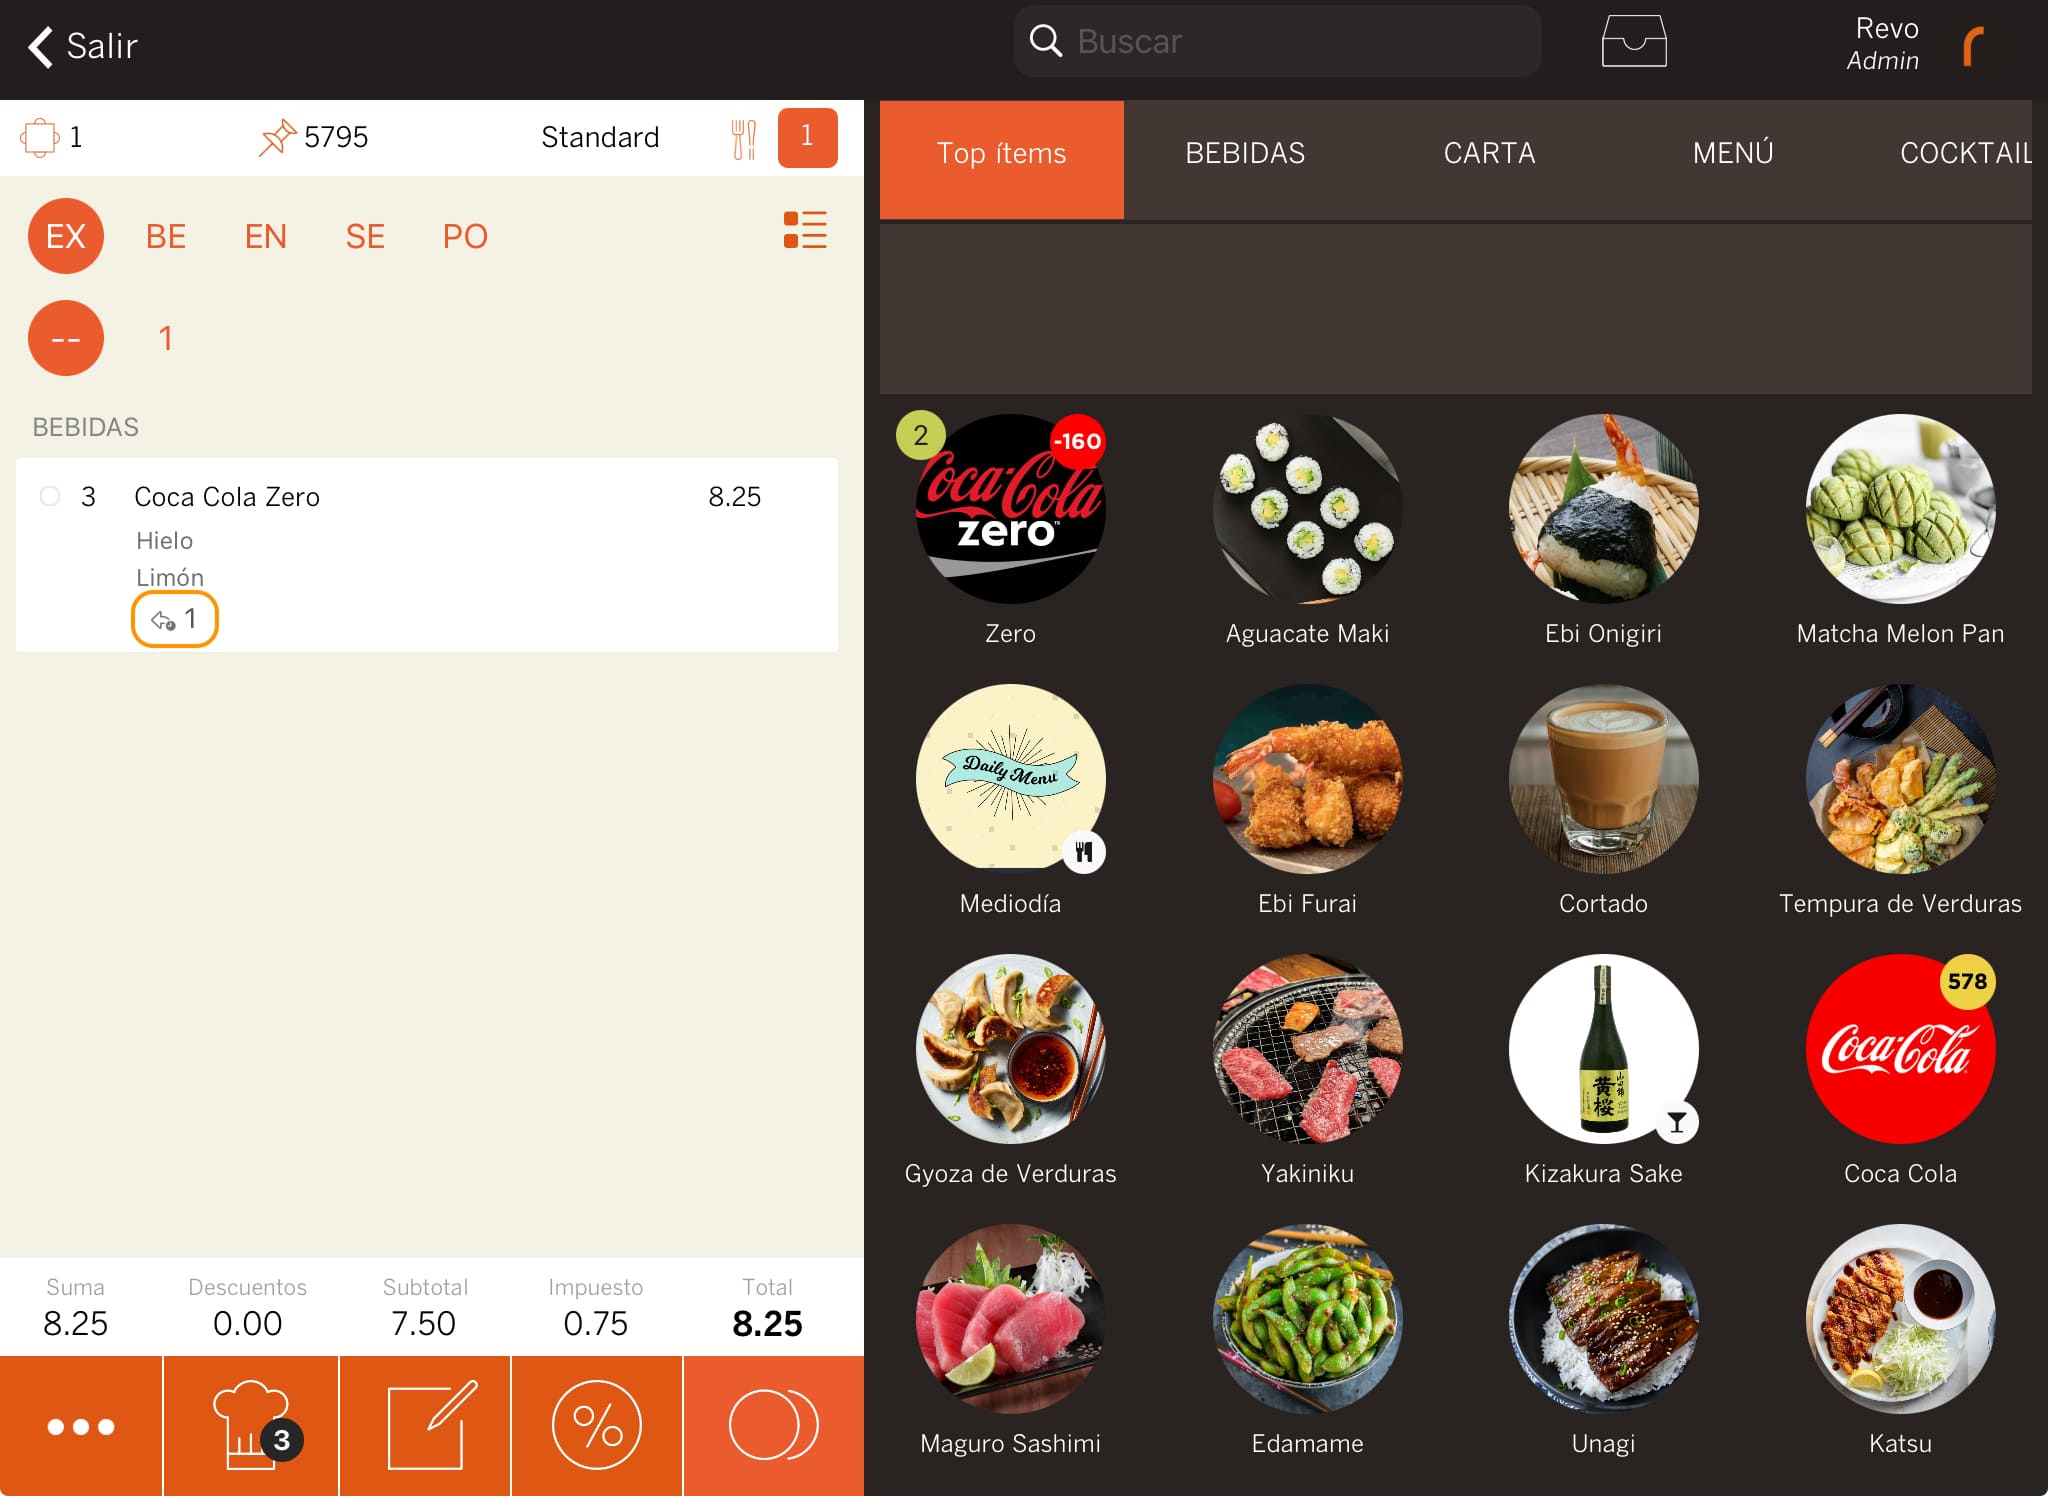
-
ON REVO XEF ADVANCE Original quantity: Displays how many products were originally in the order. For example: in the image, there was originally 1 coca-cola zero, and 2 were added later.
-
-
Date format: Choose how you want to see the date, day/month/year or year/month/day.
EMPLOYEES:
-
Automatic attendance: Enable for attendance to start automatically when you use your code for the first time during the shift. Additionally, if you left attendance open the previous day, it will be closed.
-
Share orders: Enable to allow sharing of orders between employees.
-
Worker selector: Choose how you want to access XEF:
- Pin: Enter your numeric combination set up in the employees section.
- QR/barcode/RFID: Use an external device (HID) connected to the iPad to identify yourself.
- Pin & QR/barcode/NFC: Use an external device (HID) connected to the iPad to identify yourself. You can also enter the pin directly on the iPad.
- Magnetic card: Set up the identifier in the EMPLOYEES section by adding the alphanumeric code of the magnetic card. You can then identify yourself using the NFC system.
- NFC: Set up the identifier in the EMPLOYEES section with the alphanumeric code of the NFC tag. You can then identify yourself using the registered NFC.
- Quick: Choose to clock in or out, then enter your pin to perform the action.
- Transparent: Access the XEF app, touch the screen and enter your pin for any action.
-
None: Not available.
-
PIN length: Choose the length of the employees' pin.
To edit this field, all devices must be on version 4.2 of Revo XEF.
-
Idle time: Set the seconds before the app requests the pin.
If you select 0, REVO will disable this option and never ask for the pin.
MENU:
-
Print dish order: Activate this option to print the dish order of the menus on your order tickets.
-
As normal products: Activate to print menu products along with other products. Menu products will be indicated by an (M). Here's an example with two diners, one with à la carte products and the other with menu products:
      Order: 1234
      Waiter: Luke Skywalker
      Table: 5
      Diners: 2
      {Date}
      ---------------------------------
      STARTERS                            --> Dish order
      ---------------------------------
      1  Goat cheese salad               --> À la carte product
      1  [M] Green Salad                  --> Menu product (M)
      ---------------------------------
      MAIN COURSES
      ---------------------------------
      1  Filet mignon with foie gras
          - Medium rare
      1  [M] Paella
      ---------------------------------
      DESSERTS
      ---------------------------------
      1  Crème Catalan
      1  [M] Seasonal fruit
IMPORTANT: For this option to work, it is essential that the names of the dish orders and the order of the menu dish orders are exactly the same.
In other words, if in dish orders you have 1. DRINKS 2. STARTERS, for menus it should be 1. DRINKS 2. STARTERS.Without this option activated, menu and à la carte dishes would appear separately. Very useful for businesses that combine menus with other products.
TAKEAWAY:
IMPORTANT: These options will only work if your app's working system is set to Takeaway POS or Takeaway.
-
Print to kitchen when paying: Activate to print kitchen or bar products at the same time when closing an order (paying).
-
Print waiting ticket: With this option activated, a waiting ticket with sequential numbering will be printed for the customer, allowing them to be called by their waiting number.
IMPORTANT: If you want to use this option, it's essential that the printer has multi-session enabled to print the invoice and the waiting ticket together. Otherwise, you won't be able to use it because the printer won't be able to print two consecutive tickets.
-
Check stock: Activate to not accept Revo orders ONLY with out-of-stock products.