Revo SOLO is set up as one account for all points of sale like Stores (if you have multiple ones).
OVERVIEW
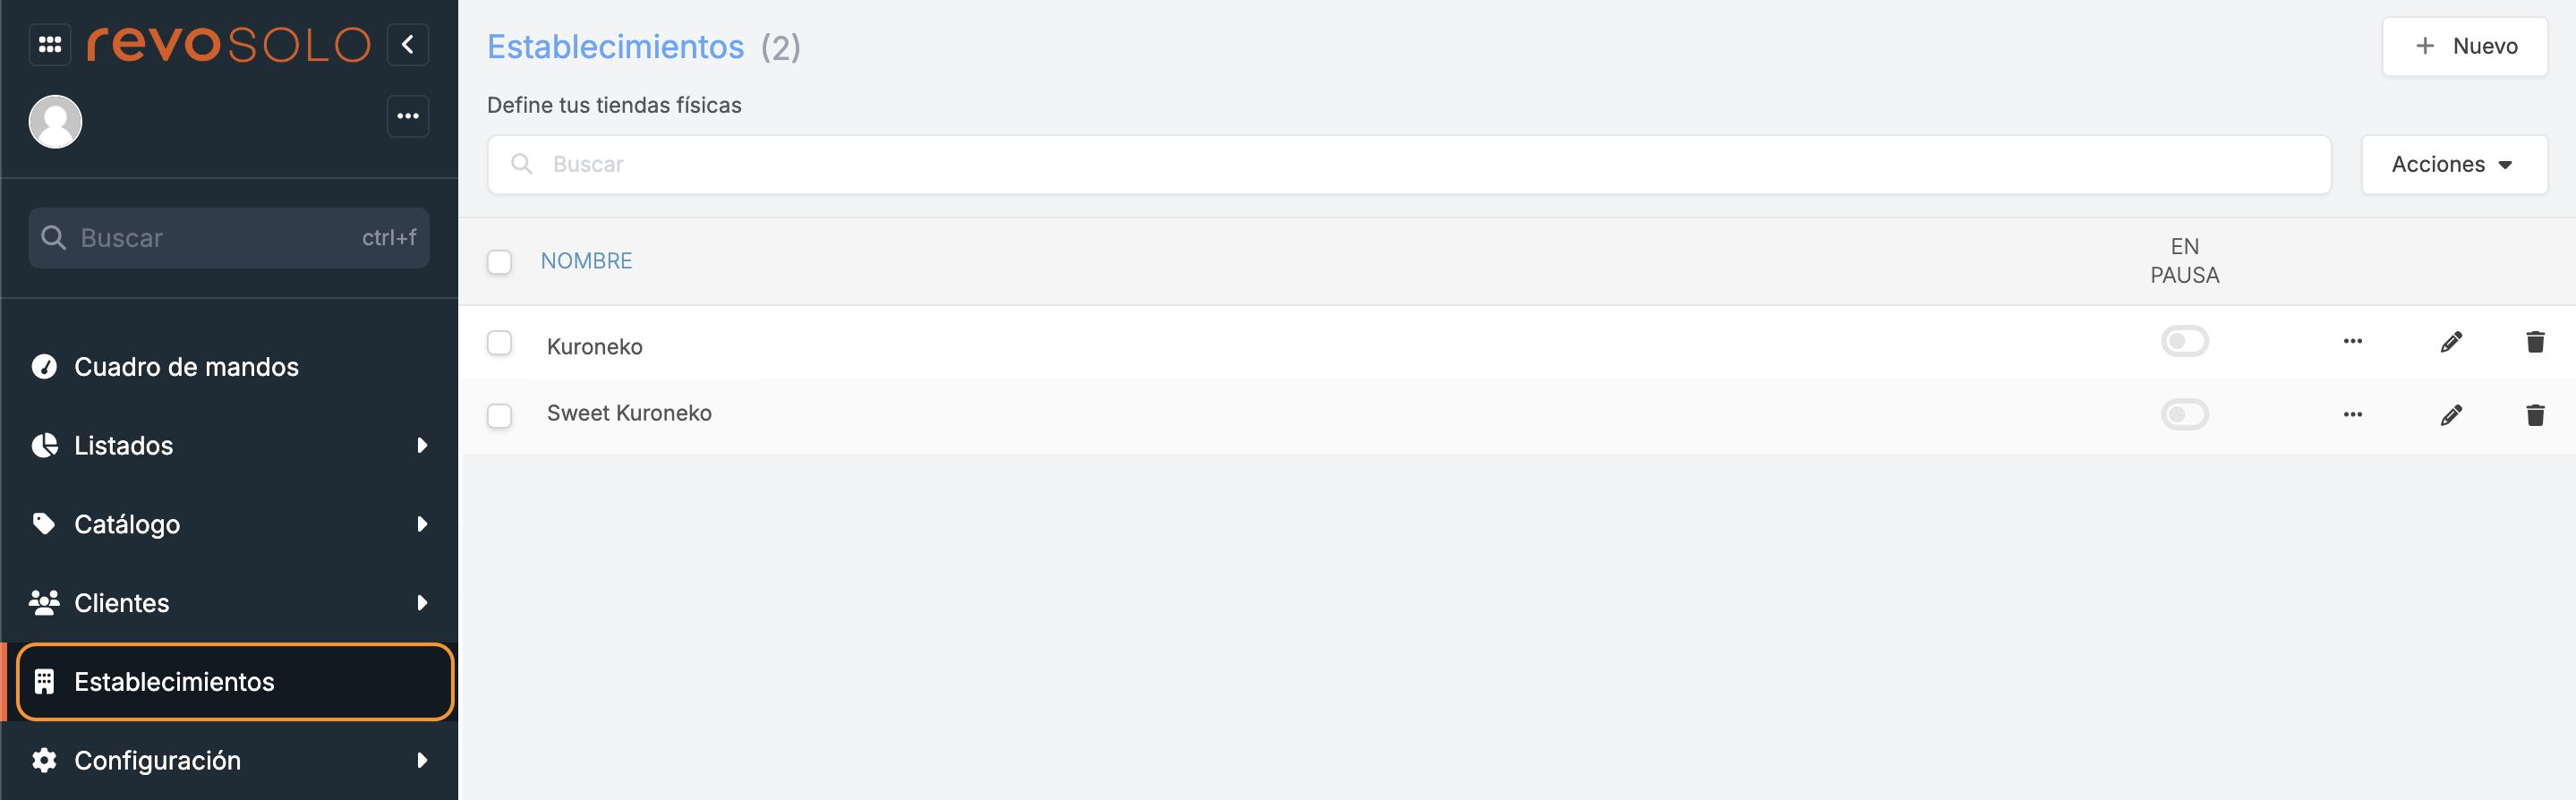
1. Access the back-office of Revo SOLO.
2. Go to STORES.
-
+ New: Create a new store. If you only have one, edit the default store’s settings.
-
: Search for stores.
-
Actions: Perform actions on selected stores.Learn more here
-
: Select stores.
-
Name: Name of the store.
-
On Hold: Pause online orders.
-
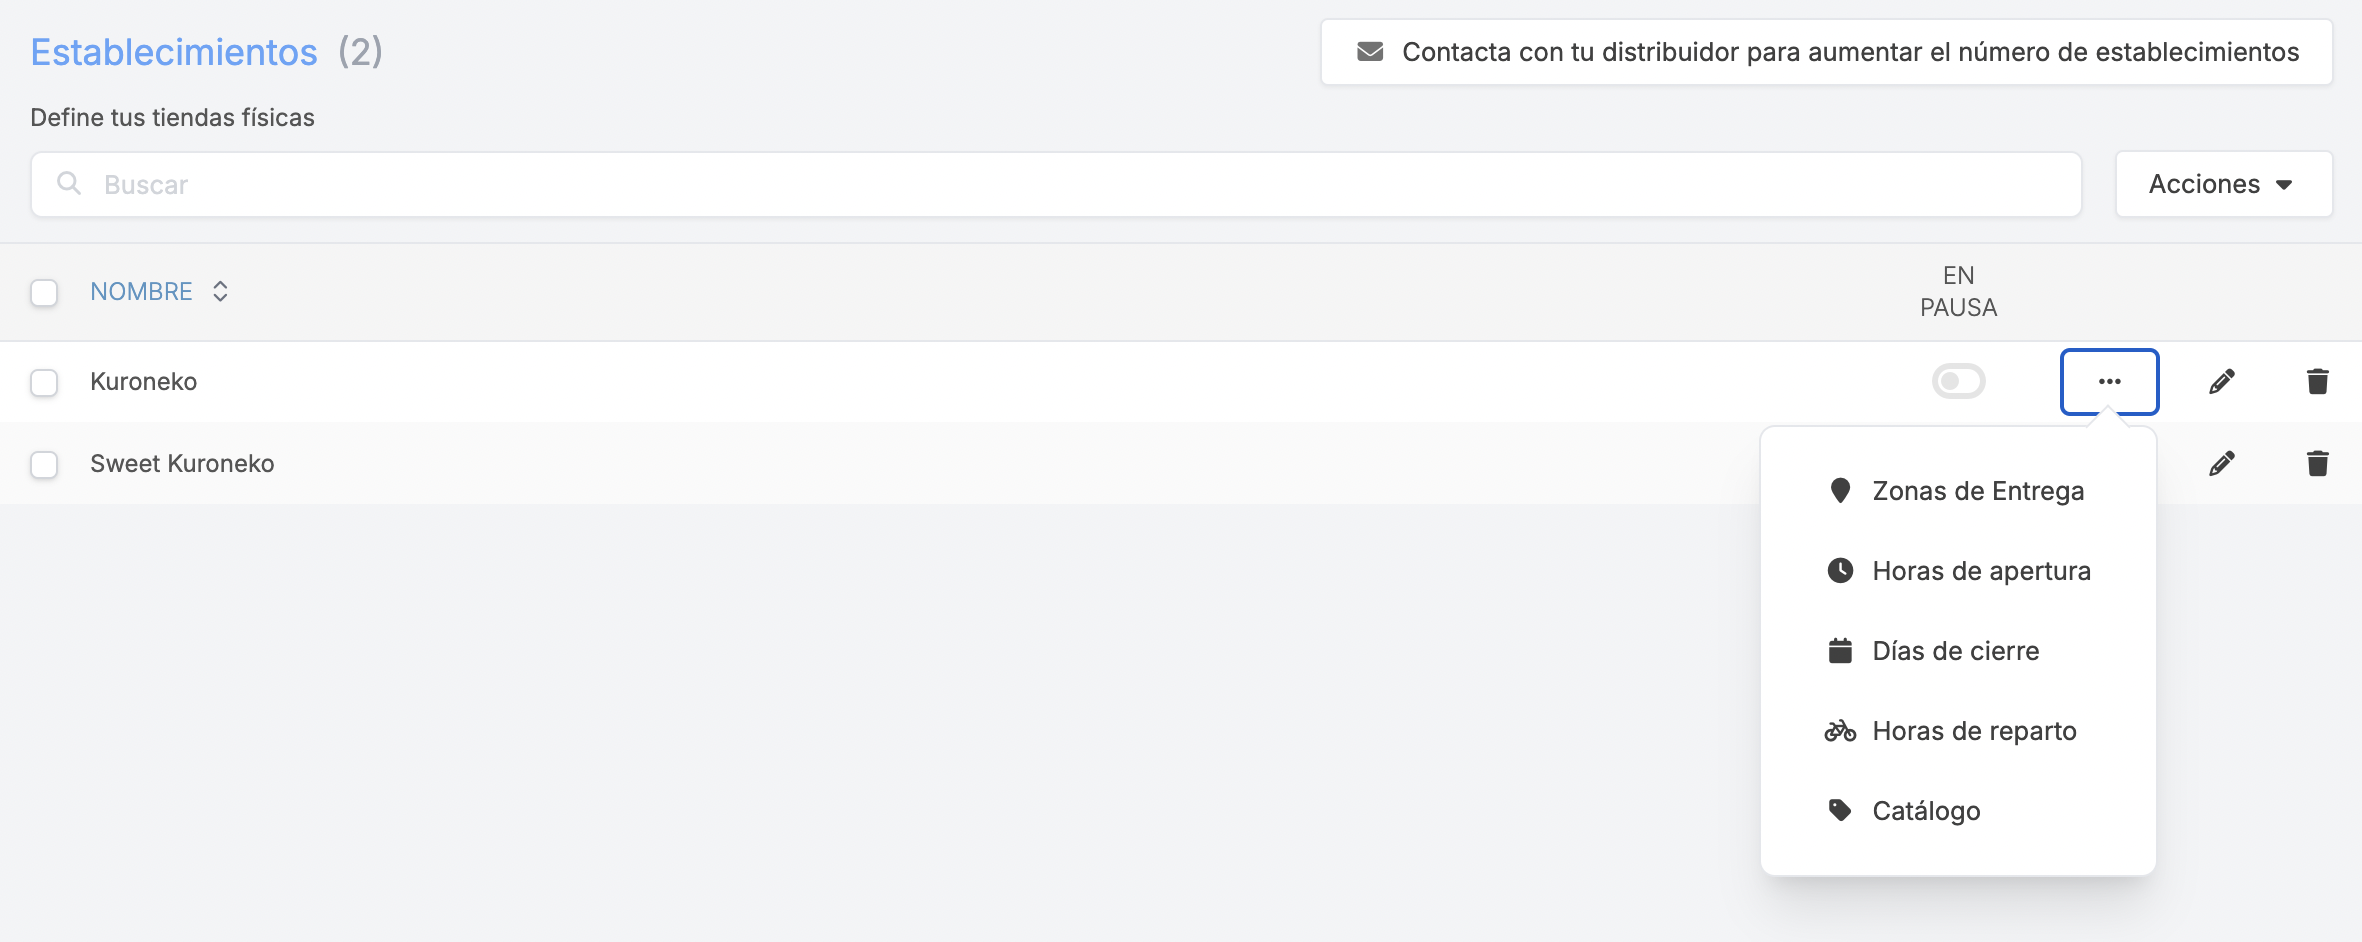
: Access to:
-
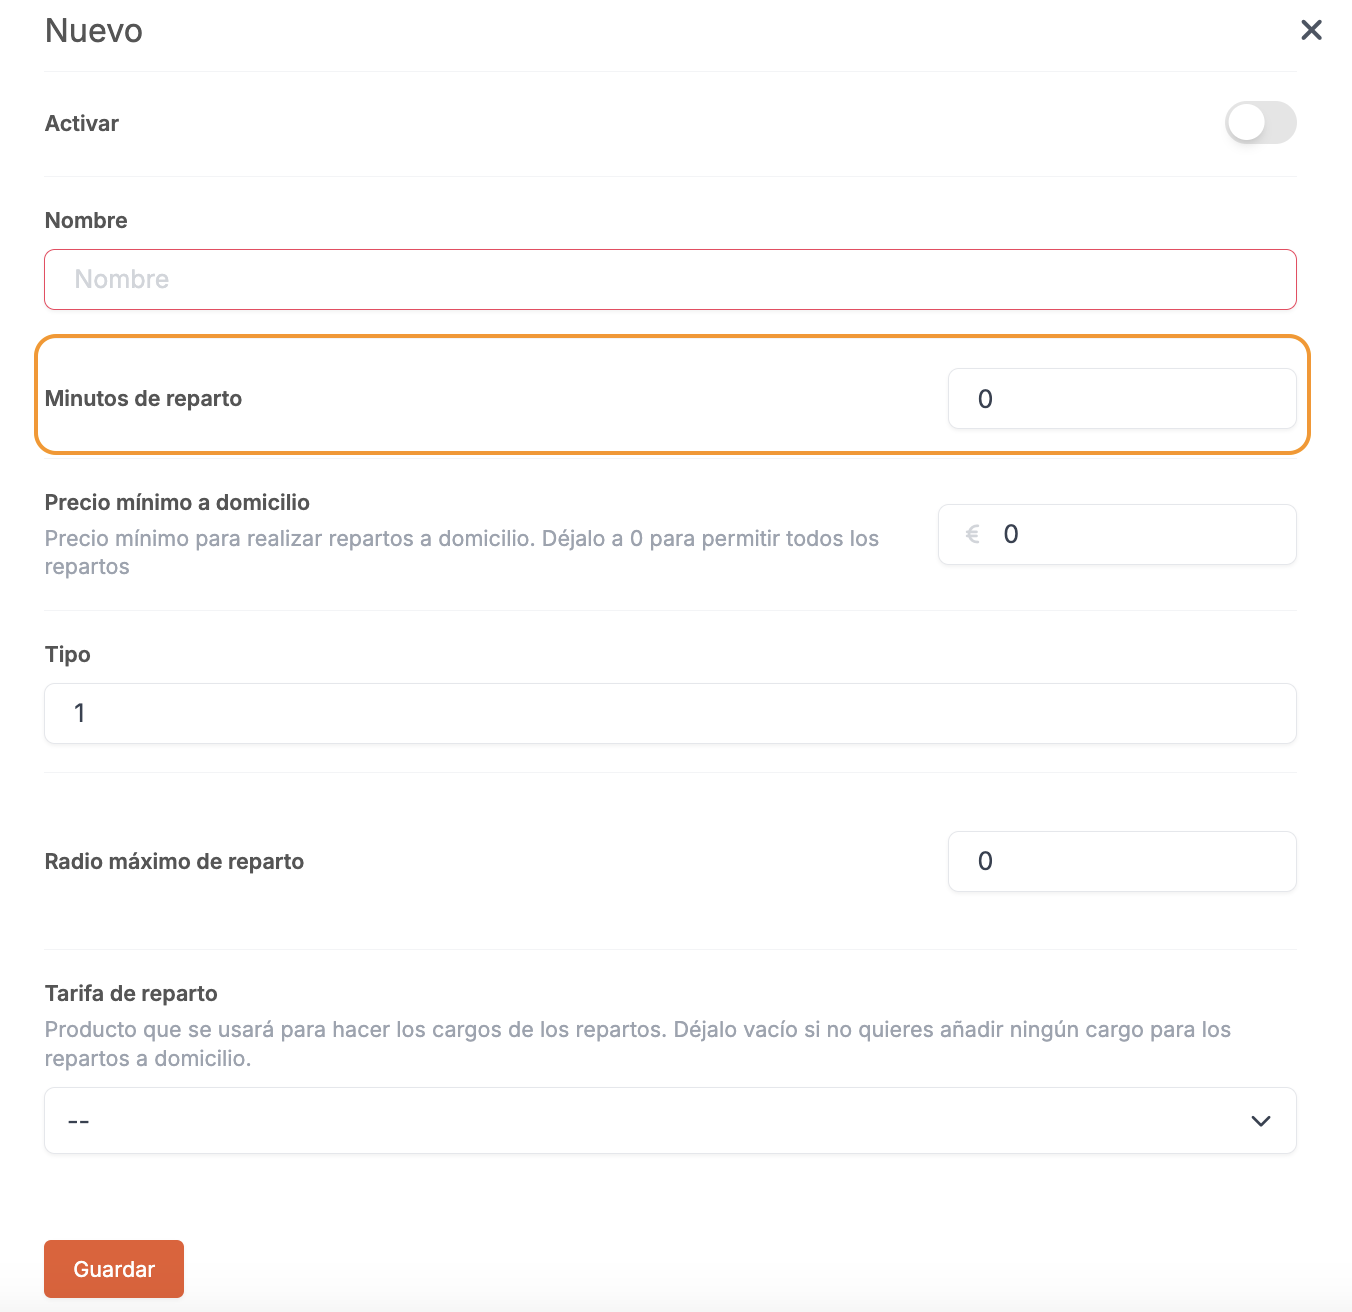
Delivery Zones: Access to configure delivery zones. Learn how here.
-
Opening Hours: Access to set up opening hours.
Opening times may not exceed 23:59. *E.g.: Saturday opening hours are from 10:00 to 00:30. A timetable must be set from 10:00:00 to 23:59:00 on Saturdays and from 00:00:00 to 00:30:00 on Sundays.
-
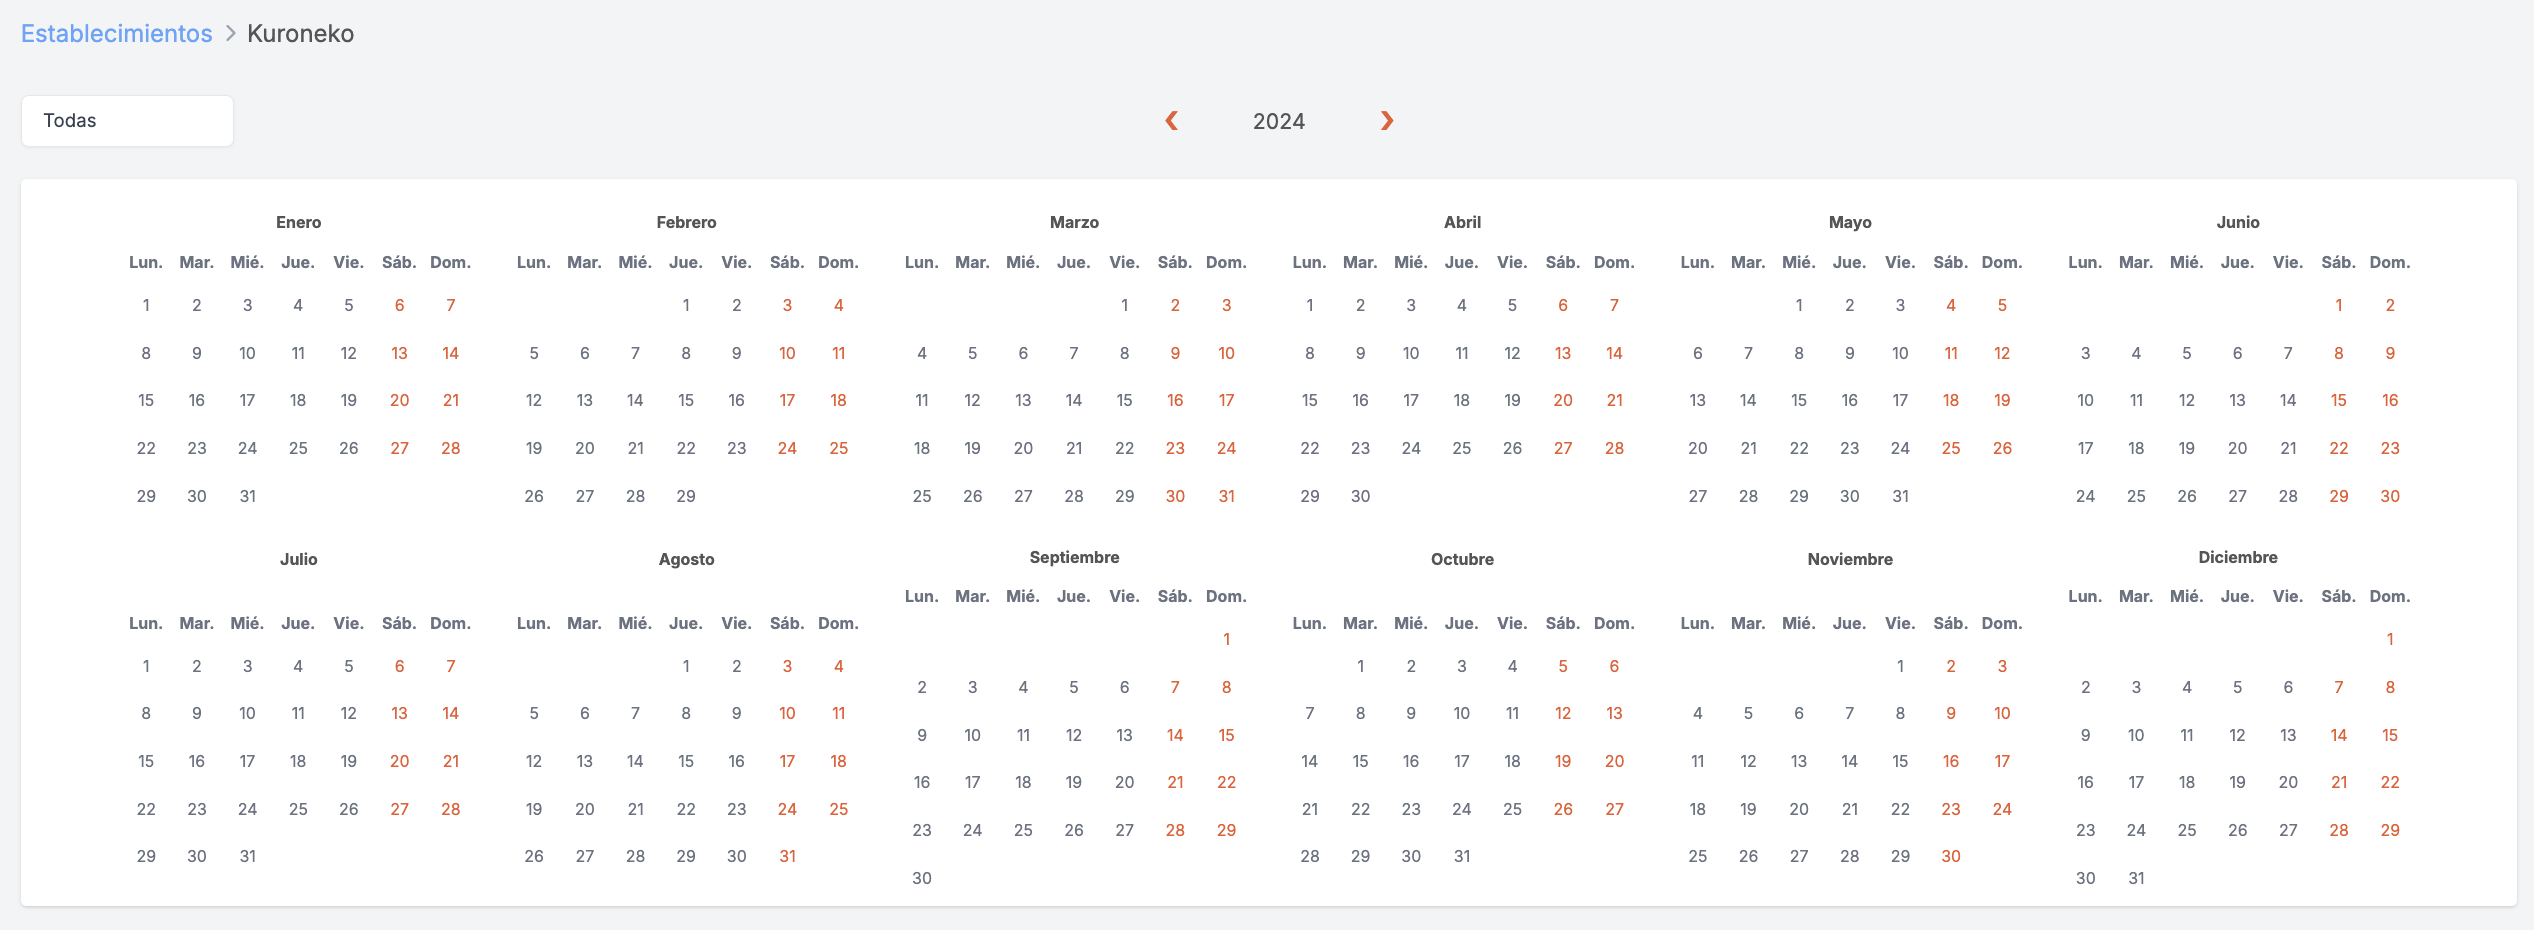
Closing days: Select which days the establishment will be closed.
-
Delivery Hours: Access to set up delivery hours.
-
Catalogue: Access to configure the catalogue of a specific establishment.
-
-
: Edit the store.
-
: Delete the store.
STORE SETTINGS
- LOCATION:
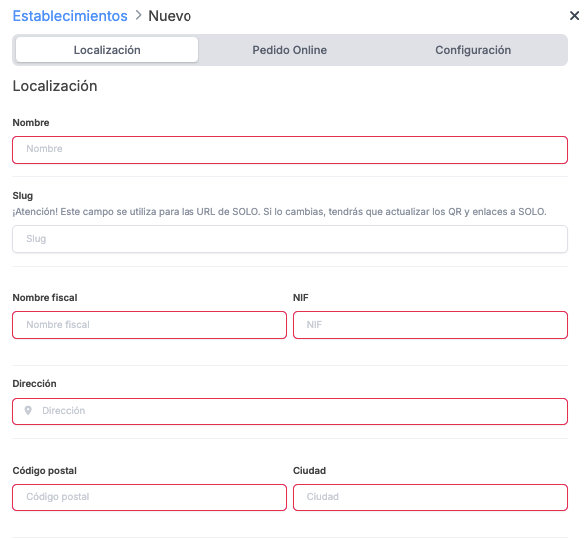
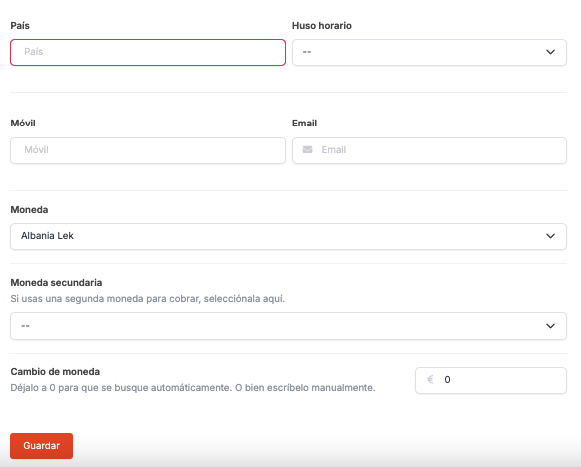
Fill in the store’s details.
-
Slug: Used for SOLO URLs. If you change it, update the QR codes and links you have in the venue.

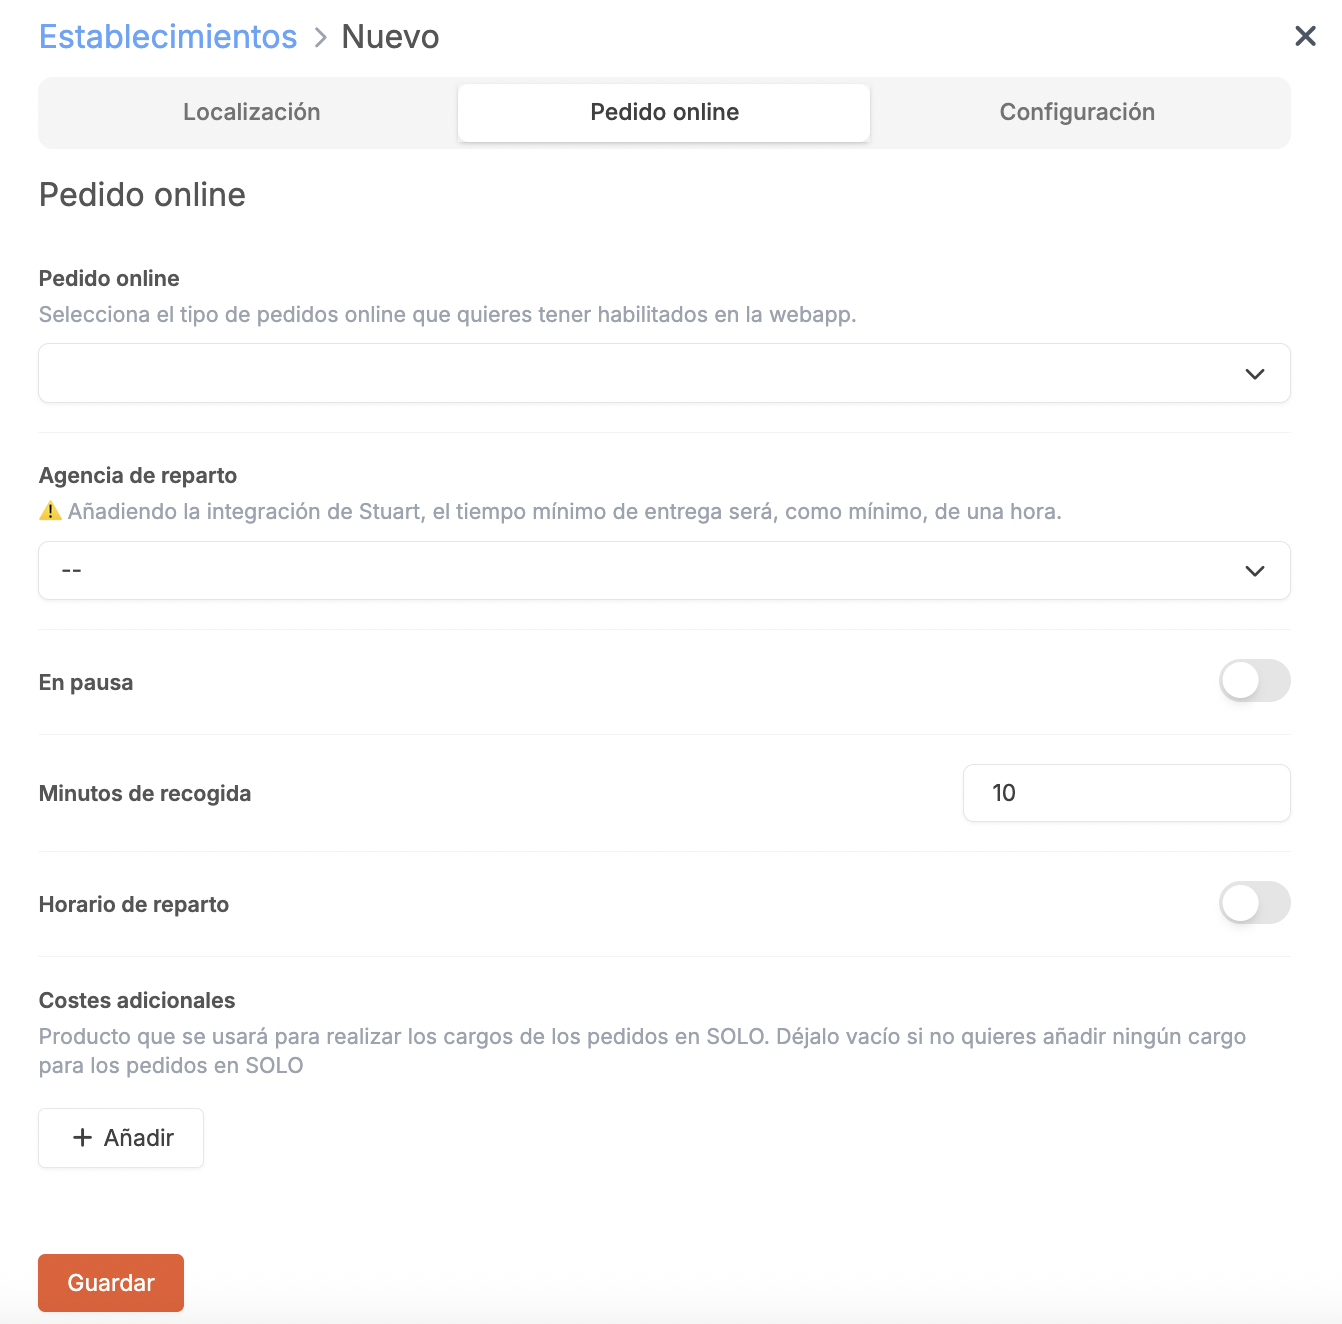
- ONLINE ORDERING:
-
Online Ordering: Enable online ordering.
-
Delivery Agency: Assign the delivery agency previously created in the Delivery Agency module.
-
On Hold: Pause online orders.
-
Pickup Minutes: Set the time between preparing the order and when it is ready for collection.
You’ll be able to set the time it takes to prepare the order + the time required for home delivery.
1. Set the collection time in minutes.
2. Go to Delivery Zones.
3. Set the Delivery Minutes (time it takes for home delivery once the order is prepared).
--> -
Delivery Hours: Enable to edit delivery hours from the interface.
-
Additional Costs: Add a product for delivery charges. The rate must be created in the Revo XEF back-office beforehand. More information here.
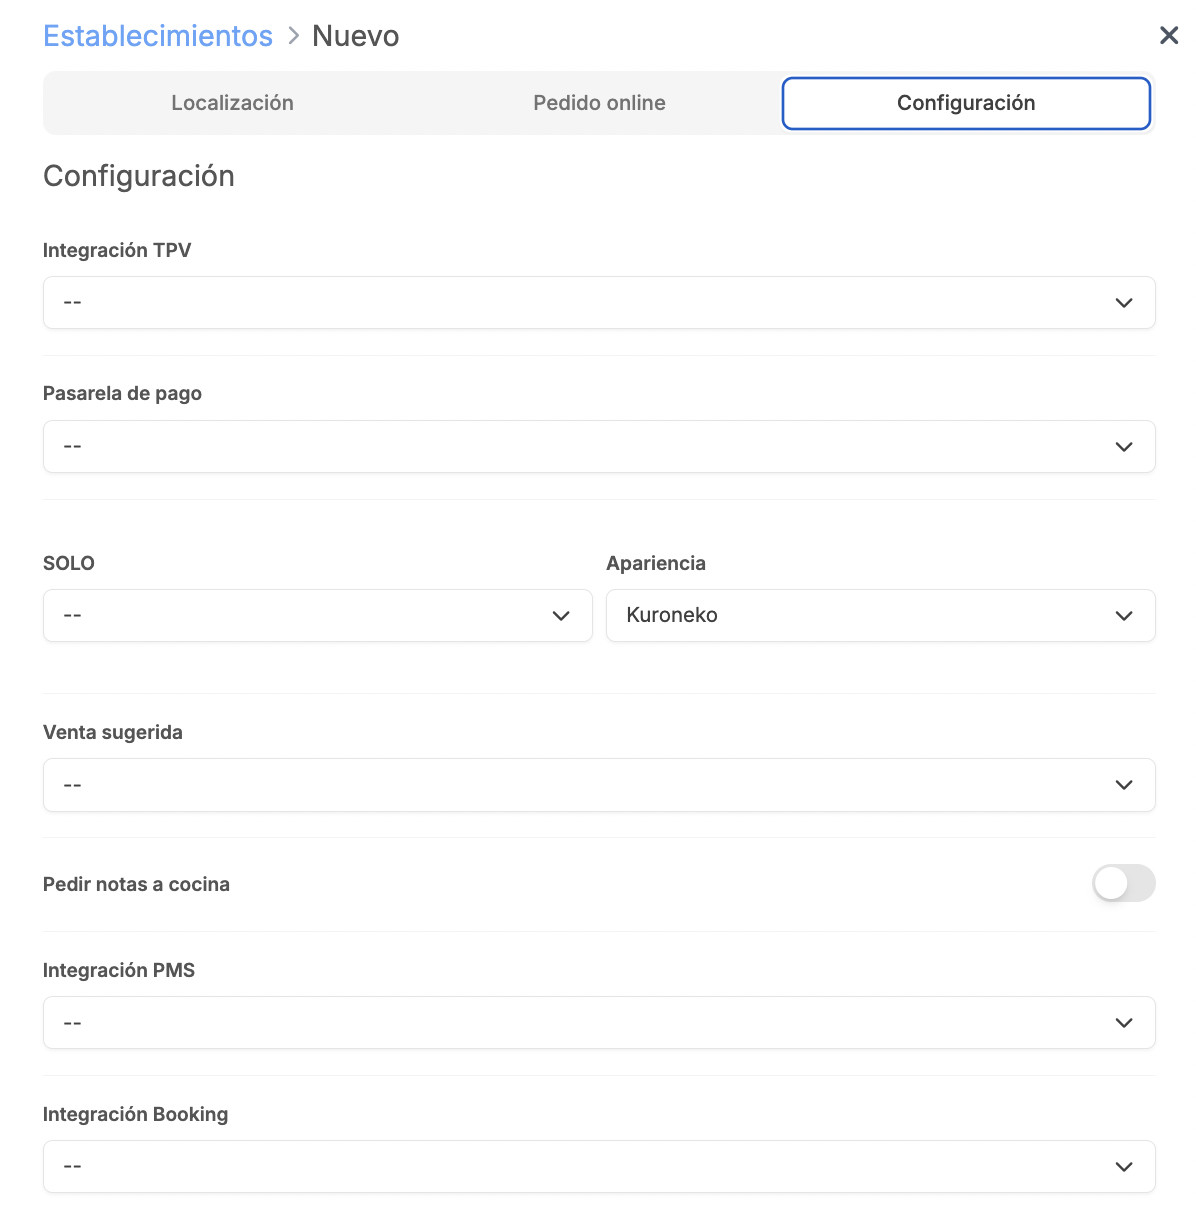
- CONFIGURATION:

-
EPOS Integration: Assign the EPOS profile previously created in the EPOS Integrations module.
-
Payment Gateway: Assign the payment gateway previously created in the Payment Gateways module.
-
SOLO: Assign the SOLO profile previously created in the Solo module.
-
Appearance: Assign the appearance profile previously created in the Appearance module.
-
Suggested Sale: Assign the suggested sale profile previously created in the Suggested Sales module.
-
Send Notes to Kitchen: Enable sending notes to the kitchen.
-
PMS Integration: Assign the PMS profile previously created in the PMS Integrations module.
-
Booking Integration: Assign the booking profile previously created in the Booking Integrations module.
-
Automatic Price Synchronisation: Enable to automatically sync the establishment’s prices when they are modified in Revo XEF.
-
Sync Times: Select from the drop-down list, the times at which you’d like prices to sync automatically.
Note that if you don’t select any times, no price sync will occur.
-
Message in Catalogue: Add a message for the catalogue.
-
Message in Order Summary: Add a message for the order summary.
-
Message in Confirmation Email: Add a message for the confirmation email.