1. WHAT IS A POLYGON 2. HOW TO CREATE A POLYGON 3. ADDING A POLYGON IN REVO SOLO 4. EDITING THE DELIVERY AREA 5. VIEWING CONFIGURED DELIVERY AREAS
1. WHAT IS A POLYGON
A polygon is a useful tool for displaying roads, borders, and other information. It is created by specifying points or vertices with their latitude and longitude coordinates. You need to indicate the points from the first to the last, closing the polygon. This allows you to create a delivery area and import it into the Revo SOLO back-office.
2. HOW TO CREATE A POLYGON
1. Access Google My Maps.
You need a Google account to access it. More information here on how to create a Google account.
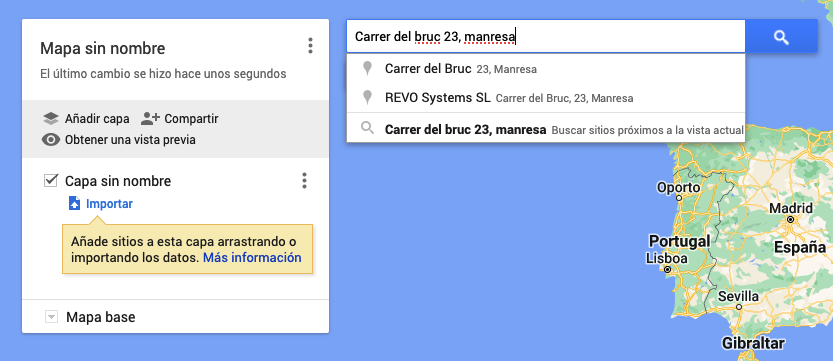
2. Click on Create a new map.

3. Search for the establishment's address in the search bar, entering the full address for greater accuracy.
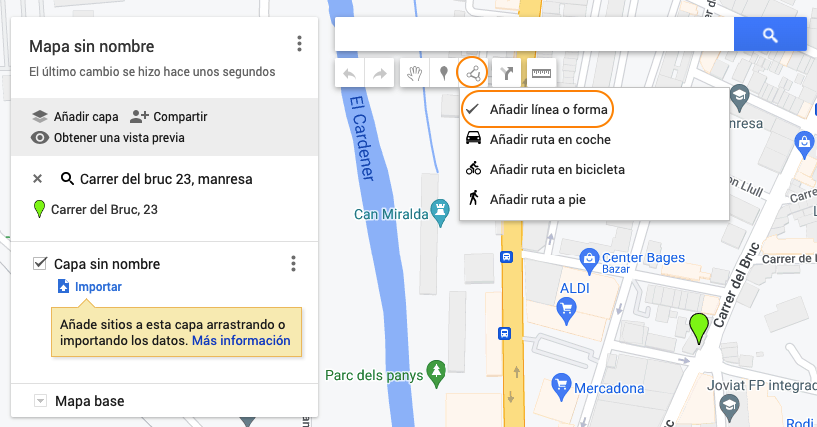
4. When the address appears on the map, click on the Draw Line icon below the search bar and select Add Line or Shape.
5. Connect the last point to the first to close the delivery area. You can modify the area by moving the white points to refine the zone.
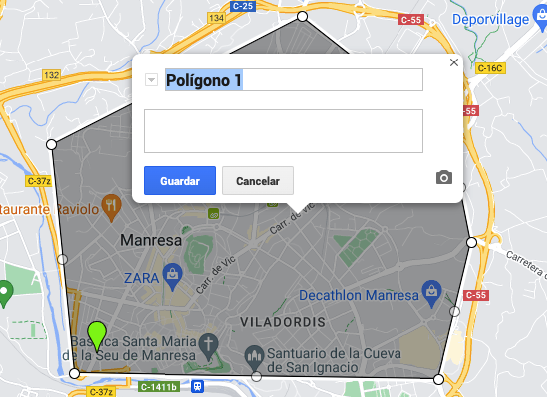
6. The area will be named Untitled Layer. If you wish, change the name by clicking on Rename this layer in the menu on the left.
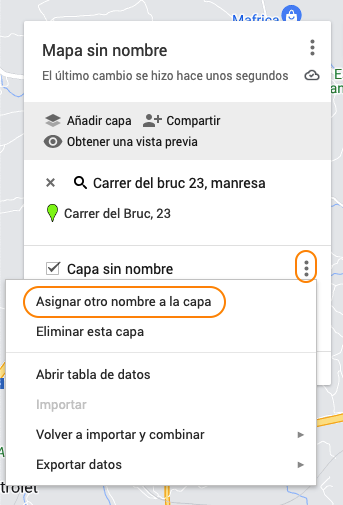
7. Edit the layer name and click Save.
8. Repeat the previous steps to draw the necessary delivery areas.
9. Once completed, click on the and select Export to KML/KMZ.
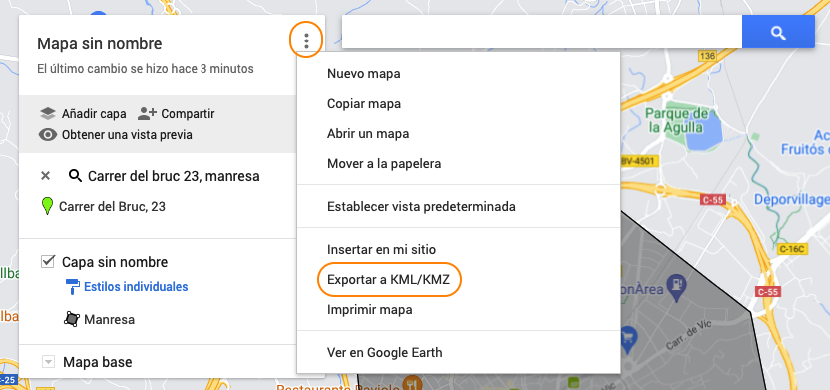
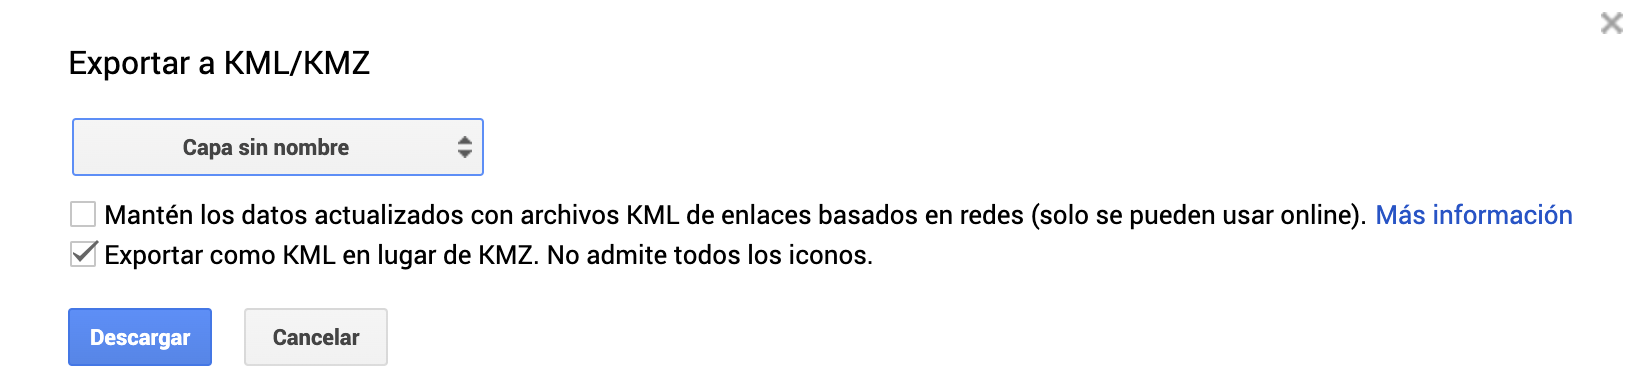
10. Export the layer as KML.
3. ADDING A POLYGON IN REVO SOLO
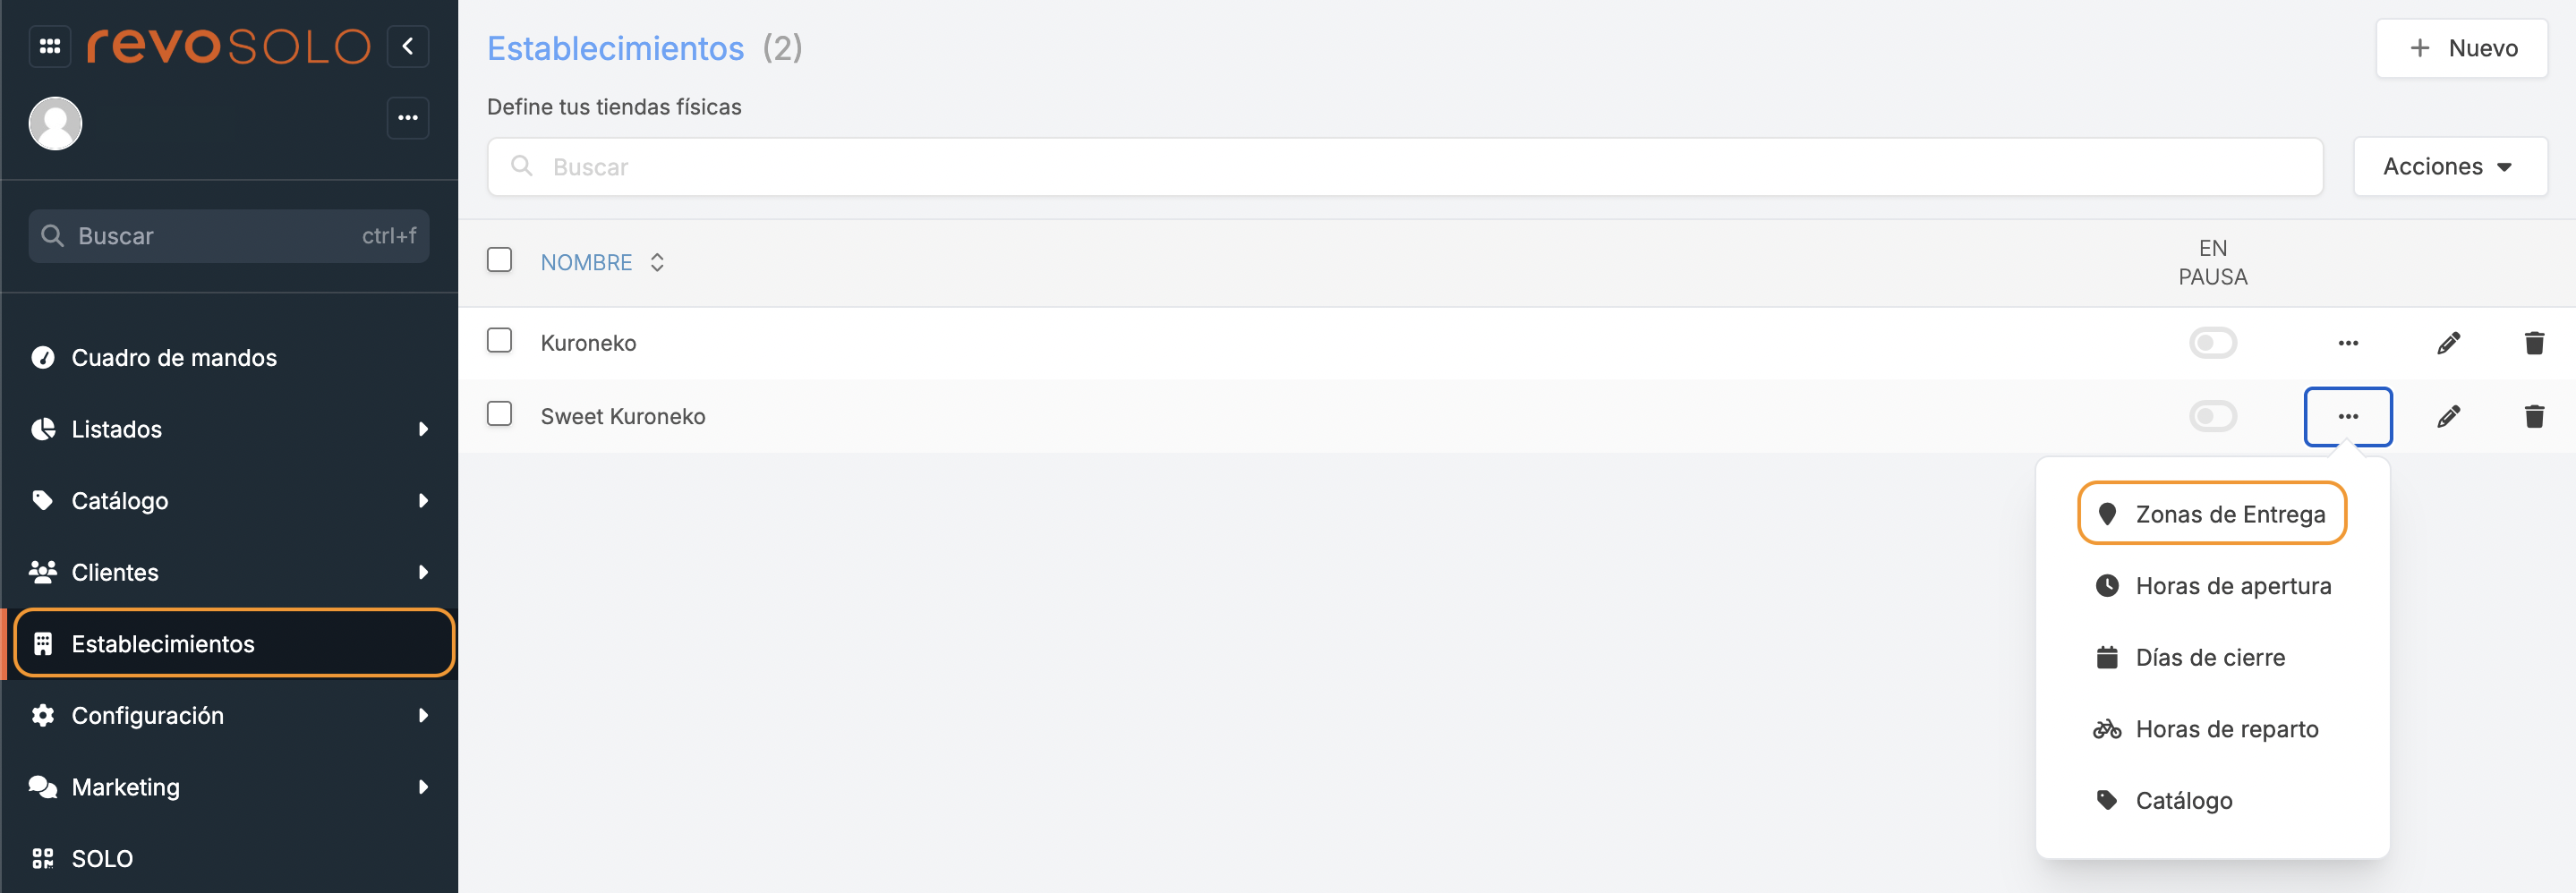
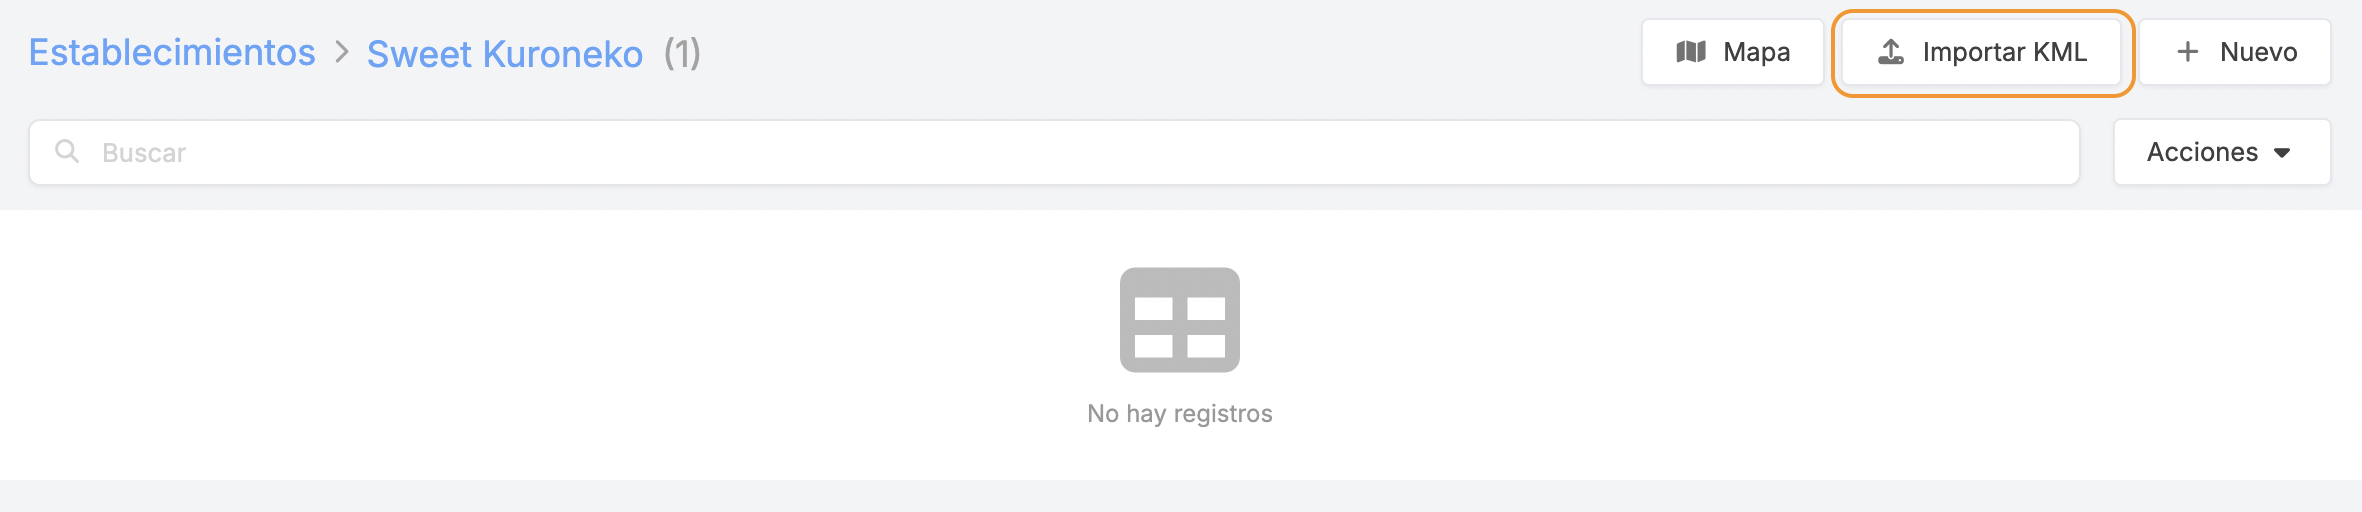
1. In the Revo SOLO back-office, access the ESTABLISHMENTS module.
2. Click on the and under Delivery Zones.
3. Click on Import KML.
4. Select the file exported from Google My Maps and click Send.
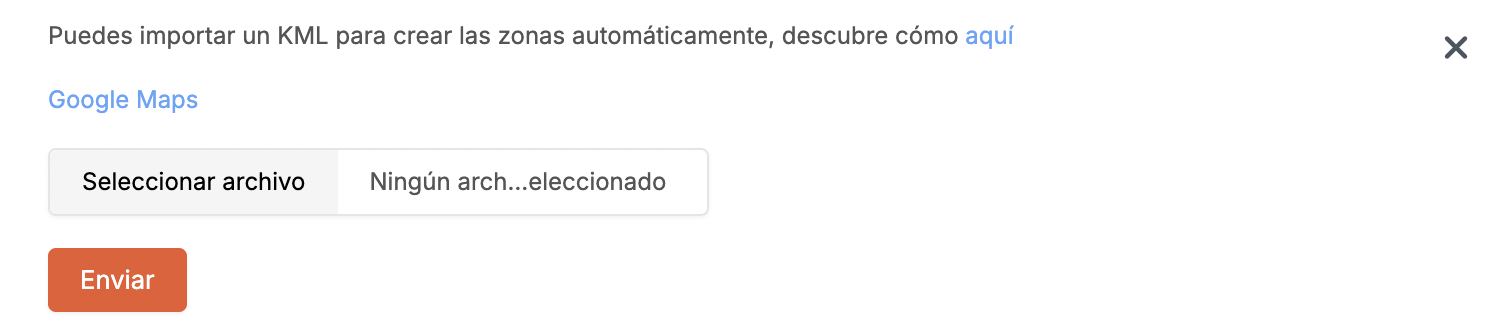
5. The delivery zone will be created for this establishment.

- Click on to view the delivery area in Google Maps.
- Click on to edit the delivery zone.
- Click on to delete the delivery zone.
4. EDITING THE DELIVERY AREA
Configure the delivery zones to optimise home deliveries. Fill in the following information:
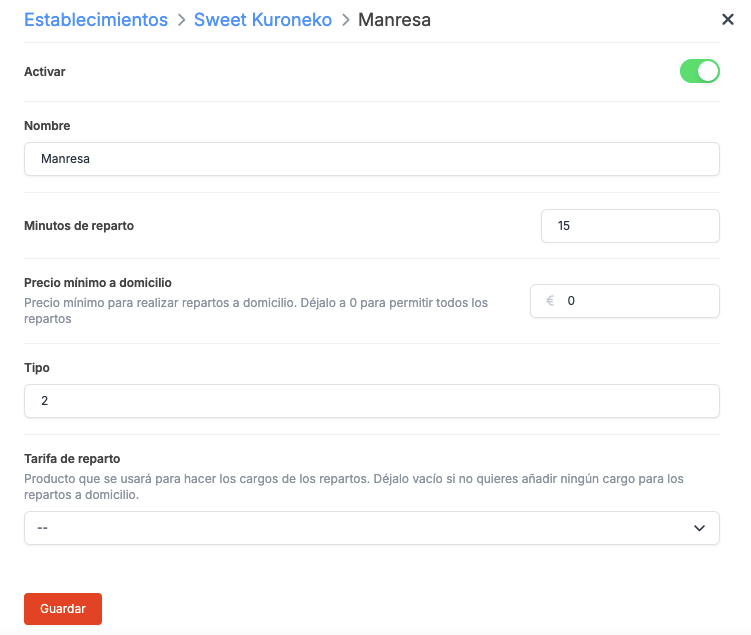
- Activate:
- Name: Name of the delivery zone.
- Delivery minutes: Time between preparing the order and being ready for delivery.
- Minimum delivery amount: Minimum amount for deliveries. Leave at 0 to set no minimum amount.
- Type: Not editable. Automatically assigned: type 1 when creating the zone manually and type 2 when importing the KML.
- Delivery fee: Select a product for delivery charges. Create the product in Revo XEF and update the catalogue in SOLO to select it.
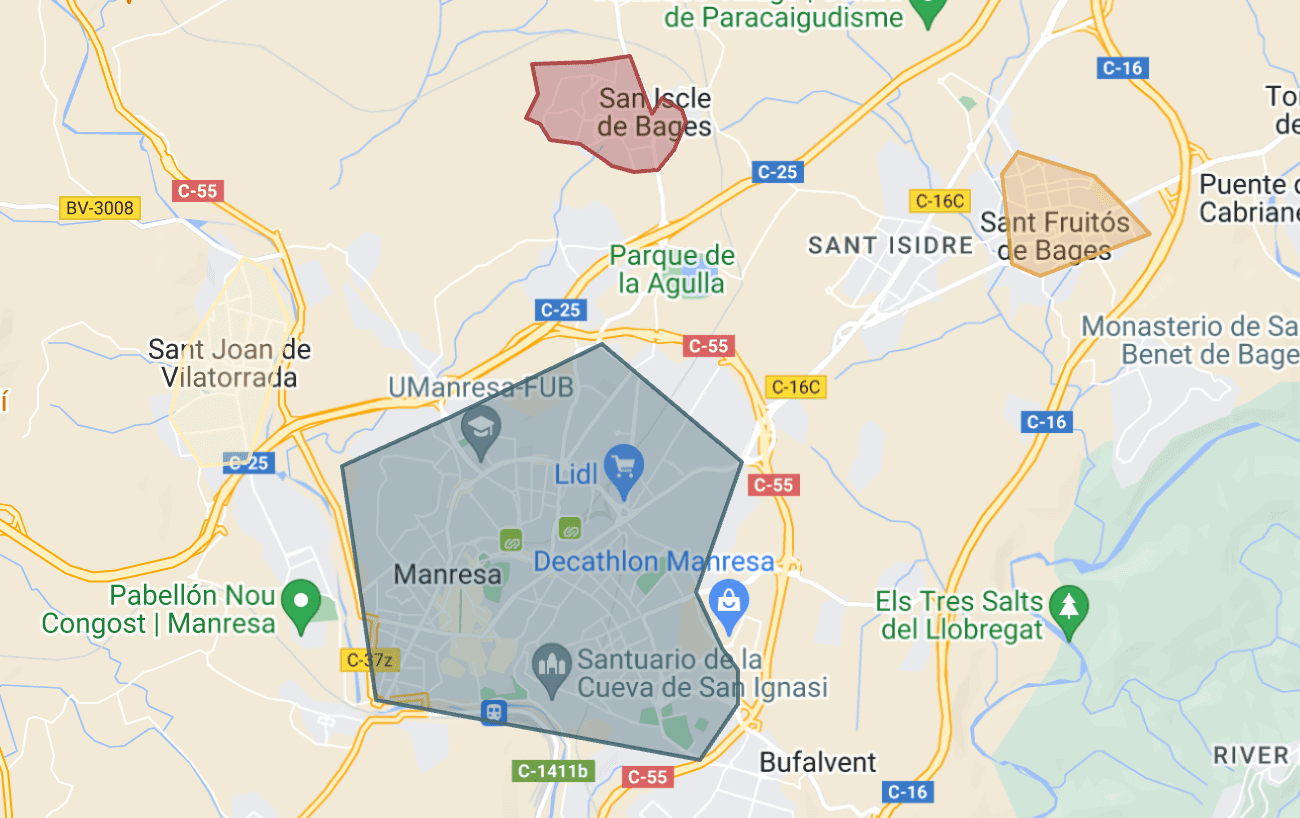
5. VIEWING CONFIGURED DELIVERY AREAS
Click on the Map in the Establishments module to view all the configured zones.