The payment screen is one of the most used in Revo XEF. From here, you can bill and charge your customers (by guests, by items...), whether in cash, by card, or other payment methods. You have a calculator to help you manage change and tips.
HOW TO ACCESS THE PAYMENT SCREEN
You can access it in three ways:
From the preview screen:
-
Tap on the table you wish to charge.
-
On the screen that appears, tap the icon.

Editing an order from the preview screen:
-
Tap on the table you wish to charge.
-
Tap Edit in the top right corner.
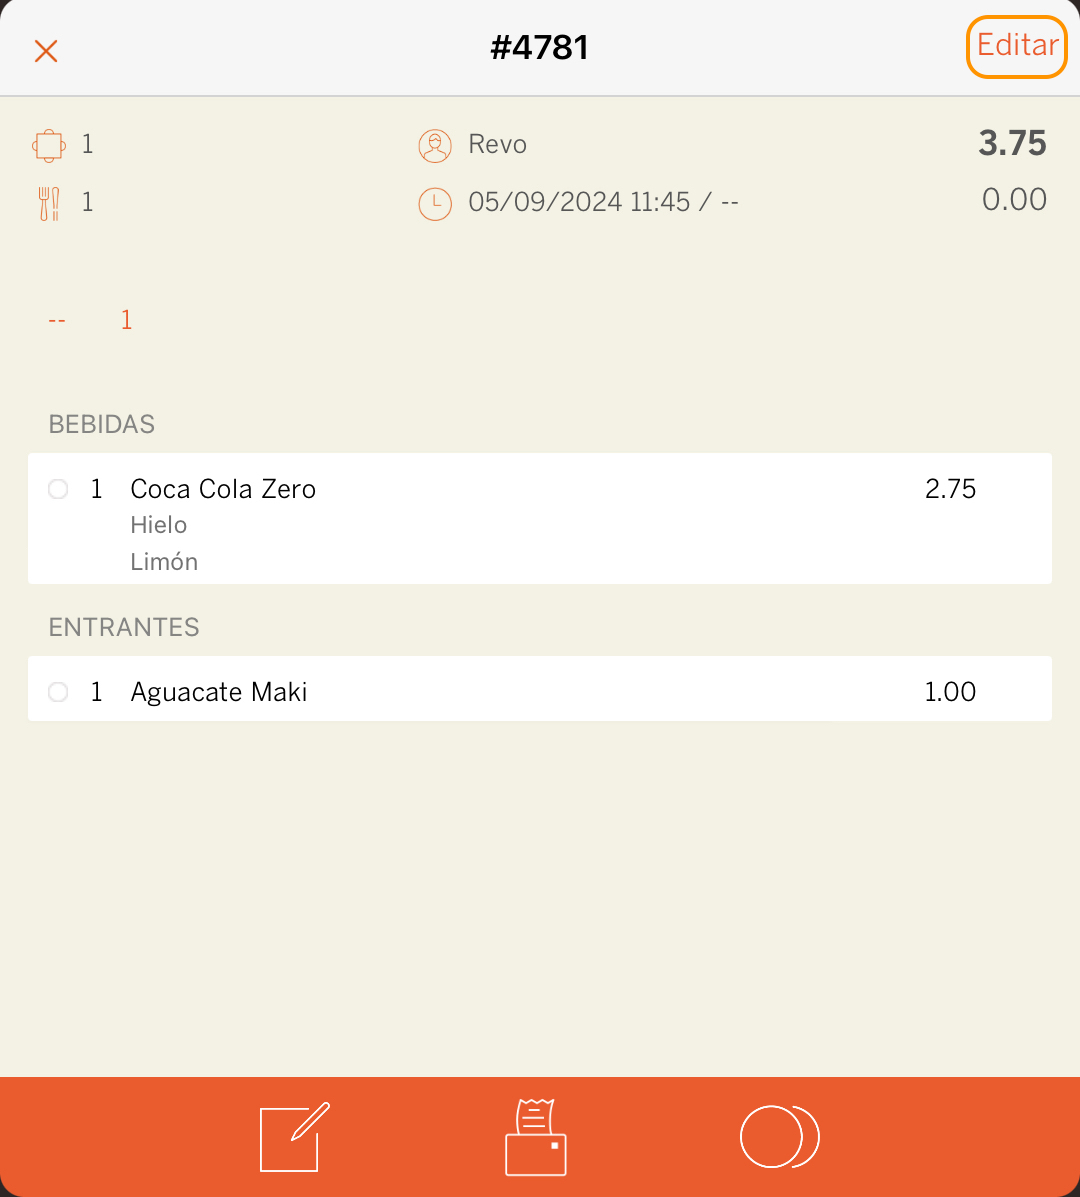
-
Once inside the order, tap the icon.

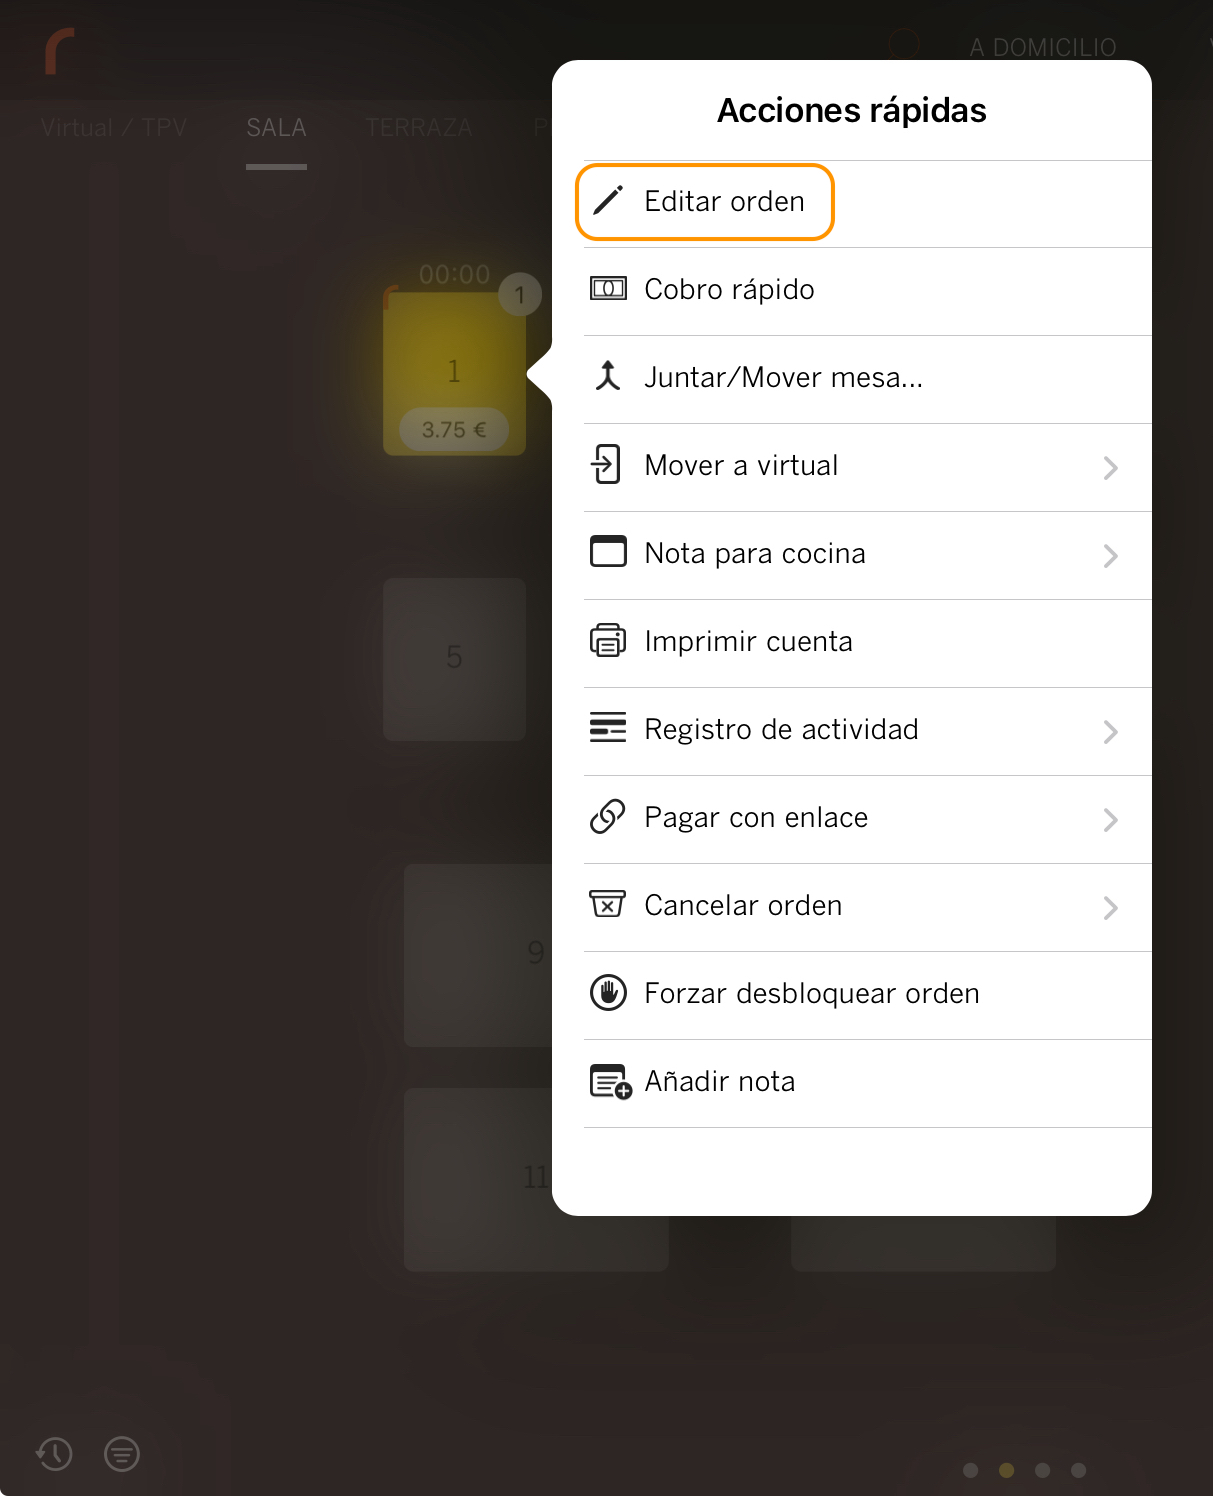
Editing an order from quick actions:
-
Swipe down from the table you wish to charge.
-
Select Edit order.
-
Once inside the order, tap the icon.
PAYMENT SCREEN
-
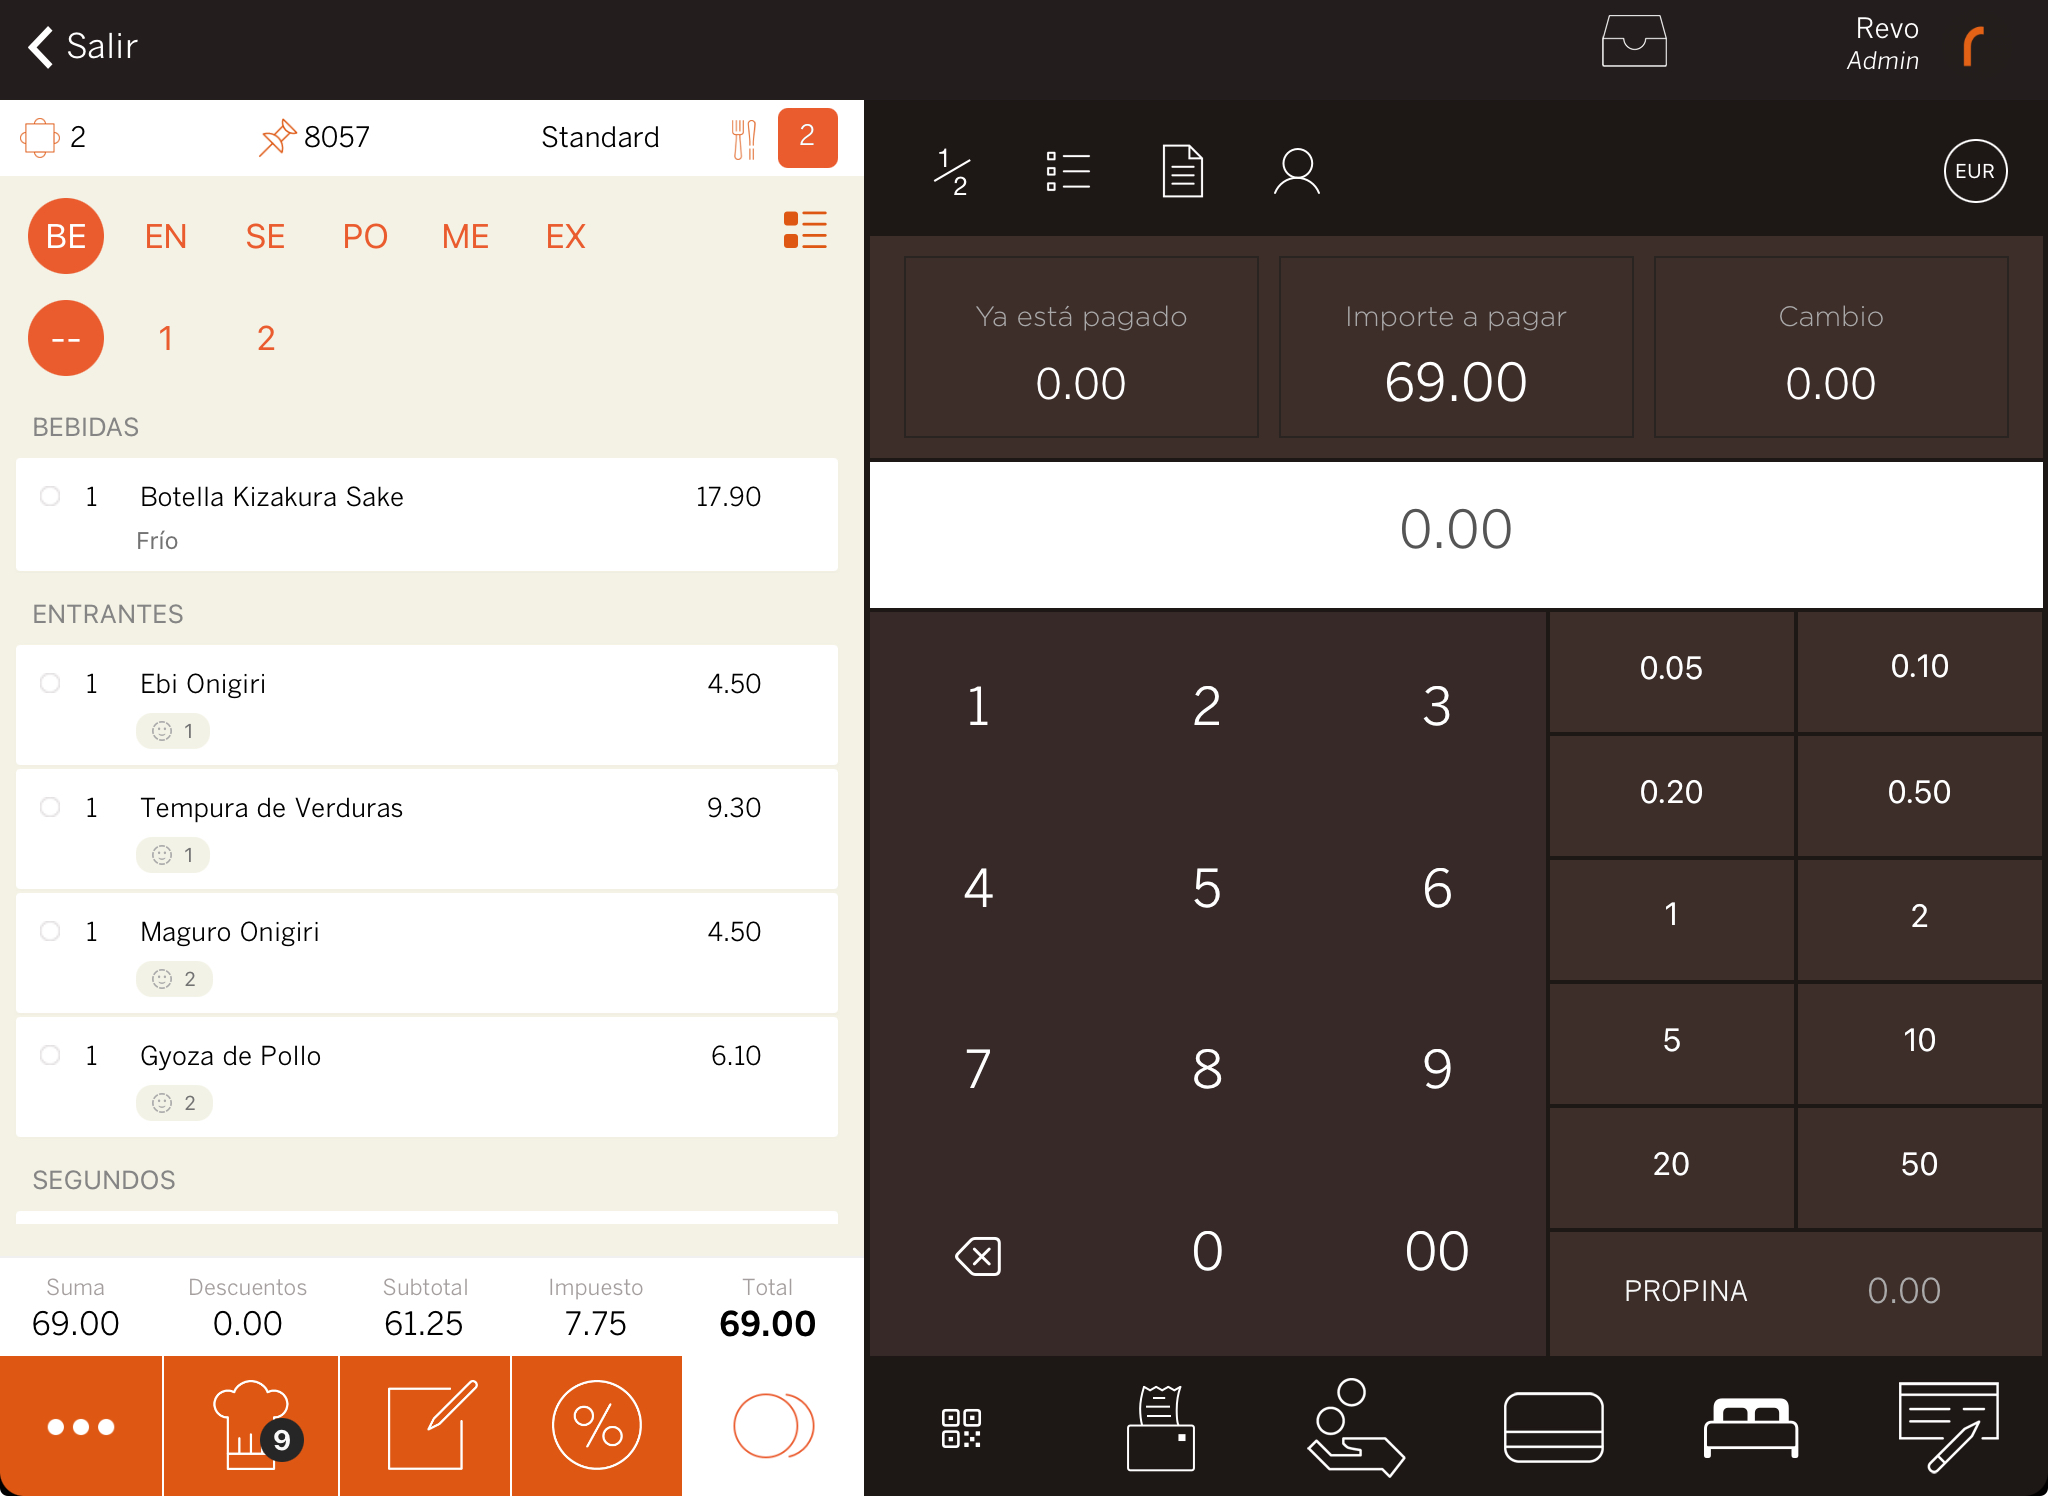
 Split by guests: Splits the total bill equally between guests. If you tap the icon and then select the number of guests, the bill will be divided automatically.
For example, in the image above, the total is €69.00, and there are 2 guests. By tapping on
and then selecting 2, the bill will be split into two equal parts of €34.50 each. You can find more information here.IMPORTANT: The bill is processed individually, but only one invoice with the total amount is printed.
-
Split by items: Allows each guest to pay for the items they consumed. Select the items and proceed with the payment.
For example, following the image above, tap the icon and then select Ebi Onigiri, Tempura vegetables, Udon, and Cheesecake. The guest will need to pay €26,60, which is the sum of the three items. If you're using chair management, tap the guest's number, and the items will be automatically selected. You can find more information here.
IMPORTANT: Here, each guest can take an invoice with the items they paid for.
AVAILABLE IN REVO XEF ADVANCE
-
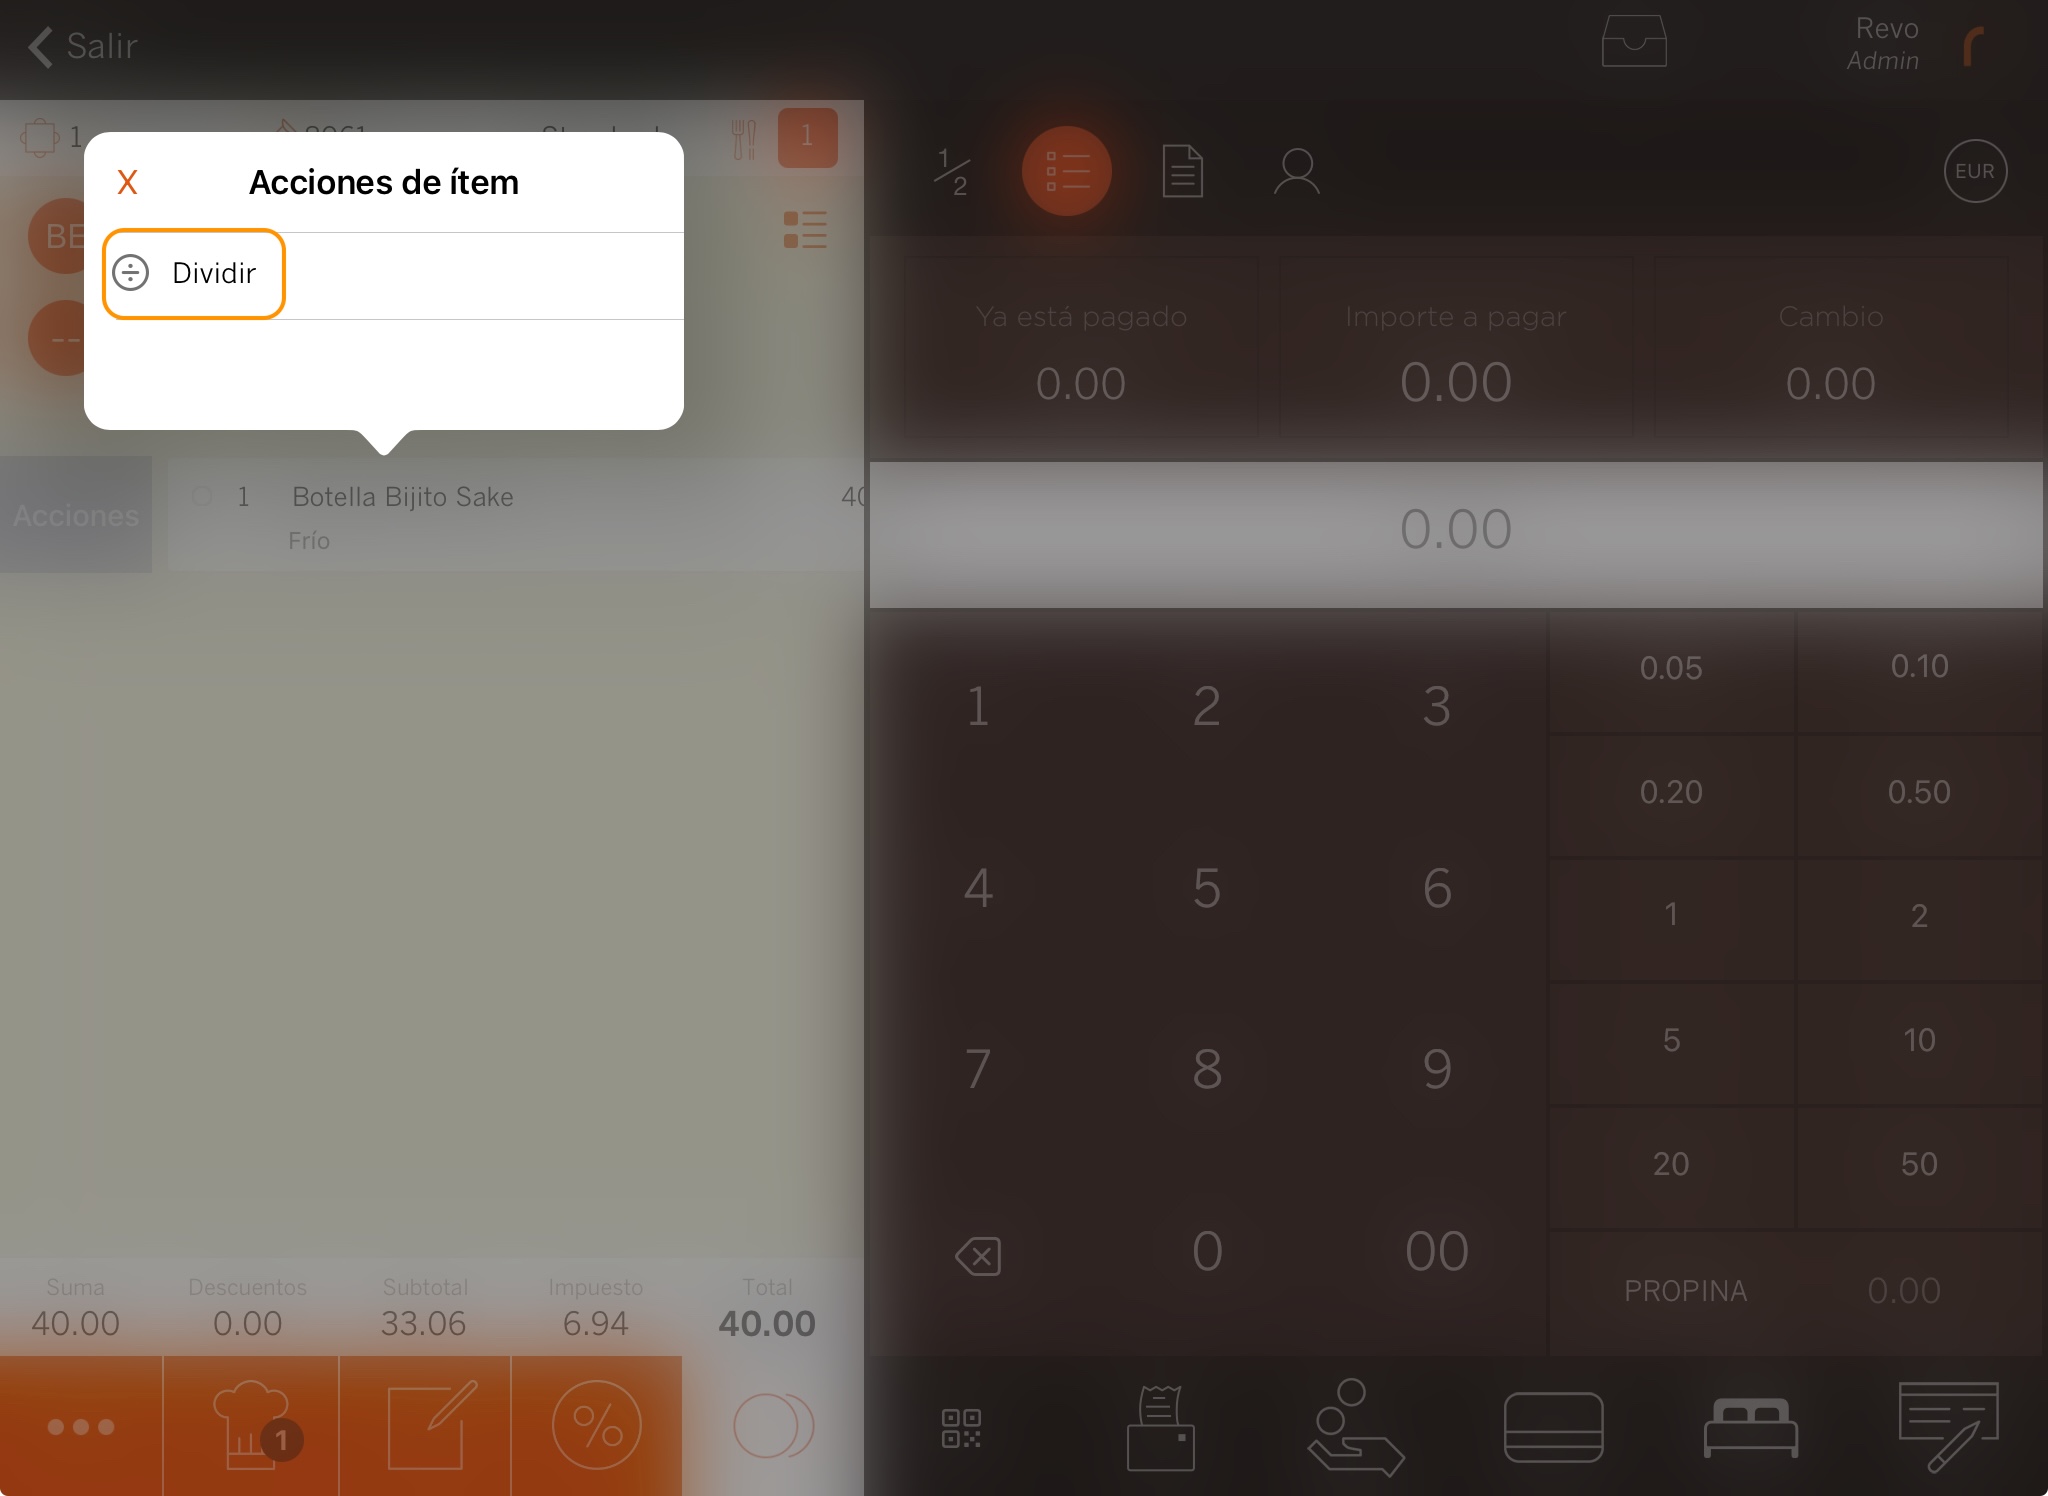
Split product: When selecting "Split by items", the option to split products will also appear. Example: a bottle of sake.
1. Select Split by items and swipe right on the product until you see Actions
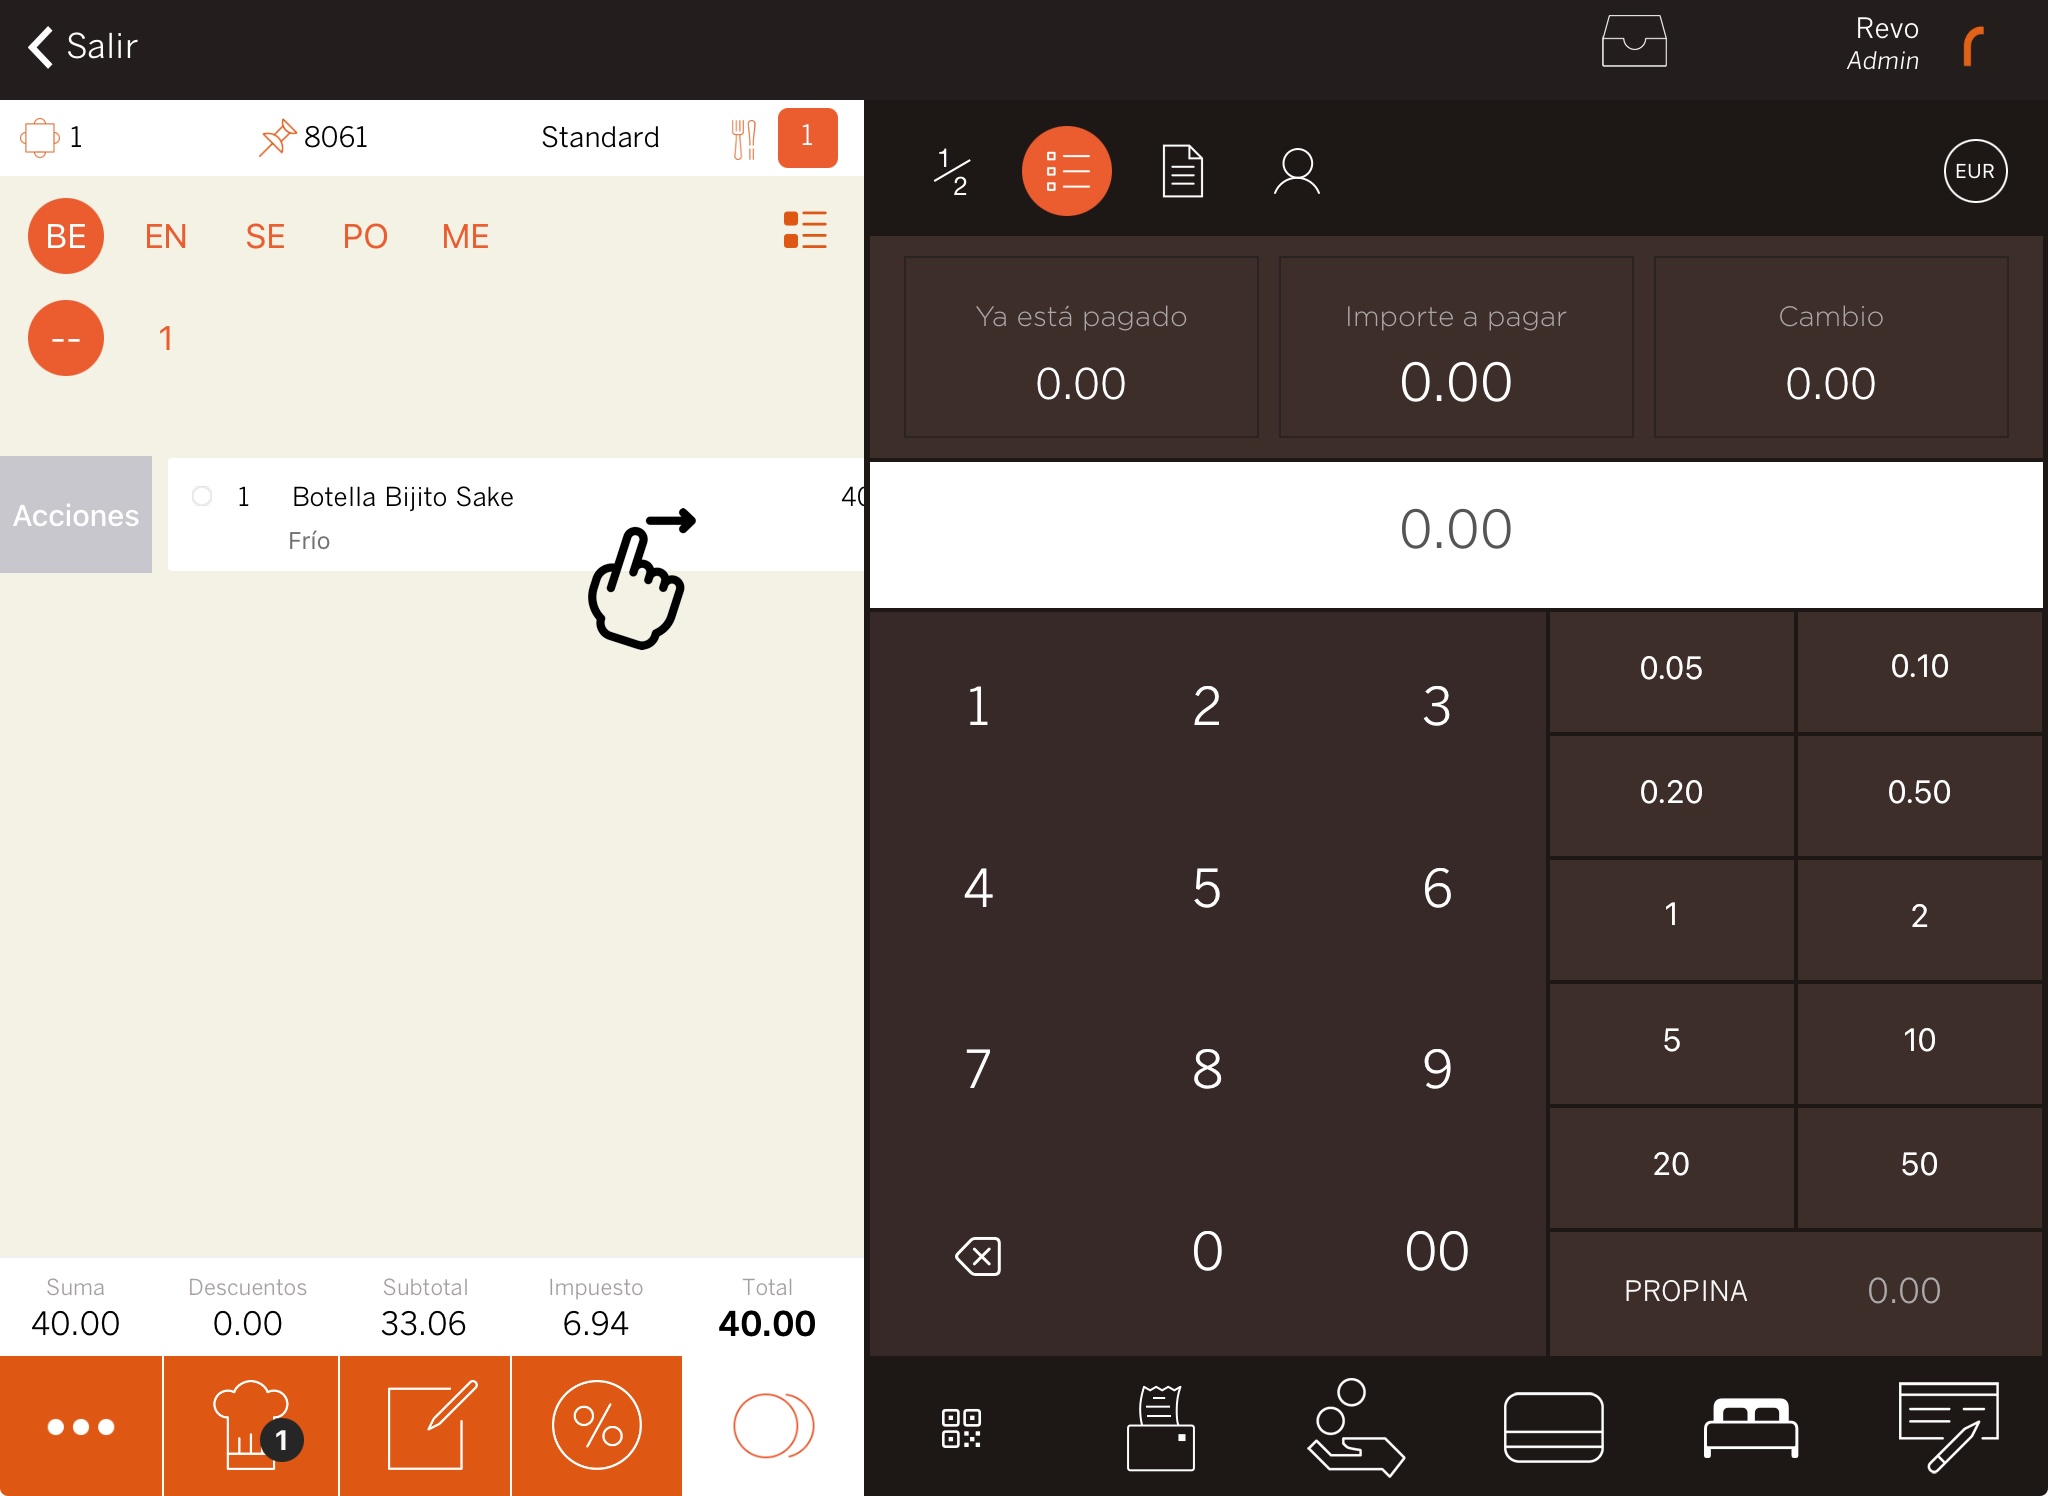
2. Select Split
3. Enter the number of diners to split between.
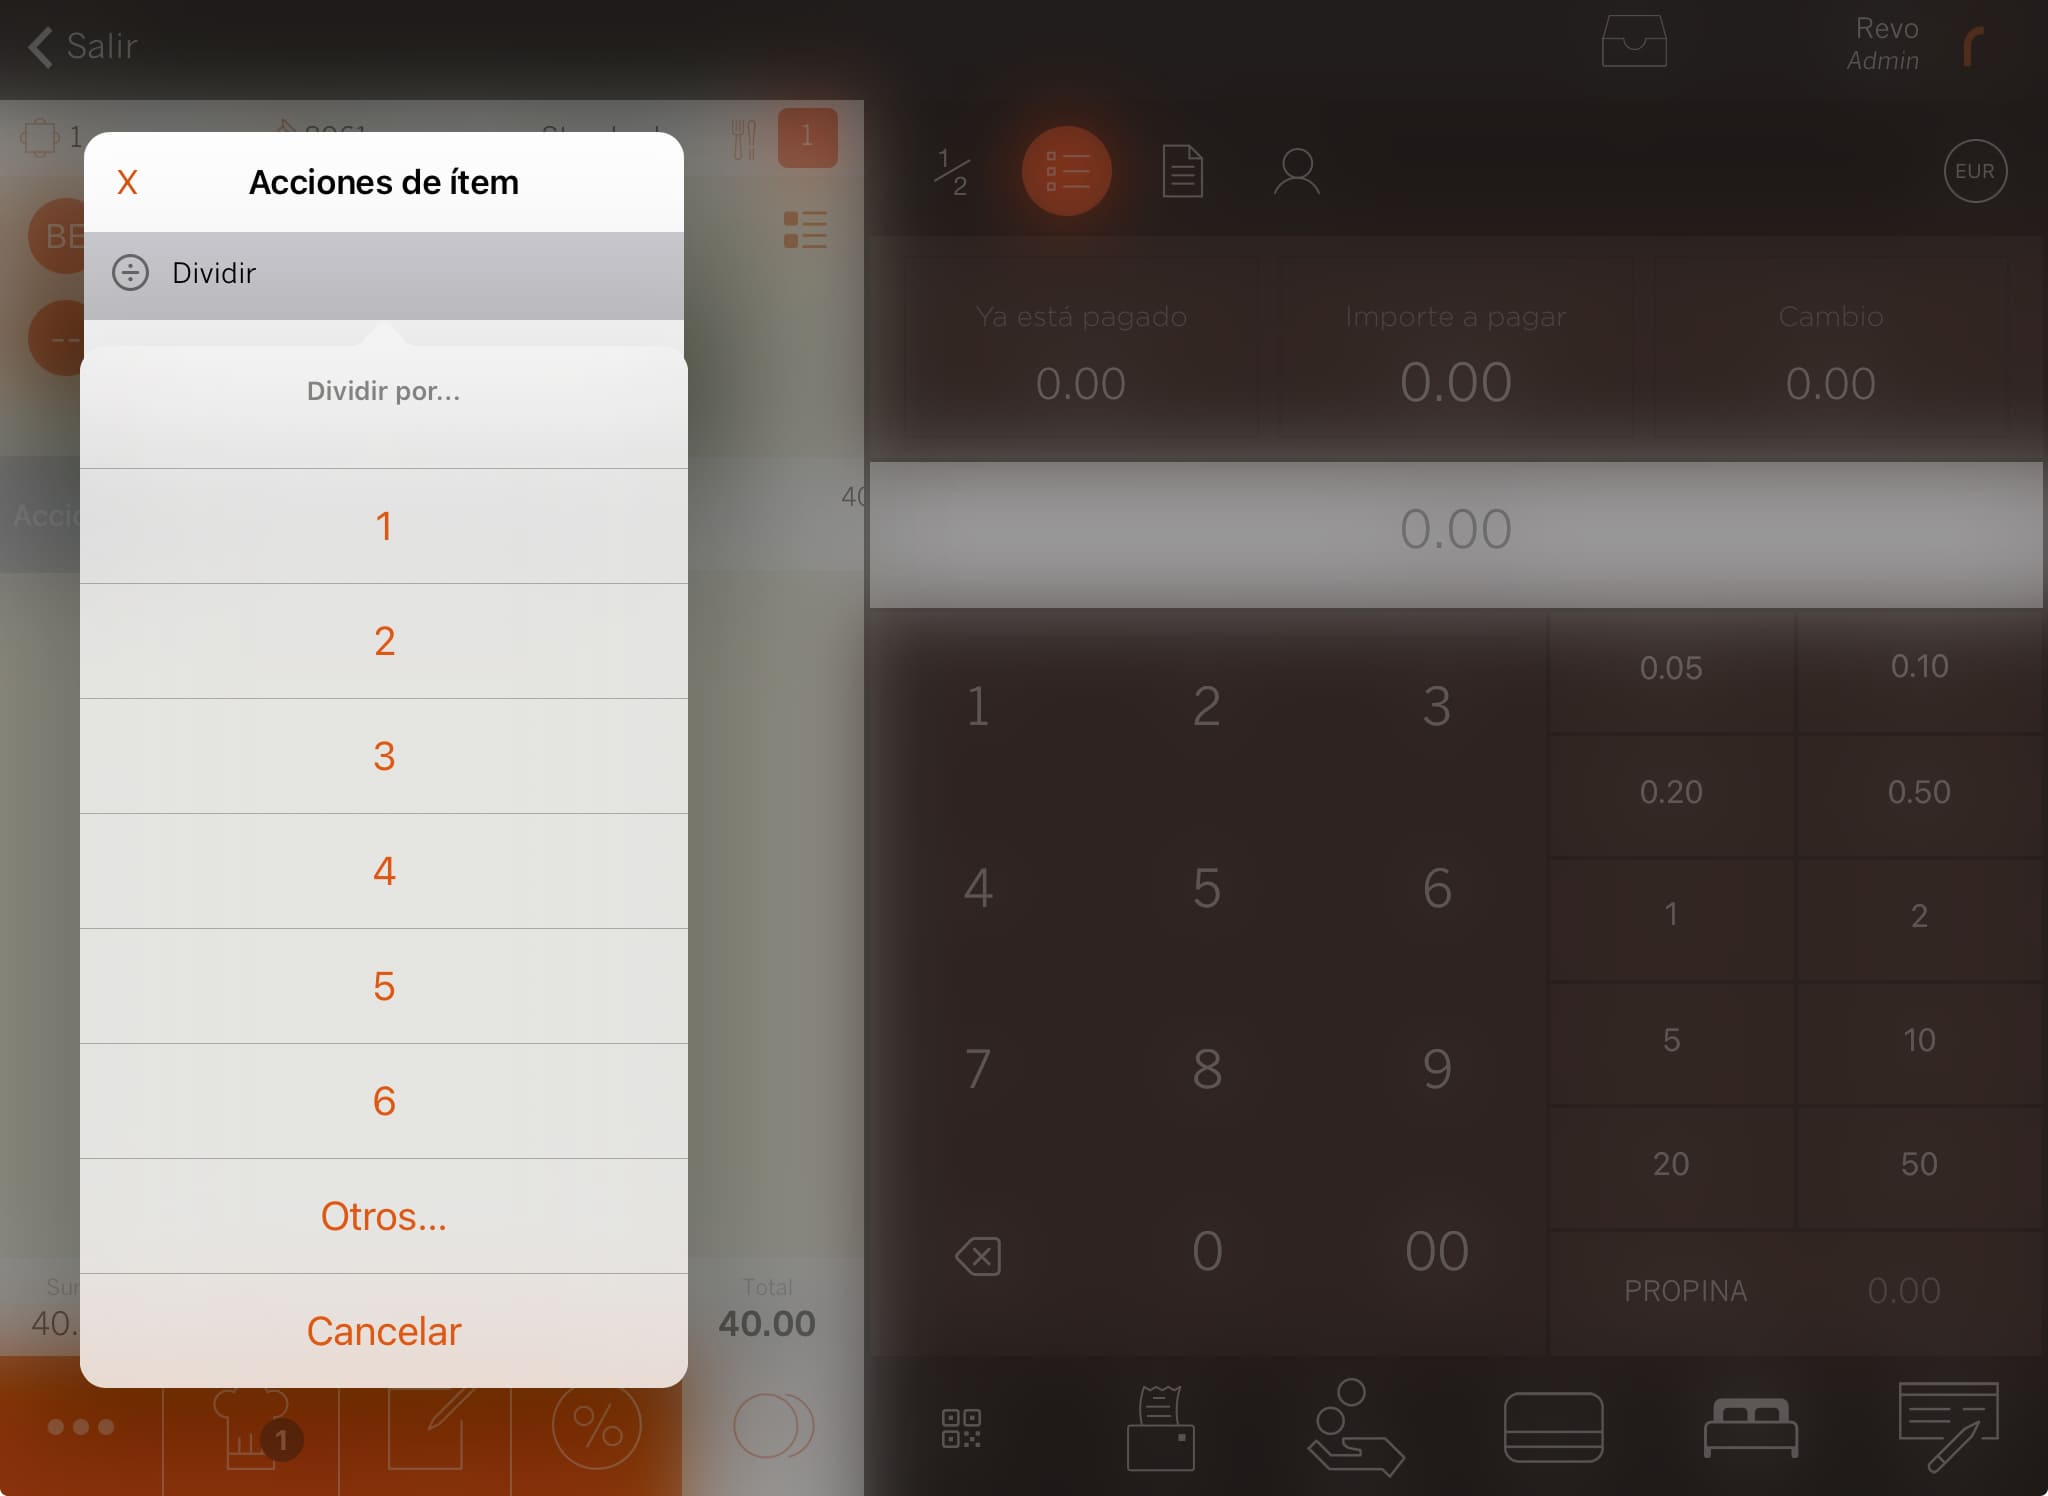
4. Select the product and the payment method.

IMPORTANT
- Only regular products and sales formats without combinations can be split.
- Split products cannot be sent to the kitchen afterwards. So it is not possible to have the option ‘Send to kitchen when closing the order’ enabled.
- Split products cannot be split again.
- Split products do not have actions (e.g. cannot be moved to another table), and behave like already paid items.
-
-
Invoices: View invoices associated with the table.
-
Associate a customer to the invoice: You can add a customer to the invoice to create a named invoice with legal details. Learn more here.
-
Information: Shows the amount paid, pending, and the change to give.
-
Amount: Enter the amount the customer gives using the calculator or fixed amounts.
-
Calculator: Use the calculator to manually input the amount, or select a predefined value to calculate the change.
-
Bottom section: Here you’ll find the four main buttons to close a bill:
- QR Code: If using Revo SOLO XPress, the QR code for payment will appear here.
- Print bill: Prints a pro forma invoice.
- Cash.
- Card.
- Shortcut: The payment method you have set up as a shortcut will appear here. More information here
- Other payment methods: Access other payment methods set up in the back office. More information here.