Creating a new customer and associating them with the invoice is easy with REVO. You can do it before closing an order, or even with an already closed and paid order.
1. When you’re ready to close an order, select the coins icon .
2. Tap on the icon .
3. If it’s a returning customer, use the search bar to select them. If it’s a new customer, select New Customer.
4. Enter the customer’s details and tap Save customer. Name, tax number (NIF), address, and city are mandatory fields.
The e-mail is not mandatory to save a customer, but it’s necessary if you want to send the invoice via e-mail.
If you make a mistake, you can correct the details by tapping on the icon or from the back-office.
5. The customer’s name will appear next to the icon in orange.
6. Close the order by selecting cash, card, or any other payment method. The invoice will print as usual, but now it will include the customer’s details.
If the customer’s details don’t appear, it’s likely you’re printing a pre-bill (receipt) instead of the final invoice.
You can also associate a customer with an invoice for an order that’s already been closed.
1. Tap the r to access the menu.
2. Go to Historic data.
3. Find and select the order you wish to associate with the customer.
Use the search bar or select the date if the order wasn’t closed today.
4. Tap on to enter the invoices.
5. Tap on Assign a customer to the invoice.
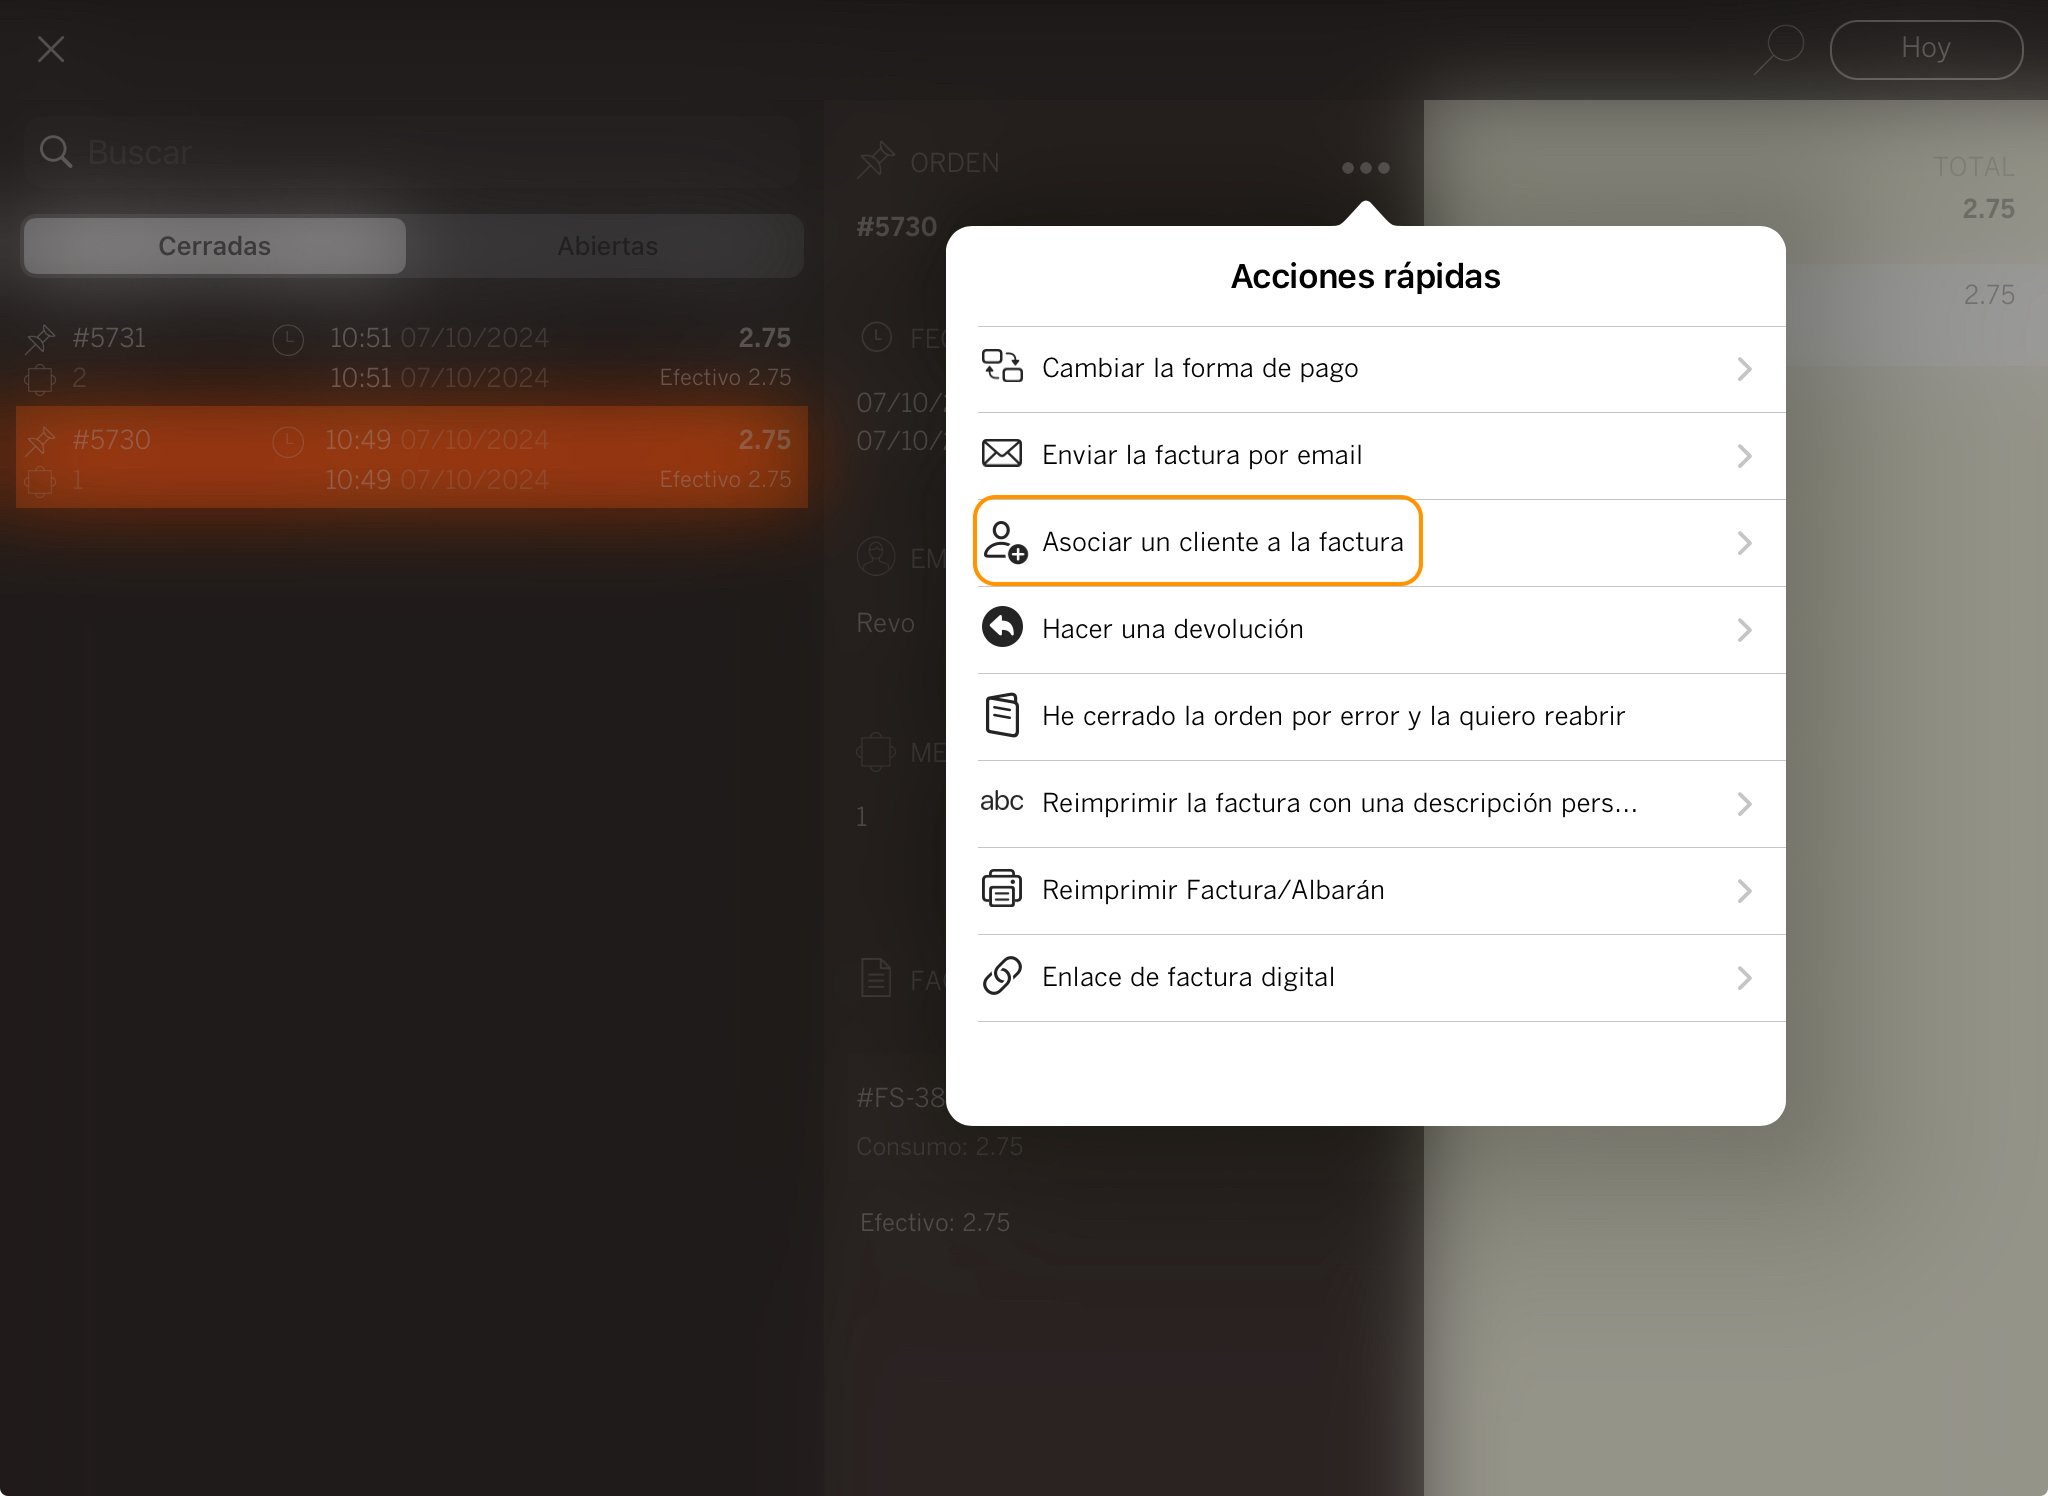
6. Select, search for, or create a new customer.
7. Once the customer is added, you can reprint the invoice or send it via e-mail by tapping on again.
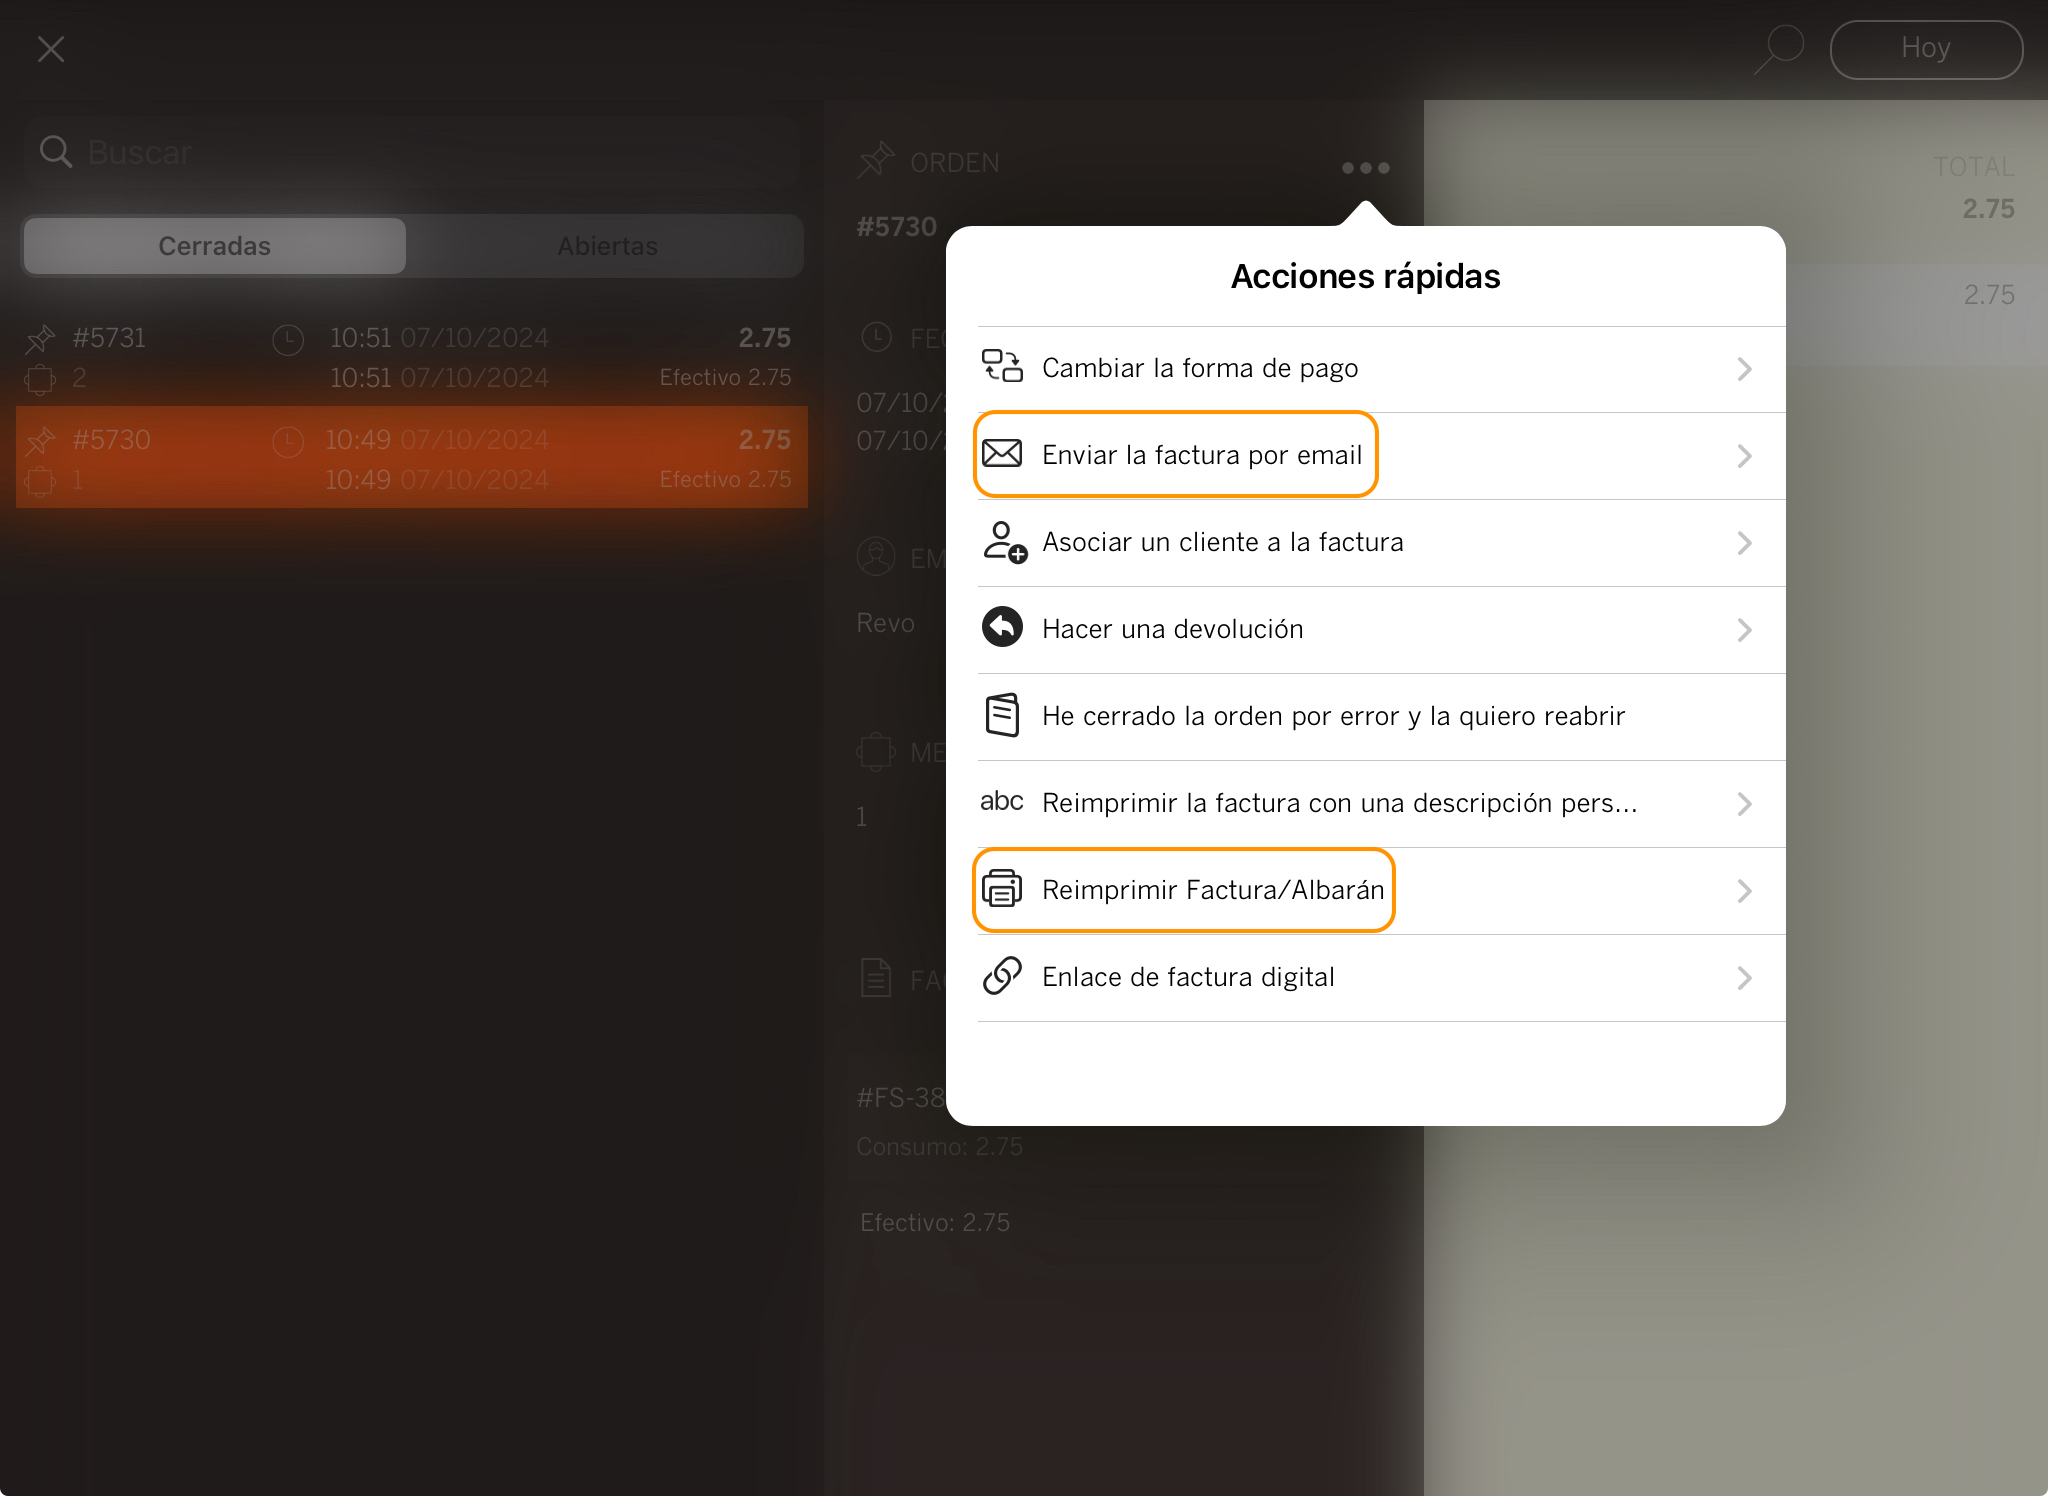
Important: To send the invoice via e-mail, the customer must have a valid e-mail address.