1. HOW TO INTEGRATE REVO XEF <-> REVO SOLO 2. HOW TO IMPORT THE CATALOGUE 3. AVAILABLE SECTIONS AND THEIR SET-UP
Now, with Revo SOLO, you can have your menu in a digital format very easily. You only need to:
1. Create the integration between Revo XEF and Revo SOLO.
2. Import the catalogue from Revo XEF to Revo SOLO.
This functionality in Revo SOLO ensures that only the sections relevant to the menu are visible in the back office. All other sections will display a message indicating that the plan needs to be upgraded to access advanced functionality.

1. HOW TO INTEGRATE REVO XEF <-> REVO SOLO
1.1. SETTING UP THE INTEGRATION IN SOLO - PART 1
1. Log in to the back office of Revo SOLO.
2. Go to Others / DEVELOPMENT .
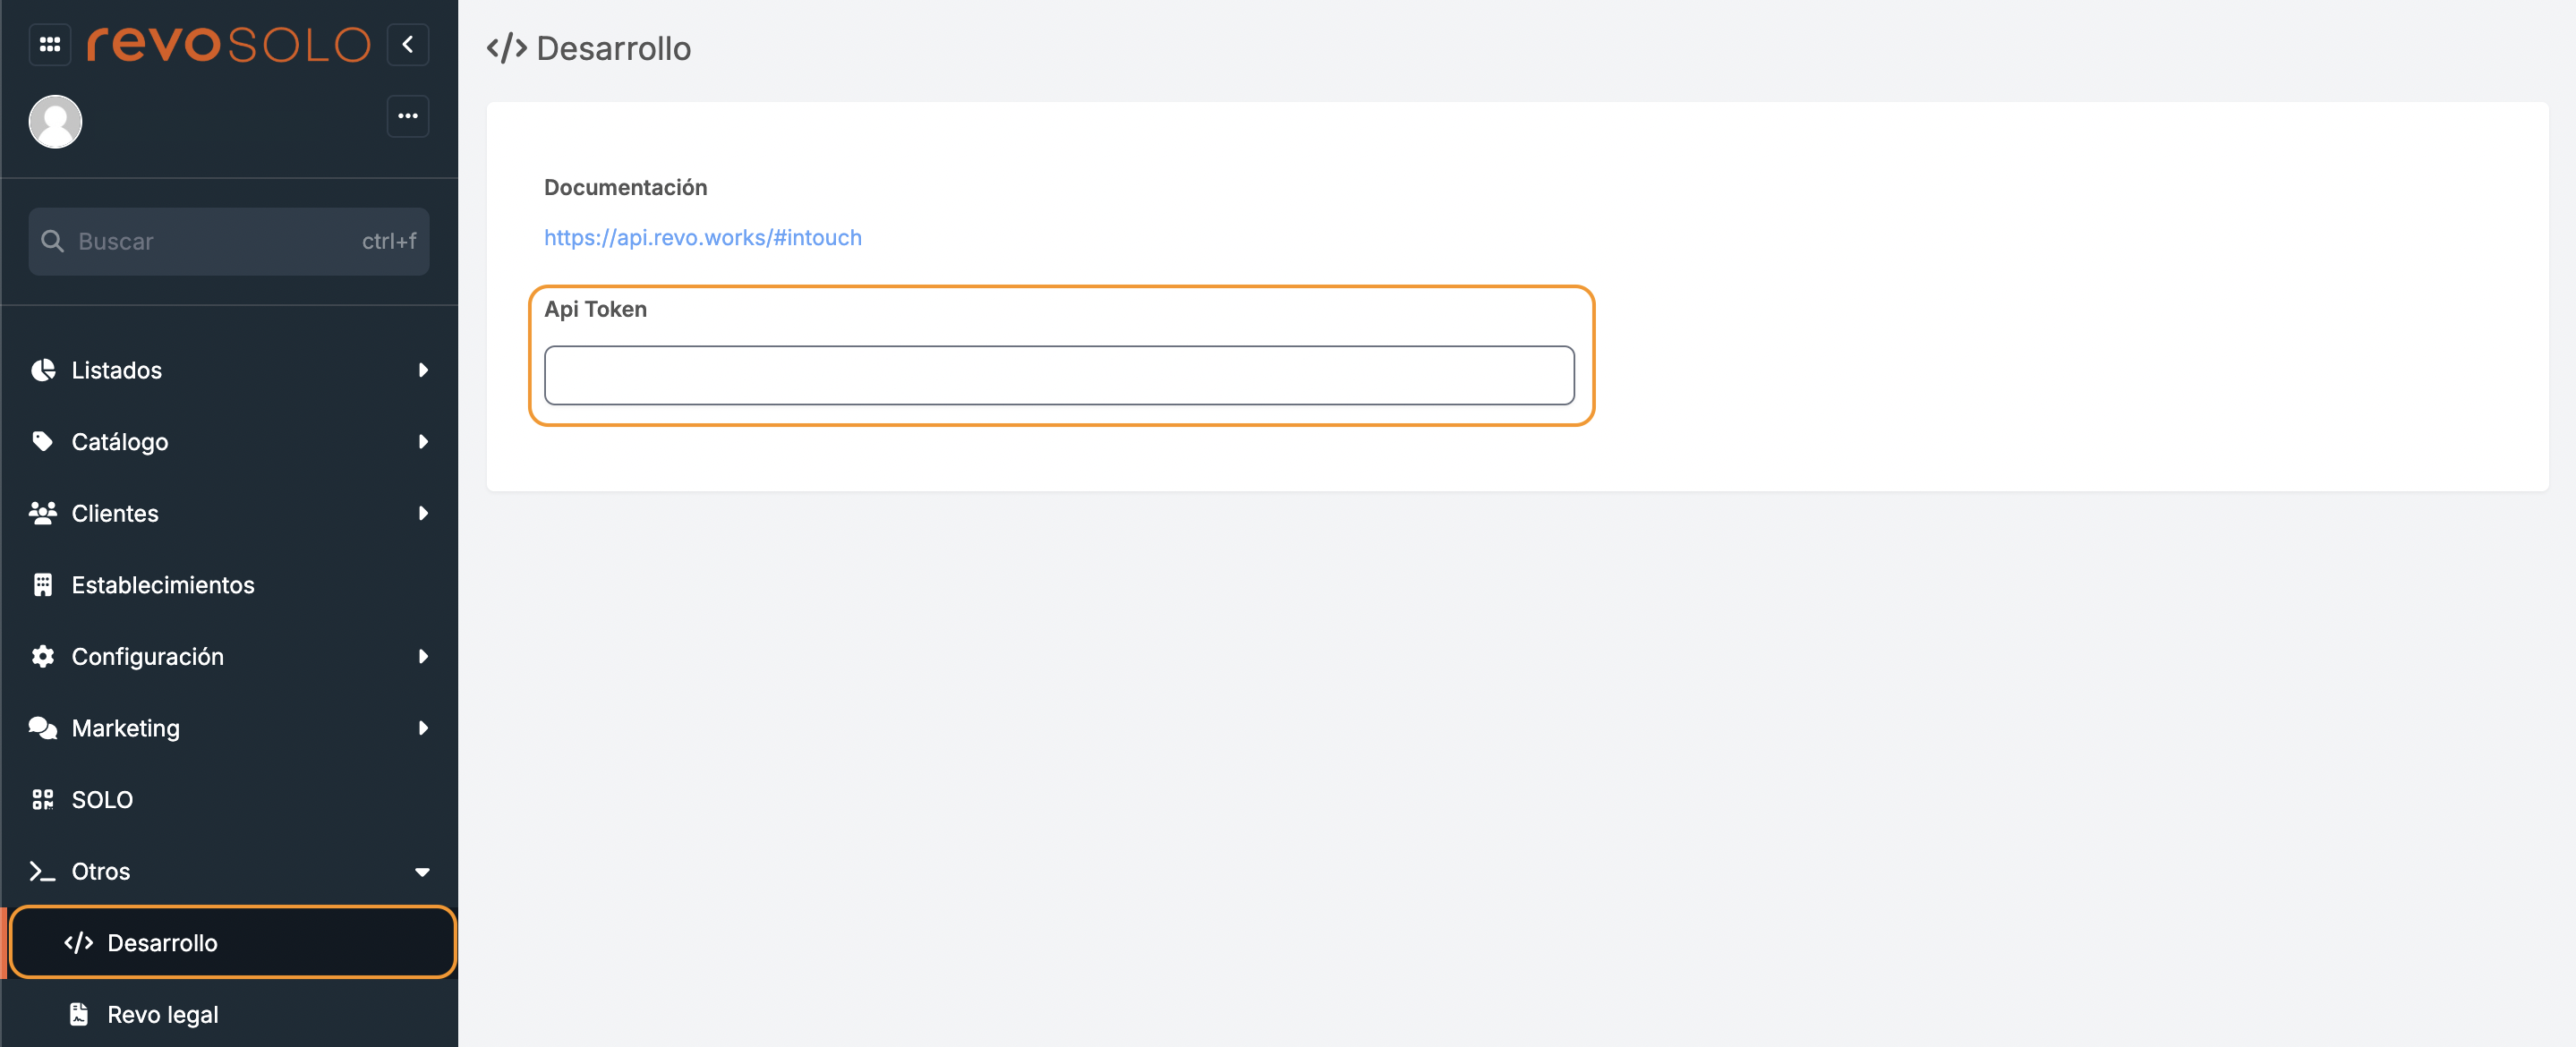
3. Copy the API token.
1.2. SETTING UP THE INTEGRATION IN XEF
1. Log in to the back office of Revo XEF.
2. Go to Integrations / INTEGRATIONS.
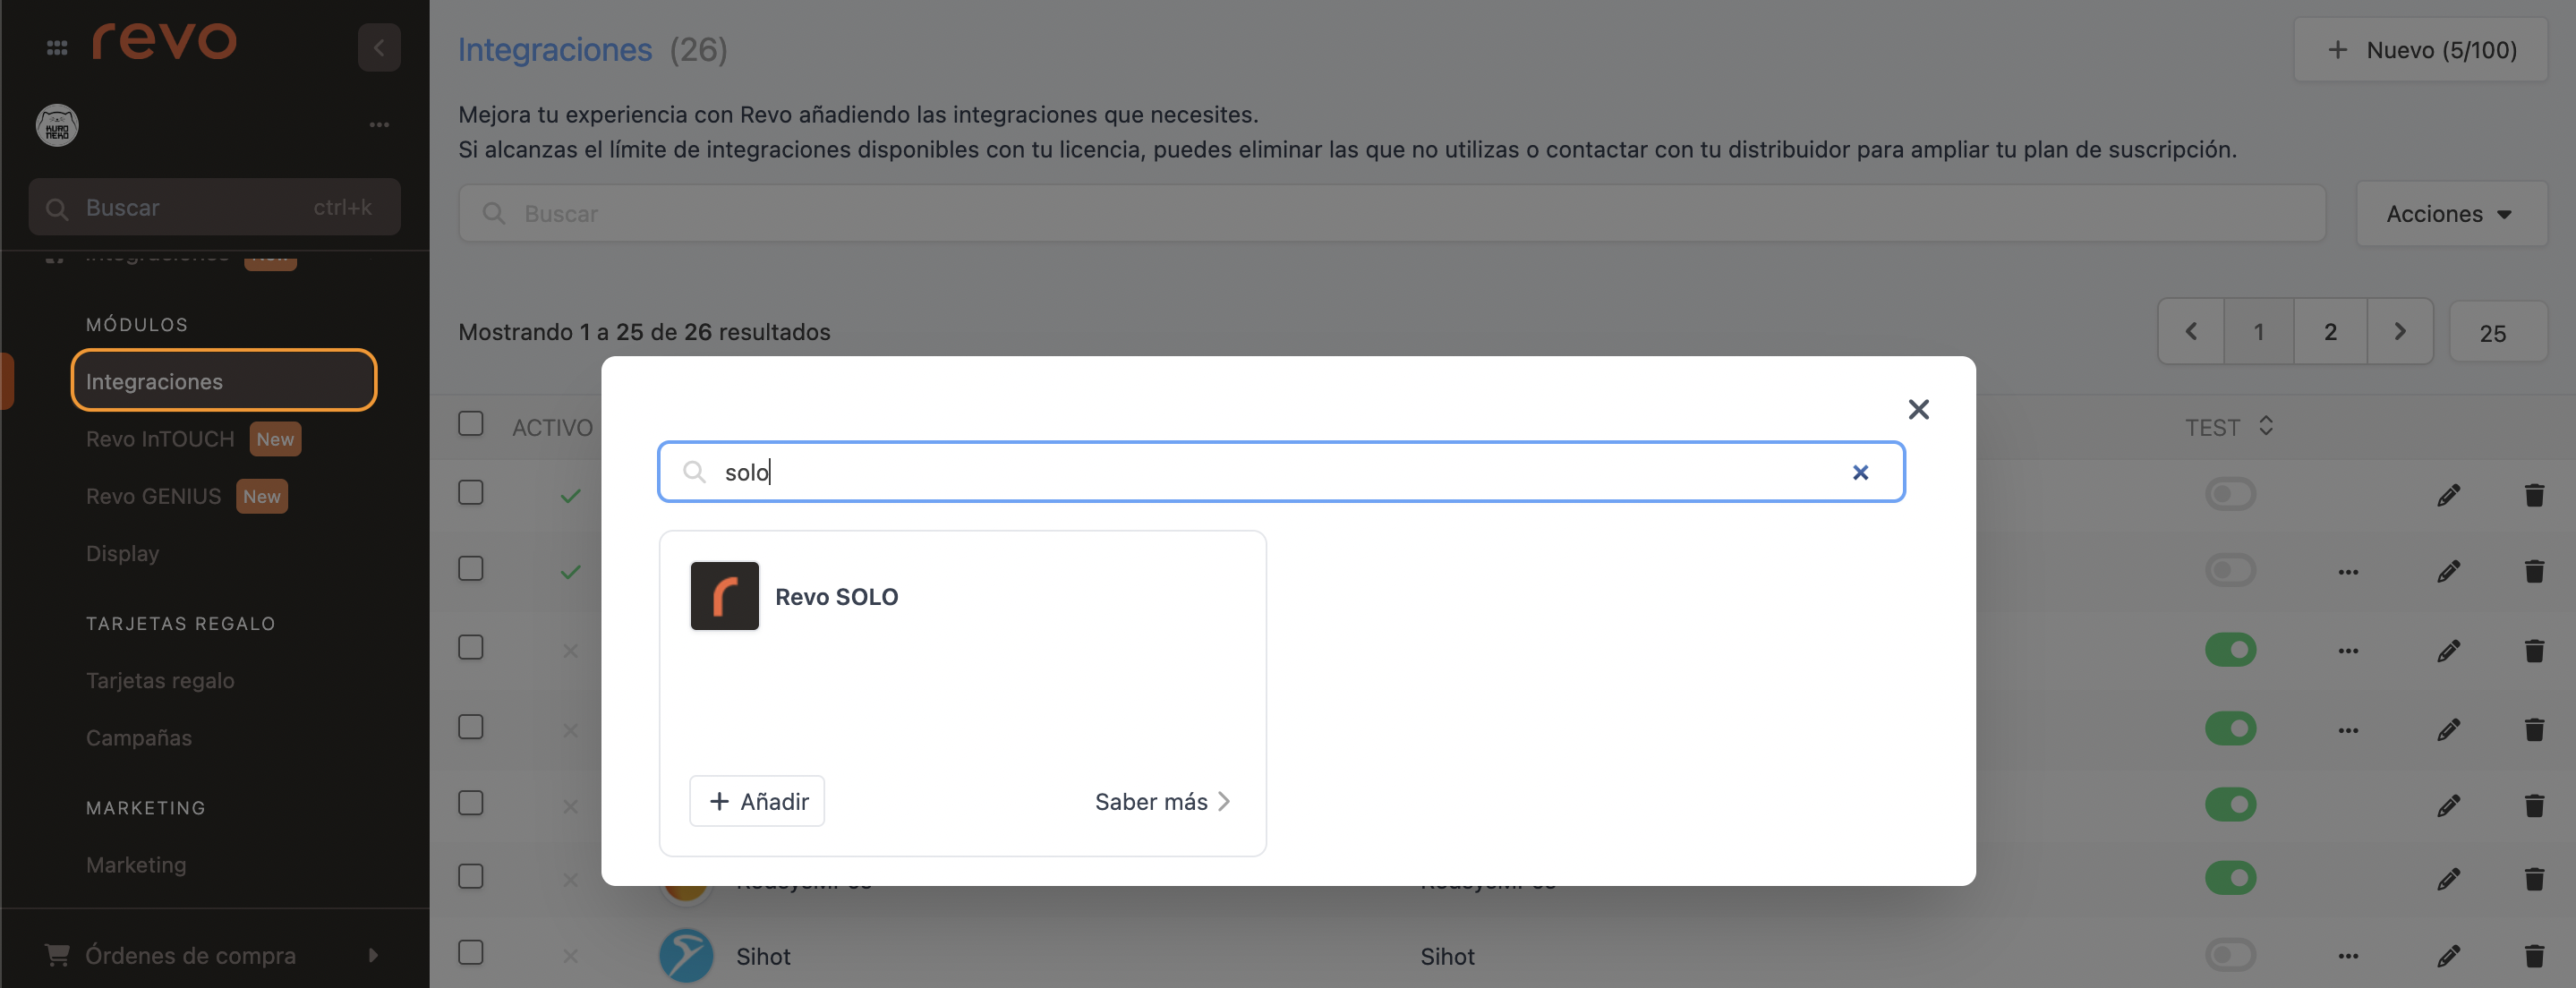
3. Click on + New, search for Solo, and then click on Add.
4. Complete only the following fields:
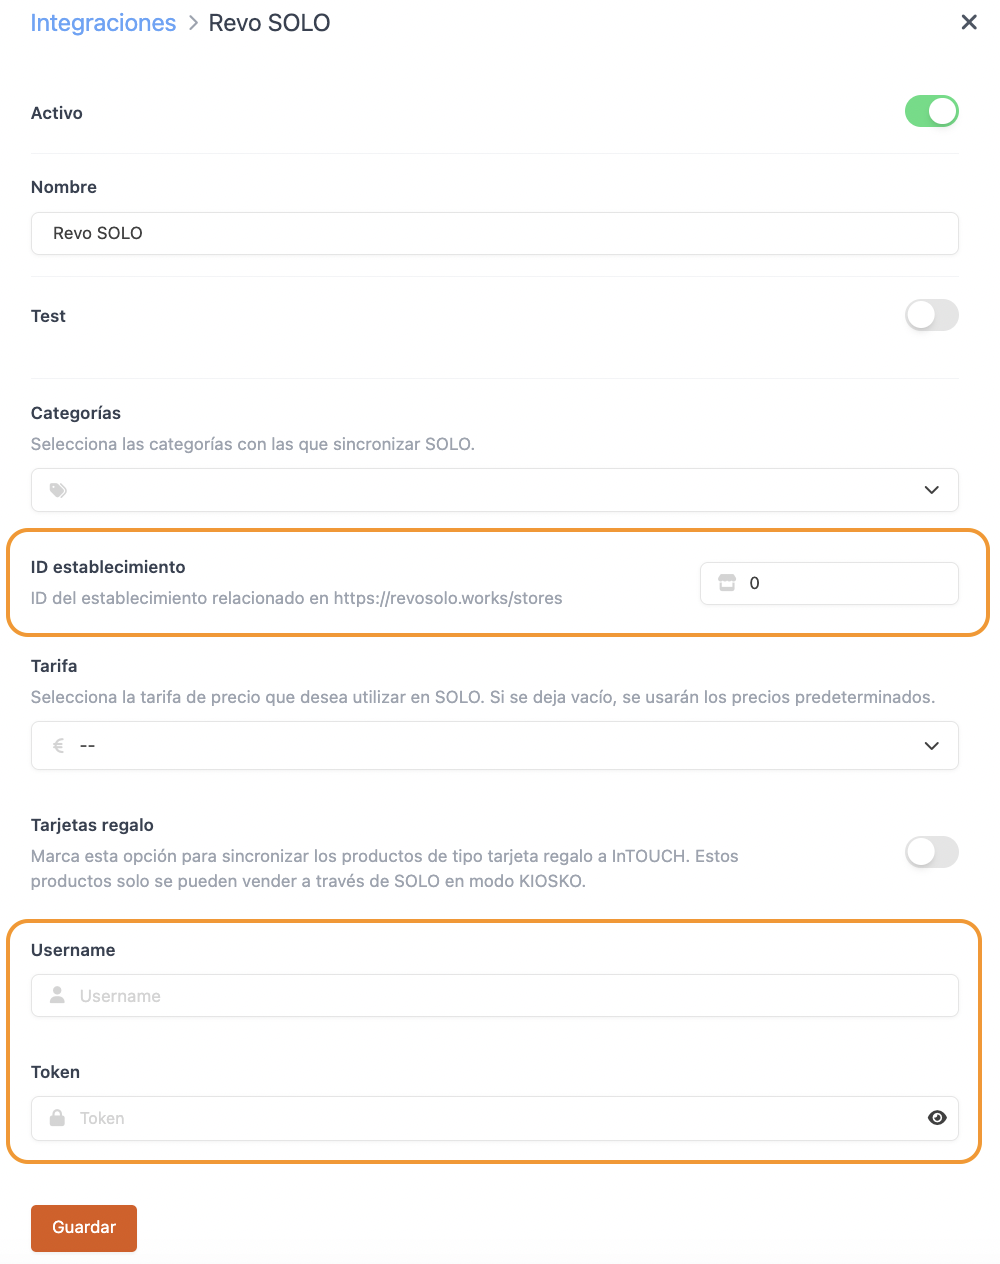
- Active:
- Name: Enter a descriptive name.
- Store ID: Enter the ID of the store in Revo SOLO.
- Username: Your Revo SOLO account name.
- Token: Paste the API token you copied in step 1.1.3.
5. Click on Save.
6. Go to Account / TOKENS.
7. Click on + New and fill in the details.
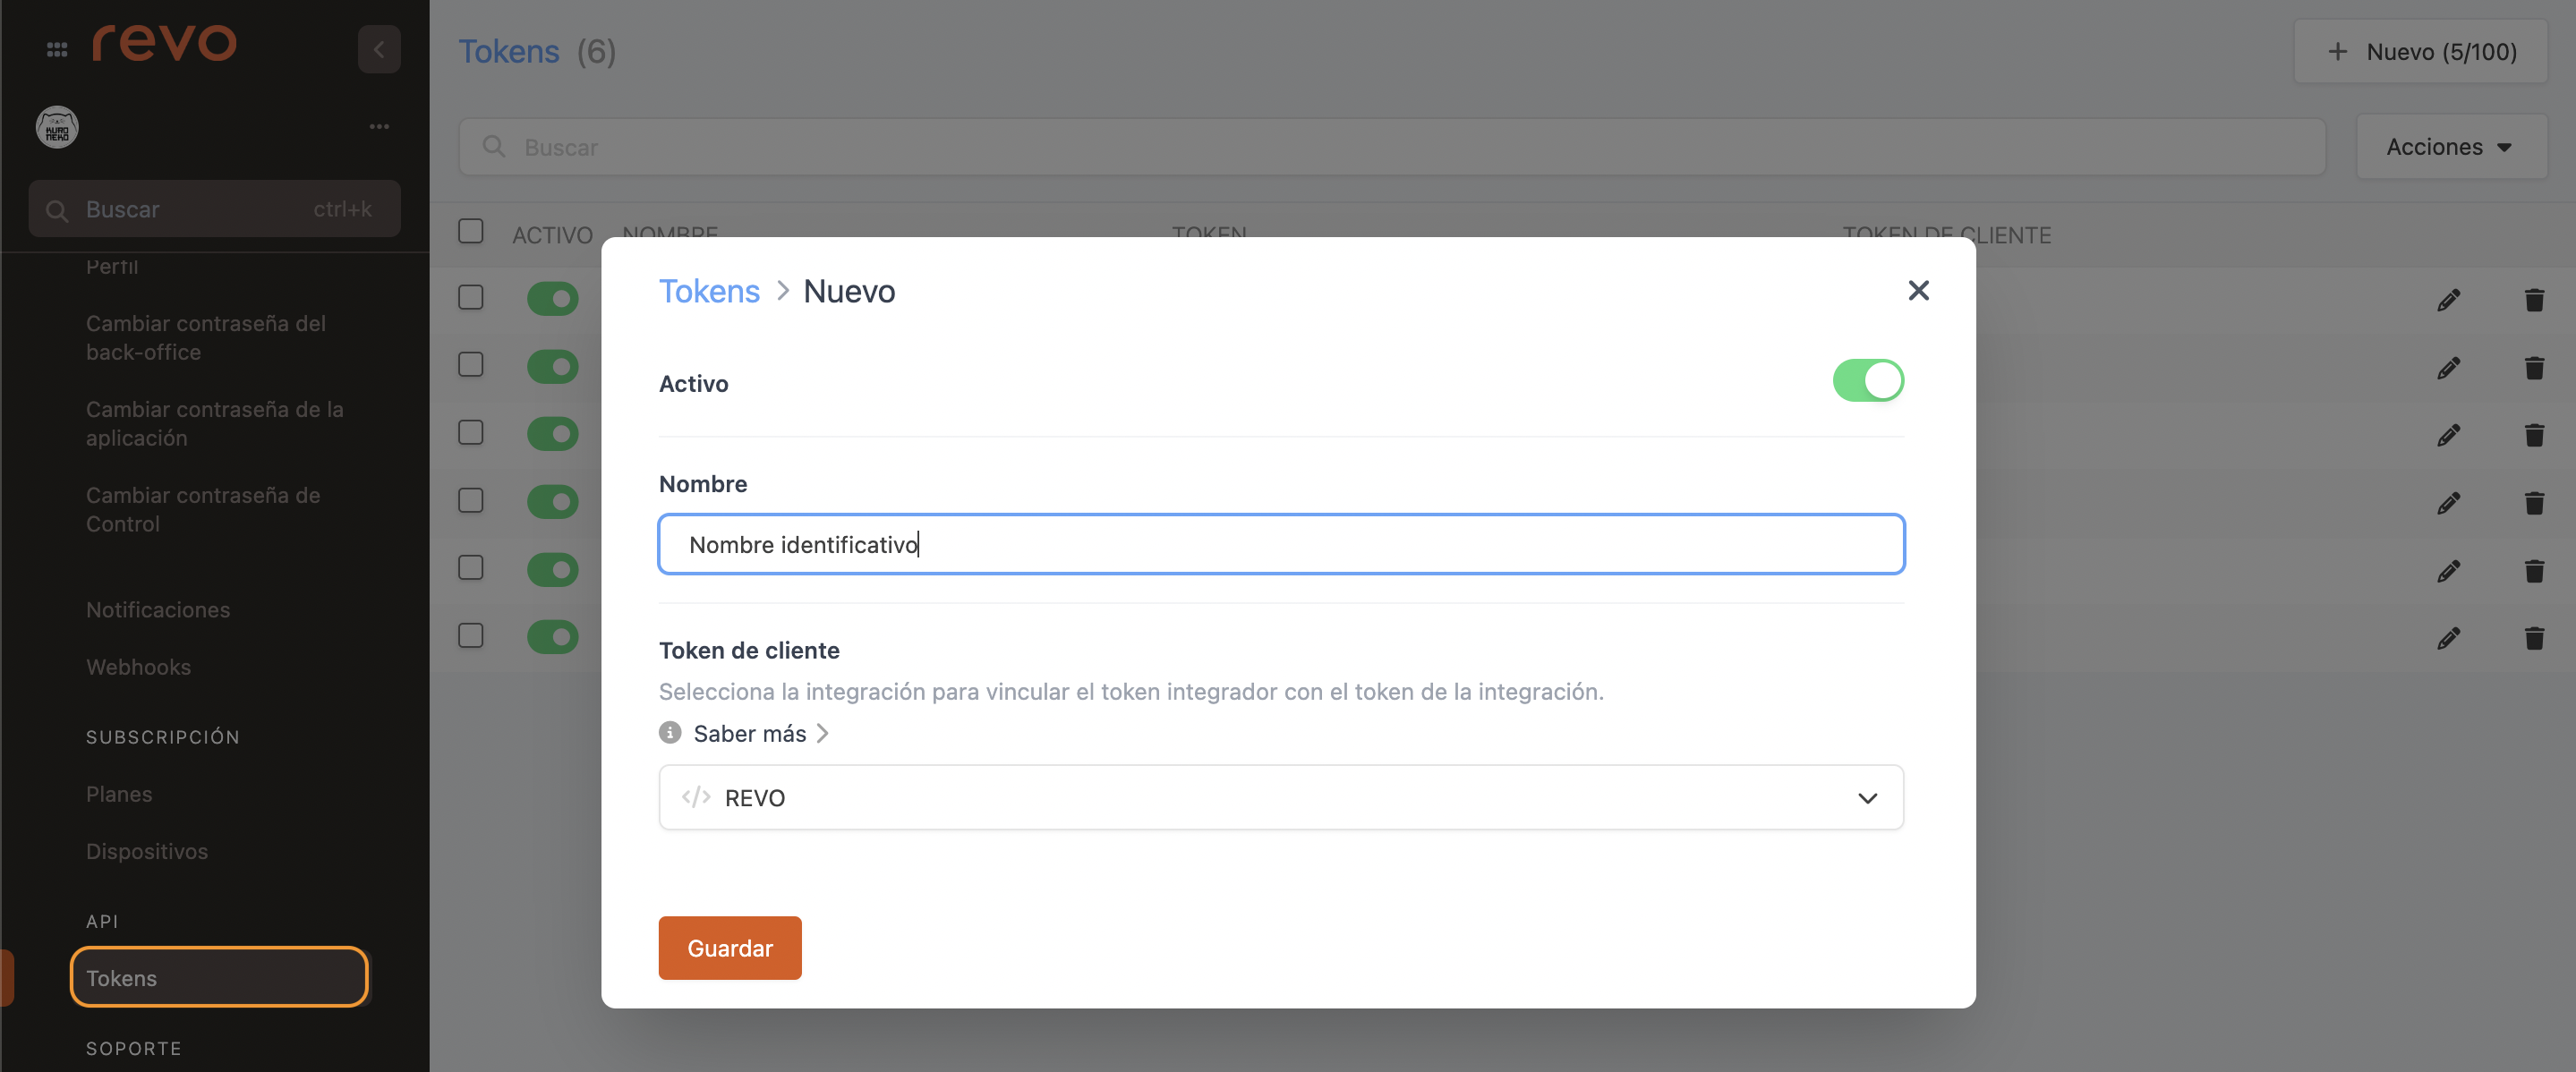
- Active:
- Name: Enter a descriptive name.
- Client token: Select REVO from the dropdown menu.
8. Click on Save.
9. Copy the token you just created.
1.3. SETTING UP THE INTEGRATION IN SOLO - PART 2
1. Return to the back office of Revo SOLO.
2. Go to Configuration / POS INTEGRATIONS.
3. Click on + New and complete the fields.
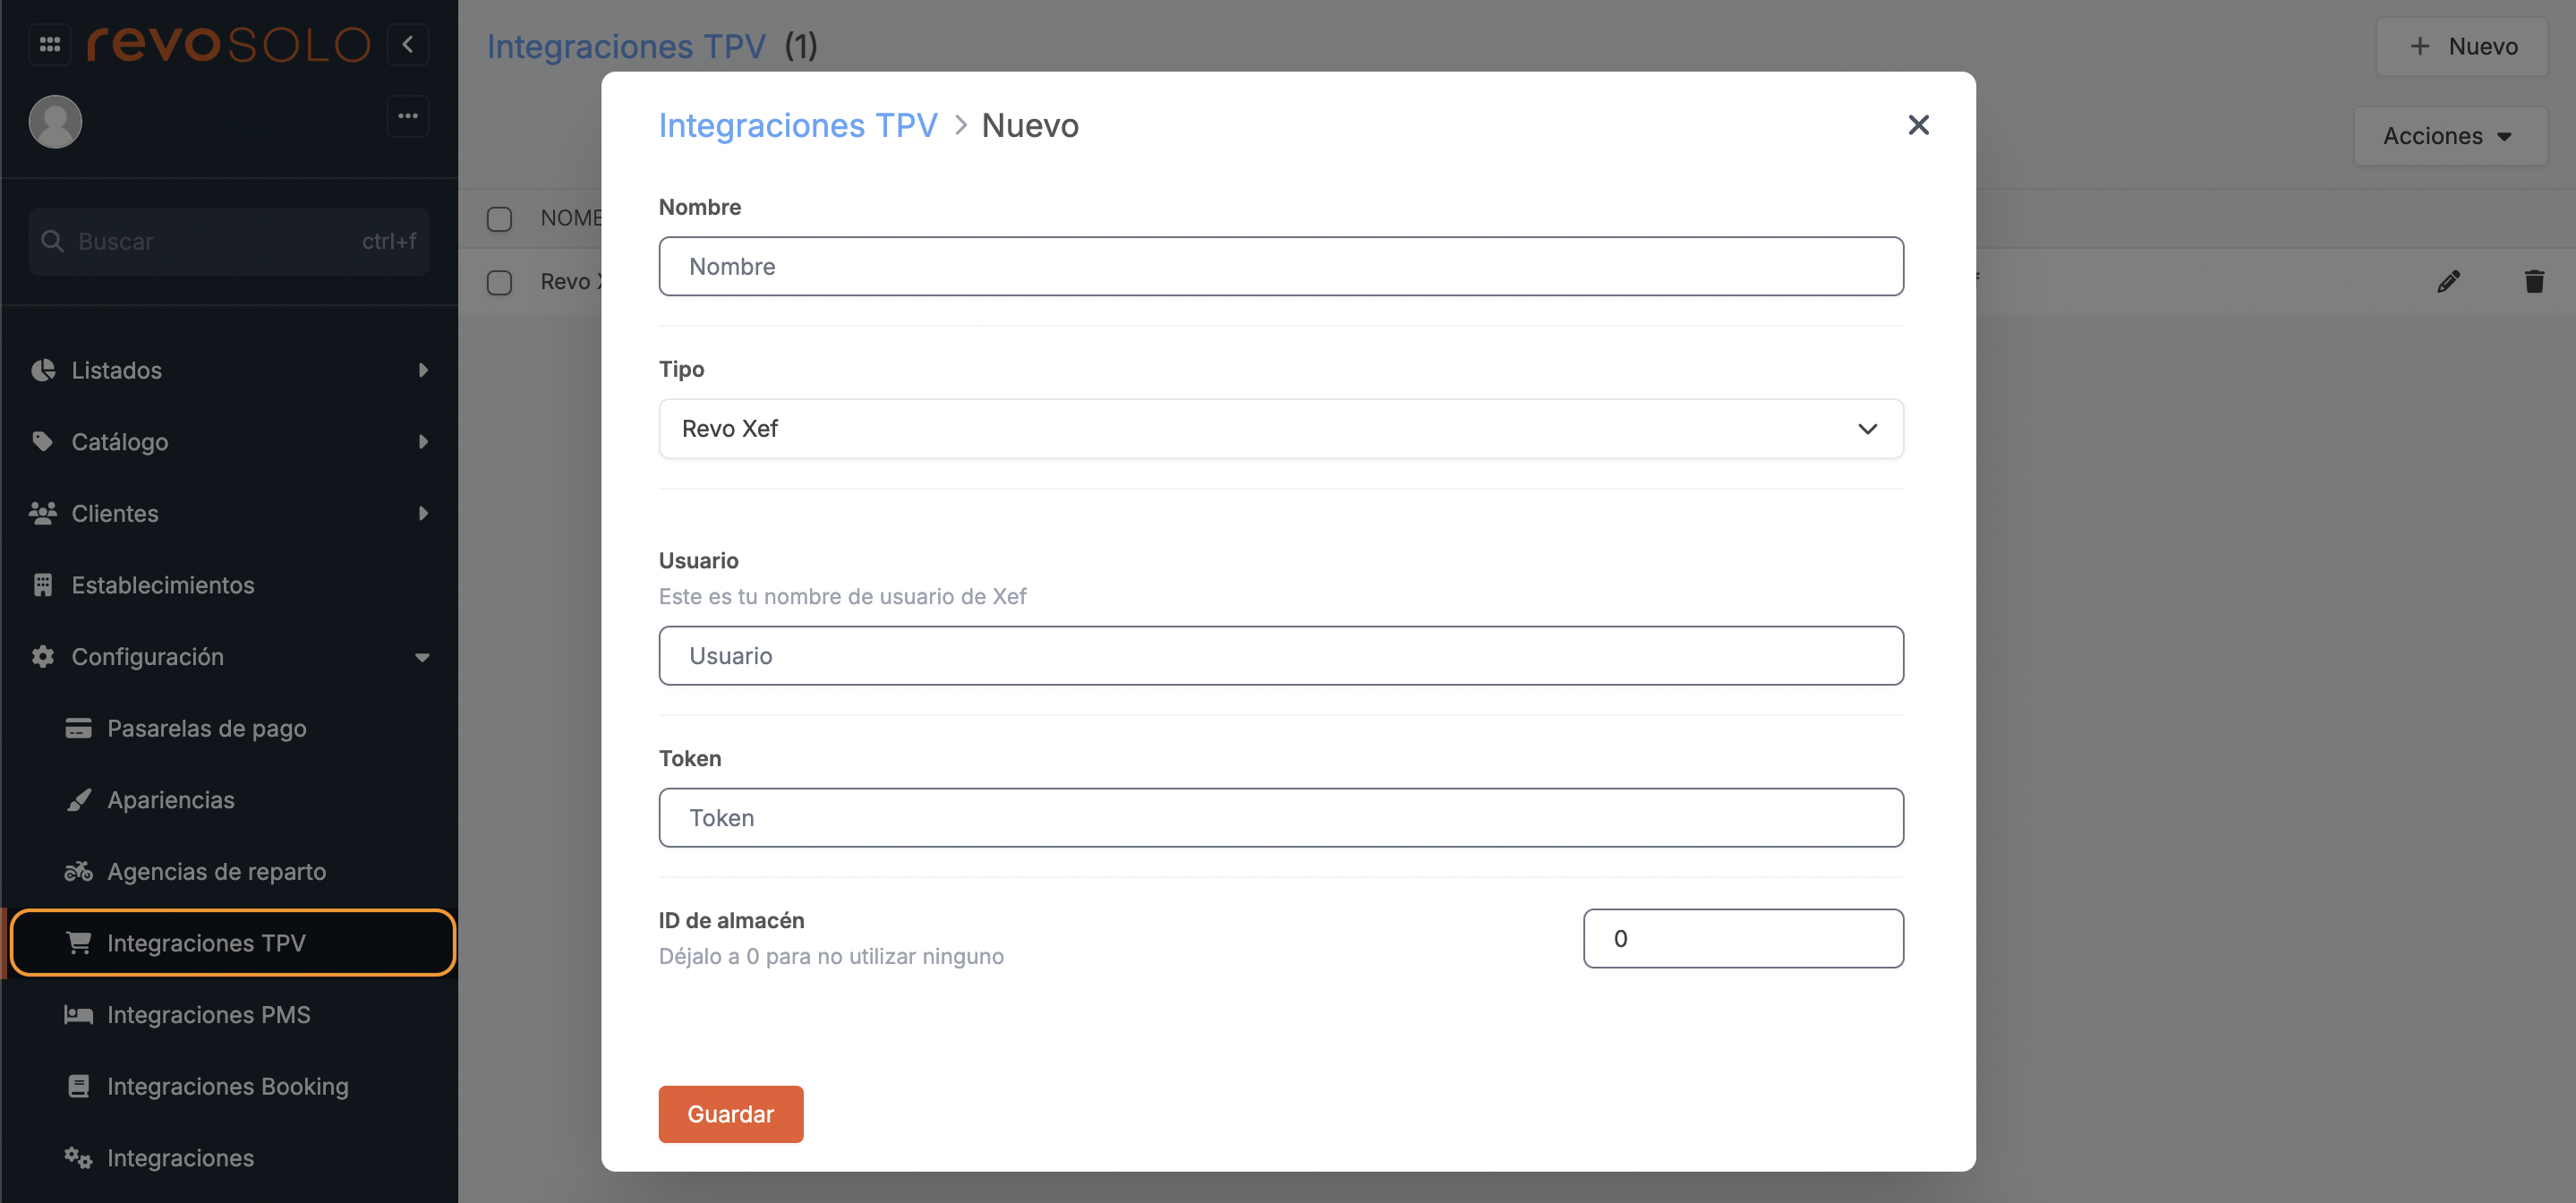
- Name: Name of the store or a descriptive name.
- Type: Revo XEF.
- Username: Your Revo XEF account name.
- Token: Paste the token you copied in step 1.2.9.
- Warehouse ID: Enter the ID of the warehouse created in your Revo XEF account. If no warehouses are created, or you do not wish to use one, leave it as 0.
4. Click on Save.
5. Go to STORES, click on the , go to the Configuration tab, and complete the fields.
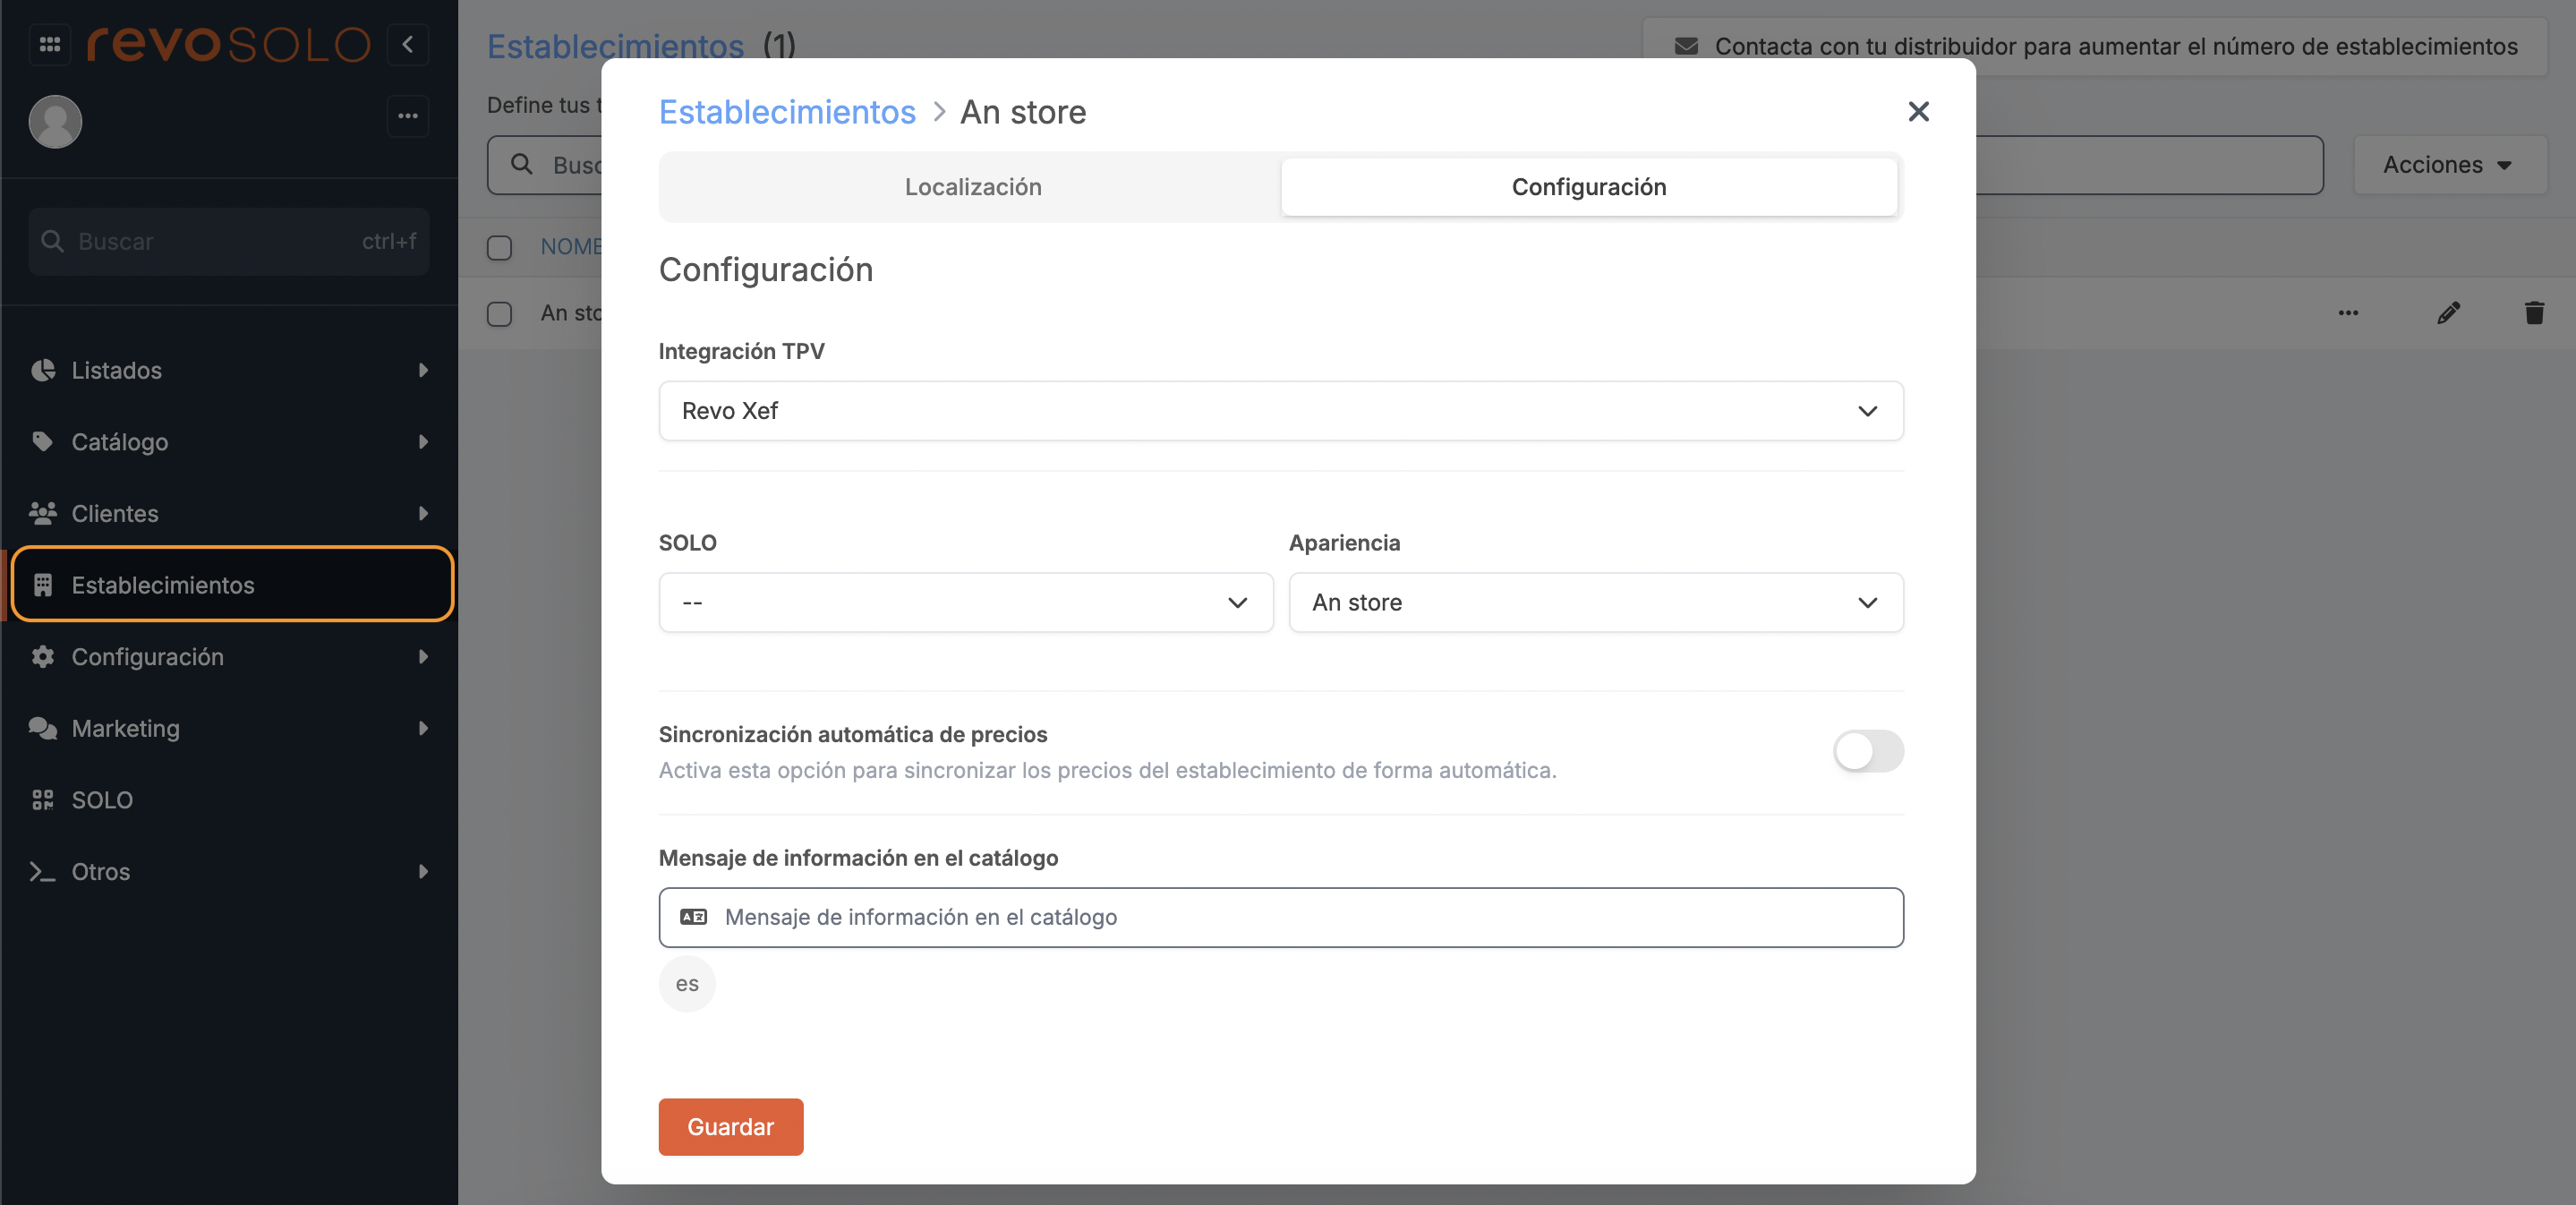
- POS Integration: Select the POS integration you just created in step 1.3.3 from the dropdown menu.
- Solo: Select the SOLO profile from the dropdown menu.
6. Click on Save.
YOUR INTEGRATION IS NOW COMPLETE!
2. HOW TO IMPORT THE CATALOGUE
From the Catalogue module, you can access all the products, modifiers, combos, and combo groups set up in the back office of Revo XEF.
To synchronise the catalogue, follow these steps:
1. Return to the back office of Revo XEF.
2. Go to INTEGRATIONS.
3. Click on in the previously set up Revo SOLO integration.
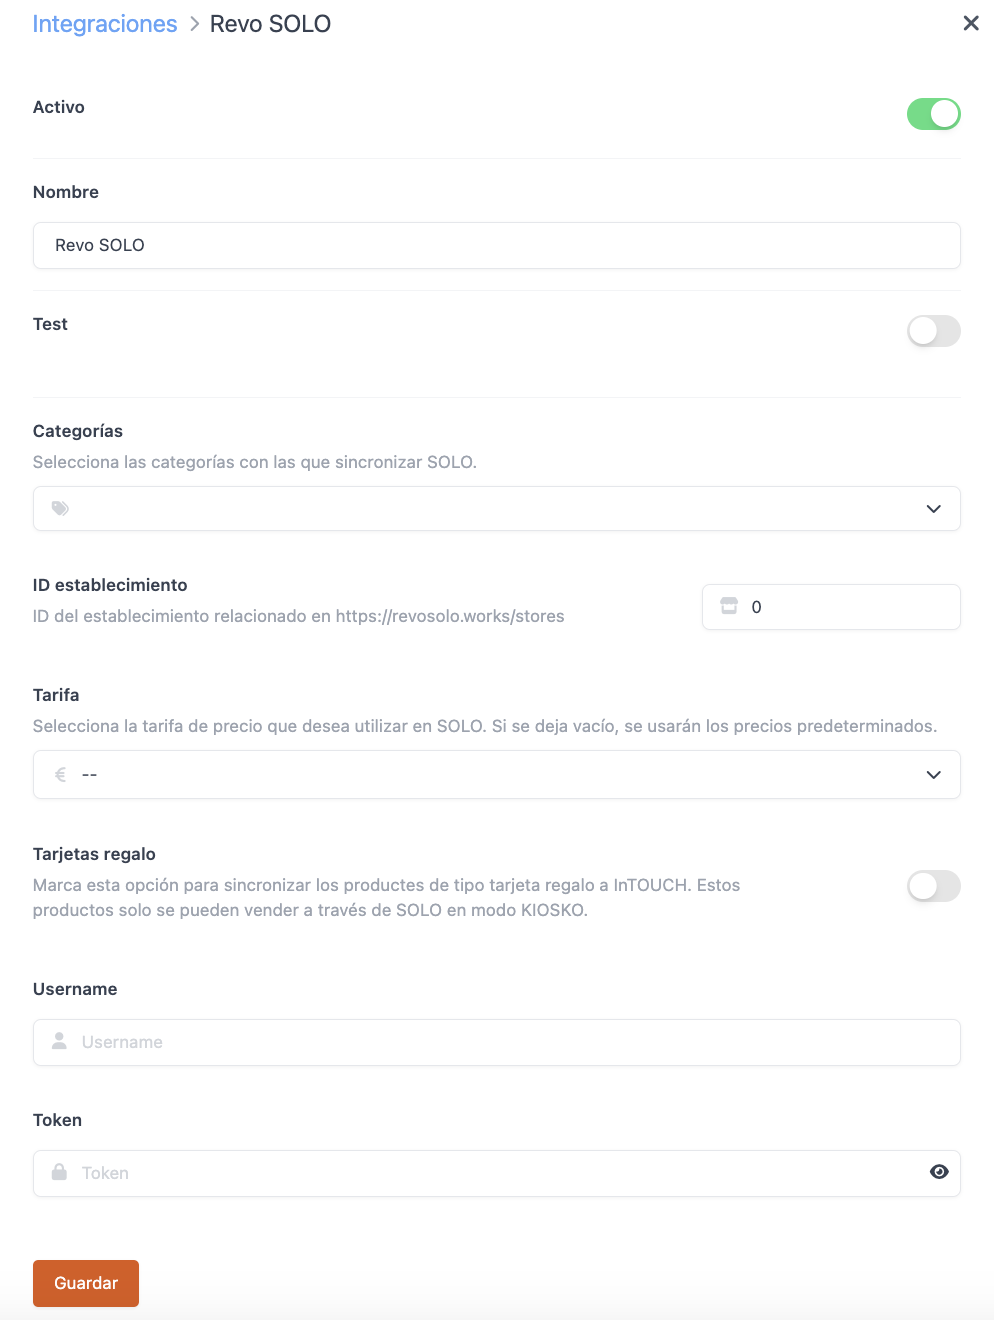
- Categories: Select all the categories you want to synchronise with Revo SOLO.
- Click on Save.
4. Click on the and select Upload Menu.

5. The first time you update the catalogue, select all the options and click on Update.
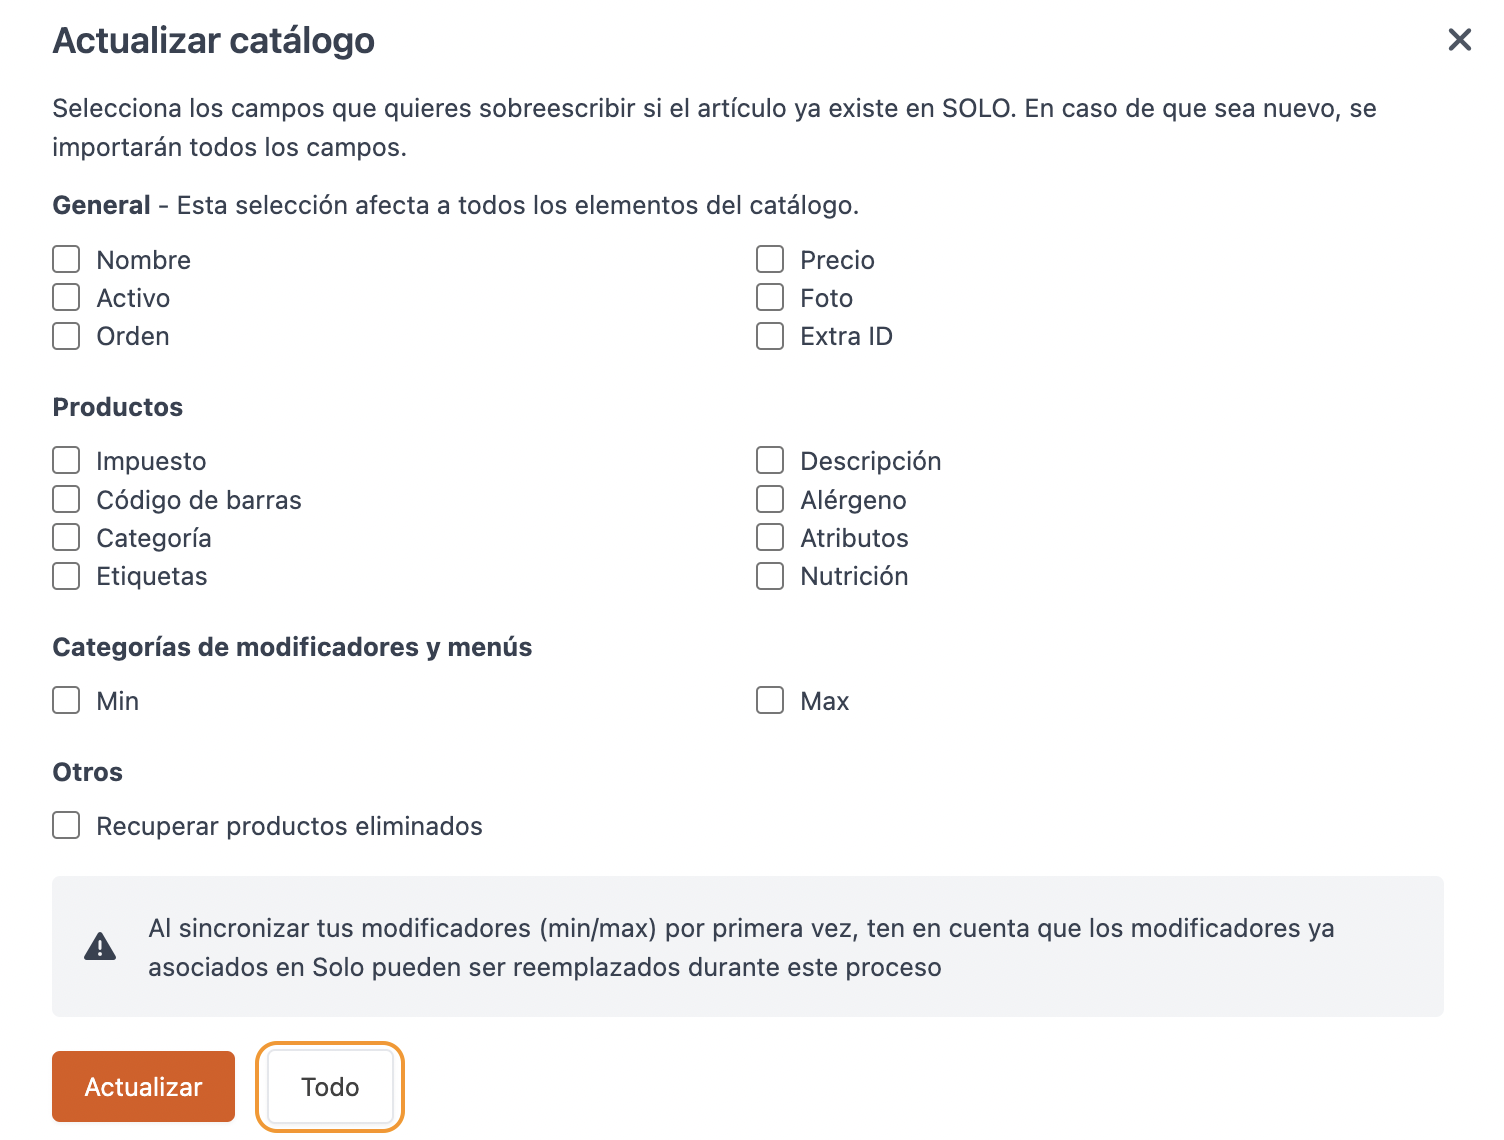
When synchronising the catalogue, part of the product set up will be transferred, including:
- Name, Price, Barcode, VAT, Image, Allergens, Diets, Preferences, Product Description, Modifiers, and Combos.
The set up NOT transferred through the integration includes:
- Name translations and description translations.
Click here to learn more about the Catalogue.
3. AVAILABLE SECTIONS AND THEIR SET-UP
As mentioned earlier, not all sections are available.
From the Set Up module, only the following sections are available:
- Appearances: learn more here.
- Events: learn more here.
- Employees: learn more here.
- Permissions: learn more here.
- Legal Documentation: learn more here.
From the Marketing module, only the following section is available:
- Banners: learn more here.
From the Solo module, there are fewer active features than in a Revo SOLO account with the self-service functionality enabled. Learn more here.
