Employees are the users who operate REVO – in other words, your staff.
Each employee has a unique 4-digit PIN to identify themselves in the REVO app. It’s recommended that each employee has their own user account and that accounts are not shared. This ensures that each person uses their privileges correctly.
MAIN SCREEN
1. Log into the back office of Revo FLOW.
2. Go to Employees / EMPLOYEES.
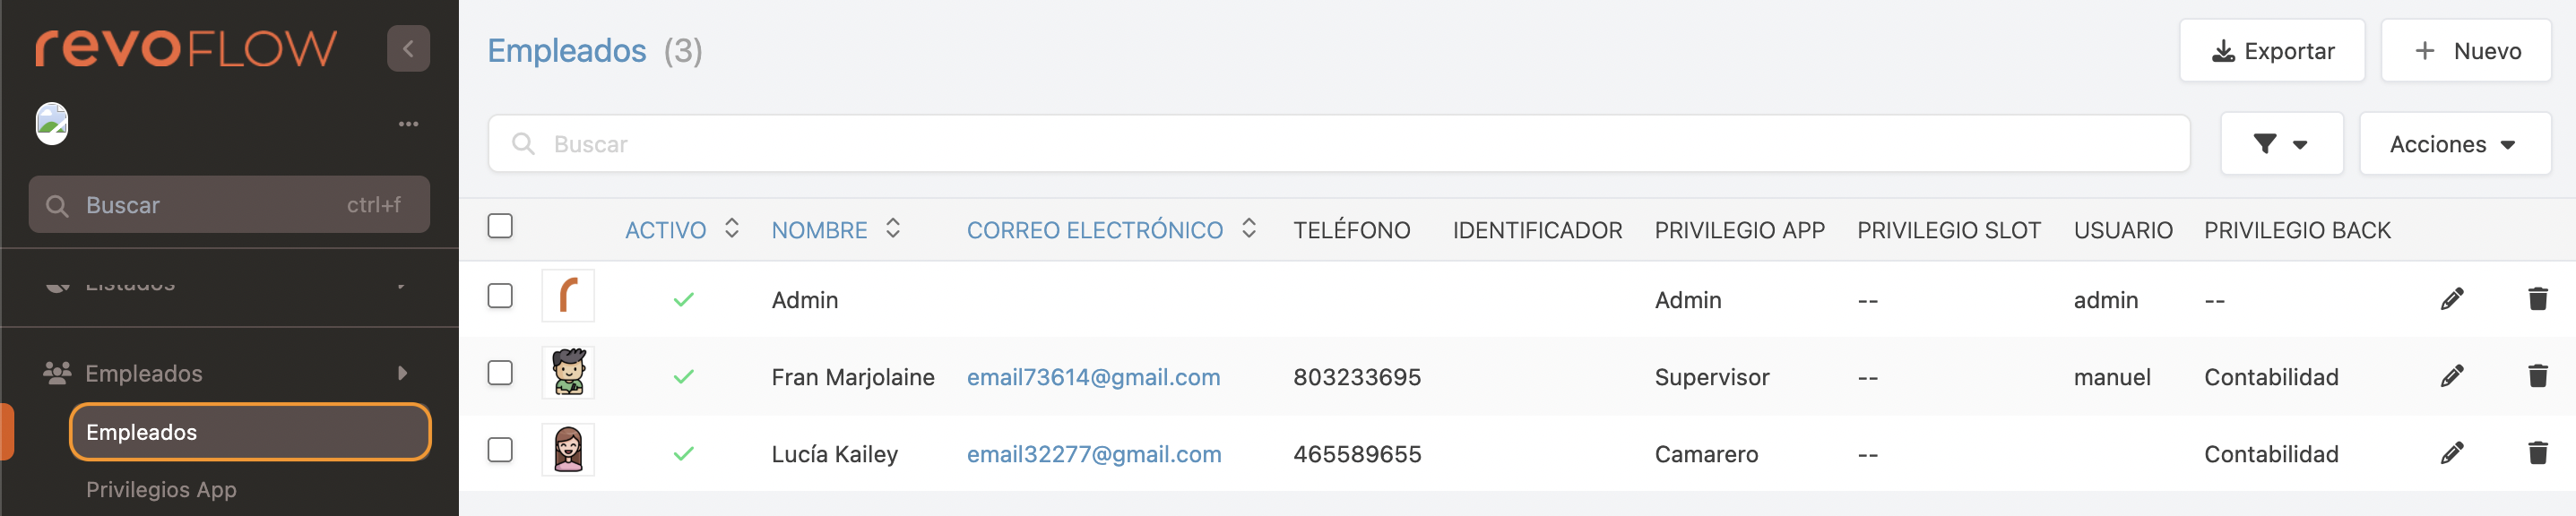
- Export: Export the list of employees.
- + New: Create a new employee.
- : Search employees.
- : Filter employees by active status or privileges.
- Actions: Delete one or several selected employees.
- : Select all or multiple employees.
- : Add a photo to quickly identify the employee.
- : Employee active or inactive.
- Name: Employee’s name.
- Email: Employee’s email address.
- Phone: Employee’s phone number.
- Identifier: Code used if using NFC, etc.
- App Privilege: Employee's privilege in the app.
- Slot Privilege: Employee’s privilege in slot.
- User: Username for the back office.
- Back Privilege: Employee’s privilege in the back office.
- : Edit the employee.
- : Delete the employee.
HOW TO CREATE AN EMPLOYEE
1. Click on +New or the icon and fill in the information:
BASIC
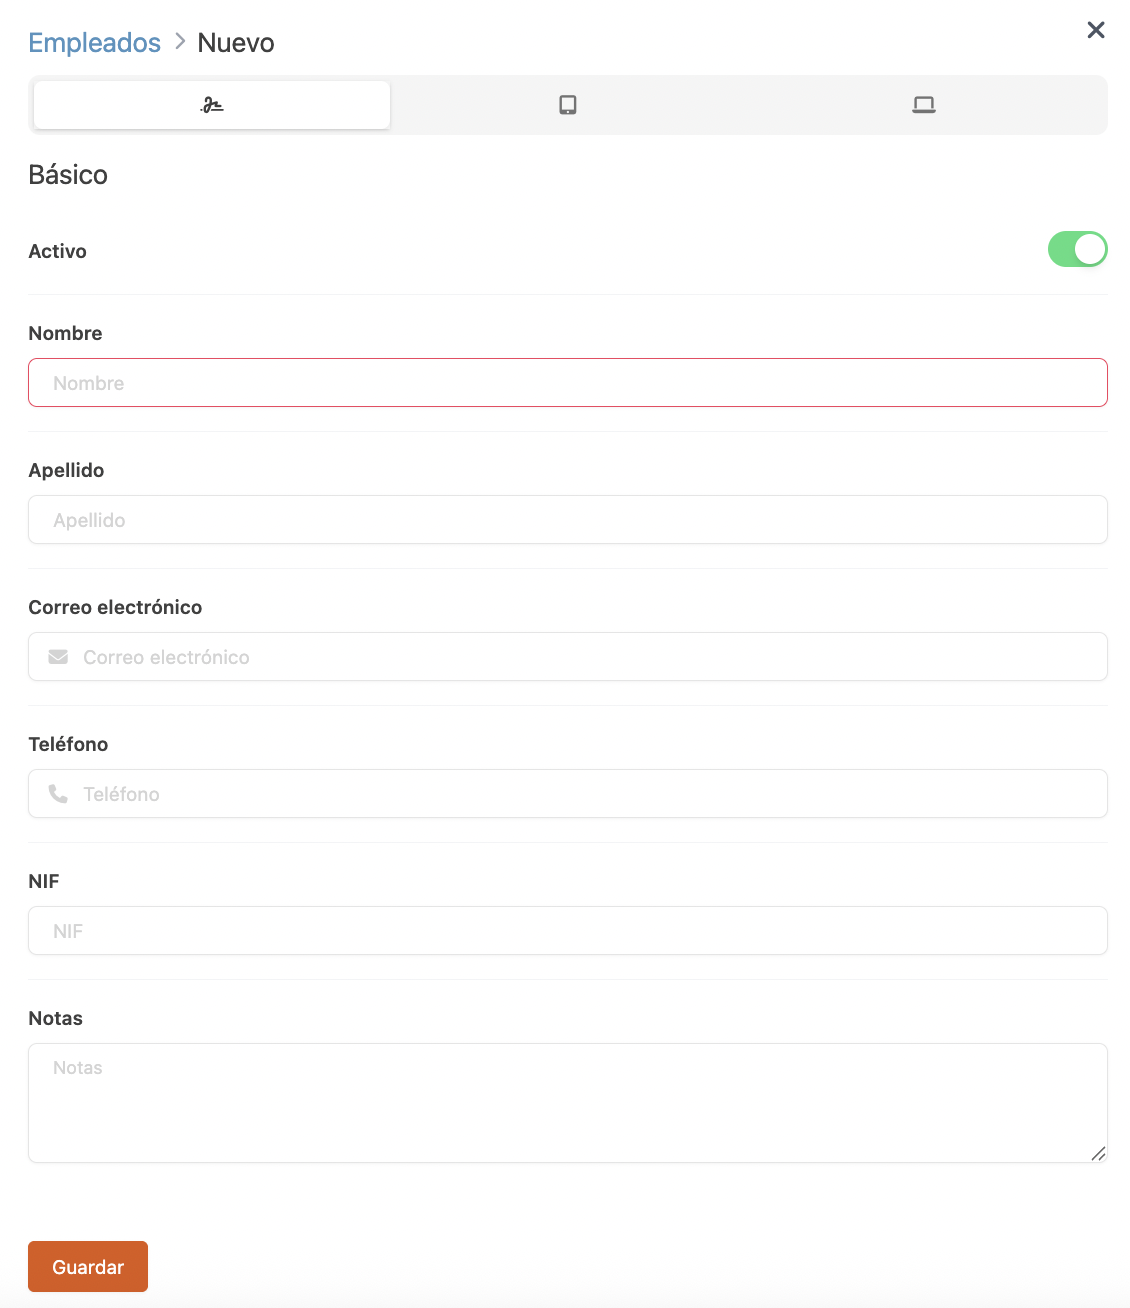
- Active: Enable for the employee to appear in the app.
- Name: Enter the employee’s first name. (Required field)
- Surname: Enter the employee’s surname.
- Email: Enter the employee’s email address.
- Phone: Enter the employee’s phone number.
- NIF: Enter the employee’s NIF.
- Notes: Add any additional information.
APP
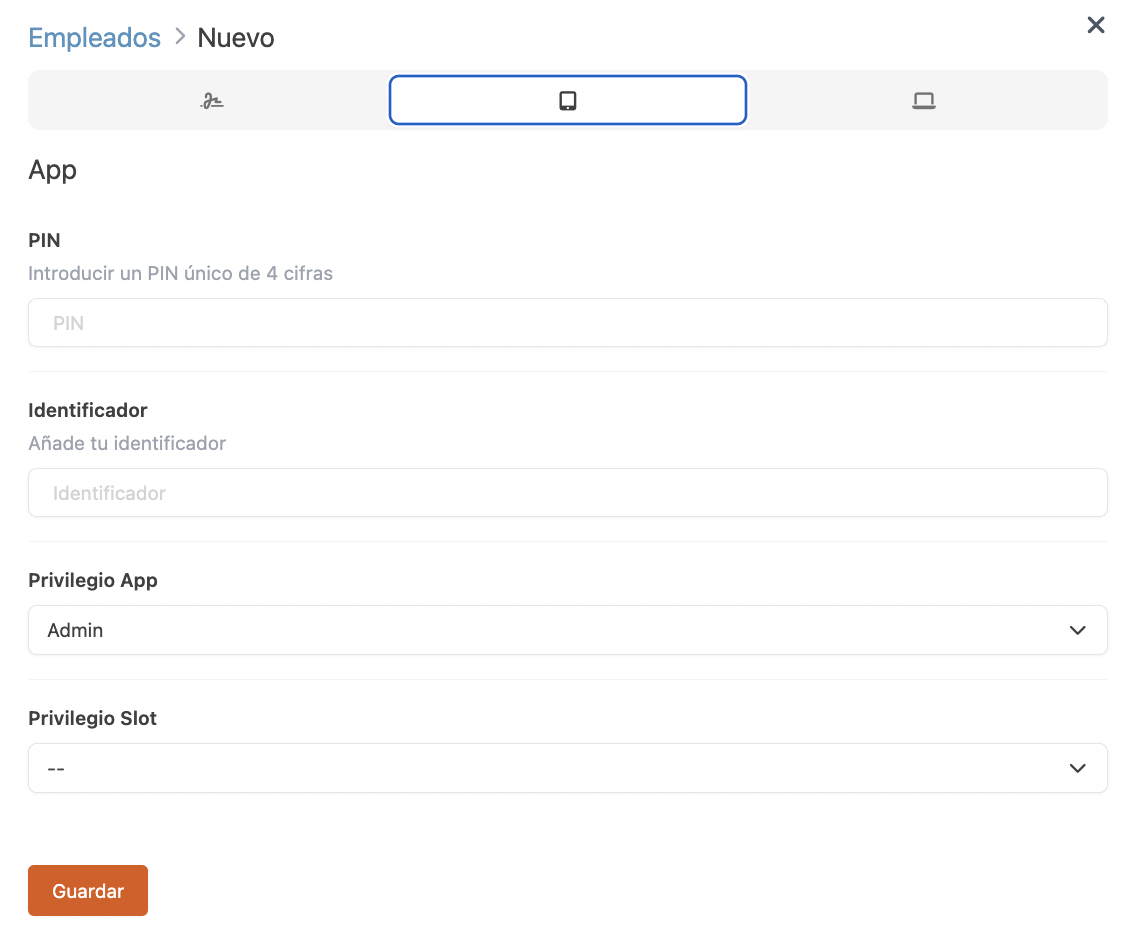
- PIN: Unique 4-digit code (cannot be repeated).
- Identifier: Value if using NFC, QR code, magnetic card, etc.
- App Privilege: Define what the employee can or cannot do in the app. Learn more here.
- Slot Privilege: Define what the employee can or cannot do in slot. Learn more here.
BACK OFFICE

- User: Employee’s username to access the back office.
- Password: Enter a password for back-office access.
-
Back Privilege: Define what the employee can or cannot do in the back office. More information here.
2. Click Save.
How to add a picture to the employee?
1. Click on , next to the employee’s name.
2. Use the Choose File button to upload an image.
3. Click Save to apply the changes.