- STATUS: ENABLED
1. WHAT IS REVO DISPLAY? 2. HOW TO CONNECT DISPLAY? 3. CONFIGURING REVO DISPLAY OPTIONS 4. ACTIVATING A MARKETING FORM IN THE REVO XEF AND REVO RETAIL APP
1. WHAT IS REVO DISPLAY?
It is an application that complements Revo XEF and Revo RETAIL. You can use it on an iPod Touch, an iPad Mini, or any iOS device.
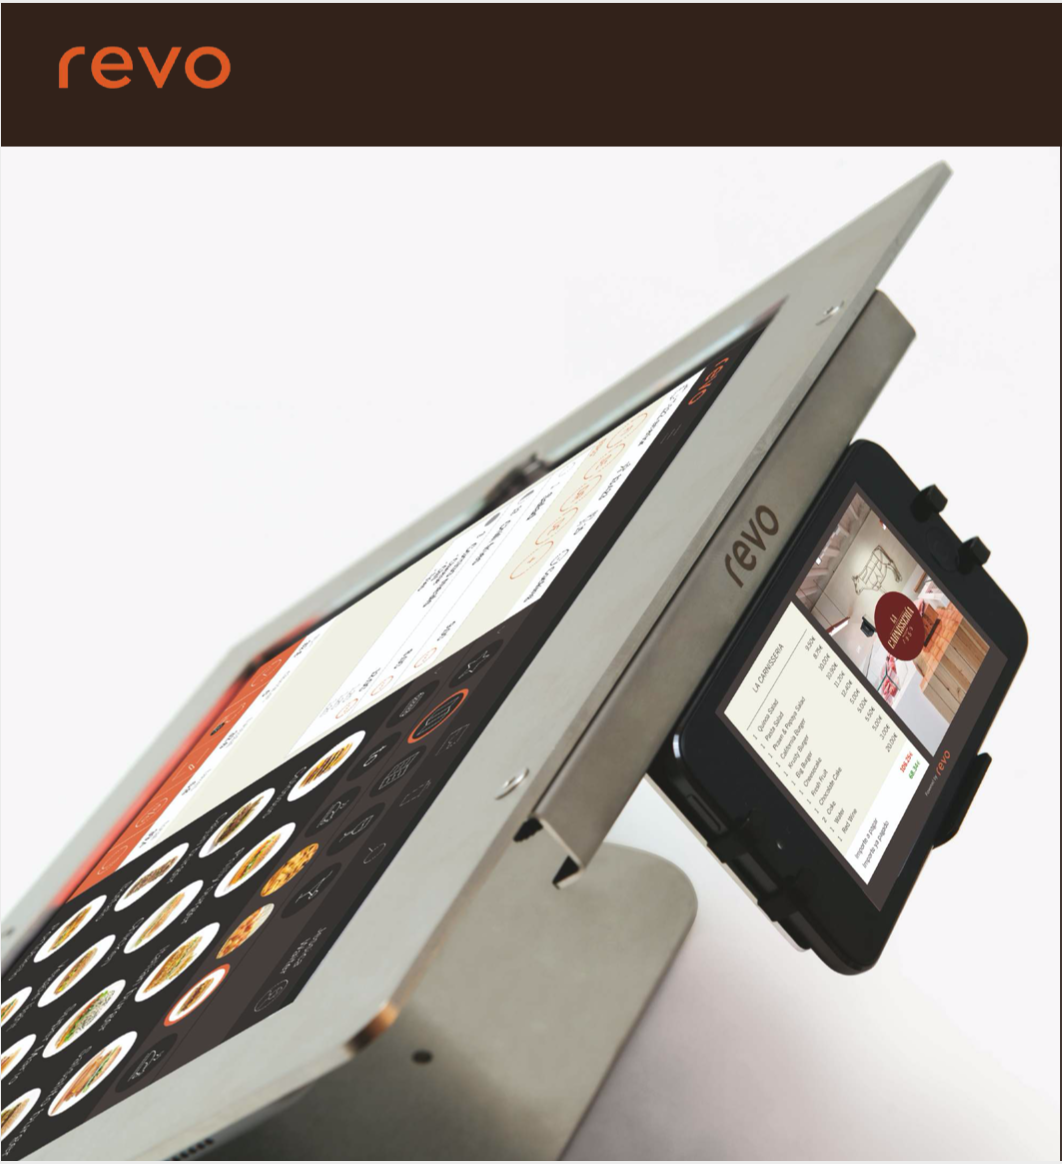
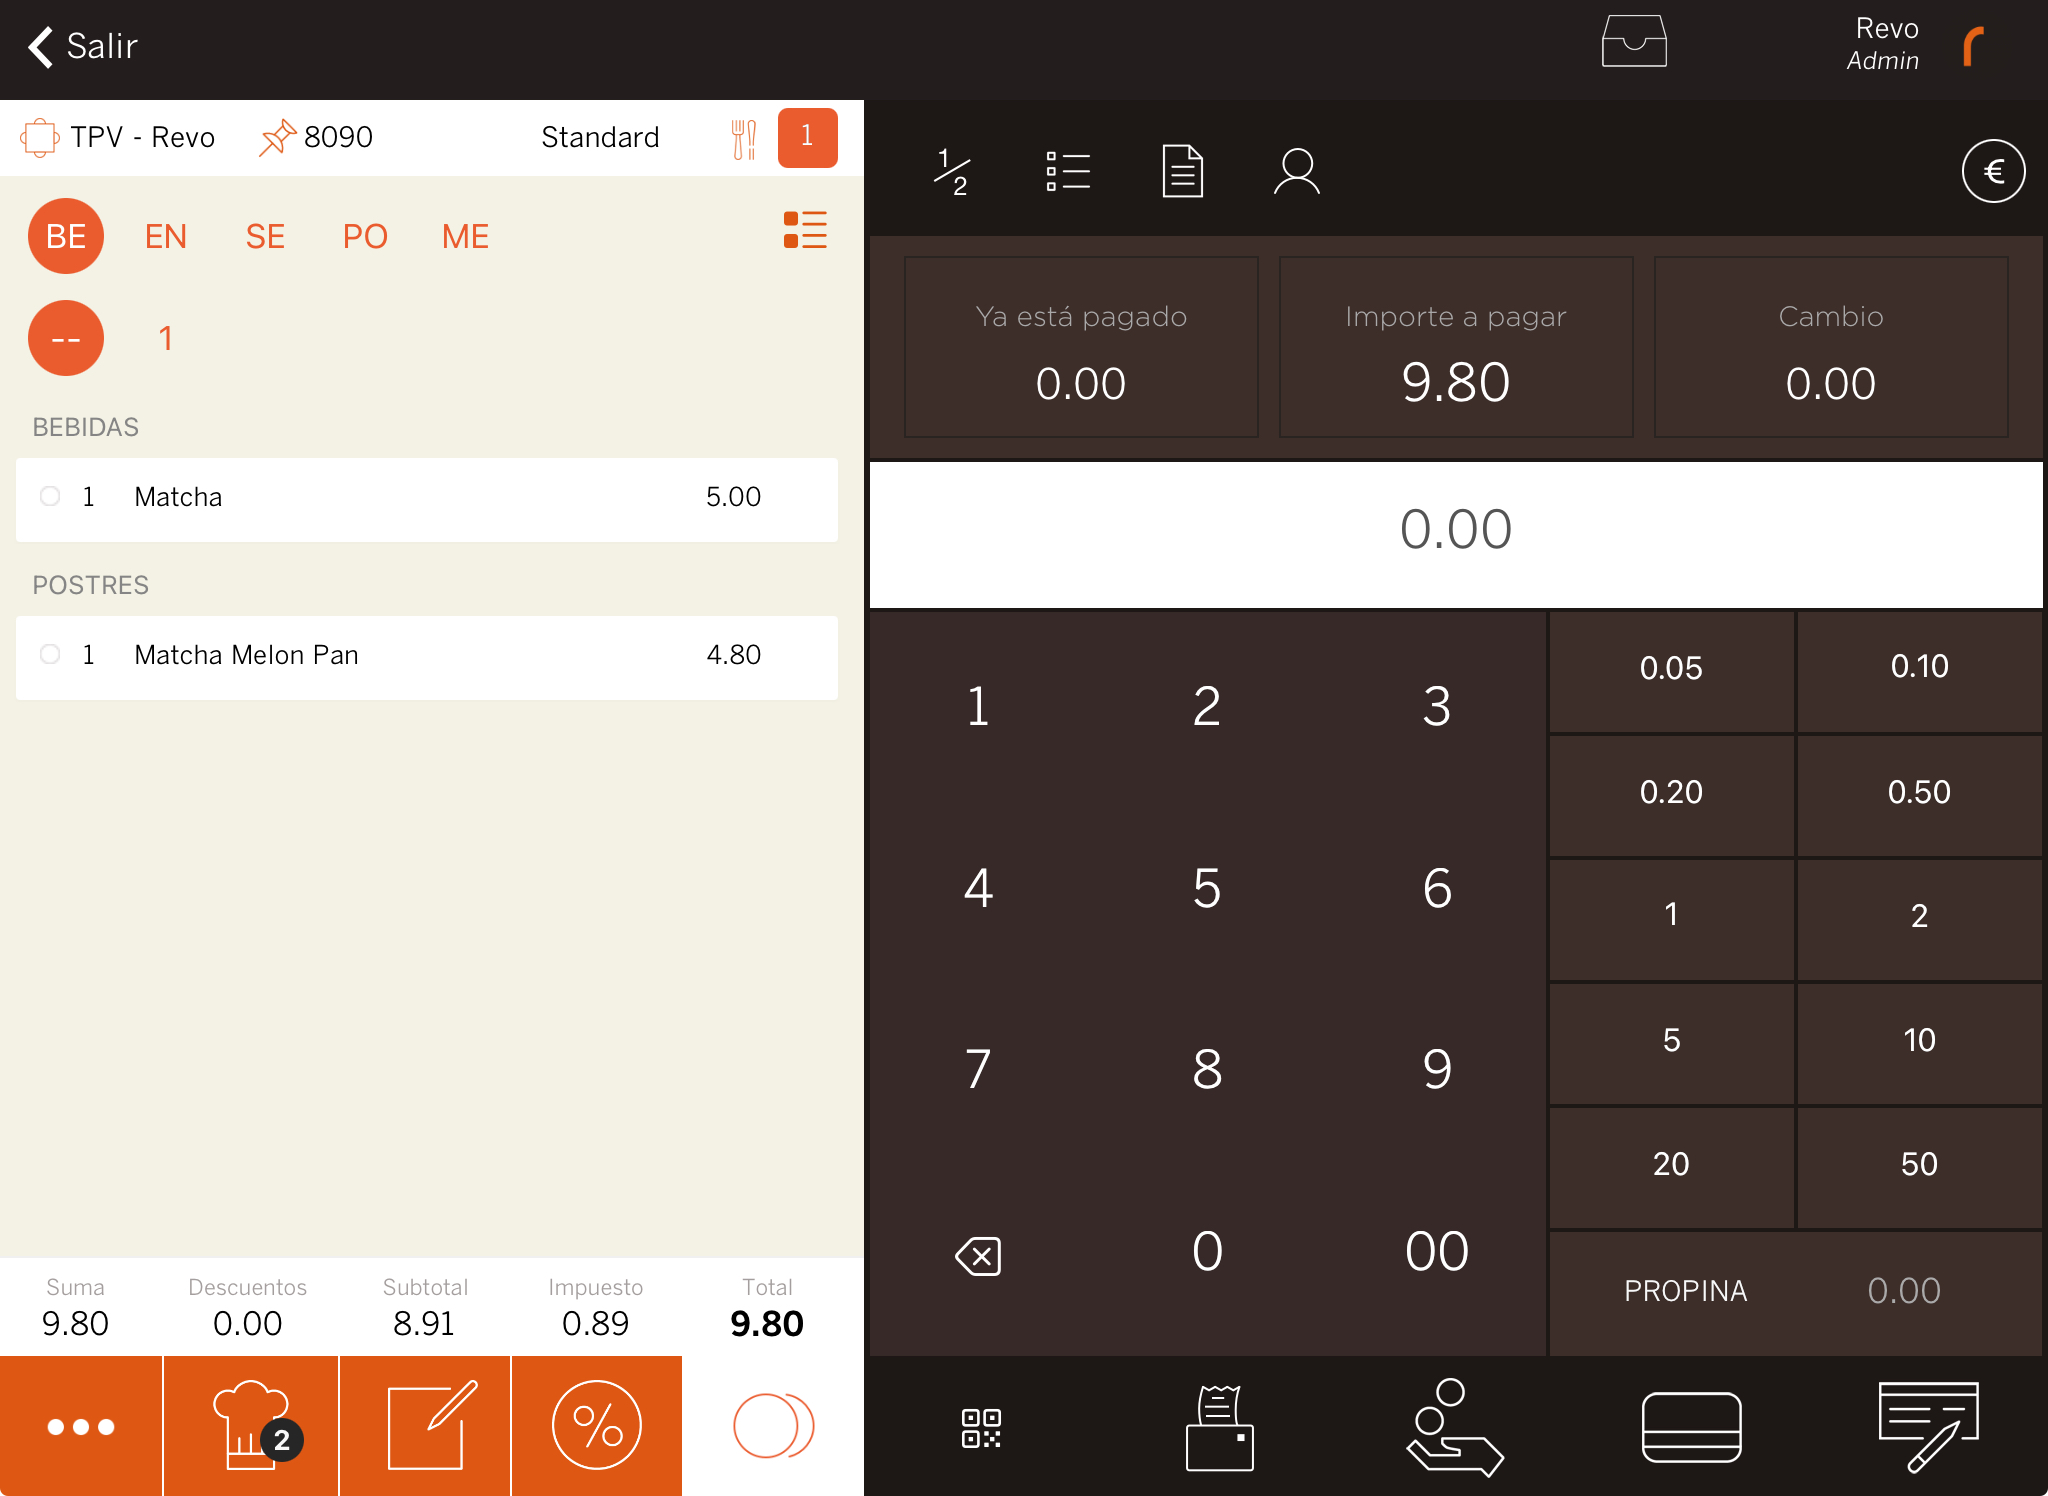
It visually and clearly displays the order to the customer, in real time, showing the price, product description, etc.
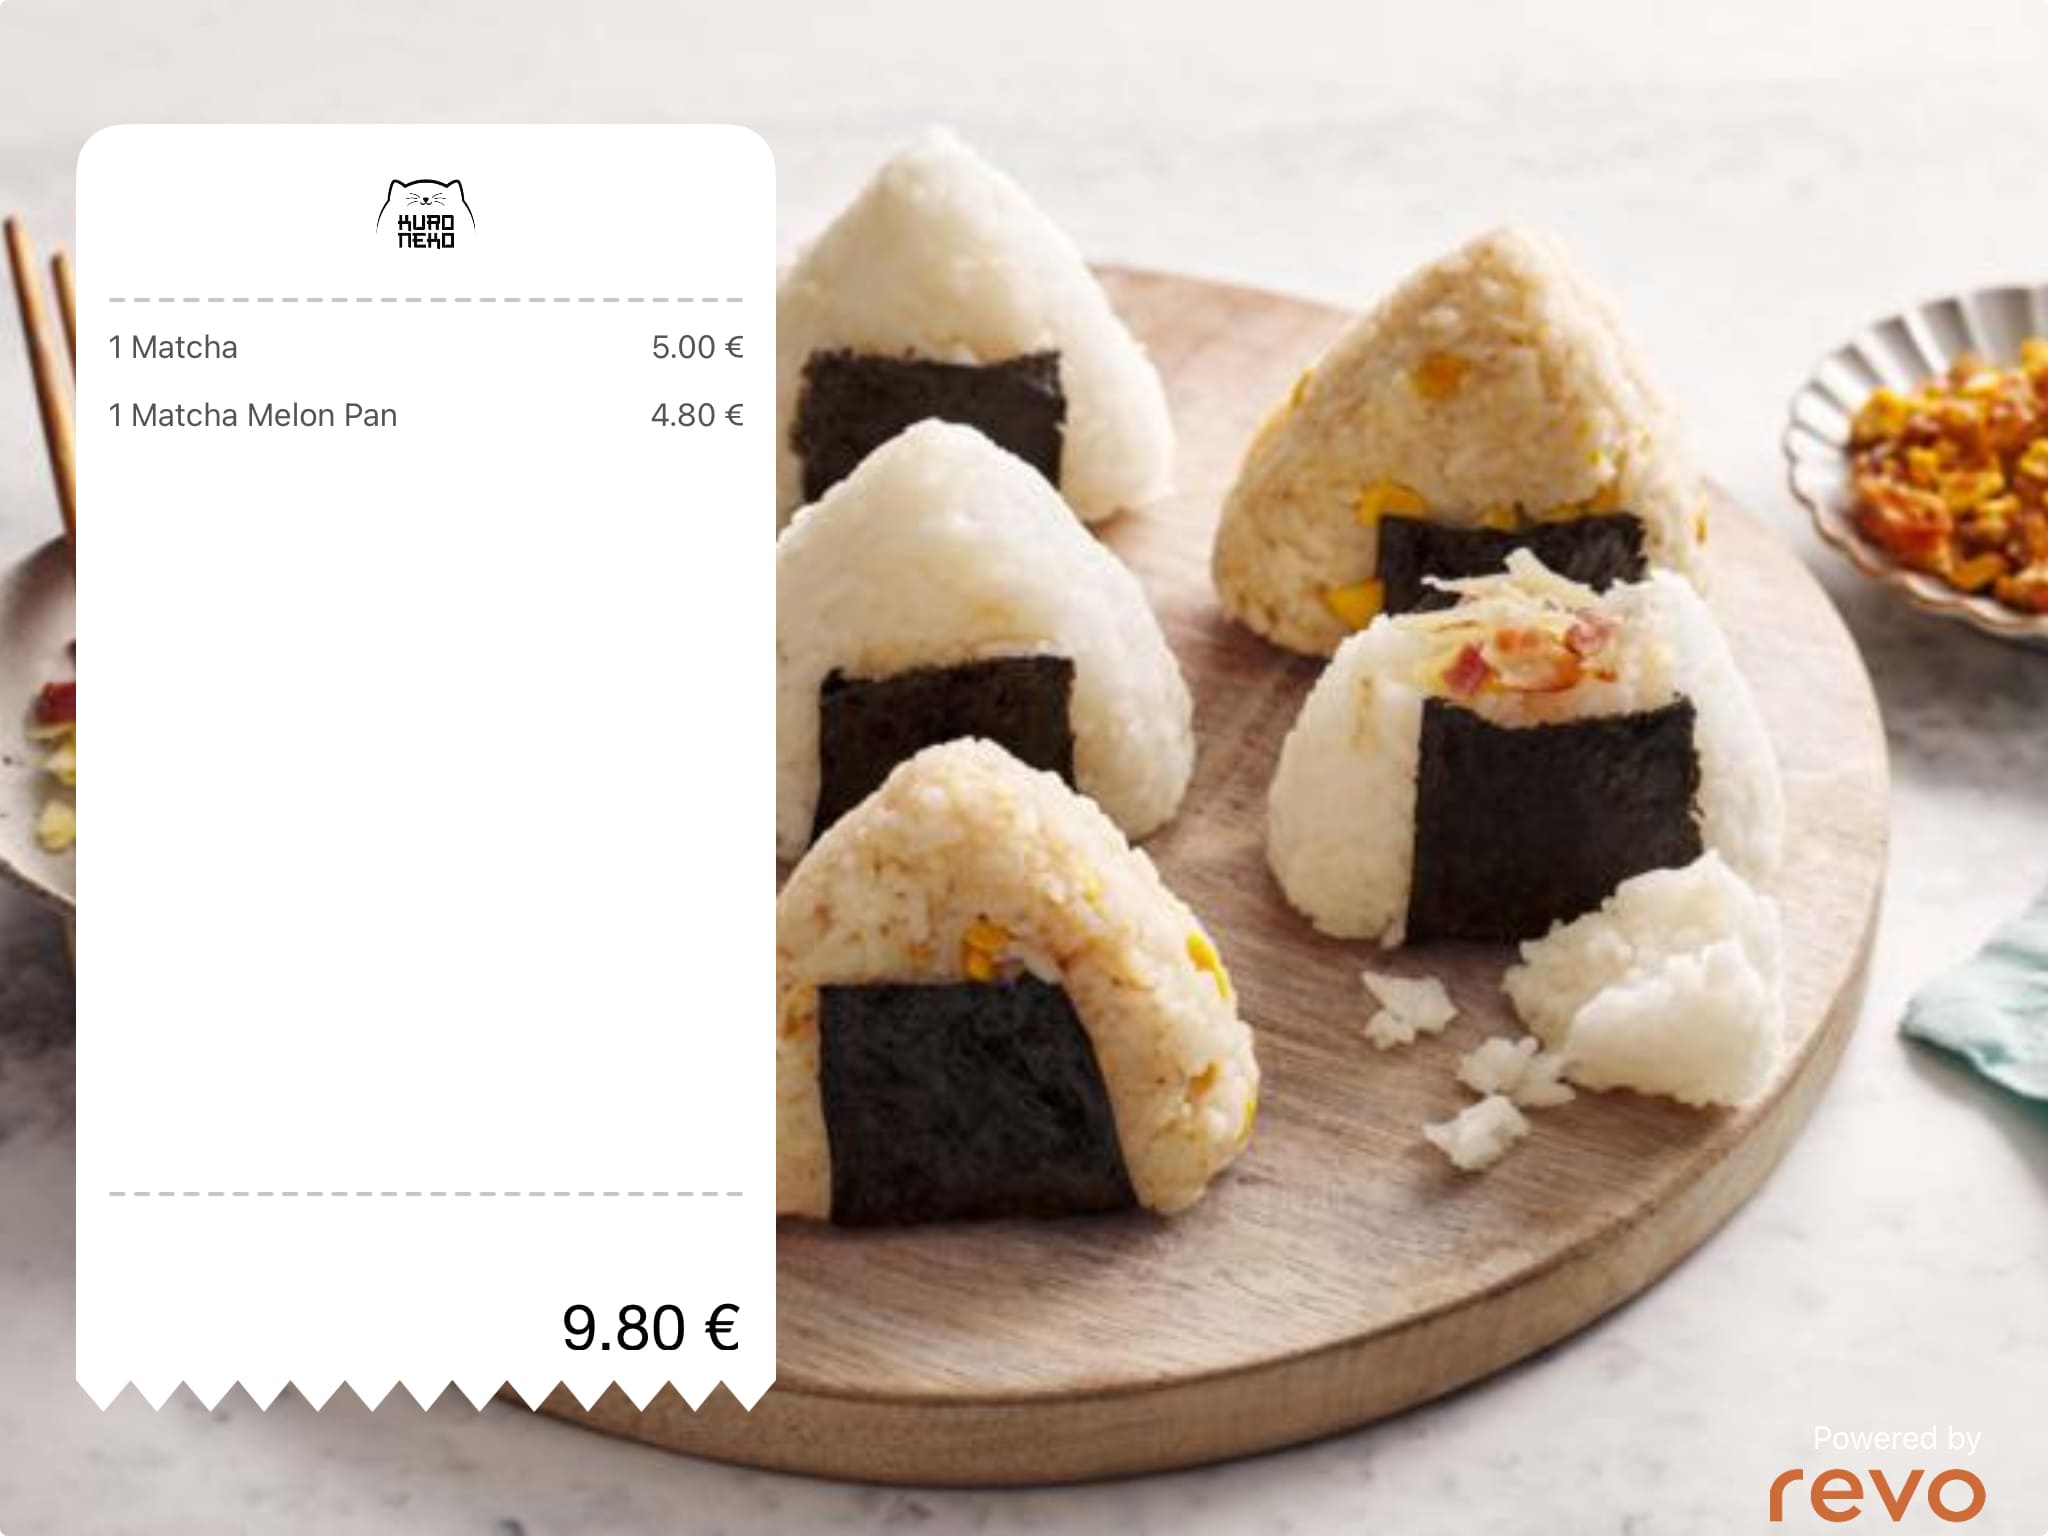
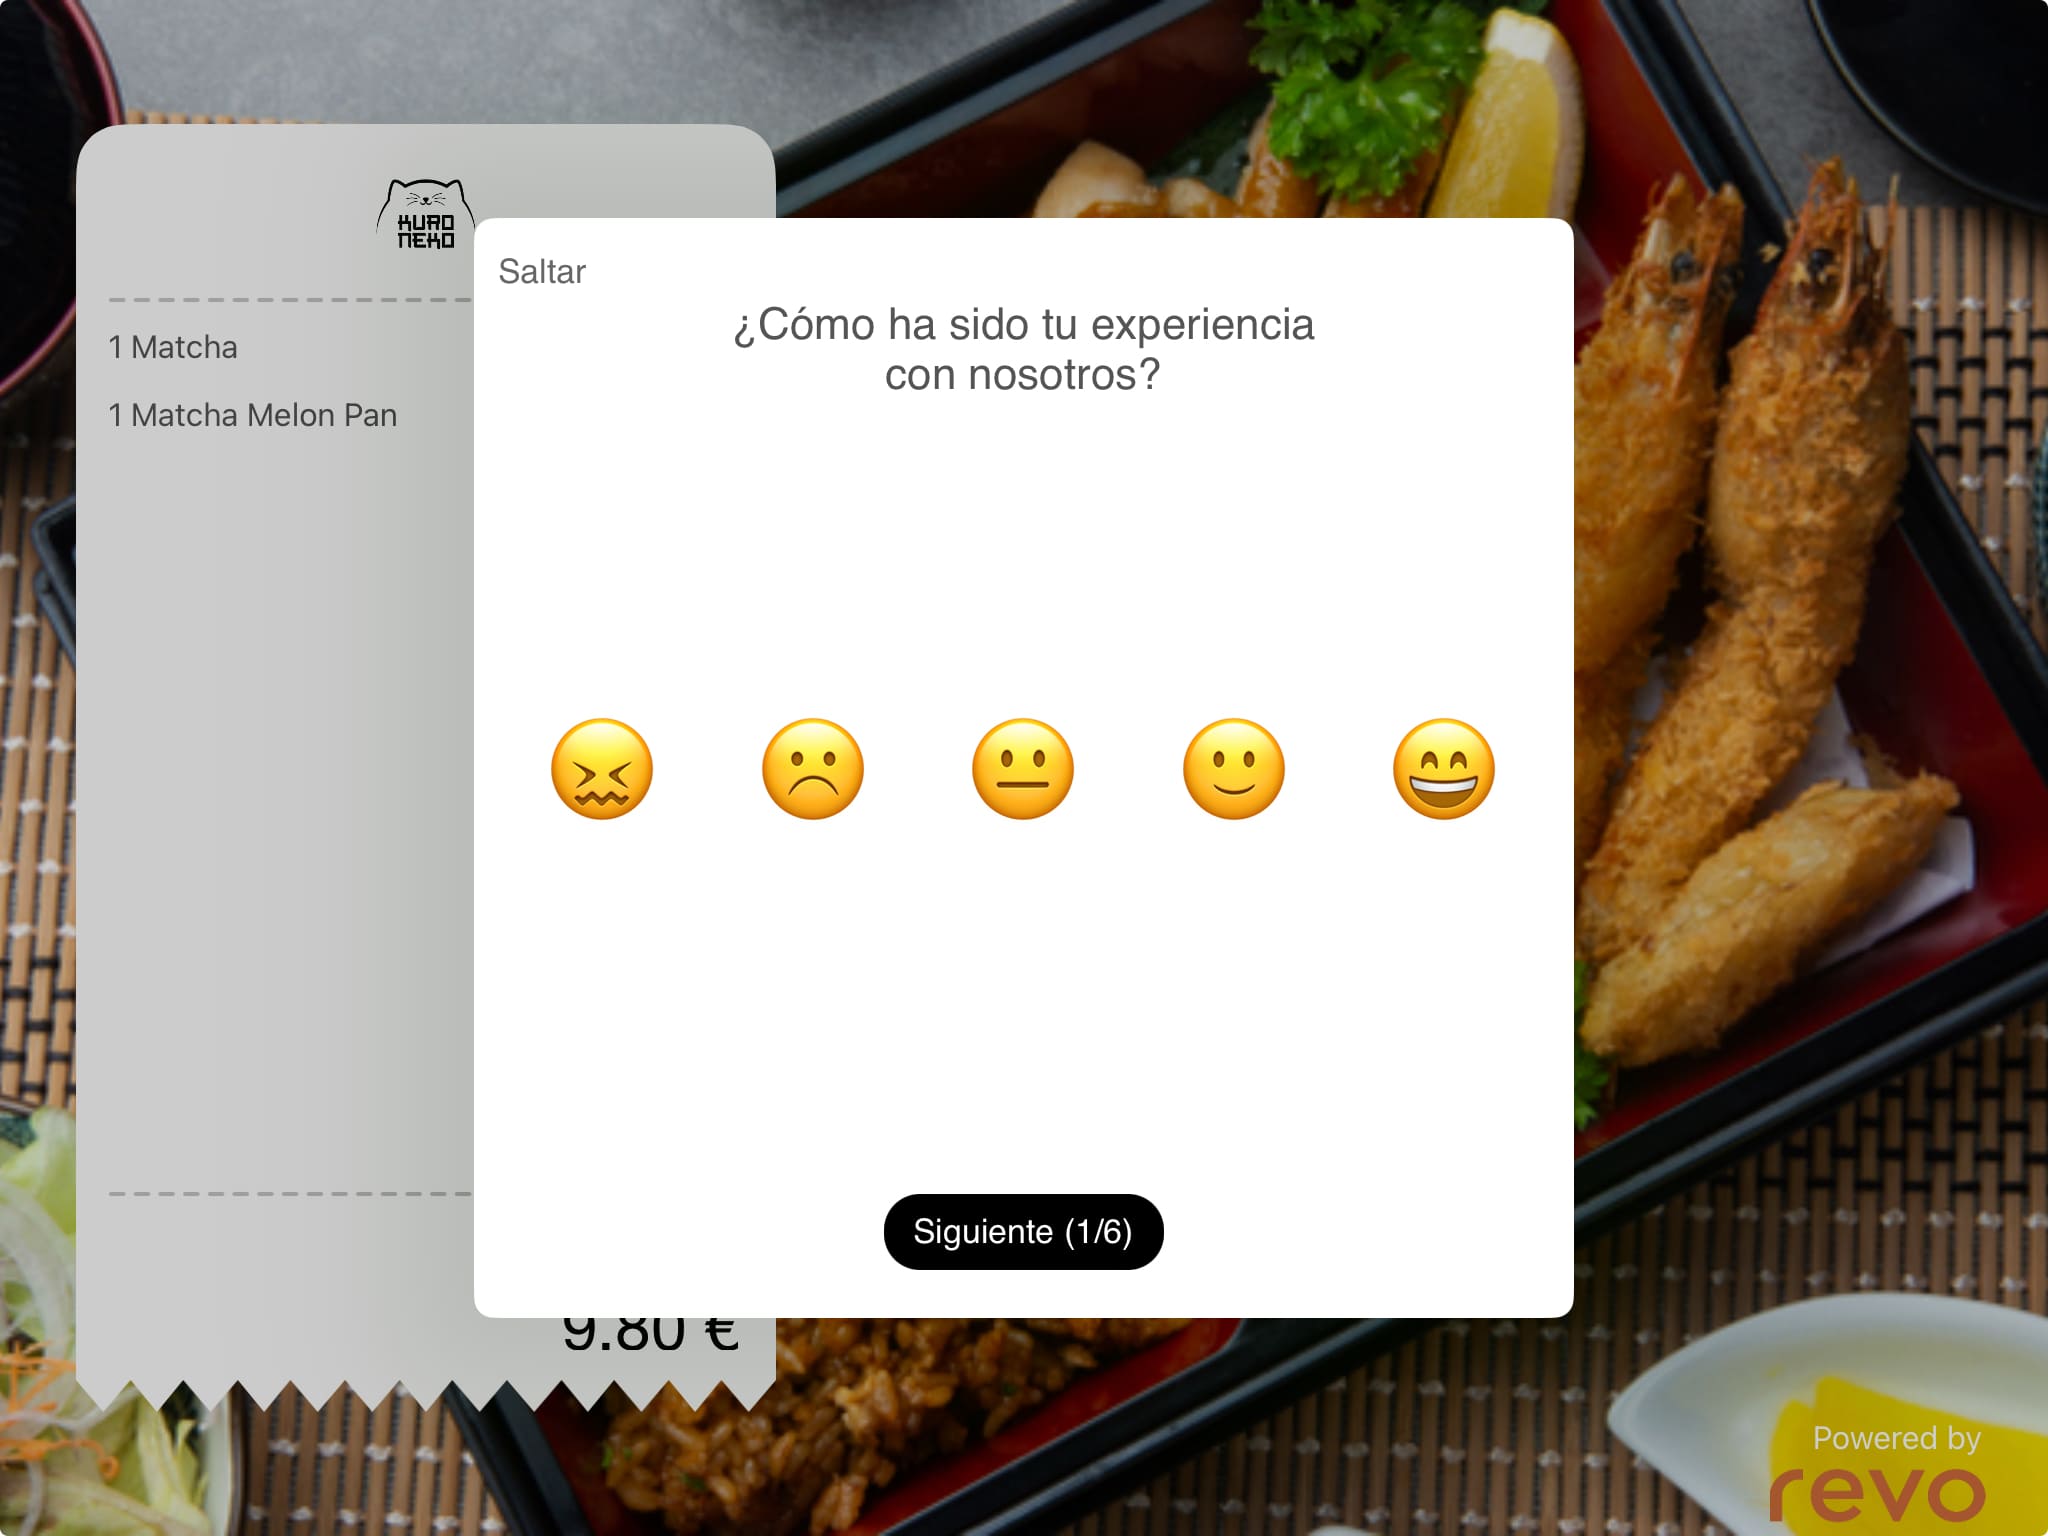
You can also add images, videos, messages or surveys as a marketing tool.
2. HOW TO CONNECT DISPLAY?
You must first connect the device running Revo DISPLAY to the one running Revo XEF or Revo RETAIL.
1. Download Revo DISPLAY from the App Store.
Then, set the IP of the device running Revo DISPLAY to static, and note it down, as you’ll need it on the other device.
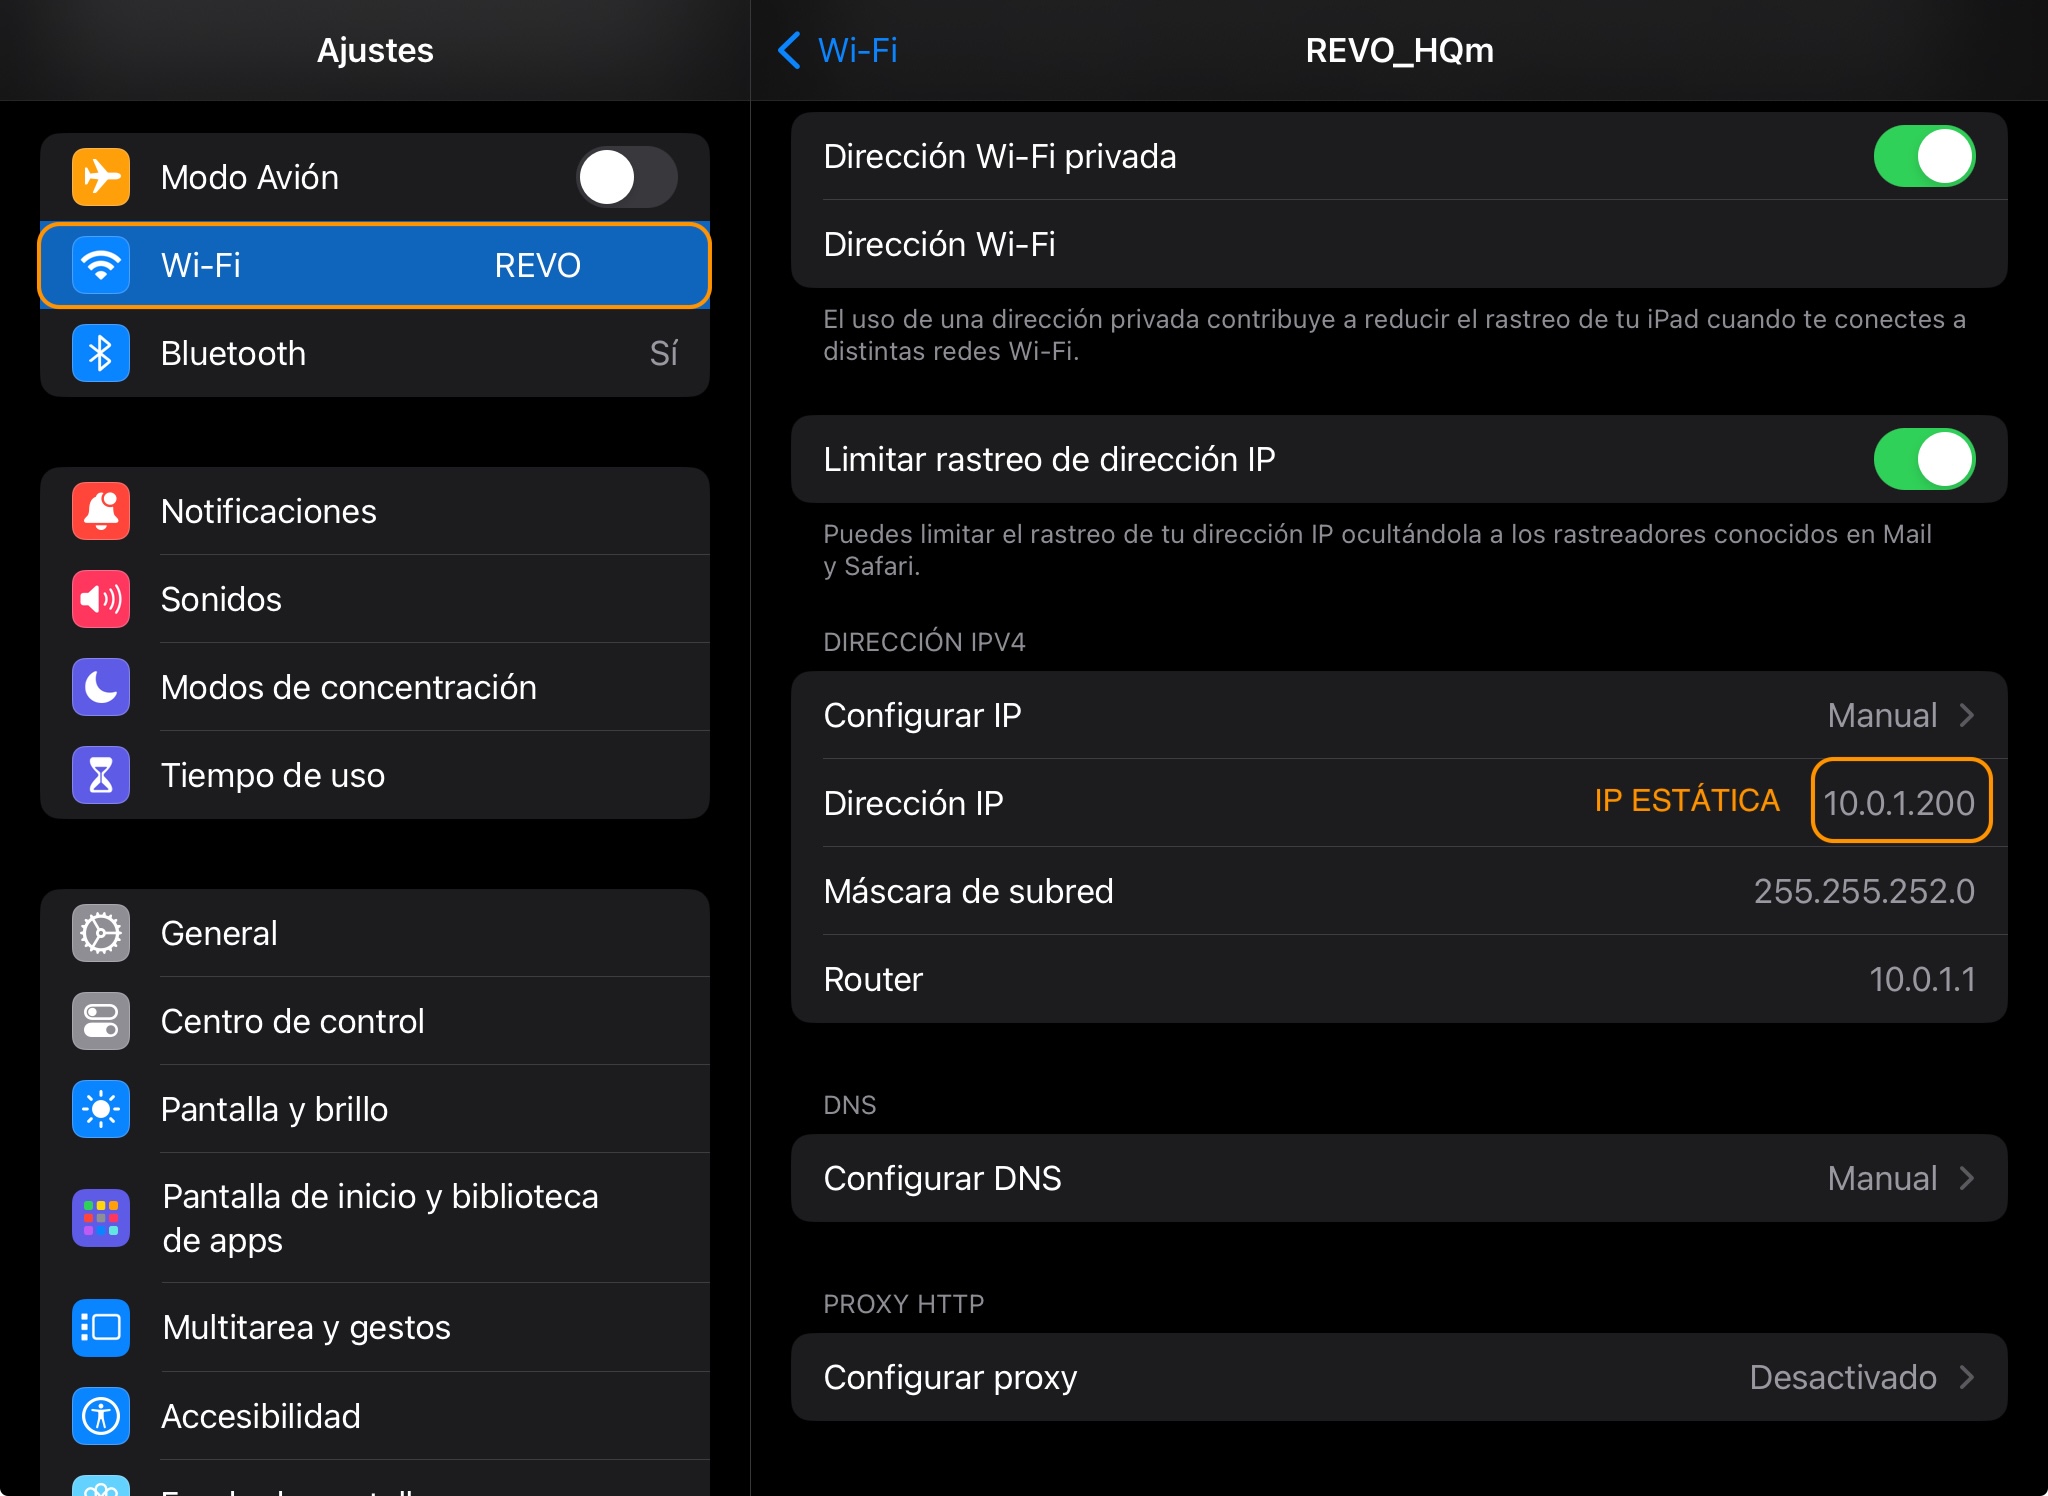
Use an IP outside the DHCP range to avoid issues.
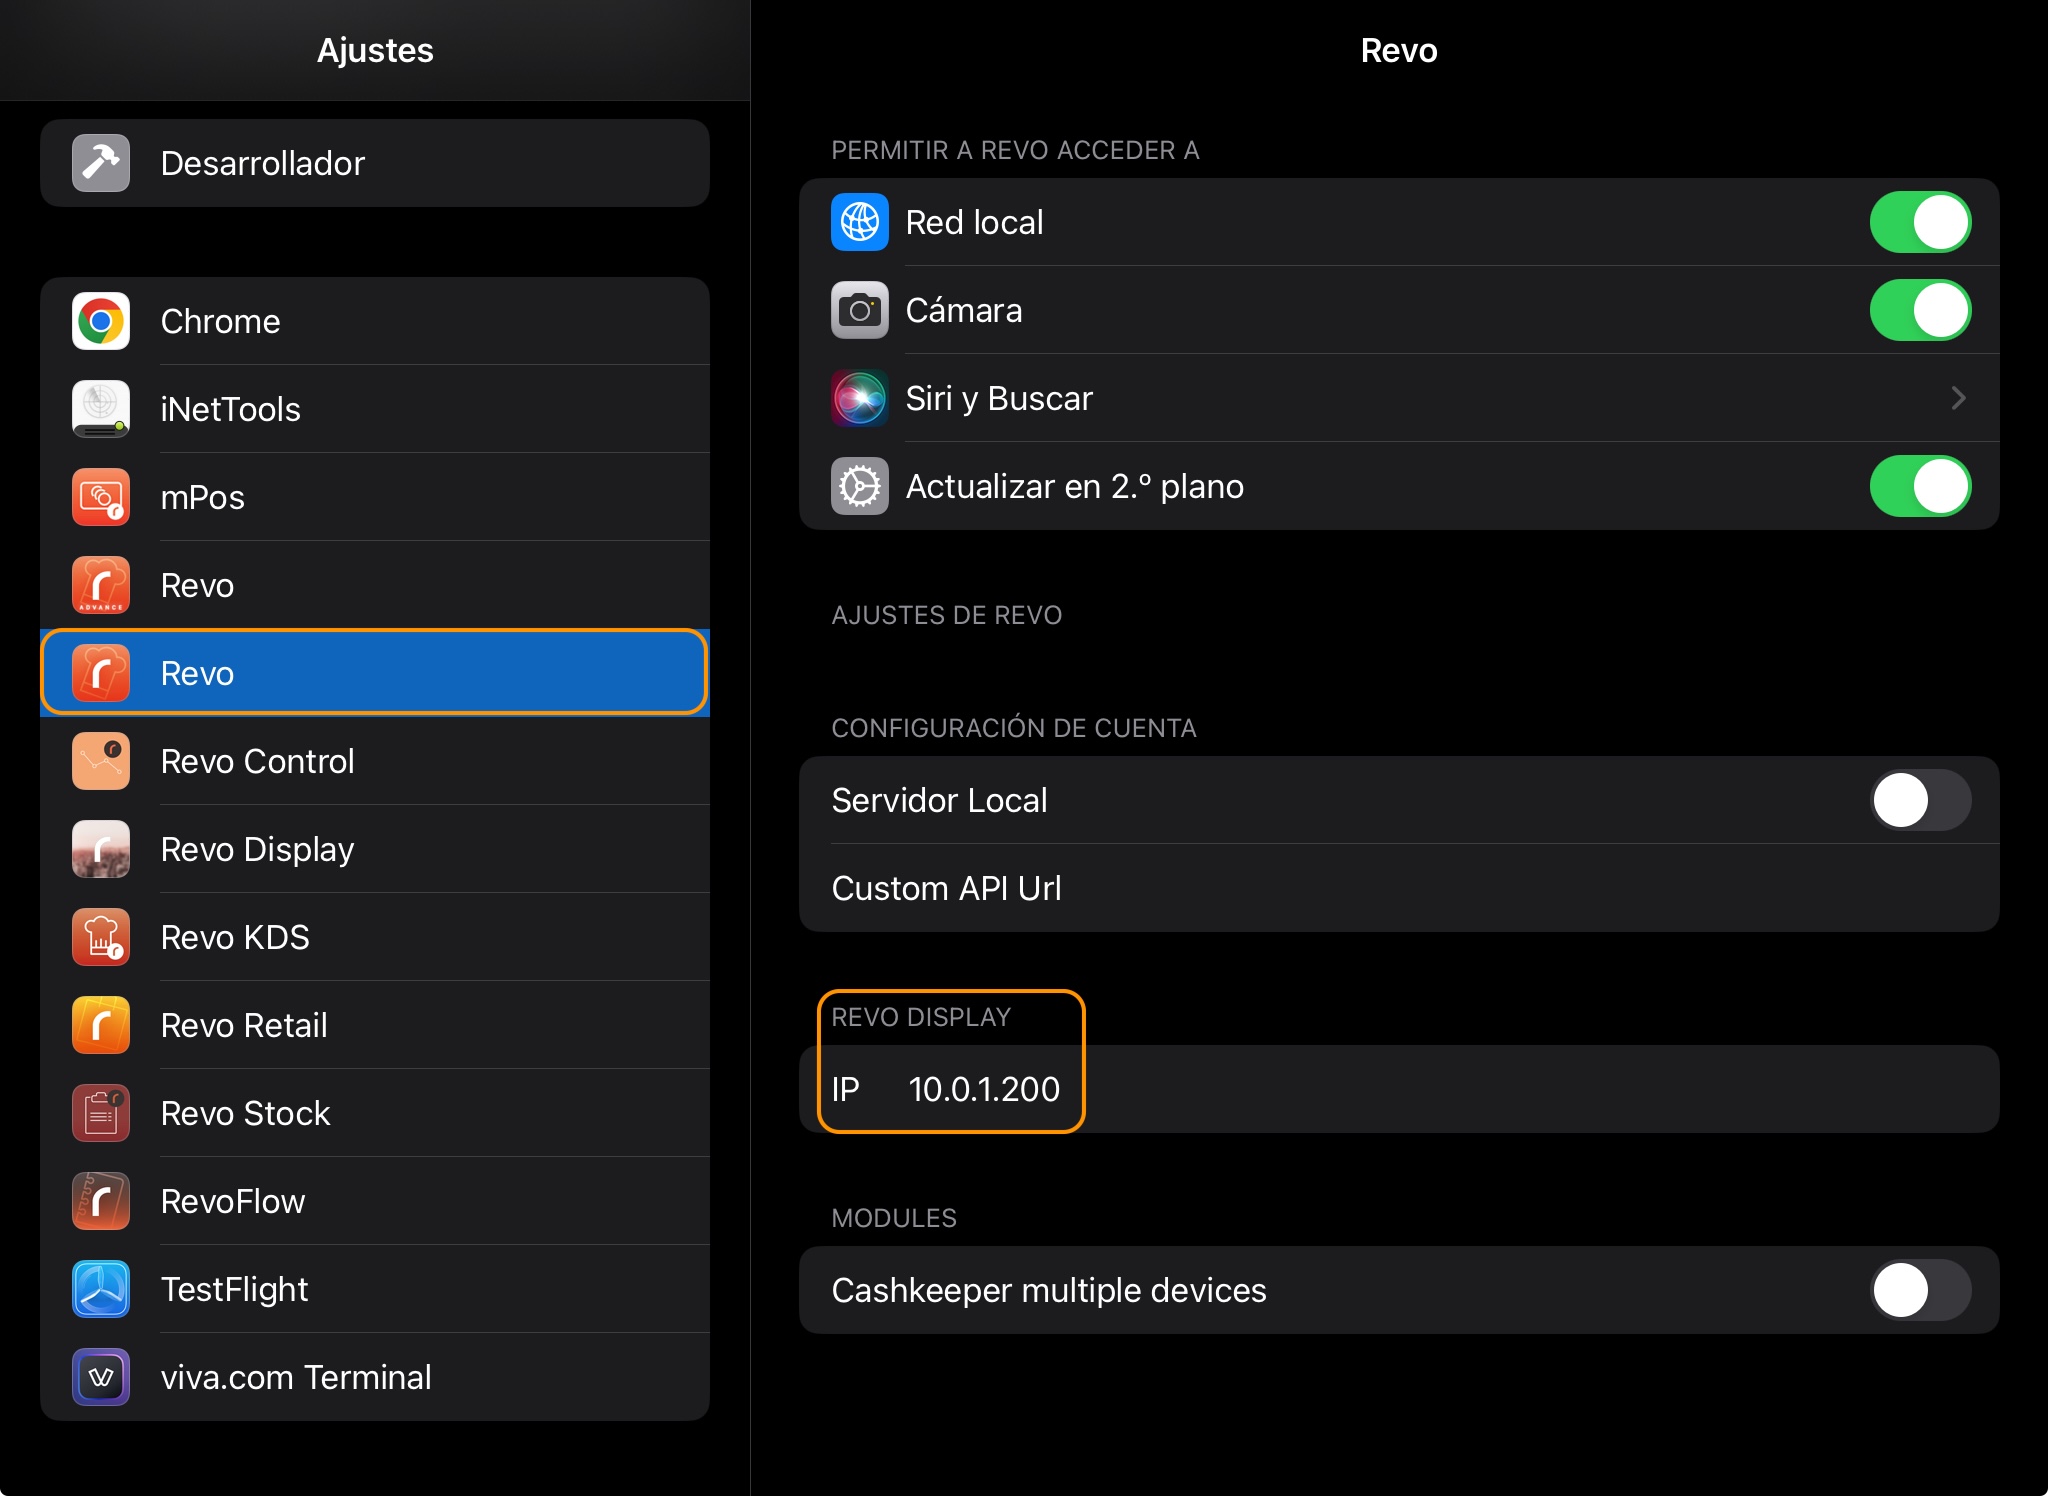
2. On the device running Revo XEF or Revo RETAIL, go to Settings / REVO and enter the IP in the Revo DISPLAY field.
IMPORTANT: Restart both apps on both devices so they connect properly.
Your devices are now connected!
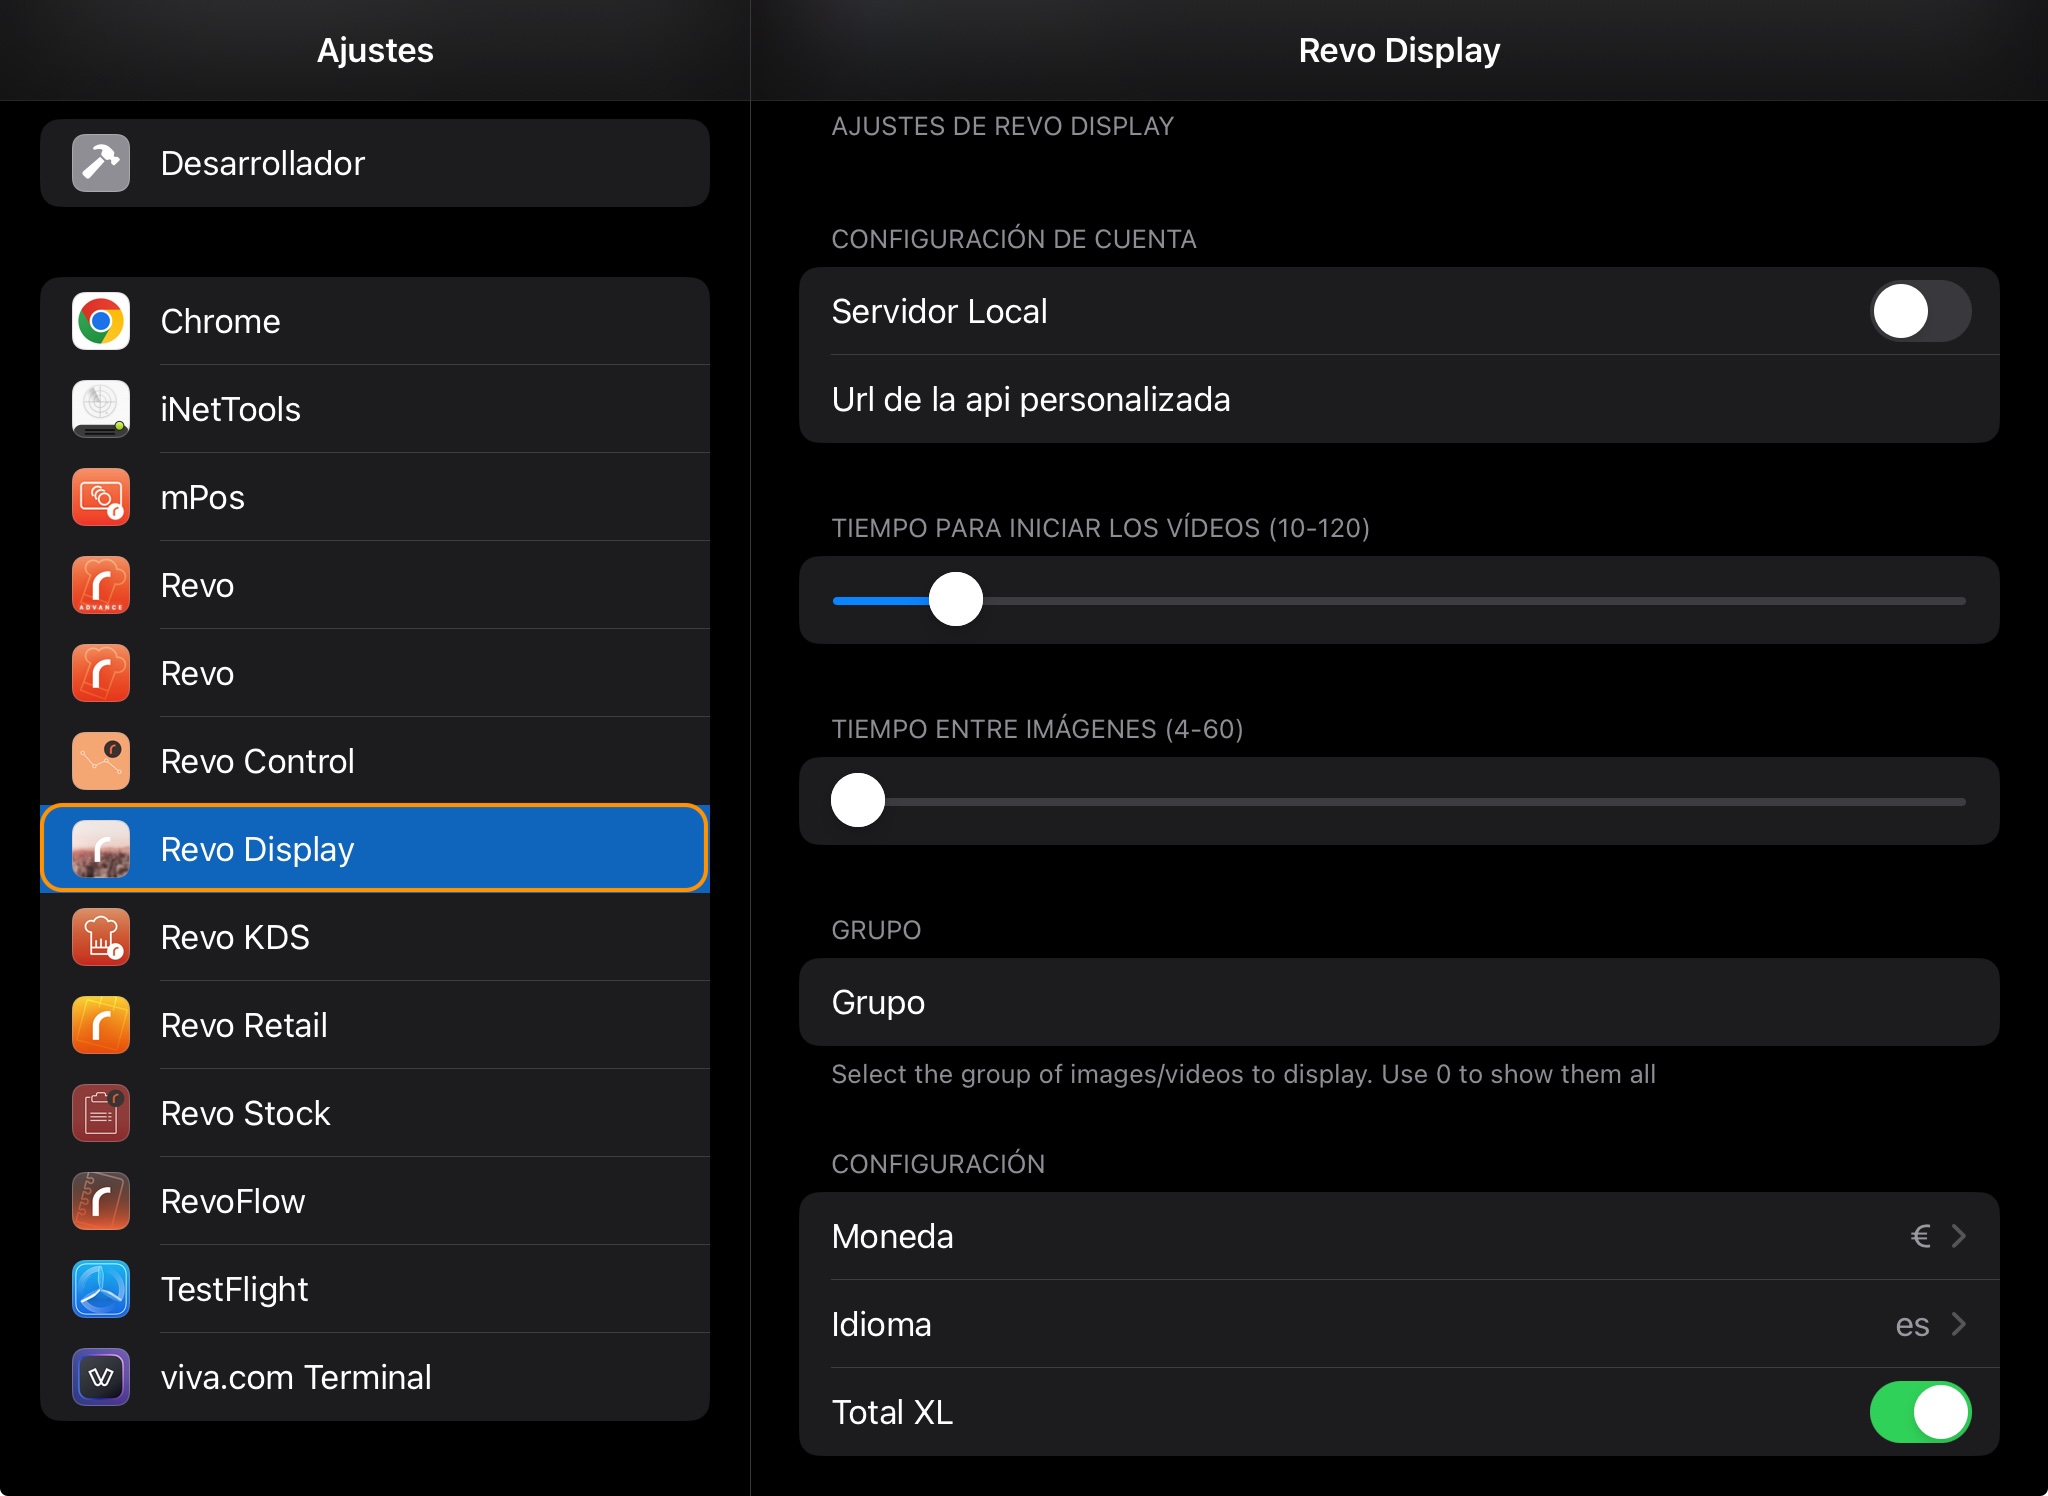
3. CONFIGURING REVO DISPLAY OPTIONS
You can add images, videos or surveys.
Adding an image:
1. Log in to the XEF back-office or the RETAIL back-office.
2. Go to Integrations / Revo DISPLAY in Revo XEF or Revo DISPLAY in Revo RETAIL.
3. Click + New and select Image.
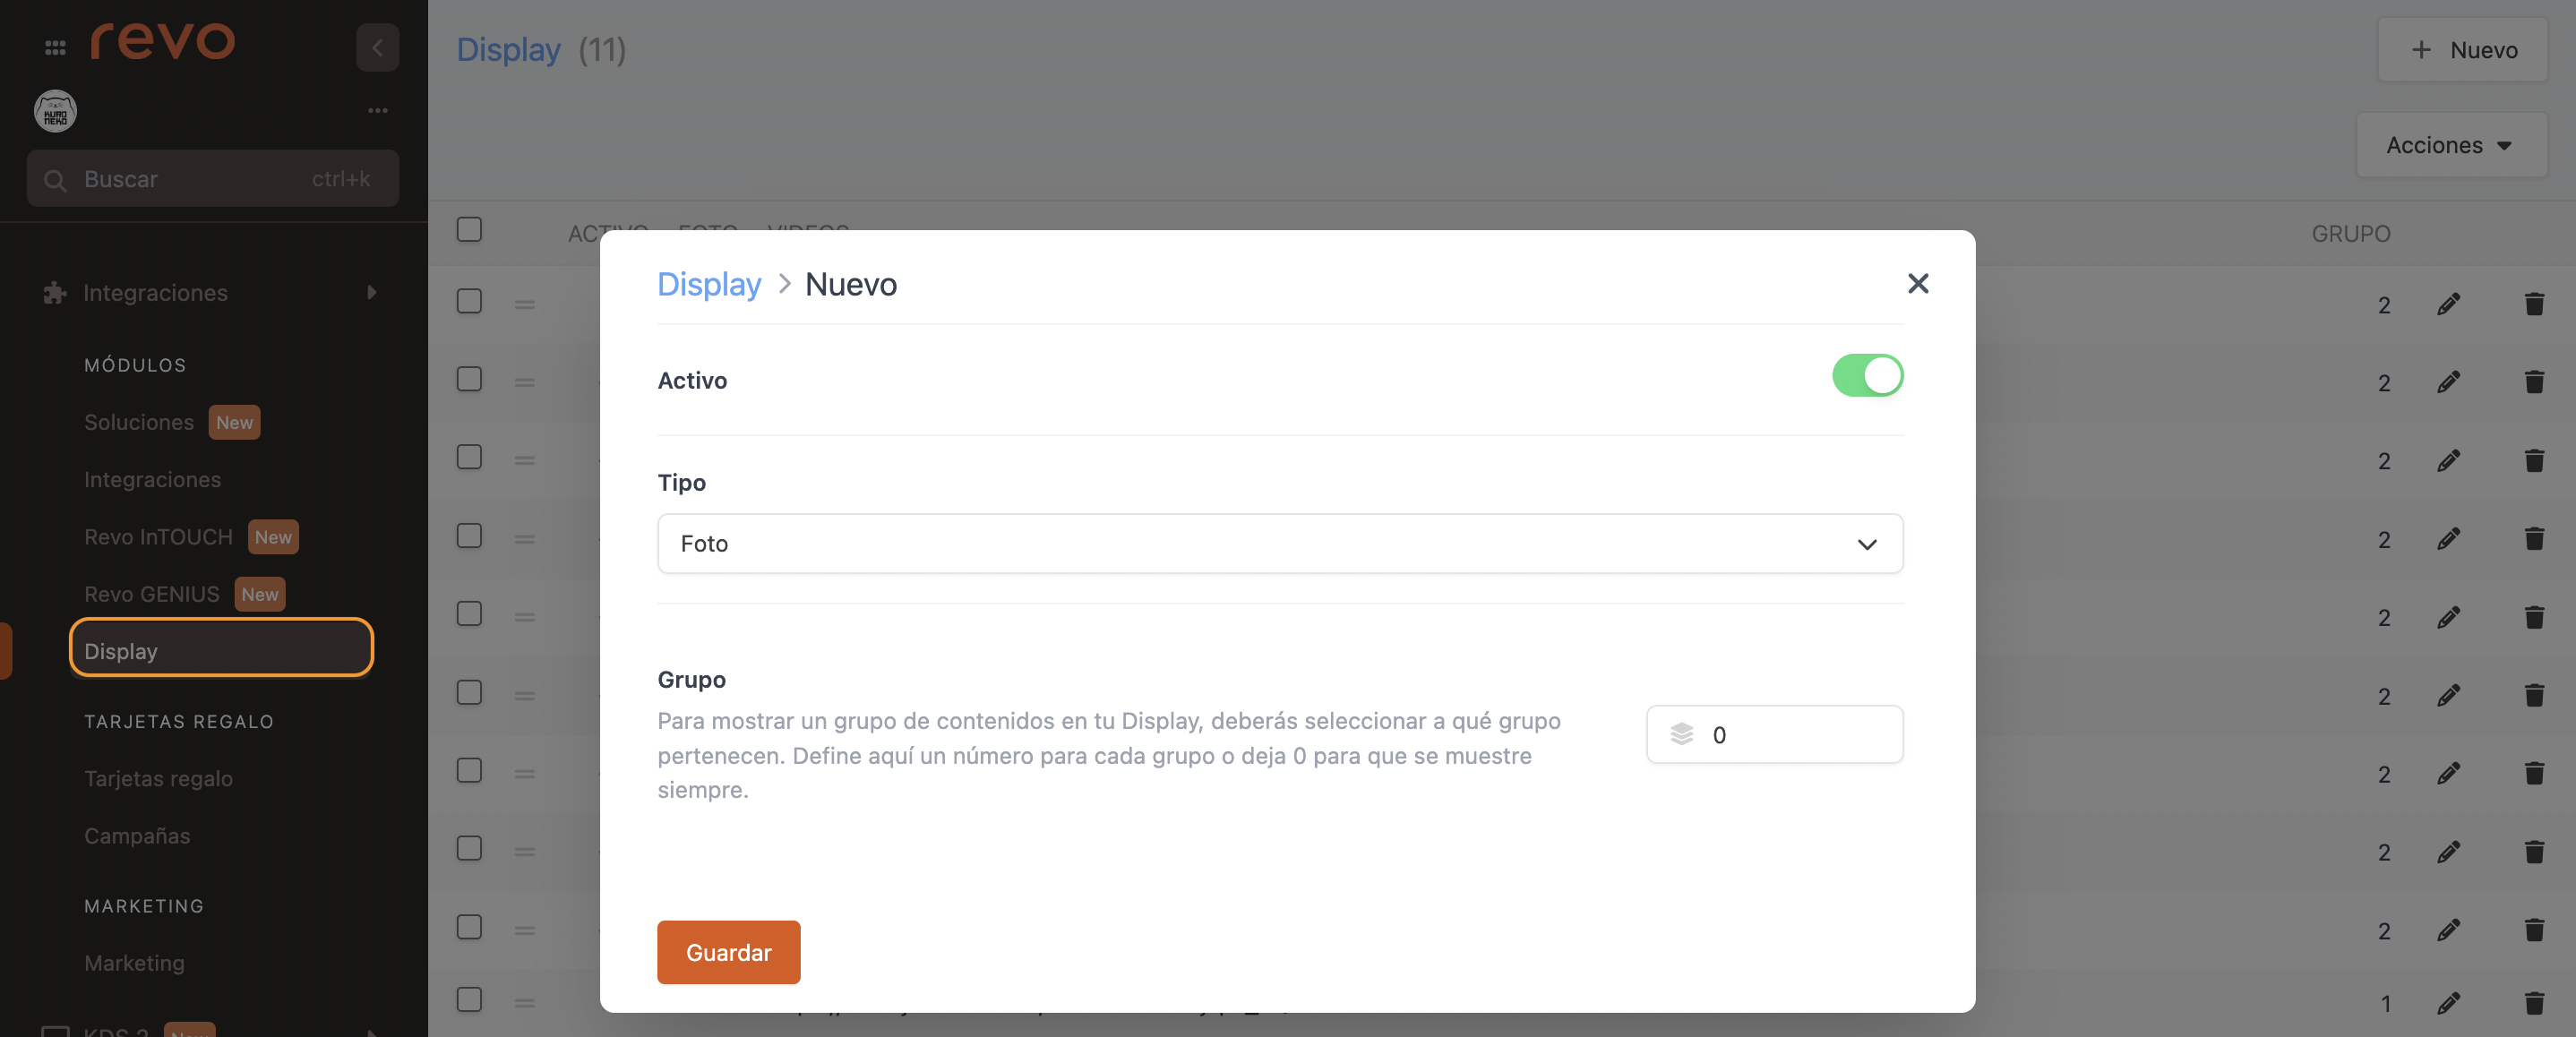
4. Click Save, click the image, select one from your device, and click Save again.
Images are displayed in the order they are uploaded.
Recommended size: 512x716.
To change the time between images:
5. Go to the device where Revo DISPLAY is installed.
6. Go to Settings / Revo DISPLAY and set the TIME BETWEEN IMAGES field (between 4 and 60 seconds).
Adding a video:
1. Log in to the Revo XEF back-office or the Revo RETAIL back-office.
2. Go to Integrations / Revo DISPLAY in Revo XEF or Revo DISPLAY in Revo RETAIL.
3. Click + New and select Video.
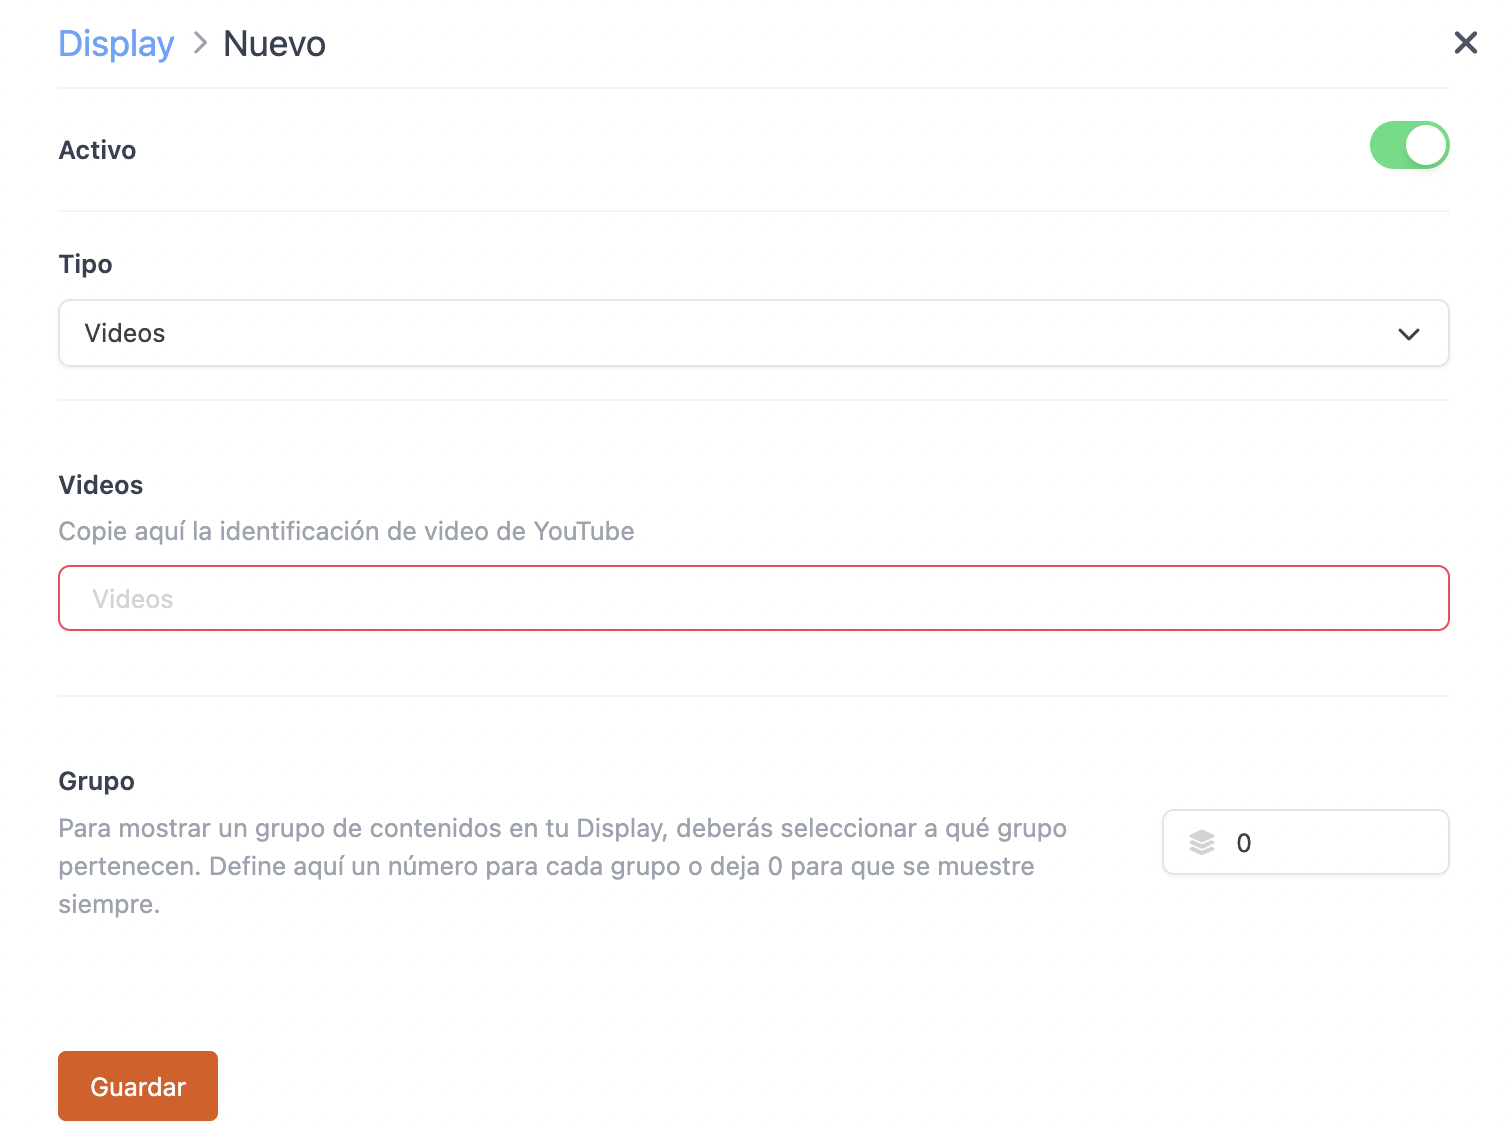
4. Paste the YouTube link and click Save.
Recommended size: 1024x768.
To change the video start time:
5. Go to the device where Revo DISPLAY is installed.
6. Go to Settings / Revo DISPLAY and adjust the VIDEO START TIME field (between 10 and 120 seconds).
Videos will play as a screensaver when there is no activity.
CREATING A SURVEY
Learn how to create surveys here for Revo XEF or here for Revo RETAIL.
4. ACTIVATING A MARKETING FORM IN THE REVO XEF AND REVO RETAIL APP
Activation is very simple.
1. Go to the REVO menu r
2. Tap to sync.
3. Go to Preferences.
4. Select the form in "Marketing Forms".
5. Enable "Show questionnaire in Revo DISPLAY".
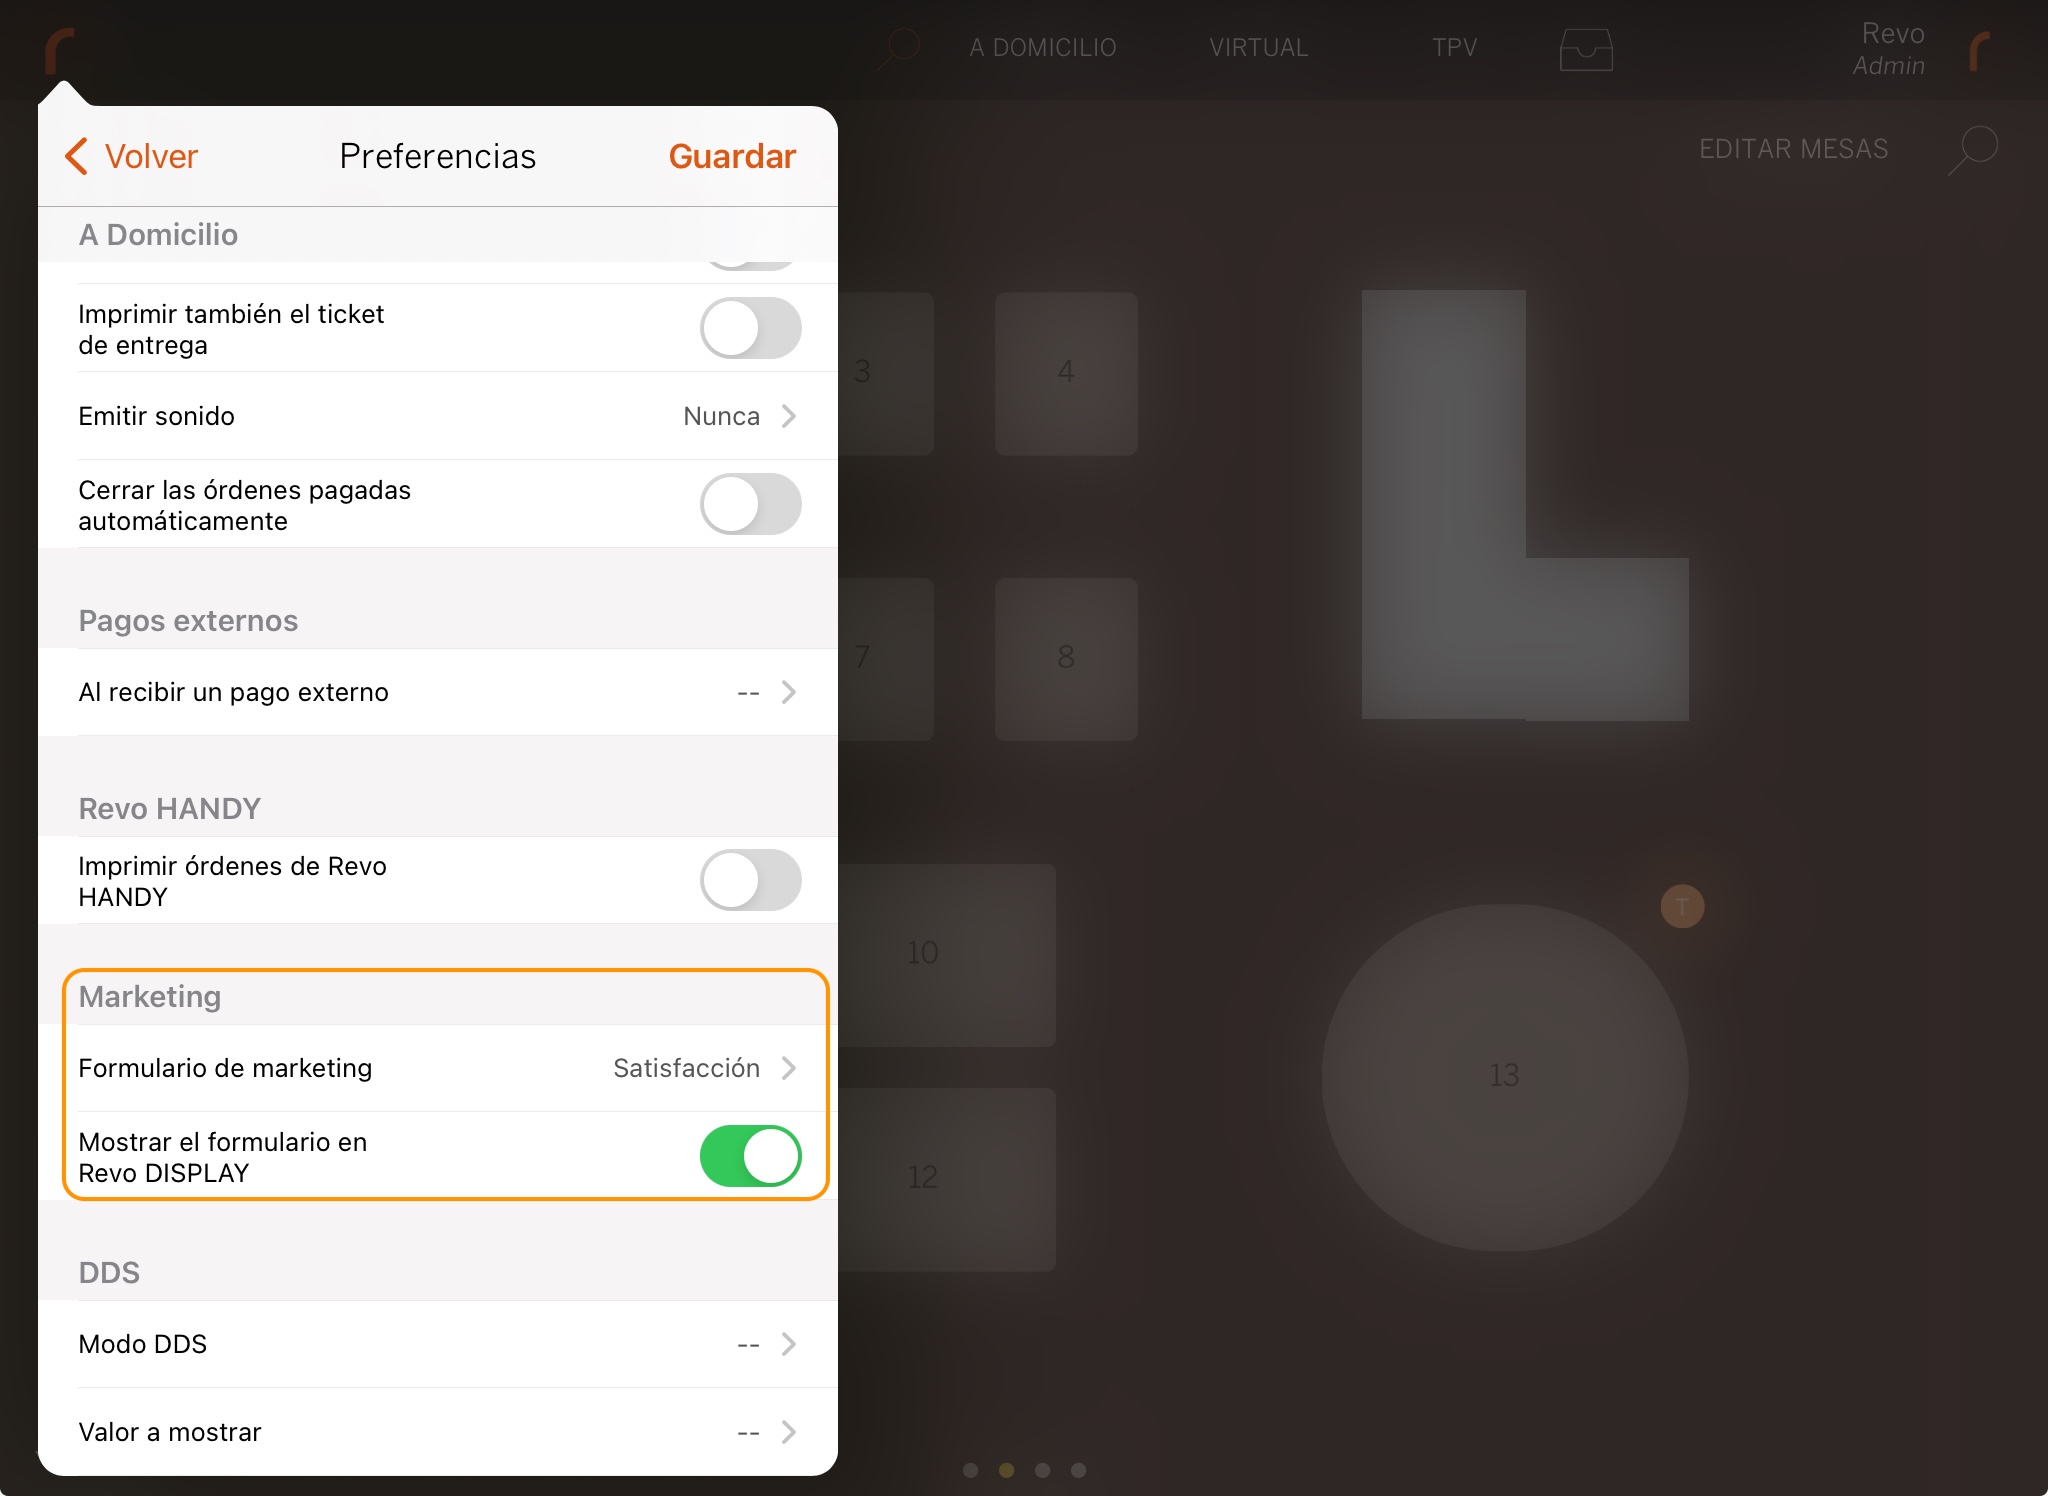
6. Tap Save to confirm.
You can have multiple surveys prepared, but only one can be shown at a time. If you disable the display option, it will appear in XEF when closing an order instead.