Here we will explain how the Google form works to configure the specifications of the WalletPass.
IMPORTANT: To fill out the form, you need to have a Google email.
In the WalletPass form, we can configure the following:
-
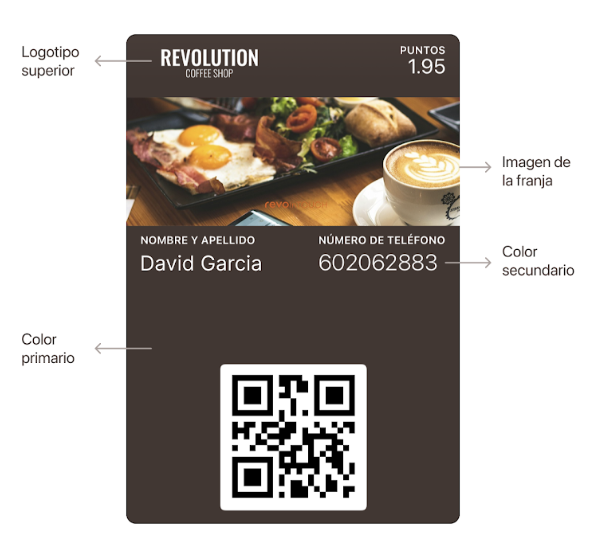
Primary Colour: We indicate the primary colour of our brand in HEX or RGB code. This colour will be displayed as the background of the Wallet Pass. Example: #000000.
-
Secondary Colour: We indicate the secondary colour of our brand in HEX or RGB code. This will be the colour of the text on the Wallet Pass. Example: #000000.
-
Top Logo: Here we add the brand logo that will be displayed at the top of the Wallet Pass.
- Minimum Size: 480 x 150 px
- Format: PNG
-
Maximum Size: 10 MB
-
Strip Image: This image is the visual representation that appears at the top or bottom of the WalletPass. Typically, it contains important information such as the company logo, event details, discounts, or the card.
- Minimum Size: 1125 x 336 px (note that the safe area is 900 x 336 px, size displayed on Apple)
- Format: PNG
-
Maximum Size: 10 MB
-
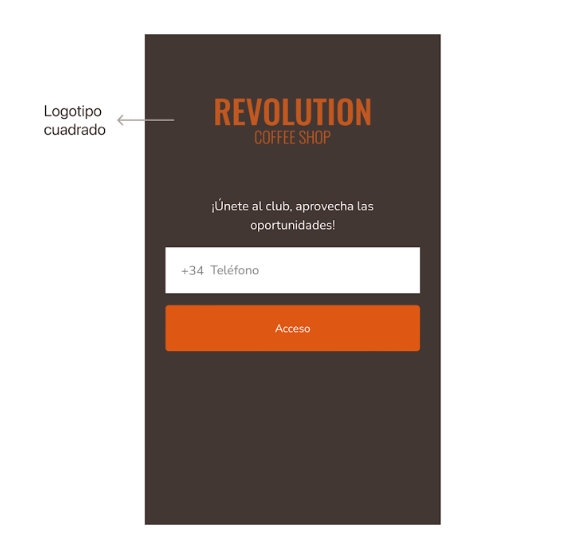
Square Logo: Here we add the brand logo that will be displayed on the WalletPass download page.
- Minimum Size: 750 x 750 px
- Format: PNG
-
Maximum Size: 10 MB


IMPORTANT: In the BASIC PLAN, only the number of perforations will be visible, without images.
If we want to use images, we will need to upgrade to the PLUS PLAN.
