STATUS: ACTIVE
VERSION: 3.5.1
1. WHAT IS GUESTPRO? 2. HOW DOES THE INTEGRATION BETWEEN GUESTPRO <-> REVO? 3. REVO CONFIGURATION 4. HOW TO MAKE A ROOM CHARGE? 5. HOW TO CANCEL A ROOM CHARGE? 6. GUESTPRO BACKOFFICE
1. WHAT IS GUESTPRO?
GuestPro is a modern platform for managing hotels.
It helps you save time and avoid mistakes, so you can focus on the customer, the product, and the competition.
- All-in-one: automate tasks from a single environment
- 100% in the cloud: no installations, easy to use, and always available
- Stable and secure: your data is protected on high-performance servers
- Open: easy to integrate thanks to its API
2. HOW DOES THE INTEGRATION BETWEEN GUESTPRO <-> REVO?
Connecting GuestPro with REVO allows you to work with both systems in the cloud.
This integration allows you to:
- Charges from REVO directly to the guest's room or bed.
- If you set it up this way, restaurant invoices will also be sent to GuestPro.
3. REVO CONFIGURATION
INTEGRATION CONFIGURATION
1. Log into the back-office of Revo XEF.
2. Go to Integrations / INTEGRATIONS.
3. Click on + New, search GuestPro and select + Add.

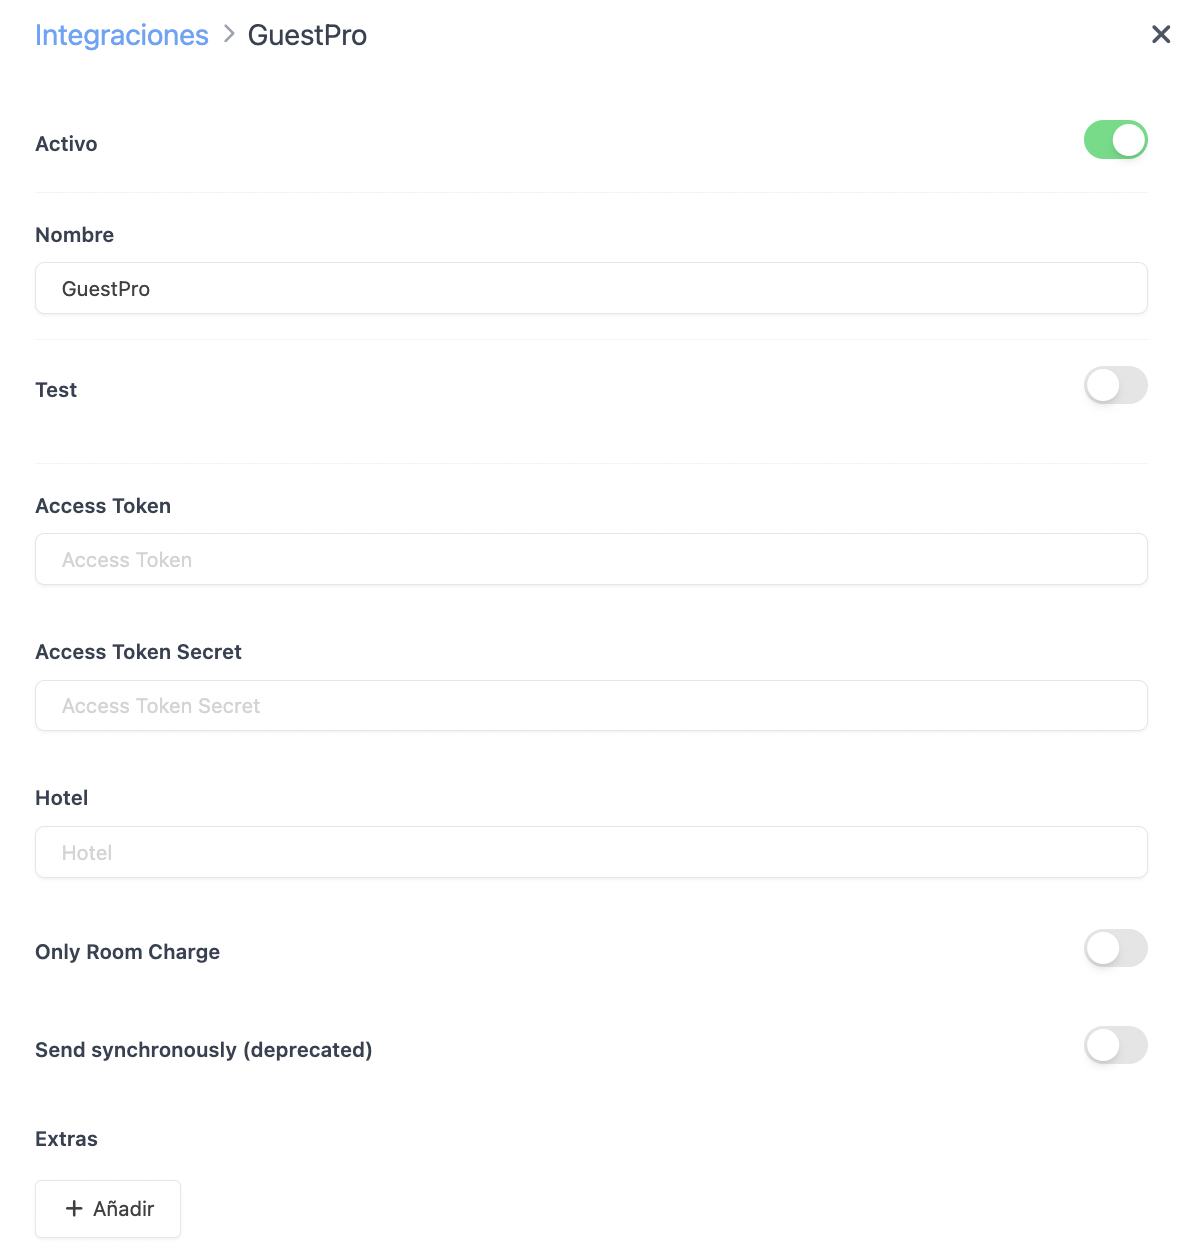
4. Fill in these fields:
-
Active:
-
Name: Give a name to the integration.
-
Test: Disabled.
-
Access Token: Provided by GuestPro.
-
Access Token Secret: Provided by GuestPro.
-
Hotel: Provided by GuestPro.
-
Only Room Charge: Enable it if you only want to send room charges.
-
Send synchronously (deprecated):
- Enabled: Invoices are sent to GuestPro when they are generated.
-
Disabled: Invoices will only be sent to GuestPro when the shift is closed.
-
Extras: Set up the general groups of the products in your catalogue with those of GuestPro (Backoffice GuestPro / Configuration / Extras).
-
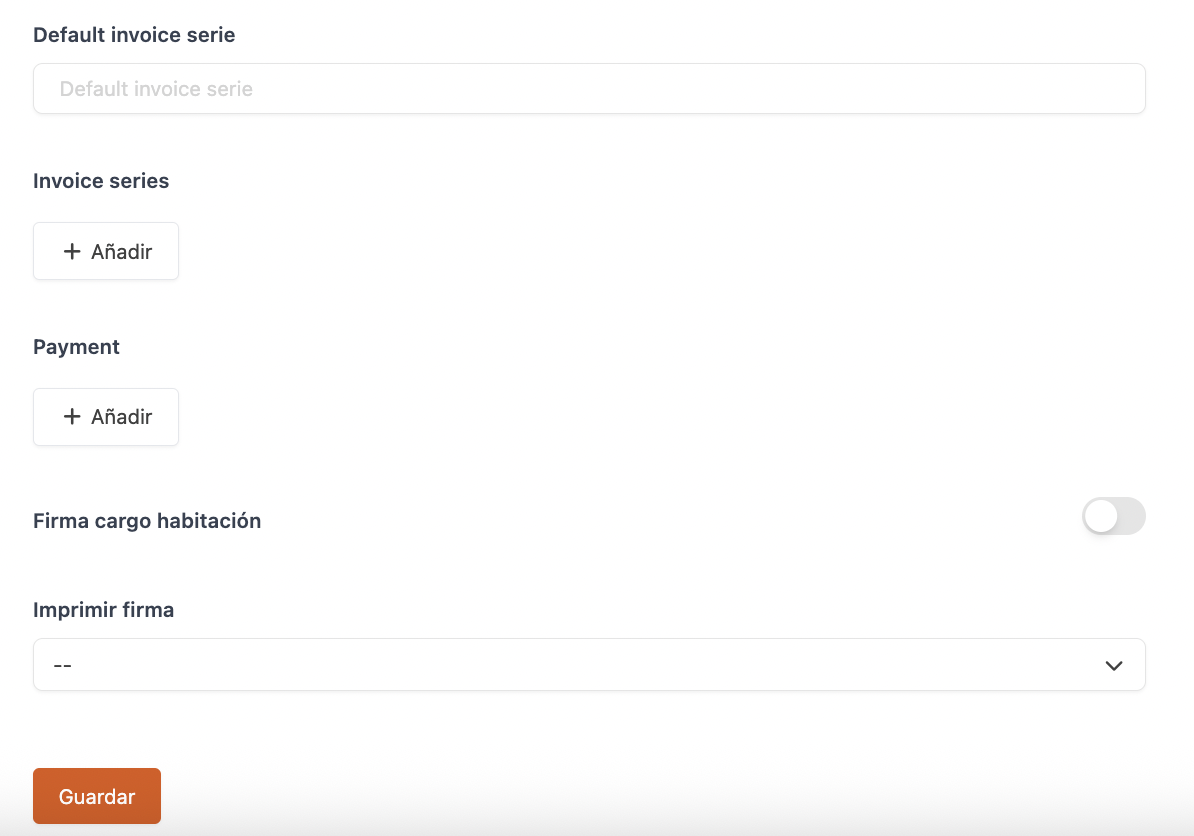
Default invoice series: ID of the series you want to use by default in GuestPro (Backoffice GuestPro / Invoicing / Invoice series).
-
Invoice series: Map the billing series of the counters with those of GuestPro (Backoffice GuestPro / Invoicing / Invoice series).
-
Payment: Map the payment methods with those of GuestPro (Backoffice GuestPro / Configuration / Settings / Payment methods).
-
Room charge signature: Enable it to request the customer's signature.
-
Print signature: Choose if you want to print the signature.
6. Press Save.
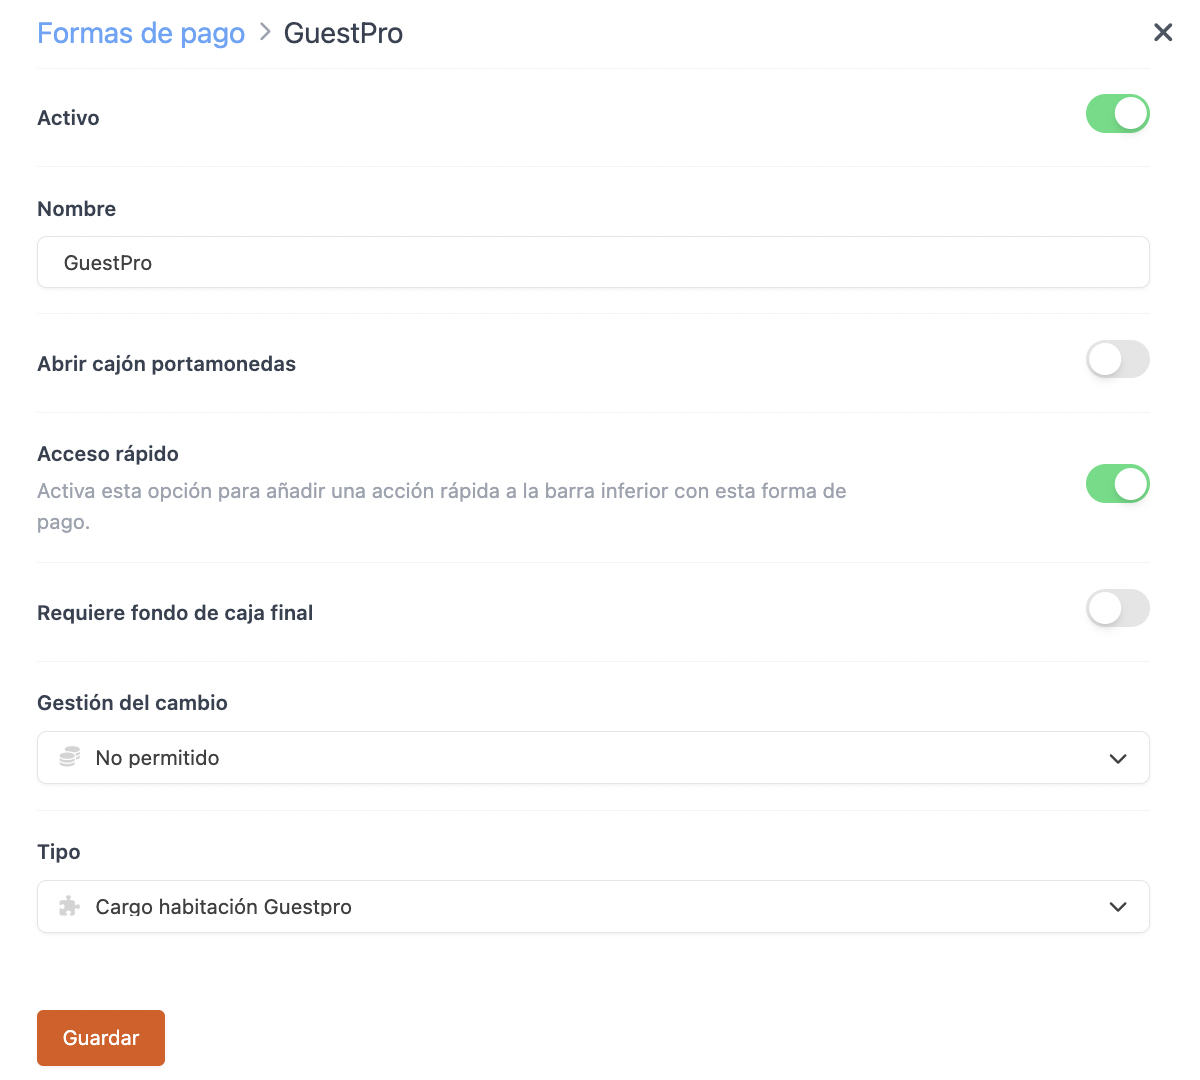
PAYMENT METHOD SETUP
1. Go to Settings / PAYMENT METHODS.
2. It will have been created automatically. You can edit it by clicking .
-
Active:
-
Name: GuestPro.
-
Open cash drawer:
-
Quick access: Activate it if you want to have it handy.
Requires Revo XEF Advance.
-
Requires final cash fund: Activate it if you need it.
-
Change management: Not allowed.
-
Type: GuestPro room charge.
4. Click Save.
Done! You already have the integration set up.
4. HOW TO MAKE A ROOM CHARGE
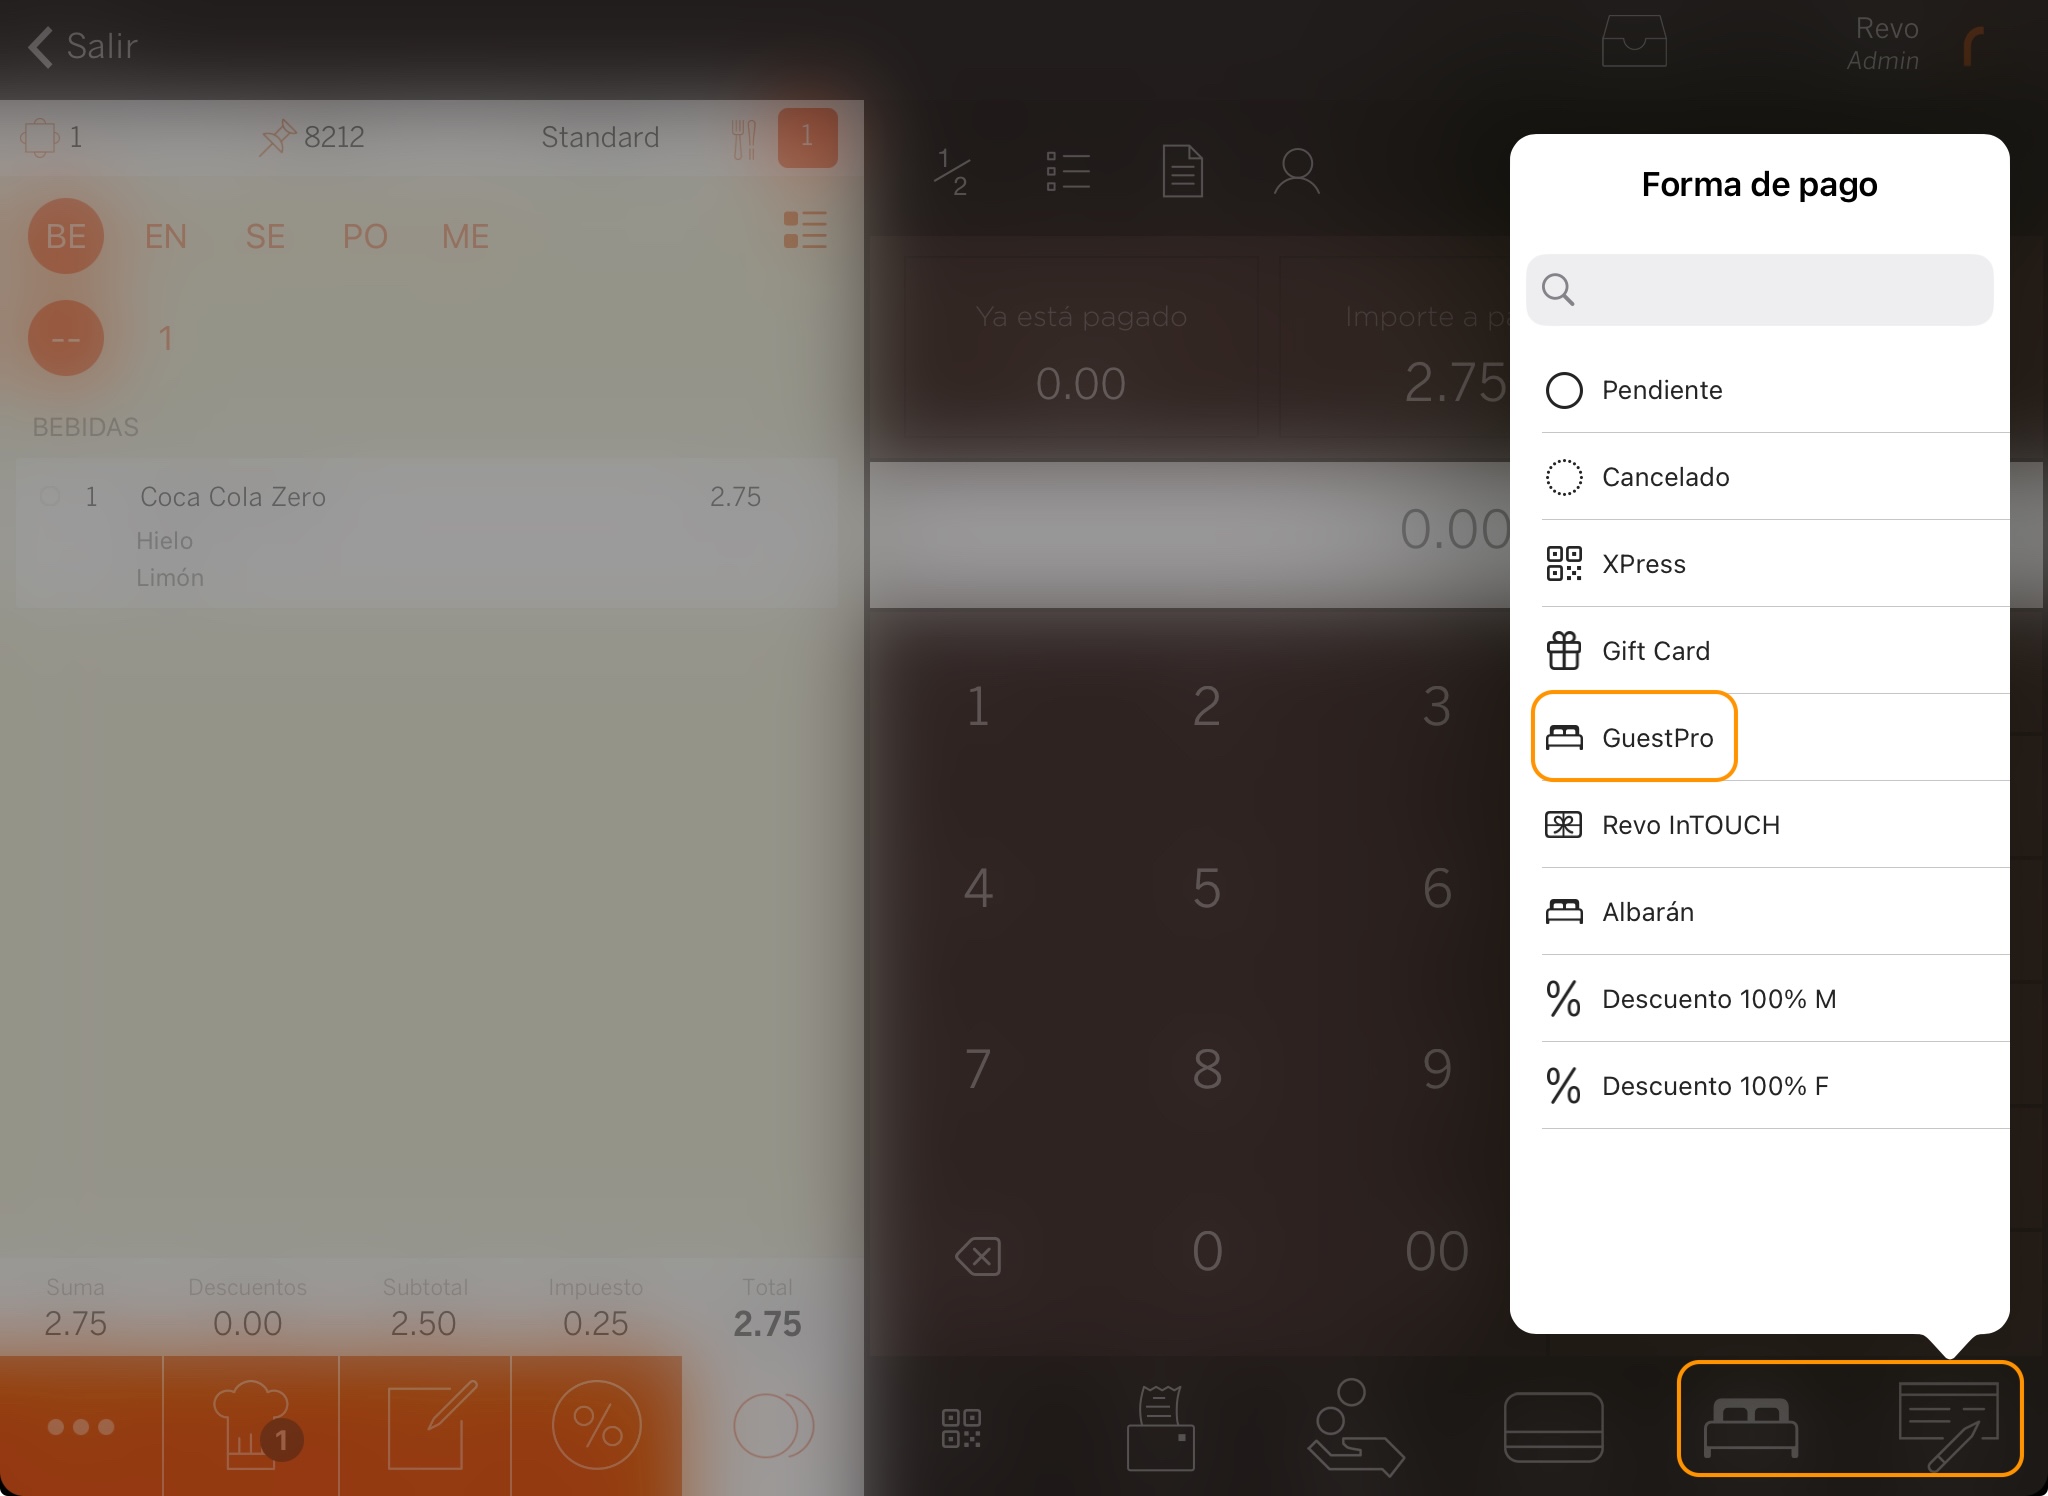
1. Open an order, add products, and click on pay.
2. If you have quick access, press . If not, click on other payment methods and choose GuestPro.
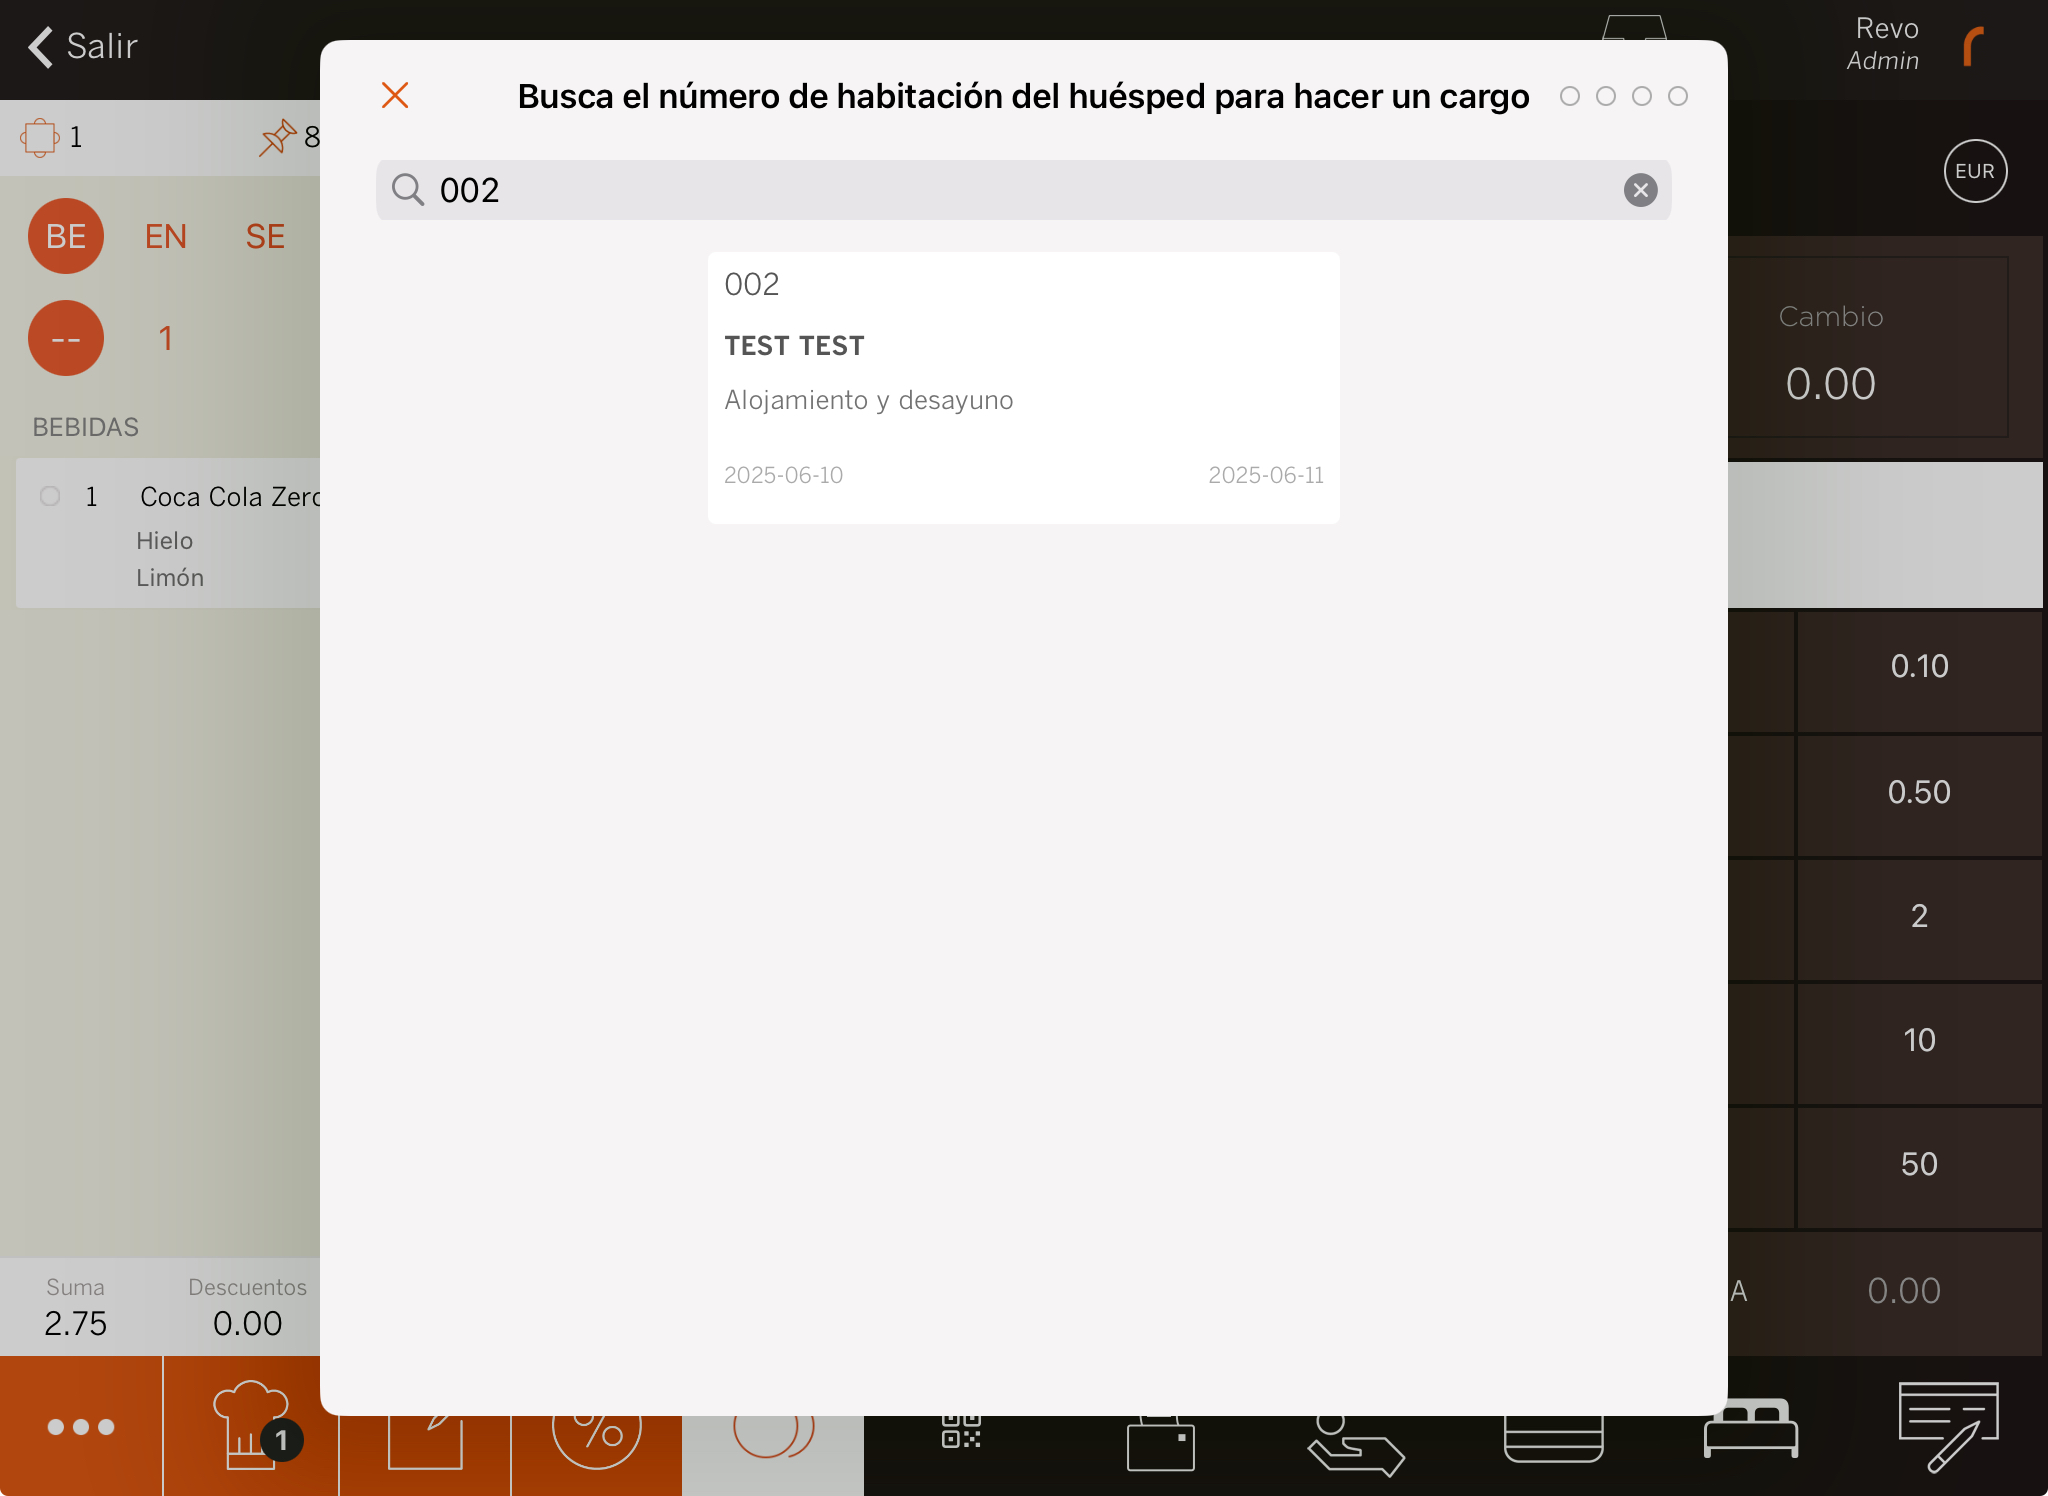
3. Write the room number. You can only search by room and not by guest.
5. If you have activated Room Charge Signature: ask the customer to sign and press .
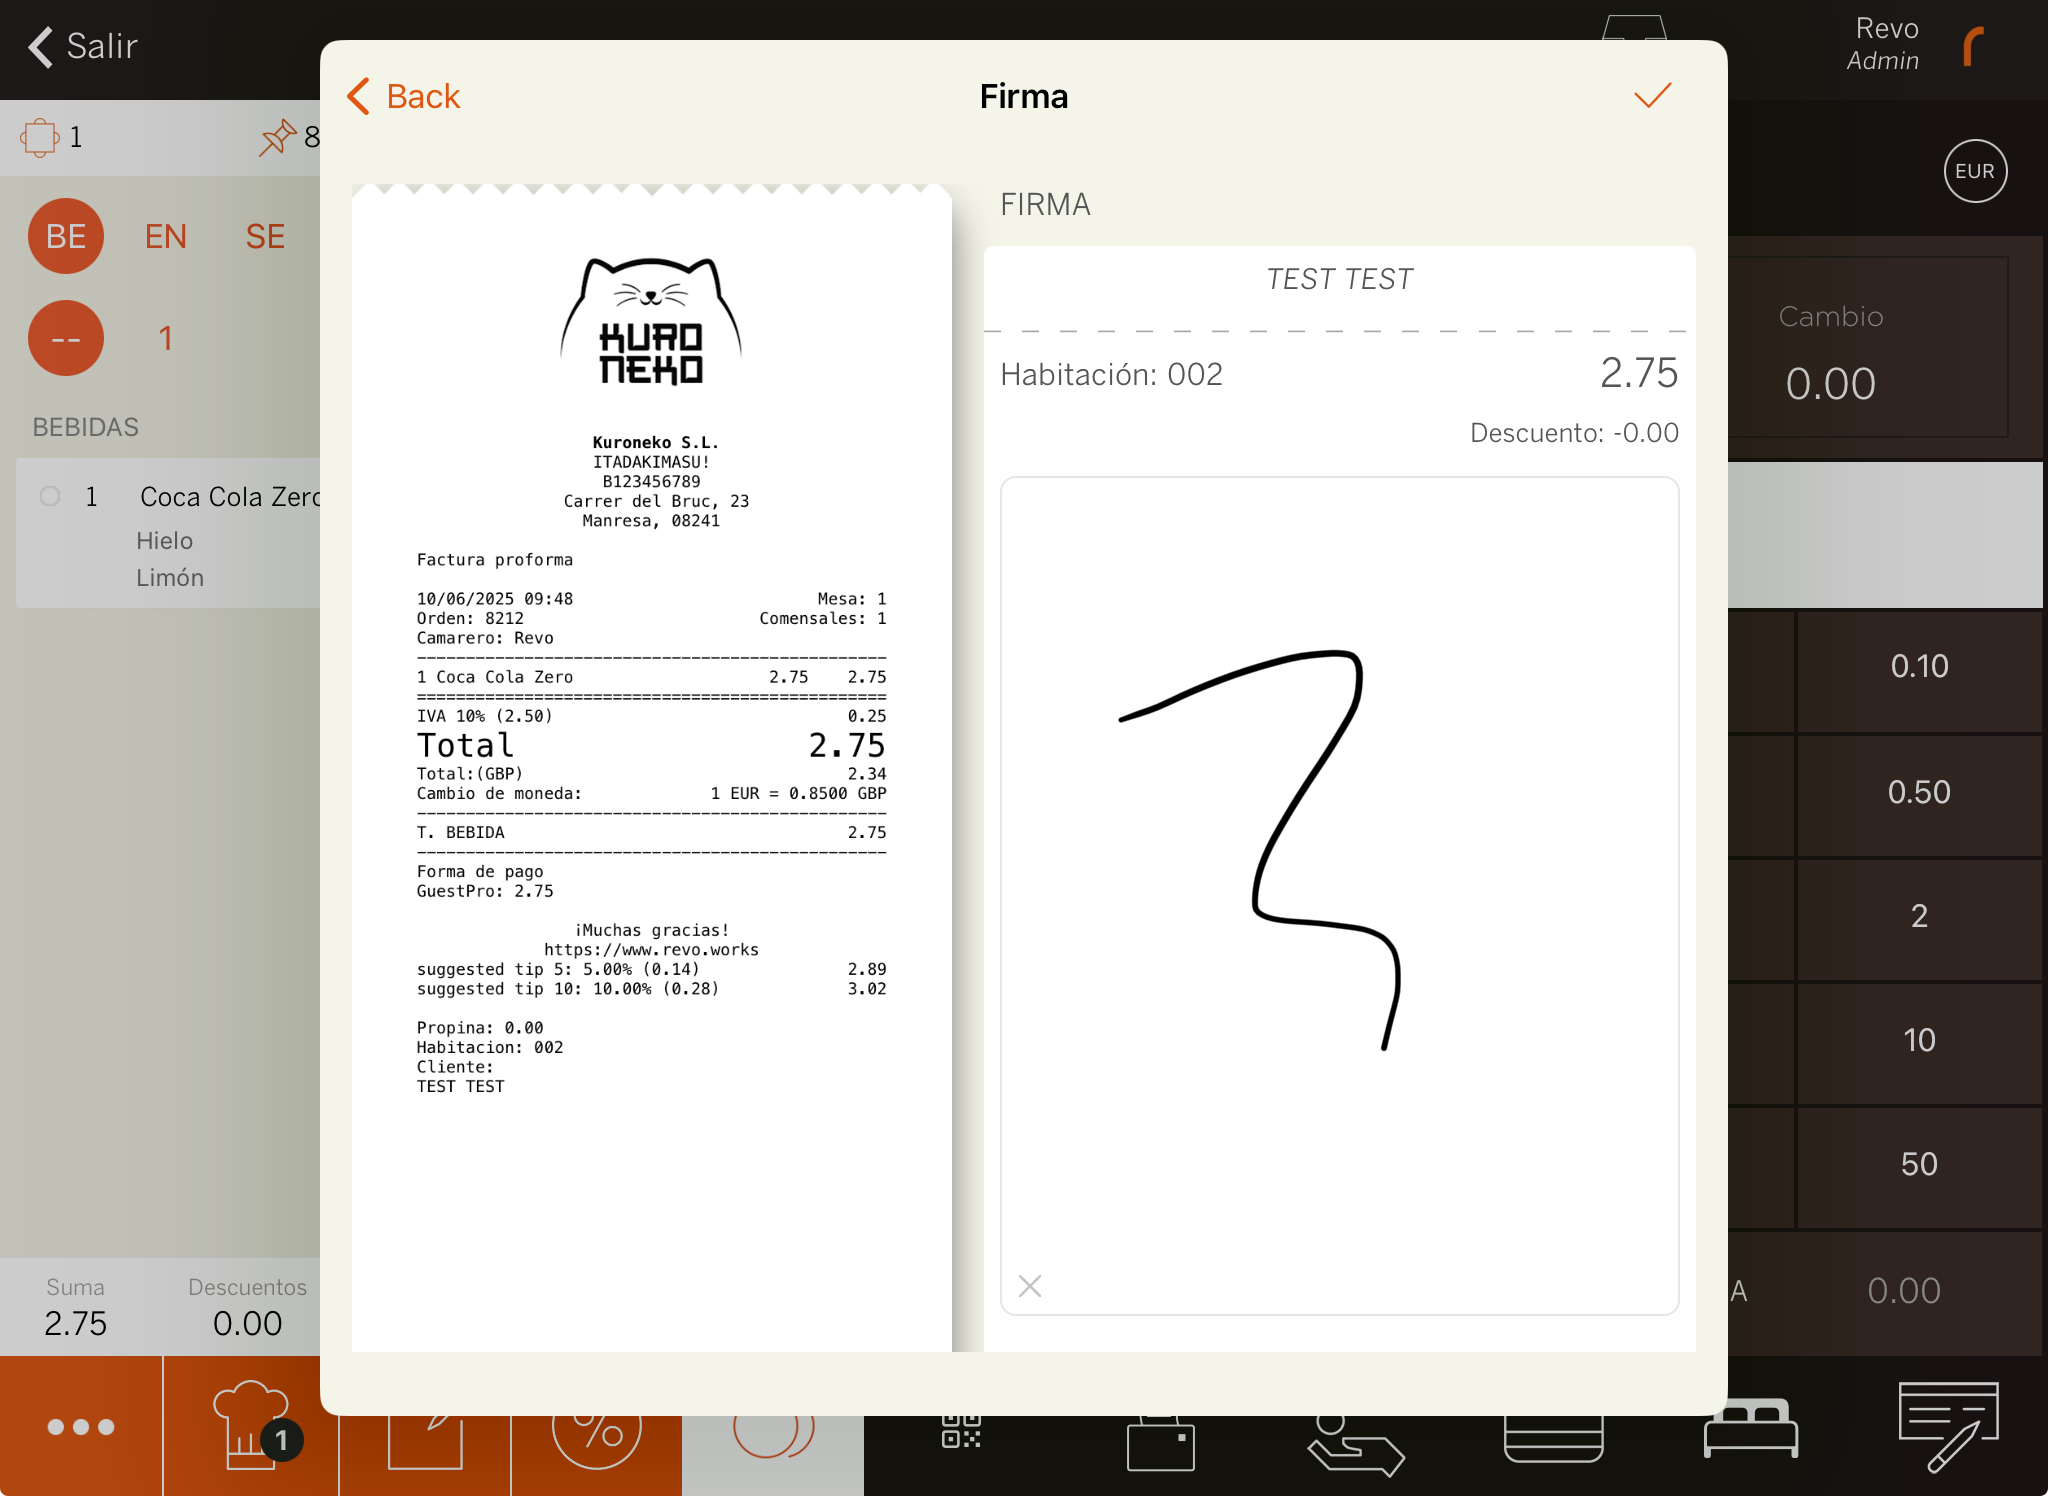
6. The system will print the receipt or ask you if you want to print it.
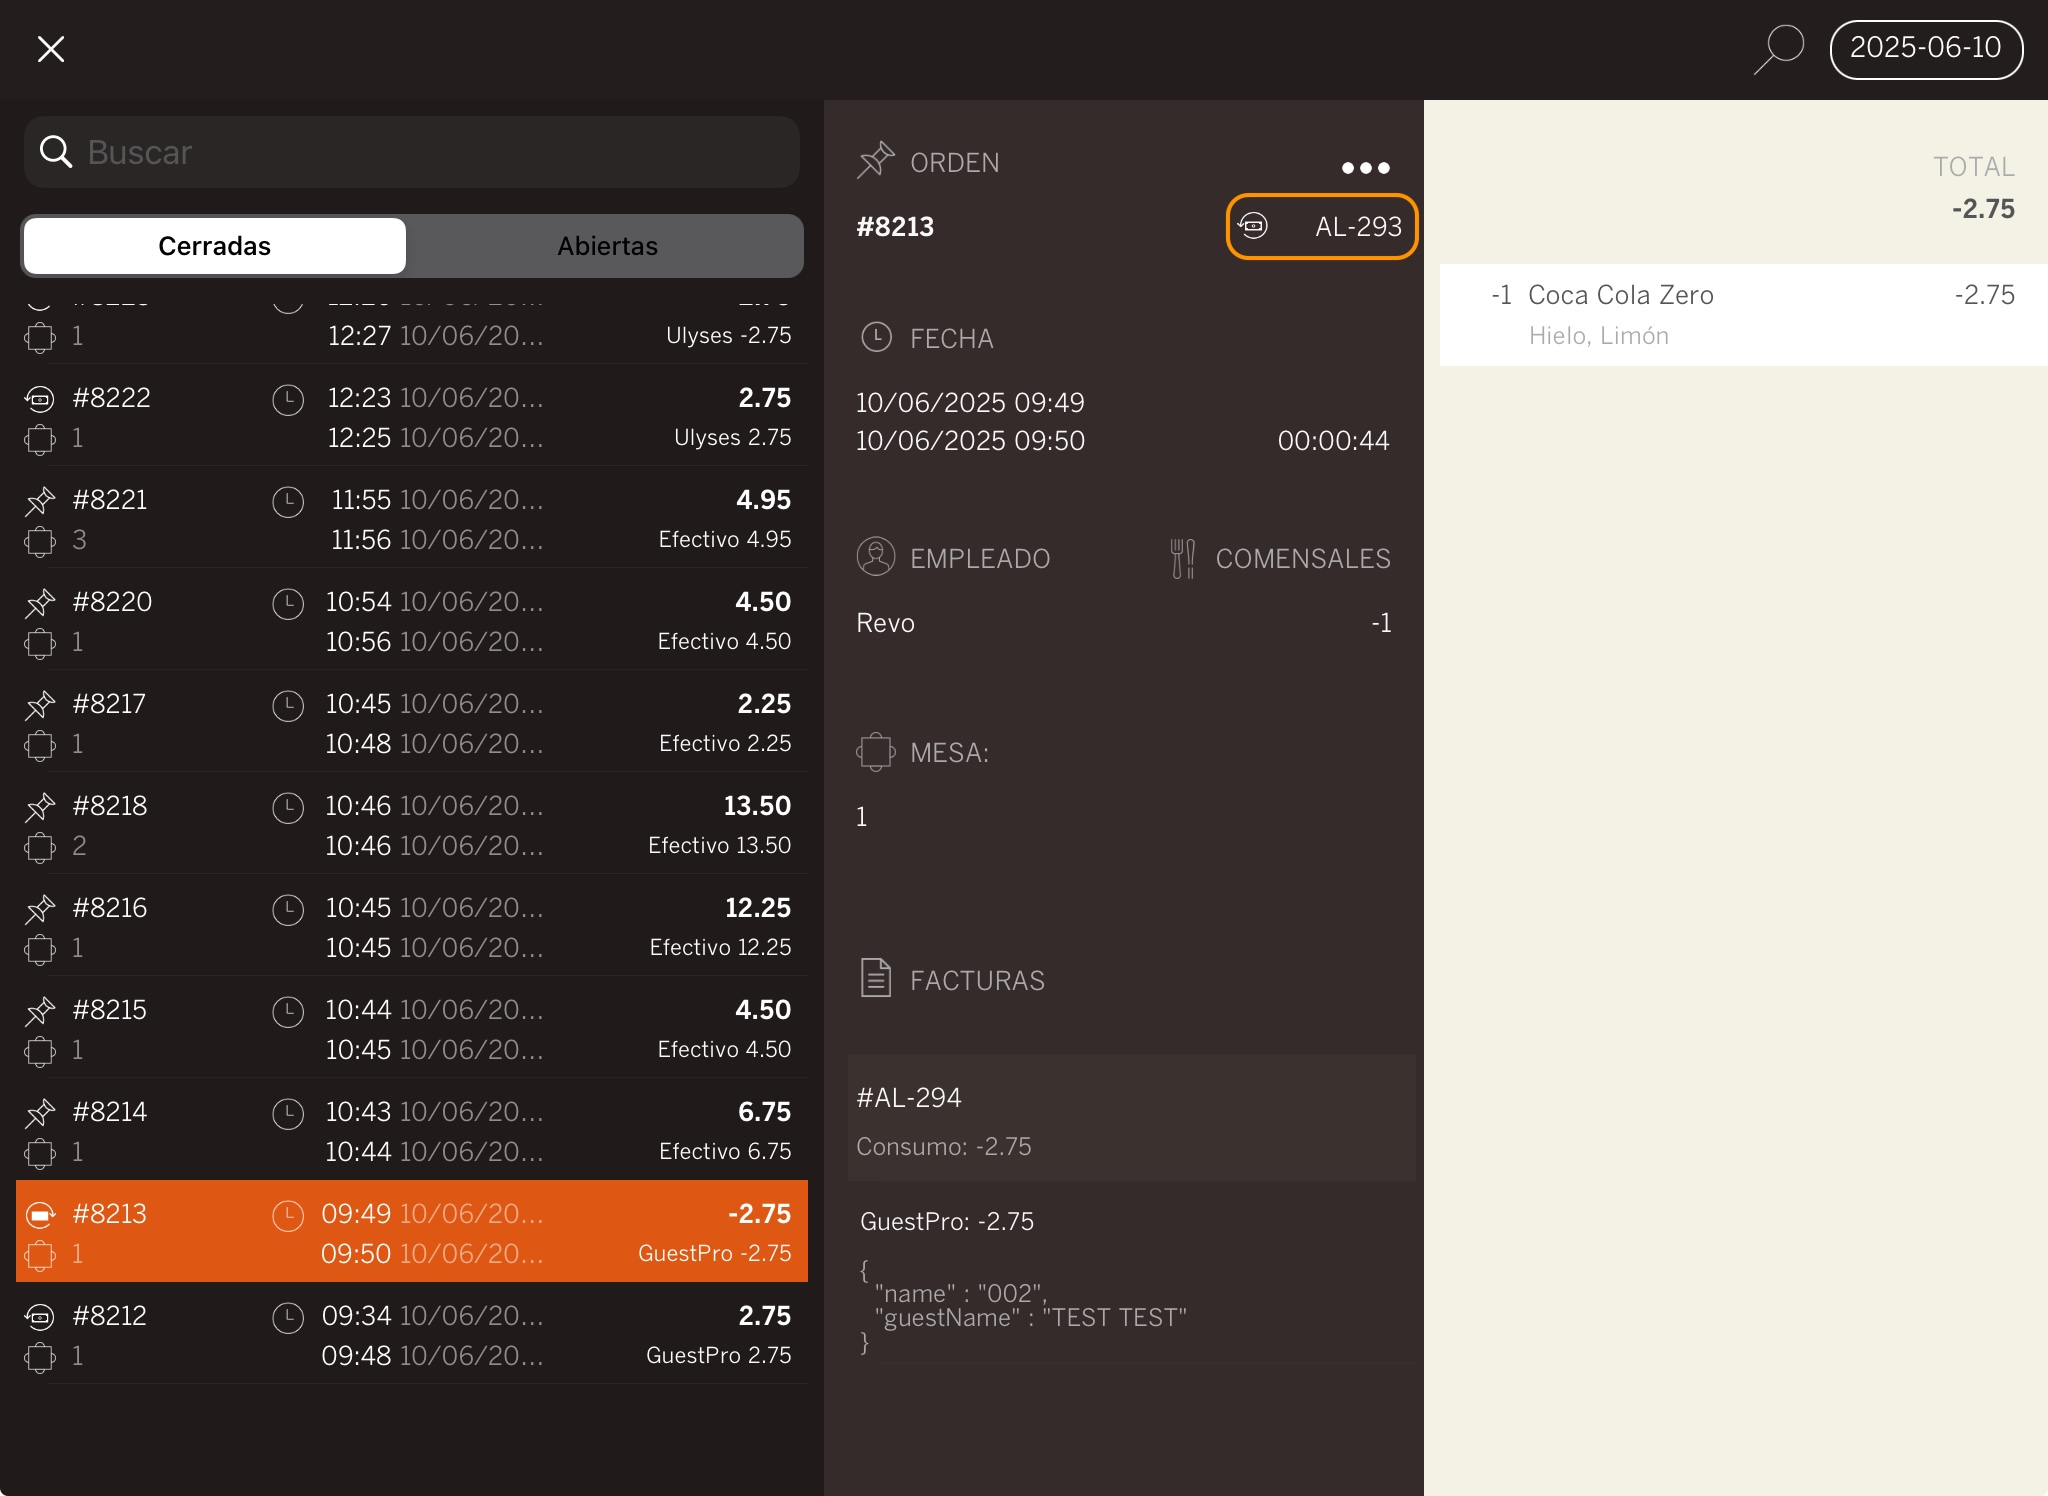
5. HOW TO CANCEL A ROOM CHARGE
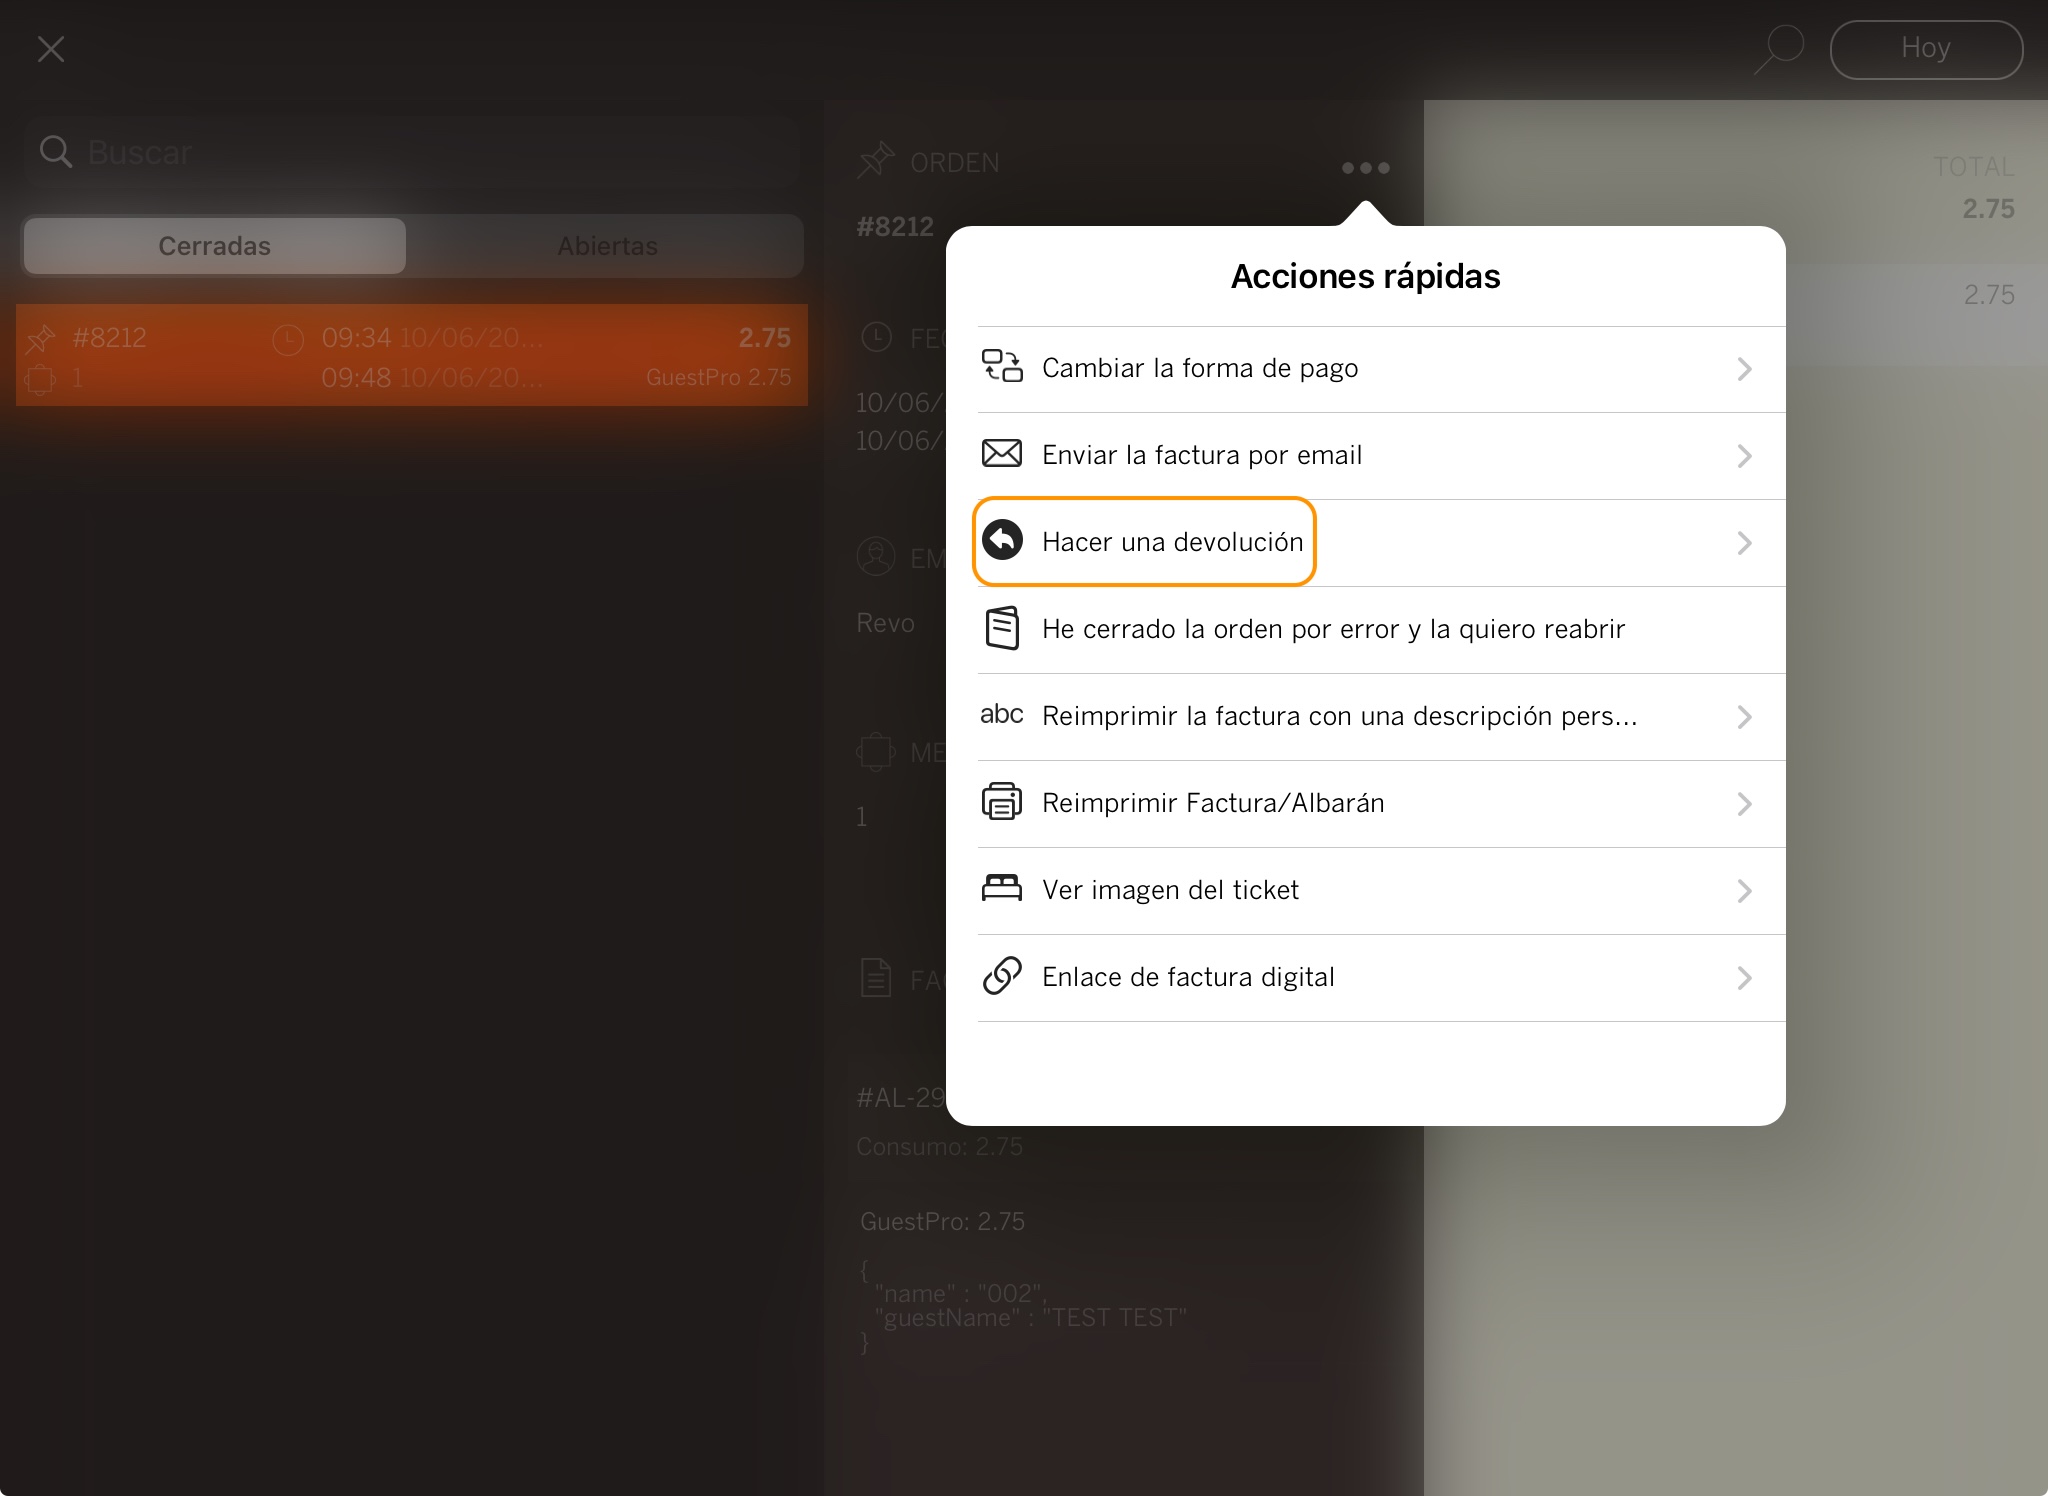
1. In the REVO menu r, go to History.
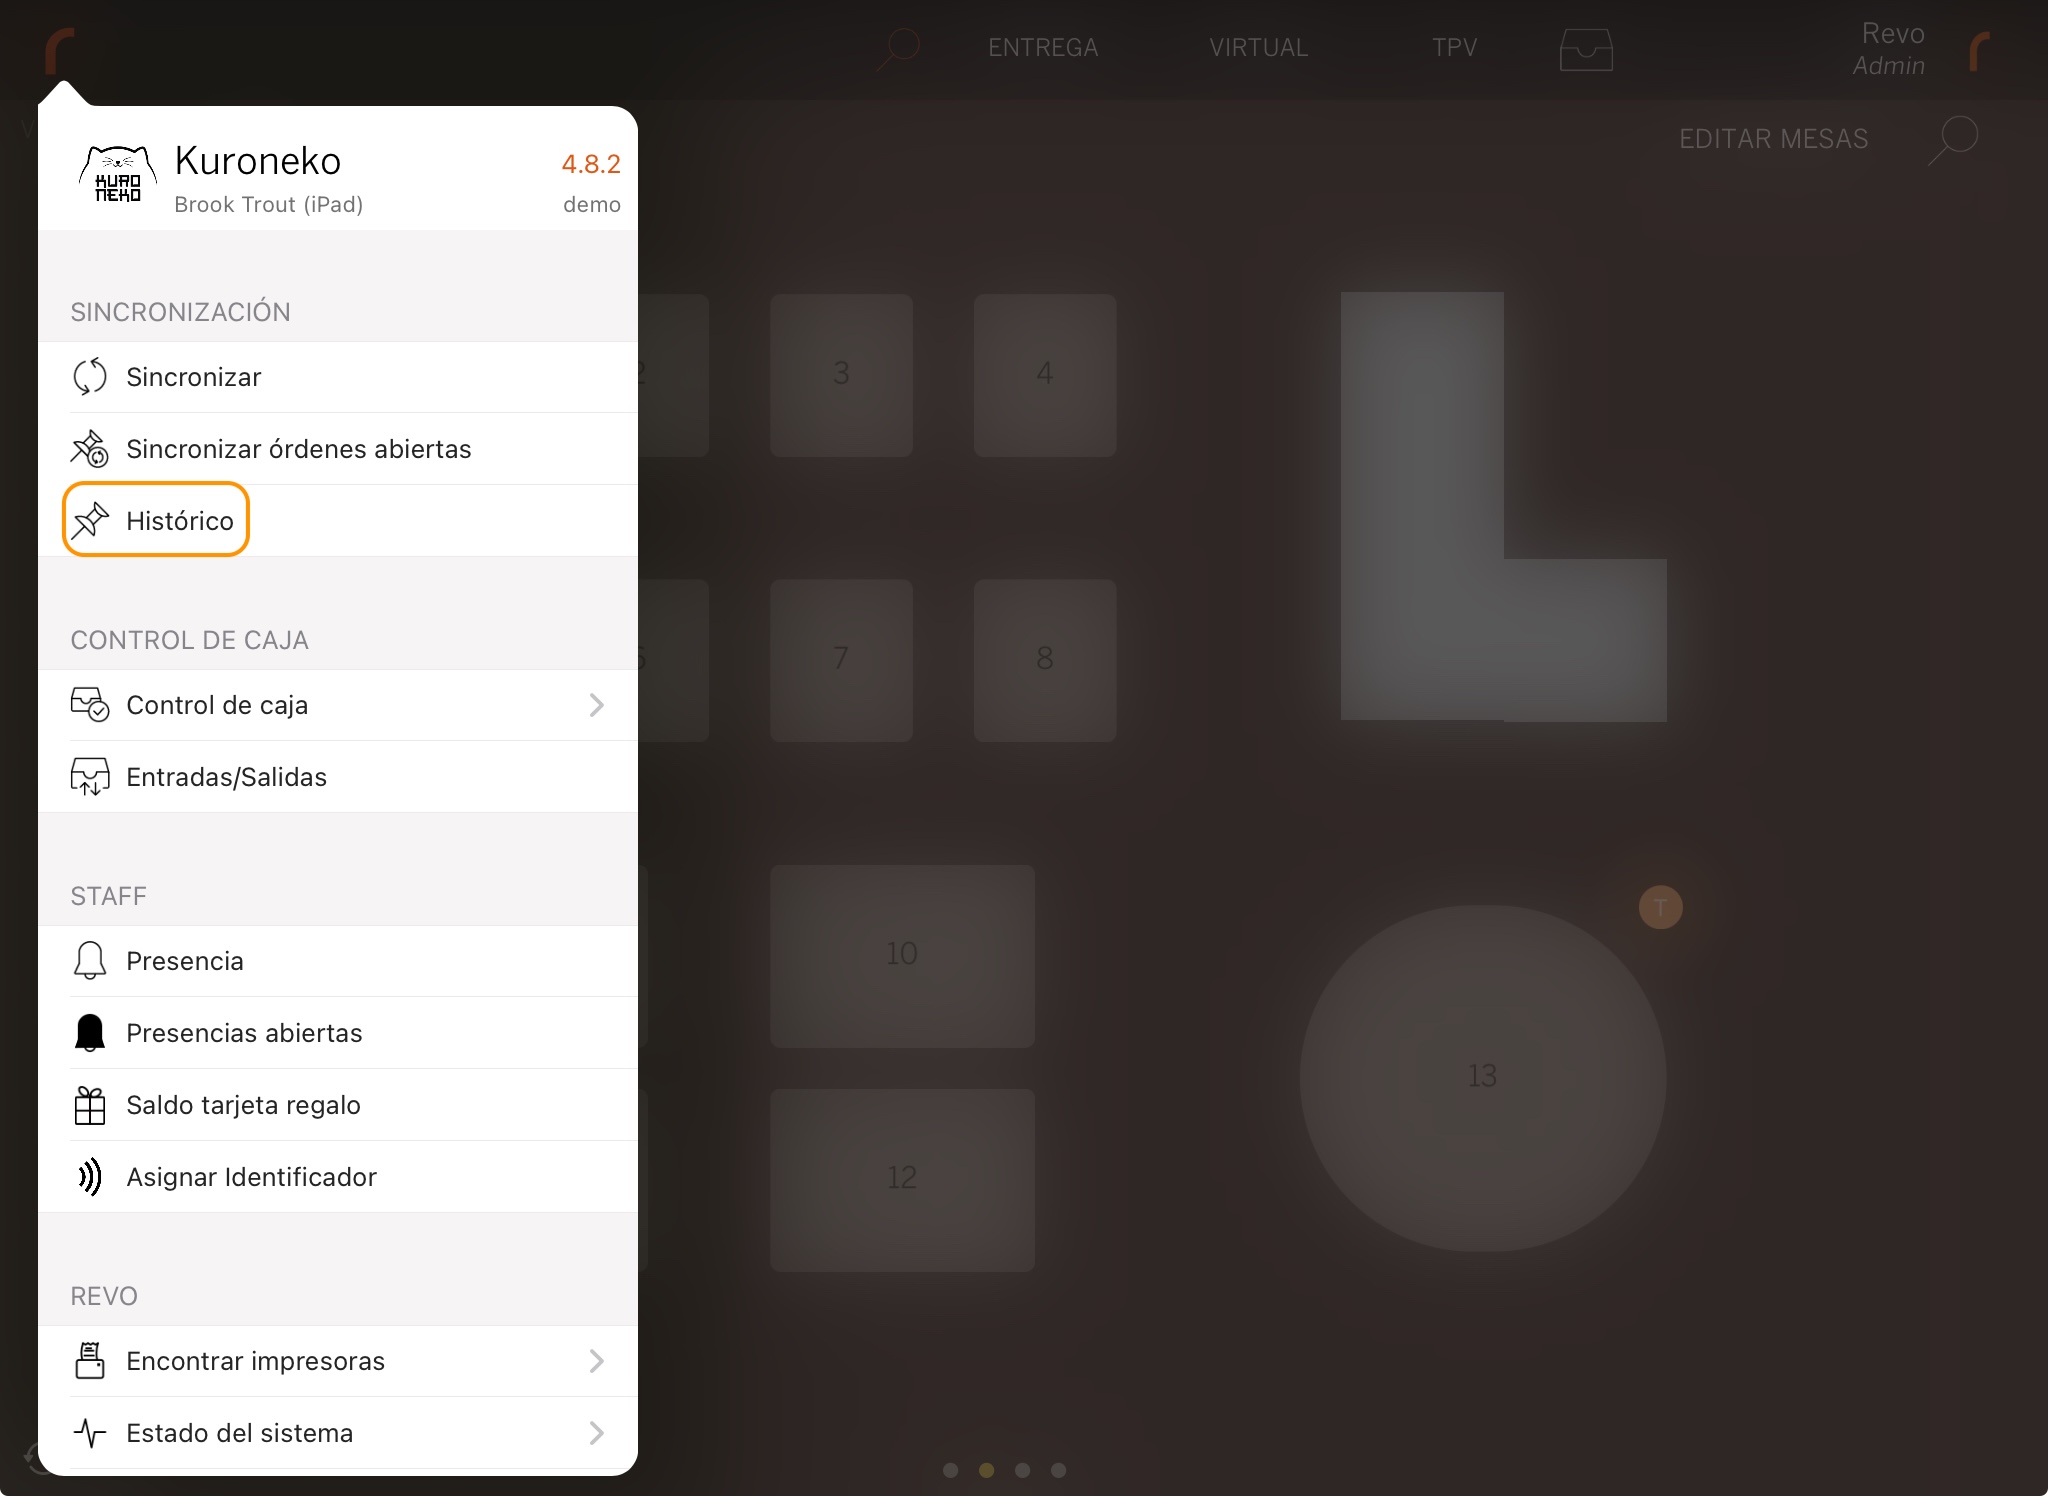
2. Search for the order, click to see Quick Actions and select Make a Return.
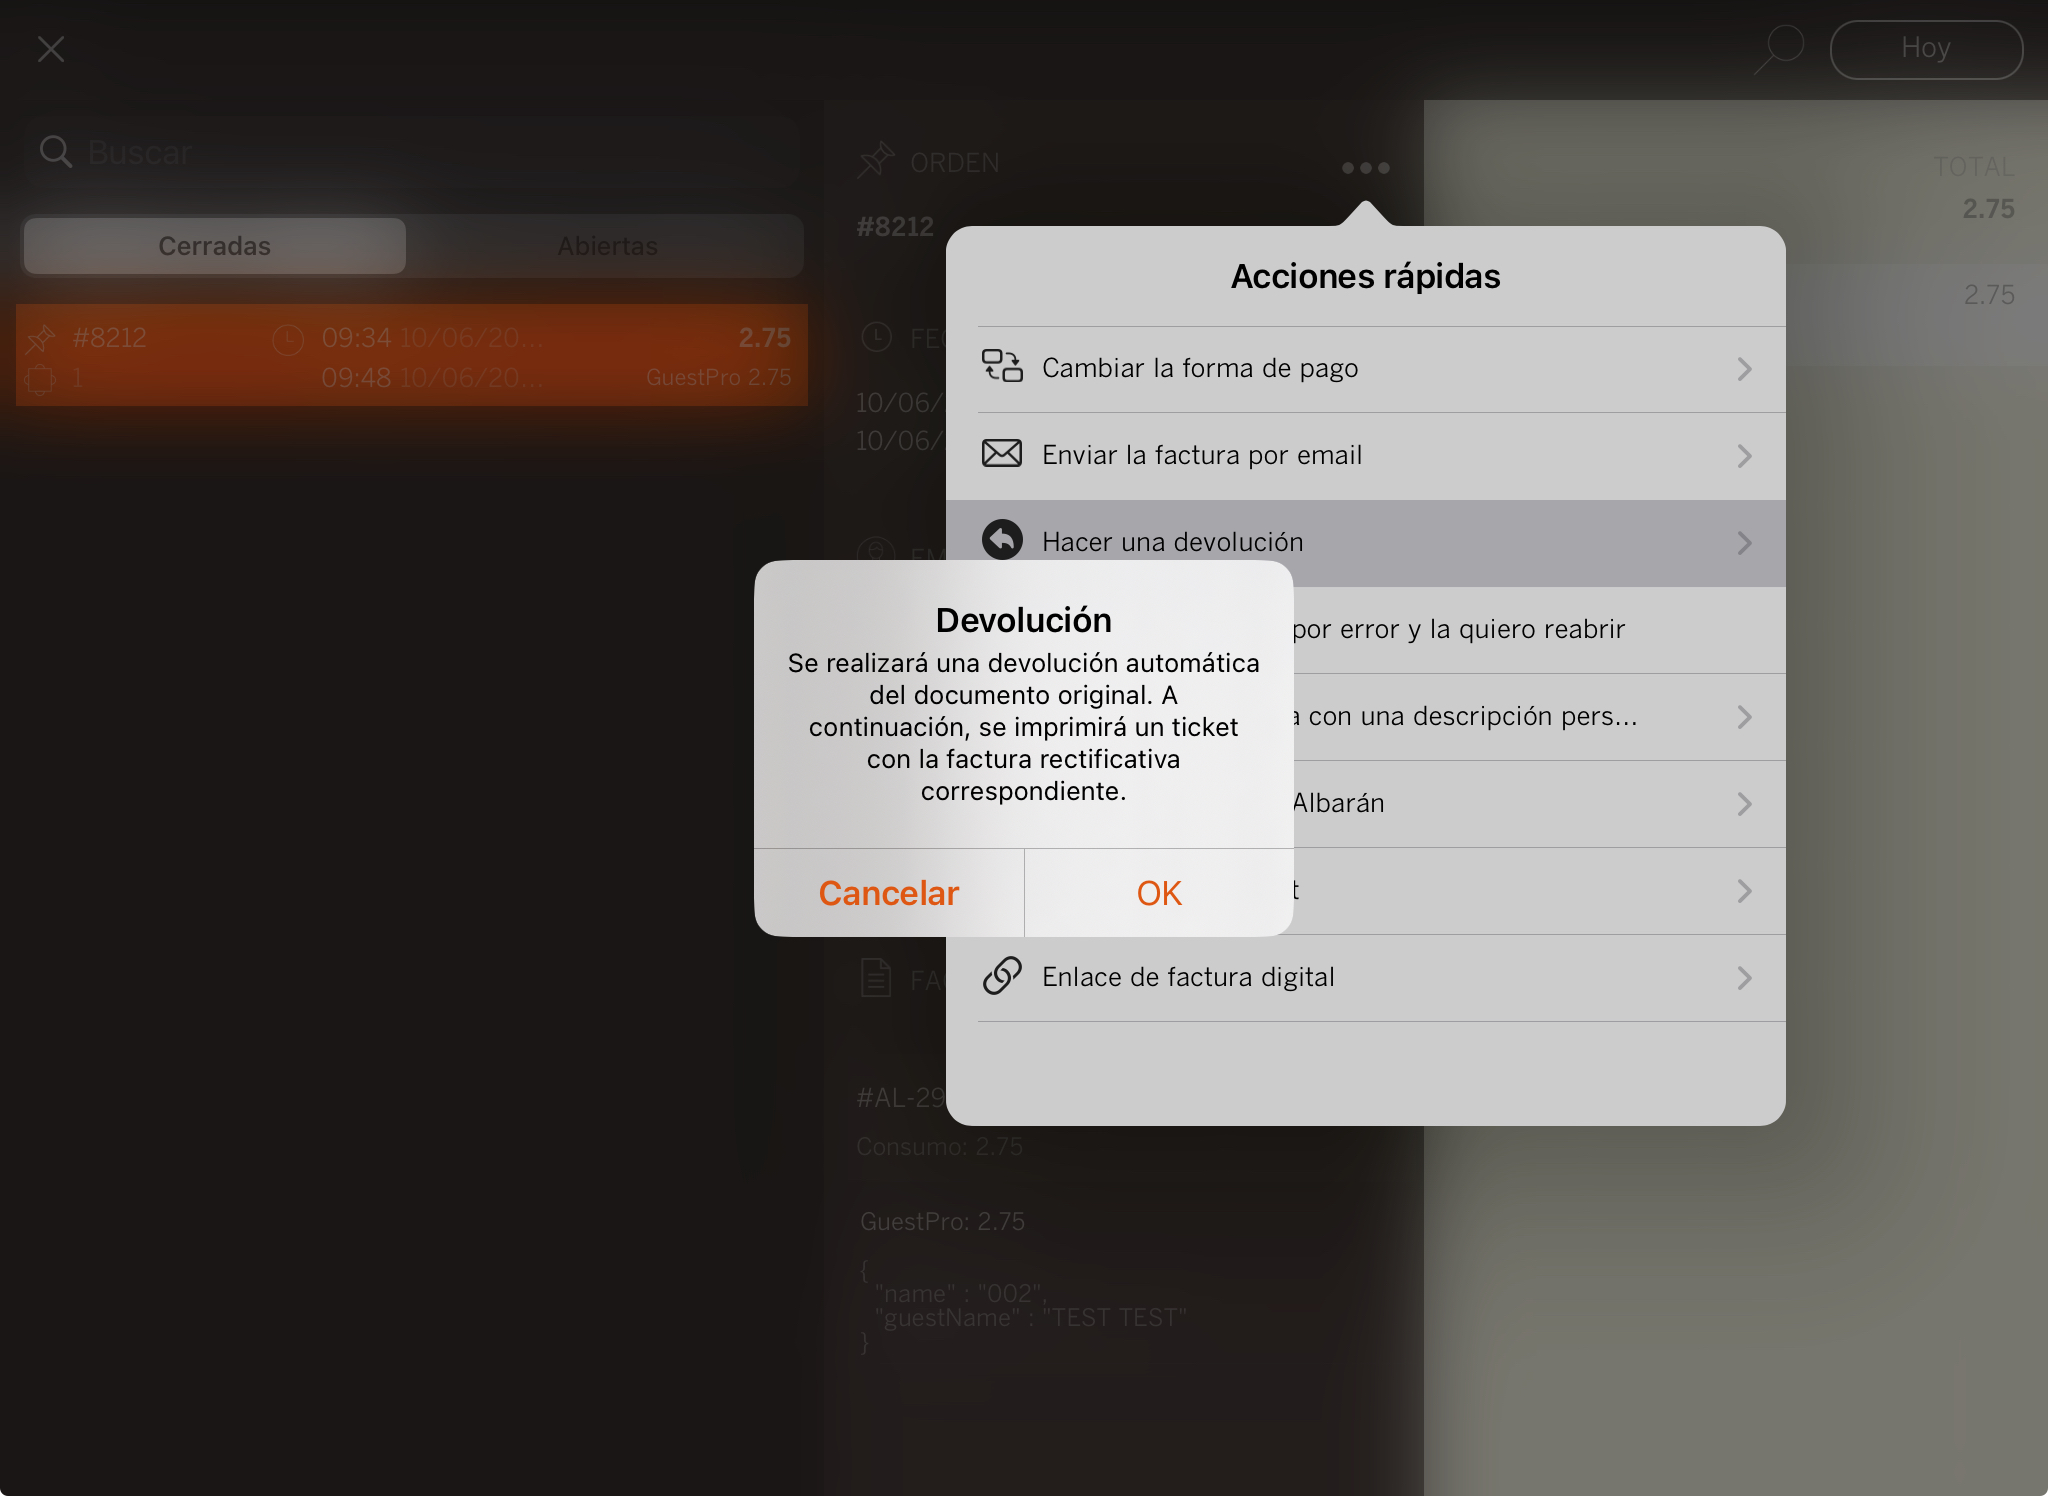
3. Confirm by tapping OK.
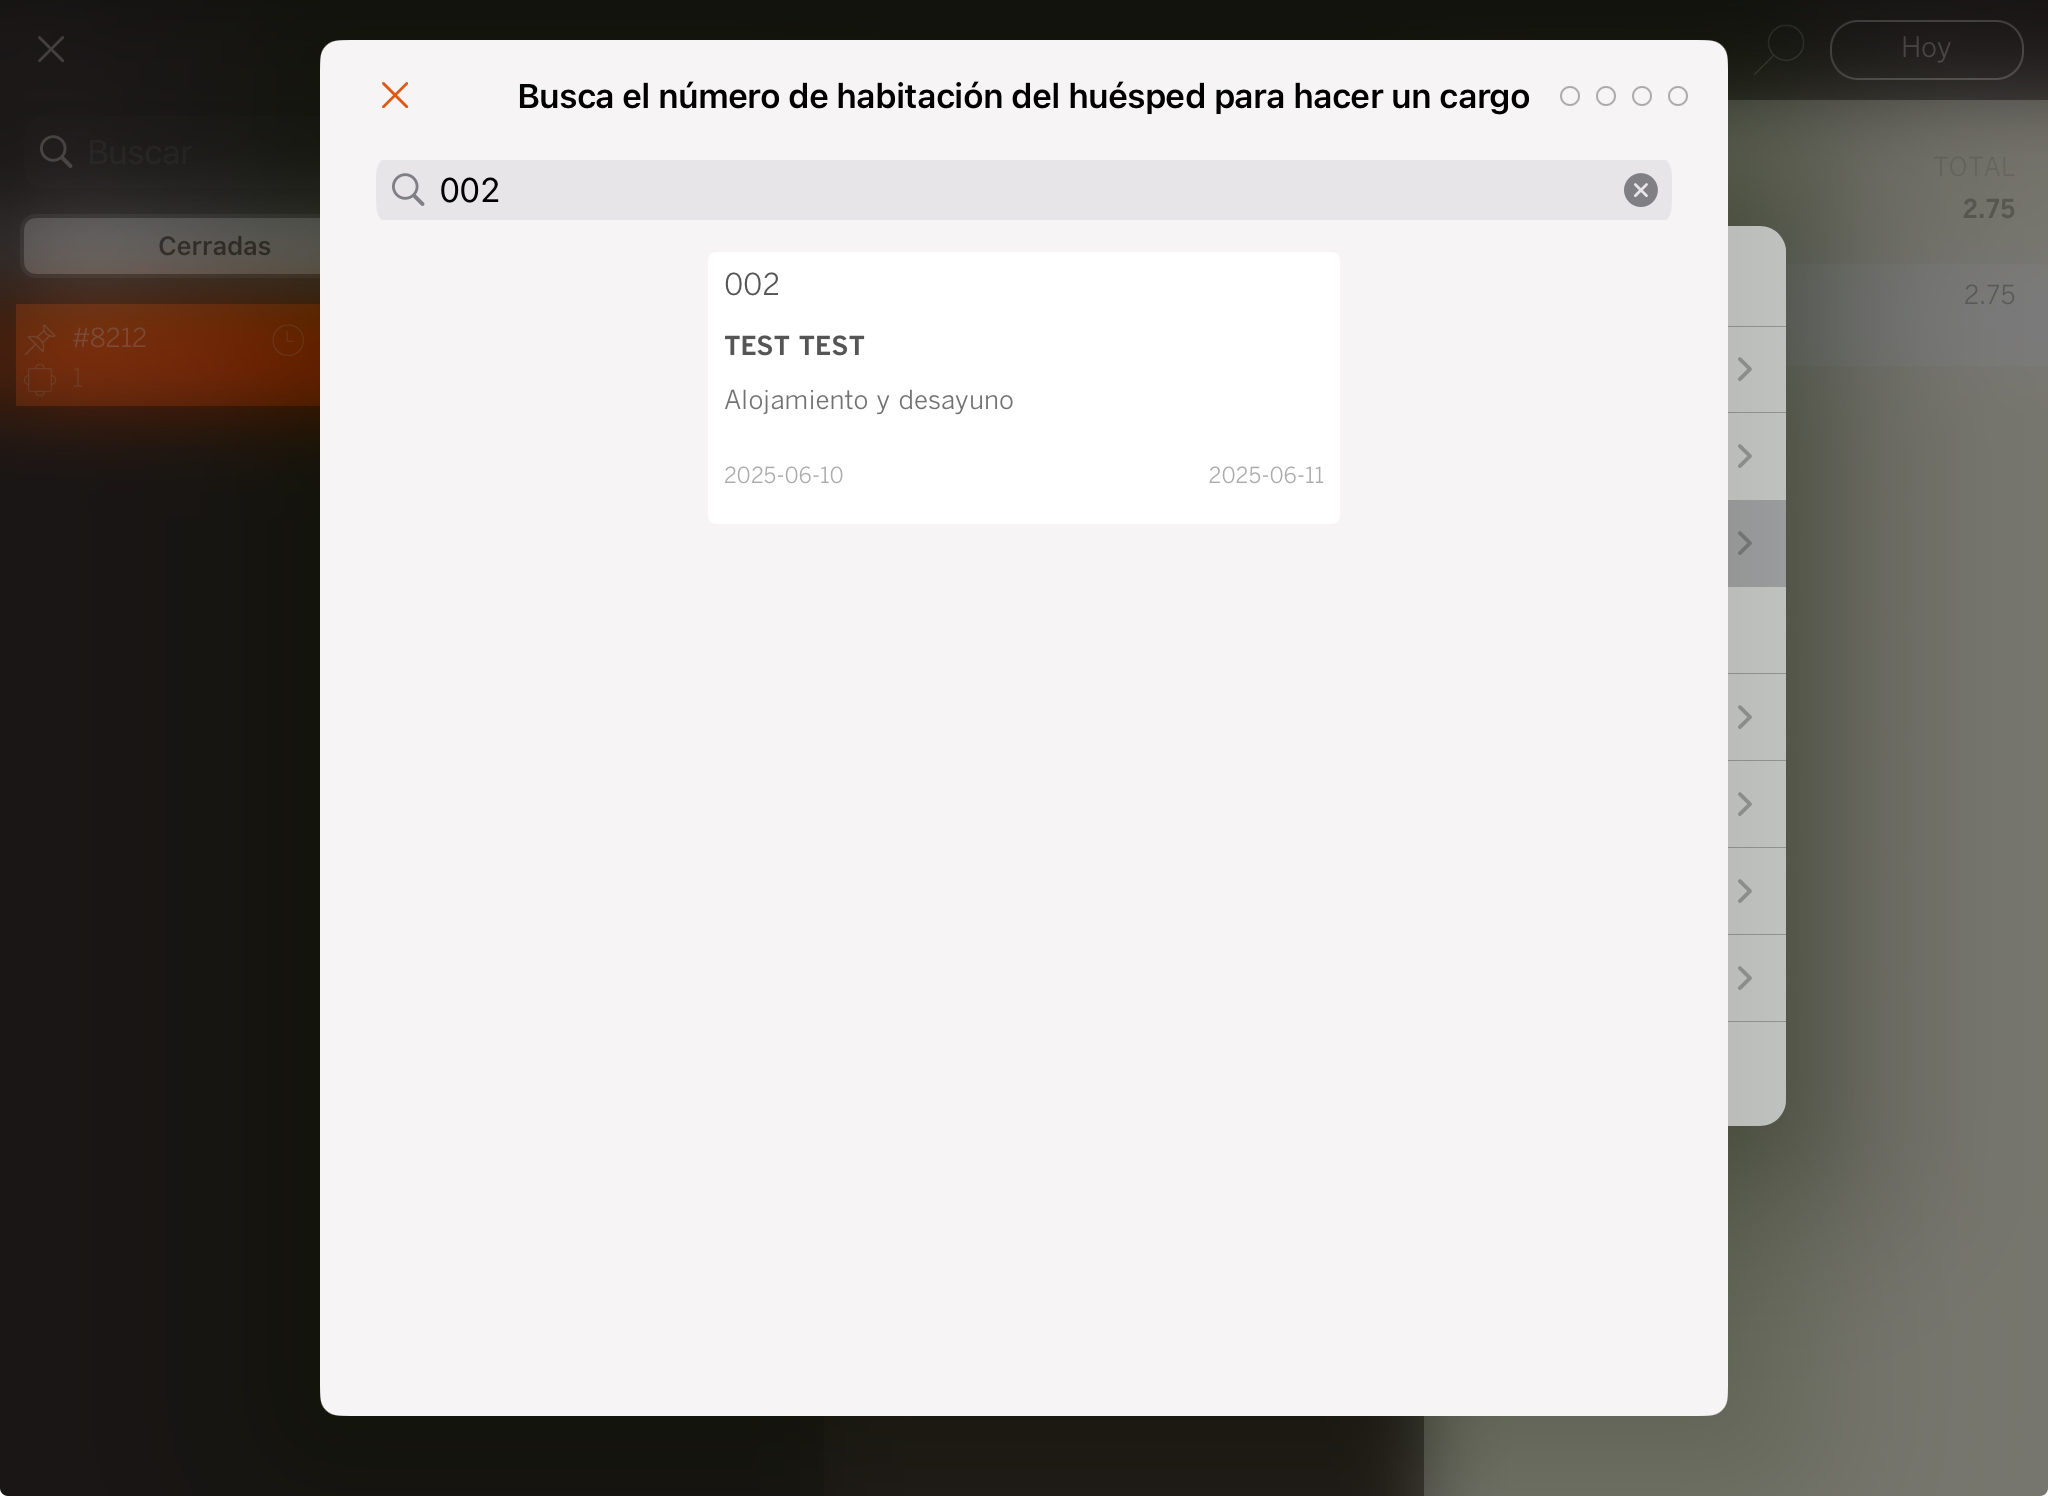
4. Write the room number. You can only search by room and not by guest.
5. If you have activated Room Charge Signature: ask the customer to sign and press .
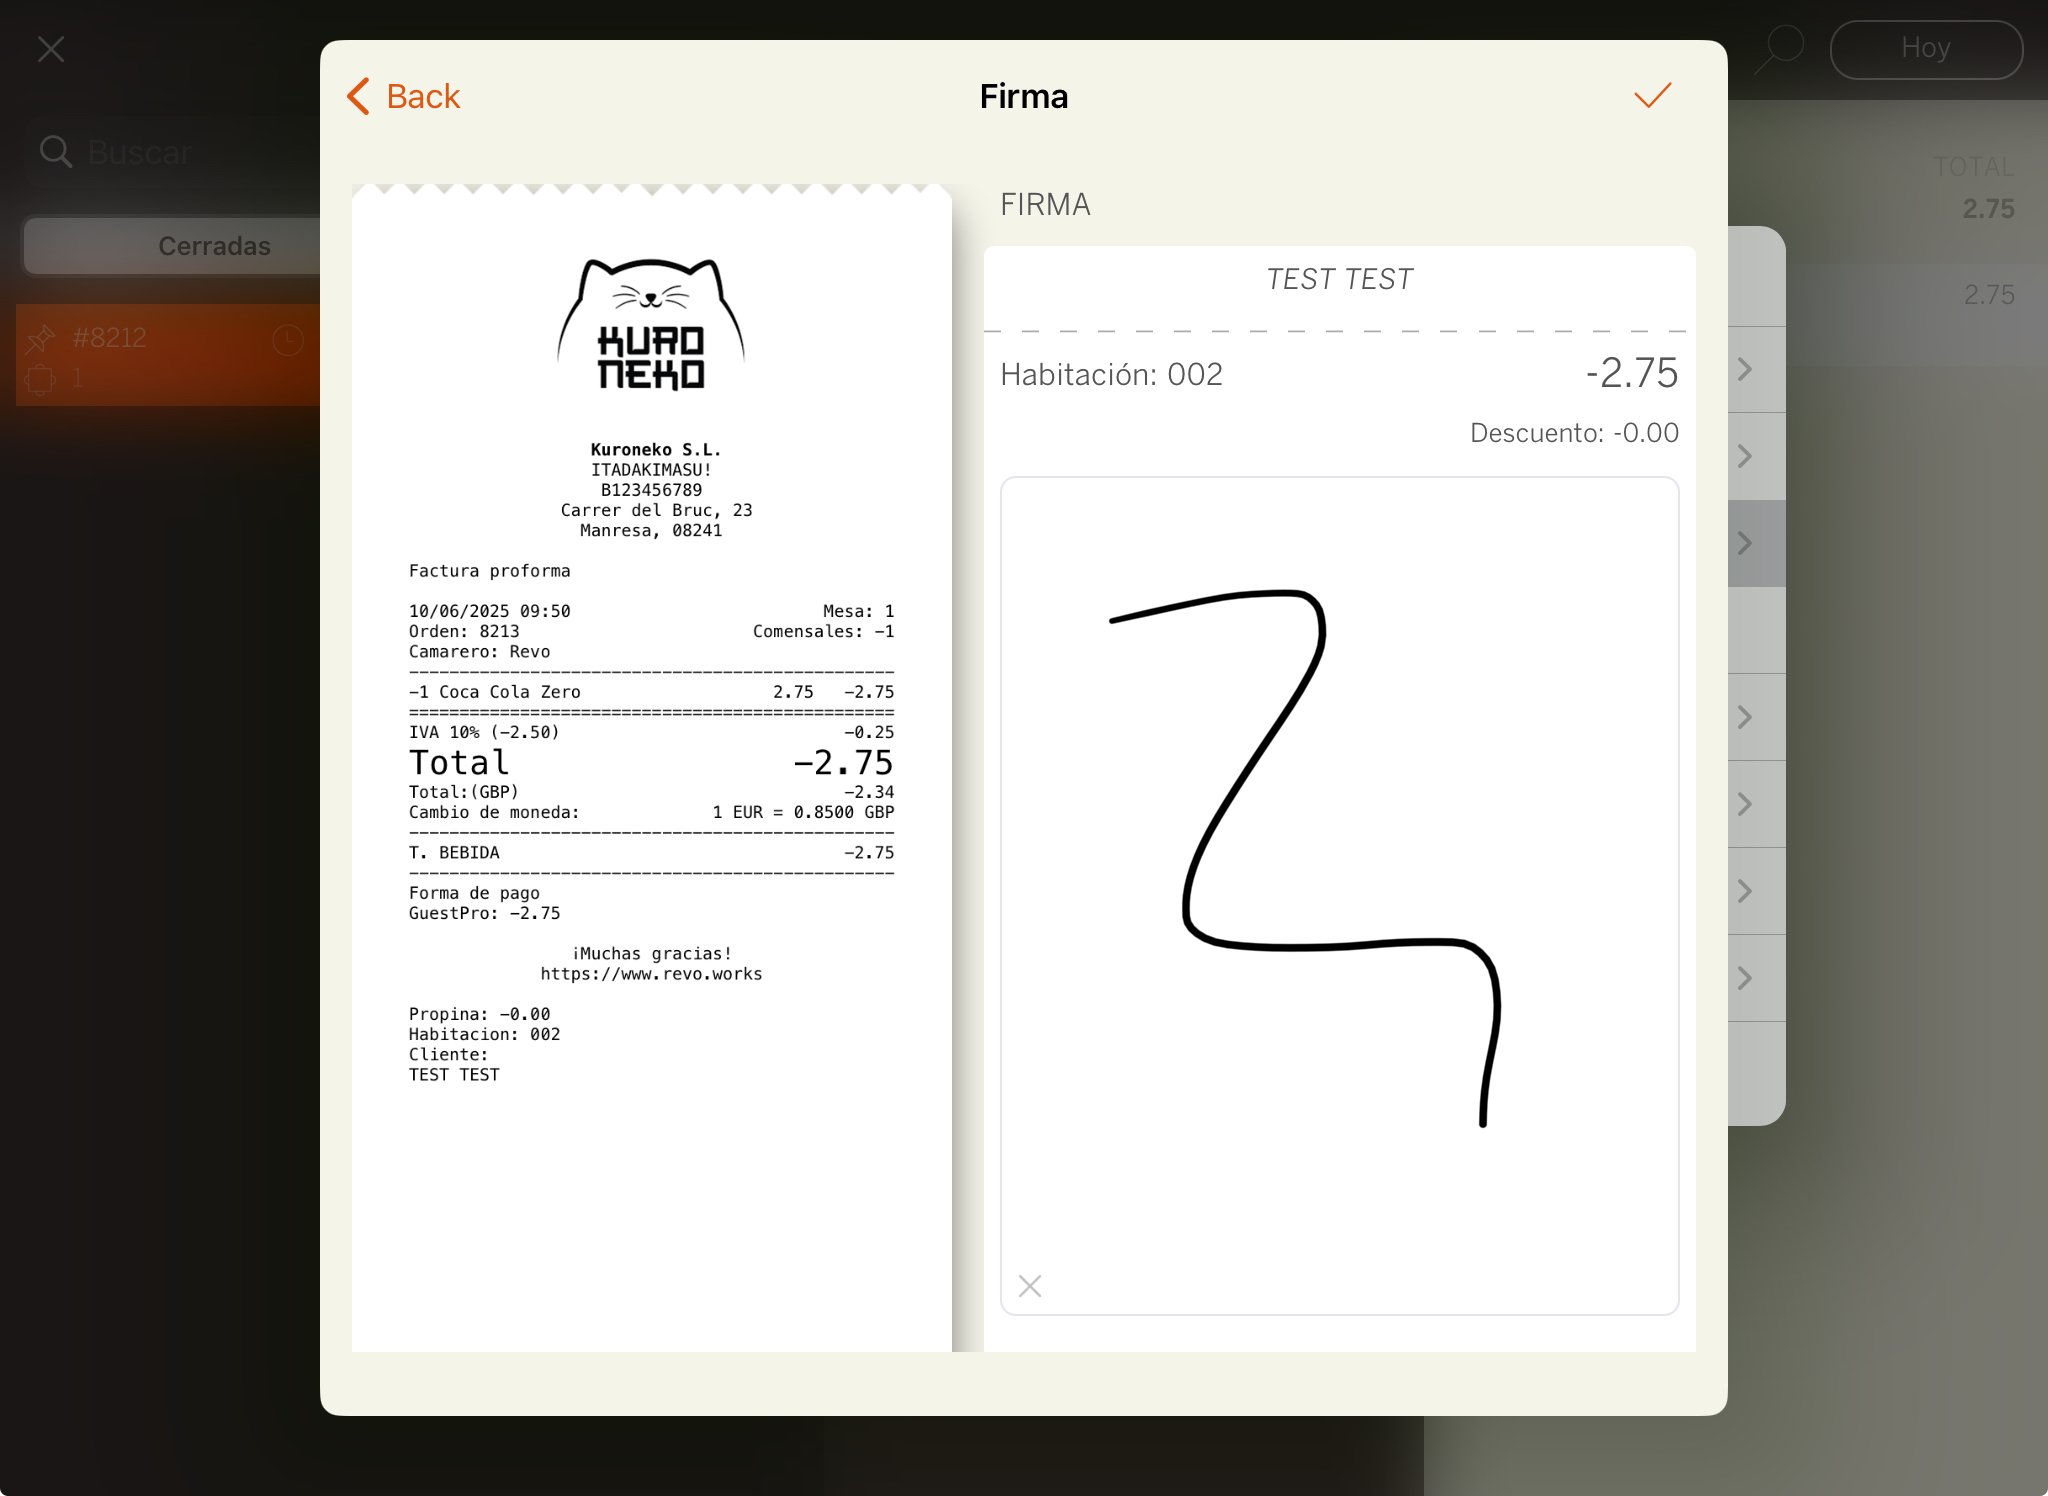
6. The receipt will be printed or the system will ask you if you want to do it.
7. Access the Historic data again and you will find the invoice in negative. This order will have the reference to the invoice it returns.
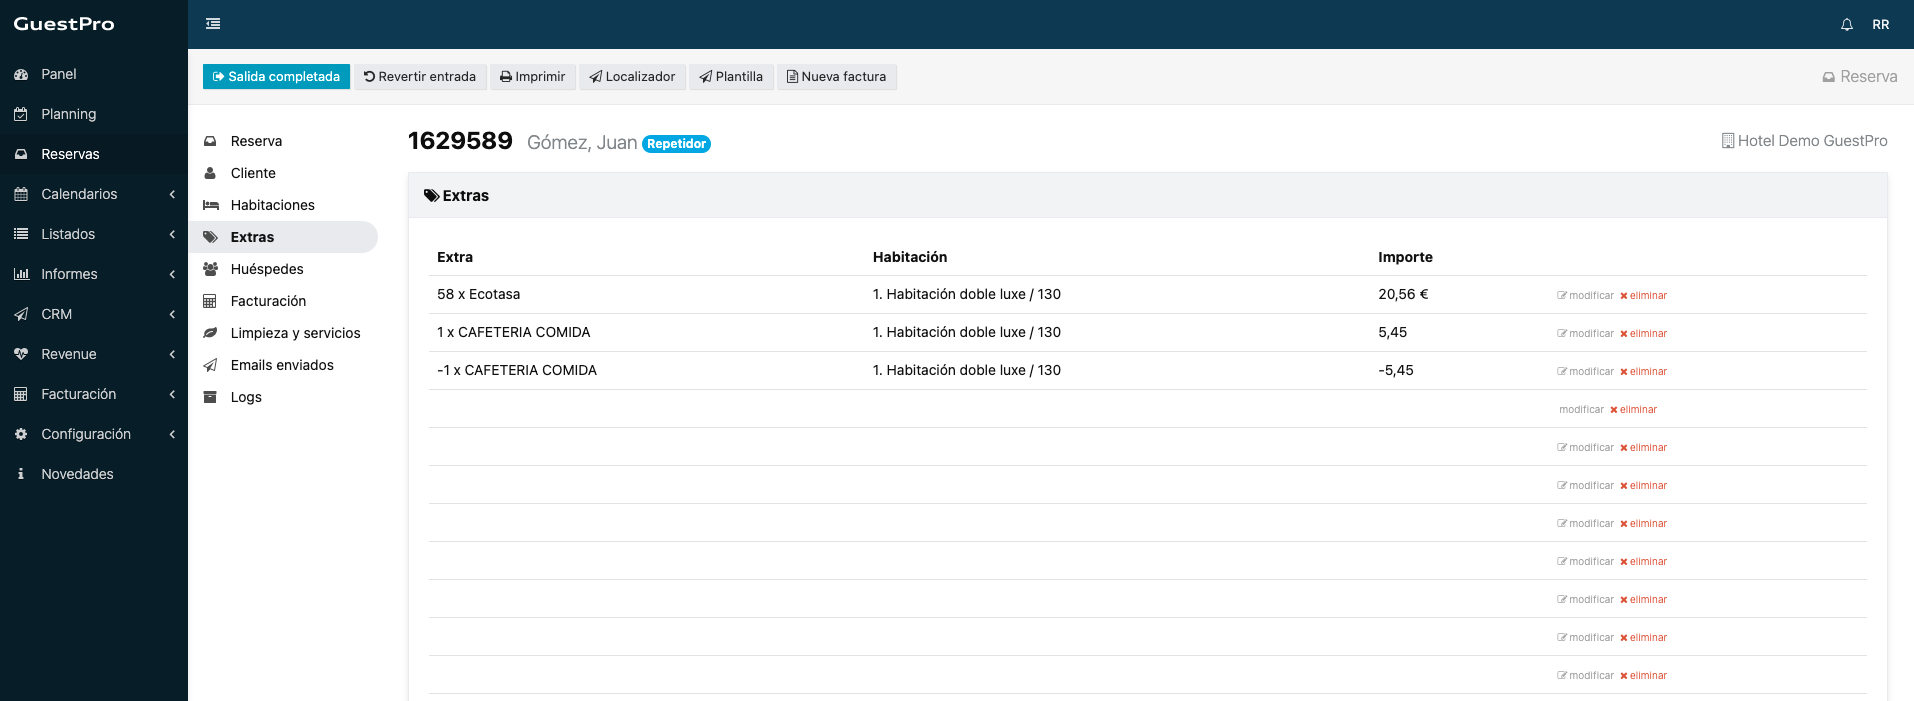
6. BACKOFFICE GUESTPRO
In the GuestPro backoffice, you will see the charge (and the refund, if any) in the Extras module of the customer's profile.