Due to a regulatory change affecting SMS delivery in Spain (in accordance with Order TDF/443/2024 and Order TDF/342/2026), mobile operators block messages sent from sender IDs that have not been properly registered.
Customers who have not completed the registration process will not be able to send SMS messages from their Cegid Revo solutions, affecting essential communications such as verification codes, reservation confirmations, reminders, or promotional campaigns.
To avoid service interruptions, the following sections explain how to register the sender ID with the CNMC and then configure it on the platform.
1. CNMC REGISTRATION PROCESS
The sender ID must be registered directly with the CNMC (National Commission for Markets and Competition) by following these steps:
- Open the official CNMC alias registration form.
- Complete the registration using the details of the company that owns the alias and specify the relationship with the requested alias (for example, Cegid Revo).
- Confirm Vonage as the service provider (PRO).
2. OFFICIAL GUIDES AND DOCUMENTATION
Refer to the manuals and official information provided by the CNMC to complete the registration process:
- Alias registration guide: General information from the CNMC.
Download the Alias Registration Guide (PDF) - Guide for alias registration: Detailed instructions for completing the procedure.
Download the Registration Guide (PDF)
3. WHERE SHOULD IT BE CONFIGURED?
Once the registration with the CNMC has been completed and approved, enter the alias in the relevant back office depending on the solution you use:
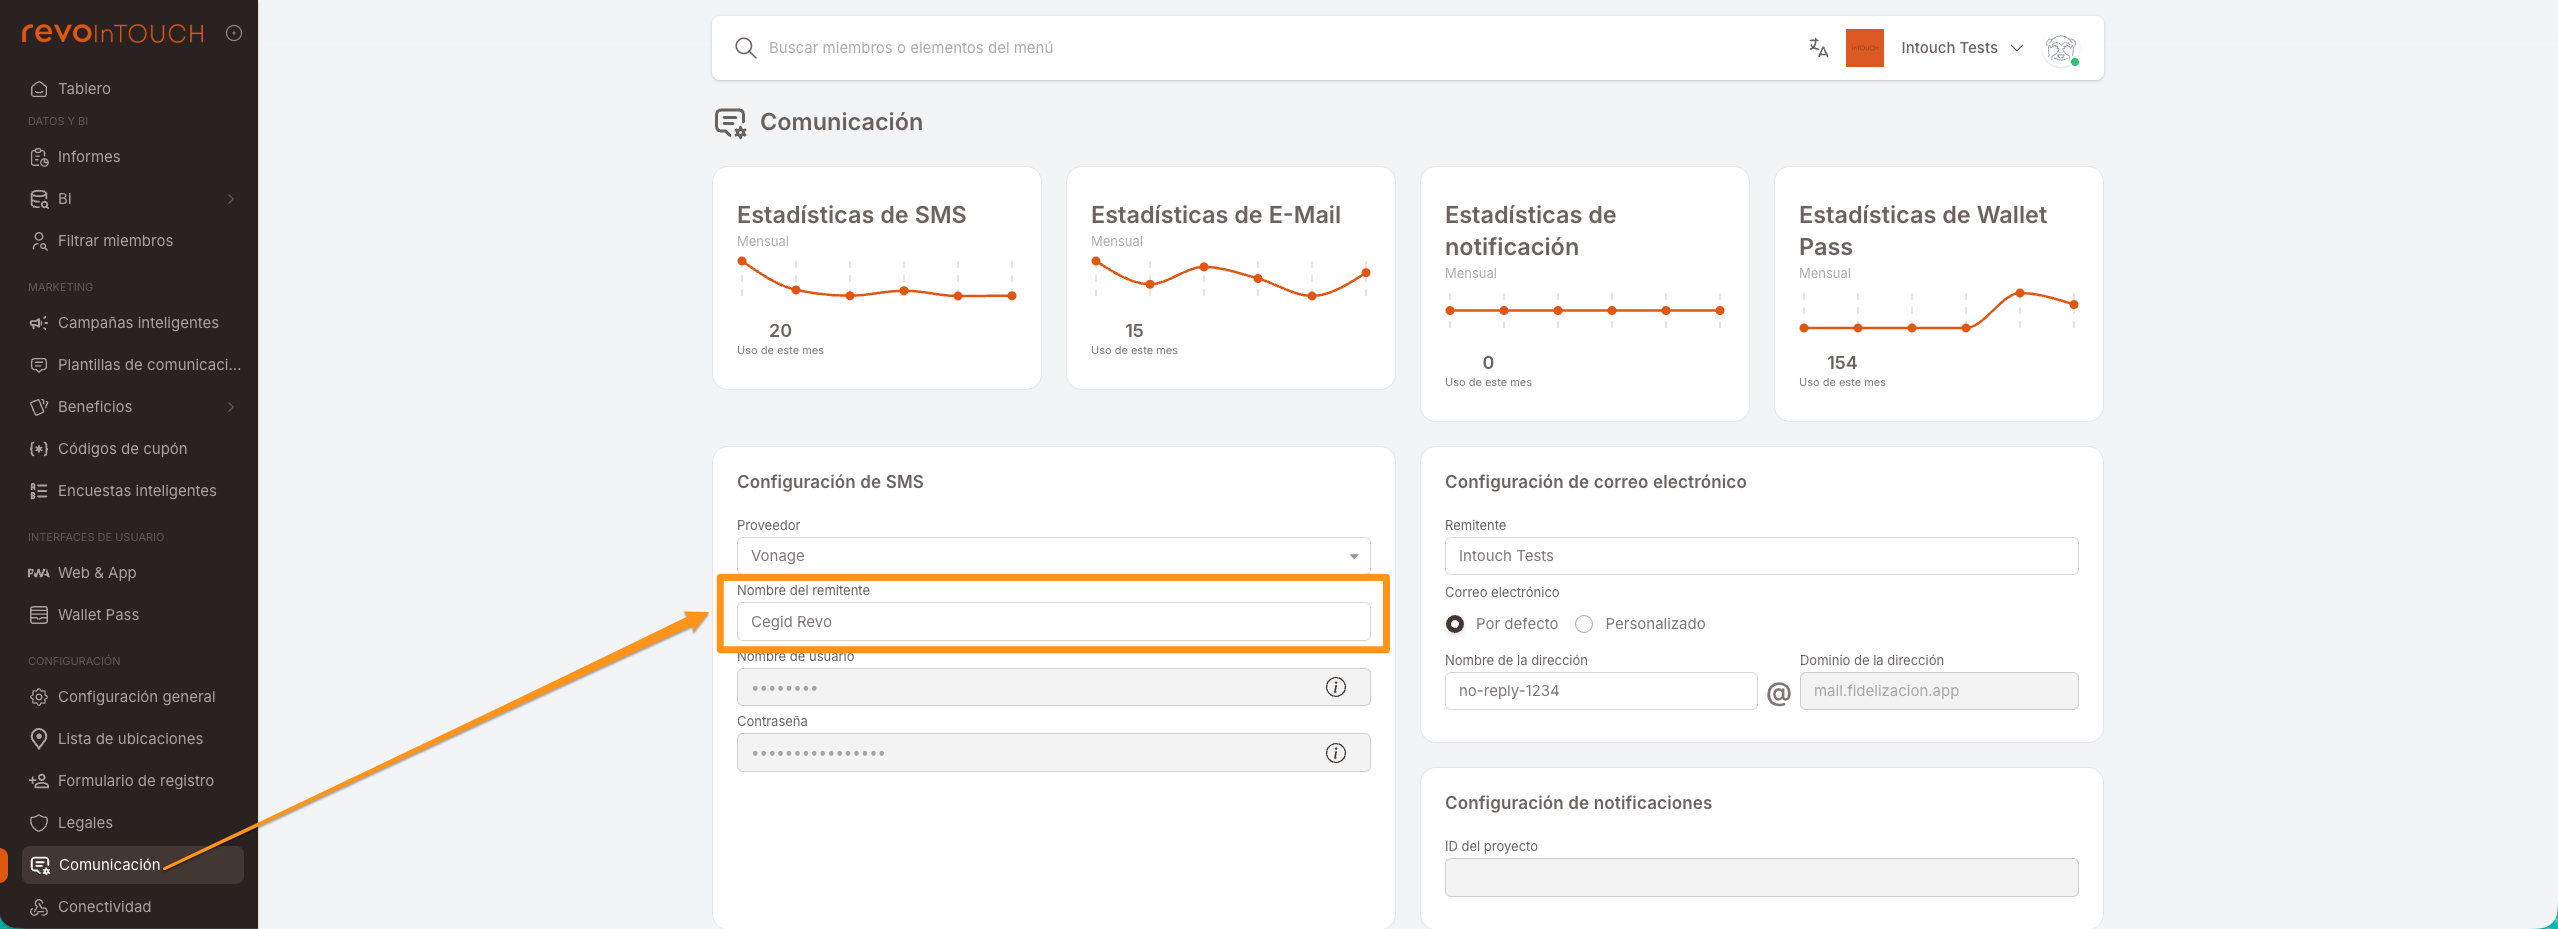
Configuration in the Revo INTOUCH back office
Revo INTOUCHIf you use Revo INTOUCH, open the Communication menu and go to the SMS Settings section.
Update the Sender name field with the approved alias.
Configuration in the Revo SOLO back office
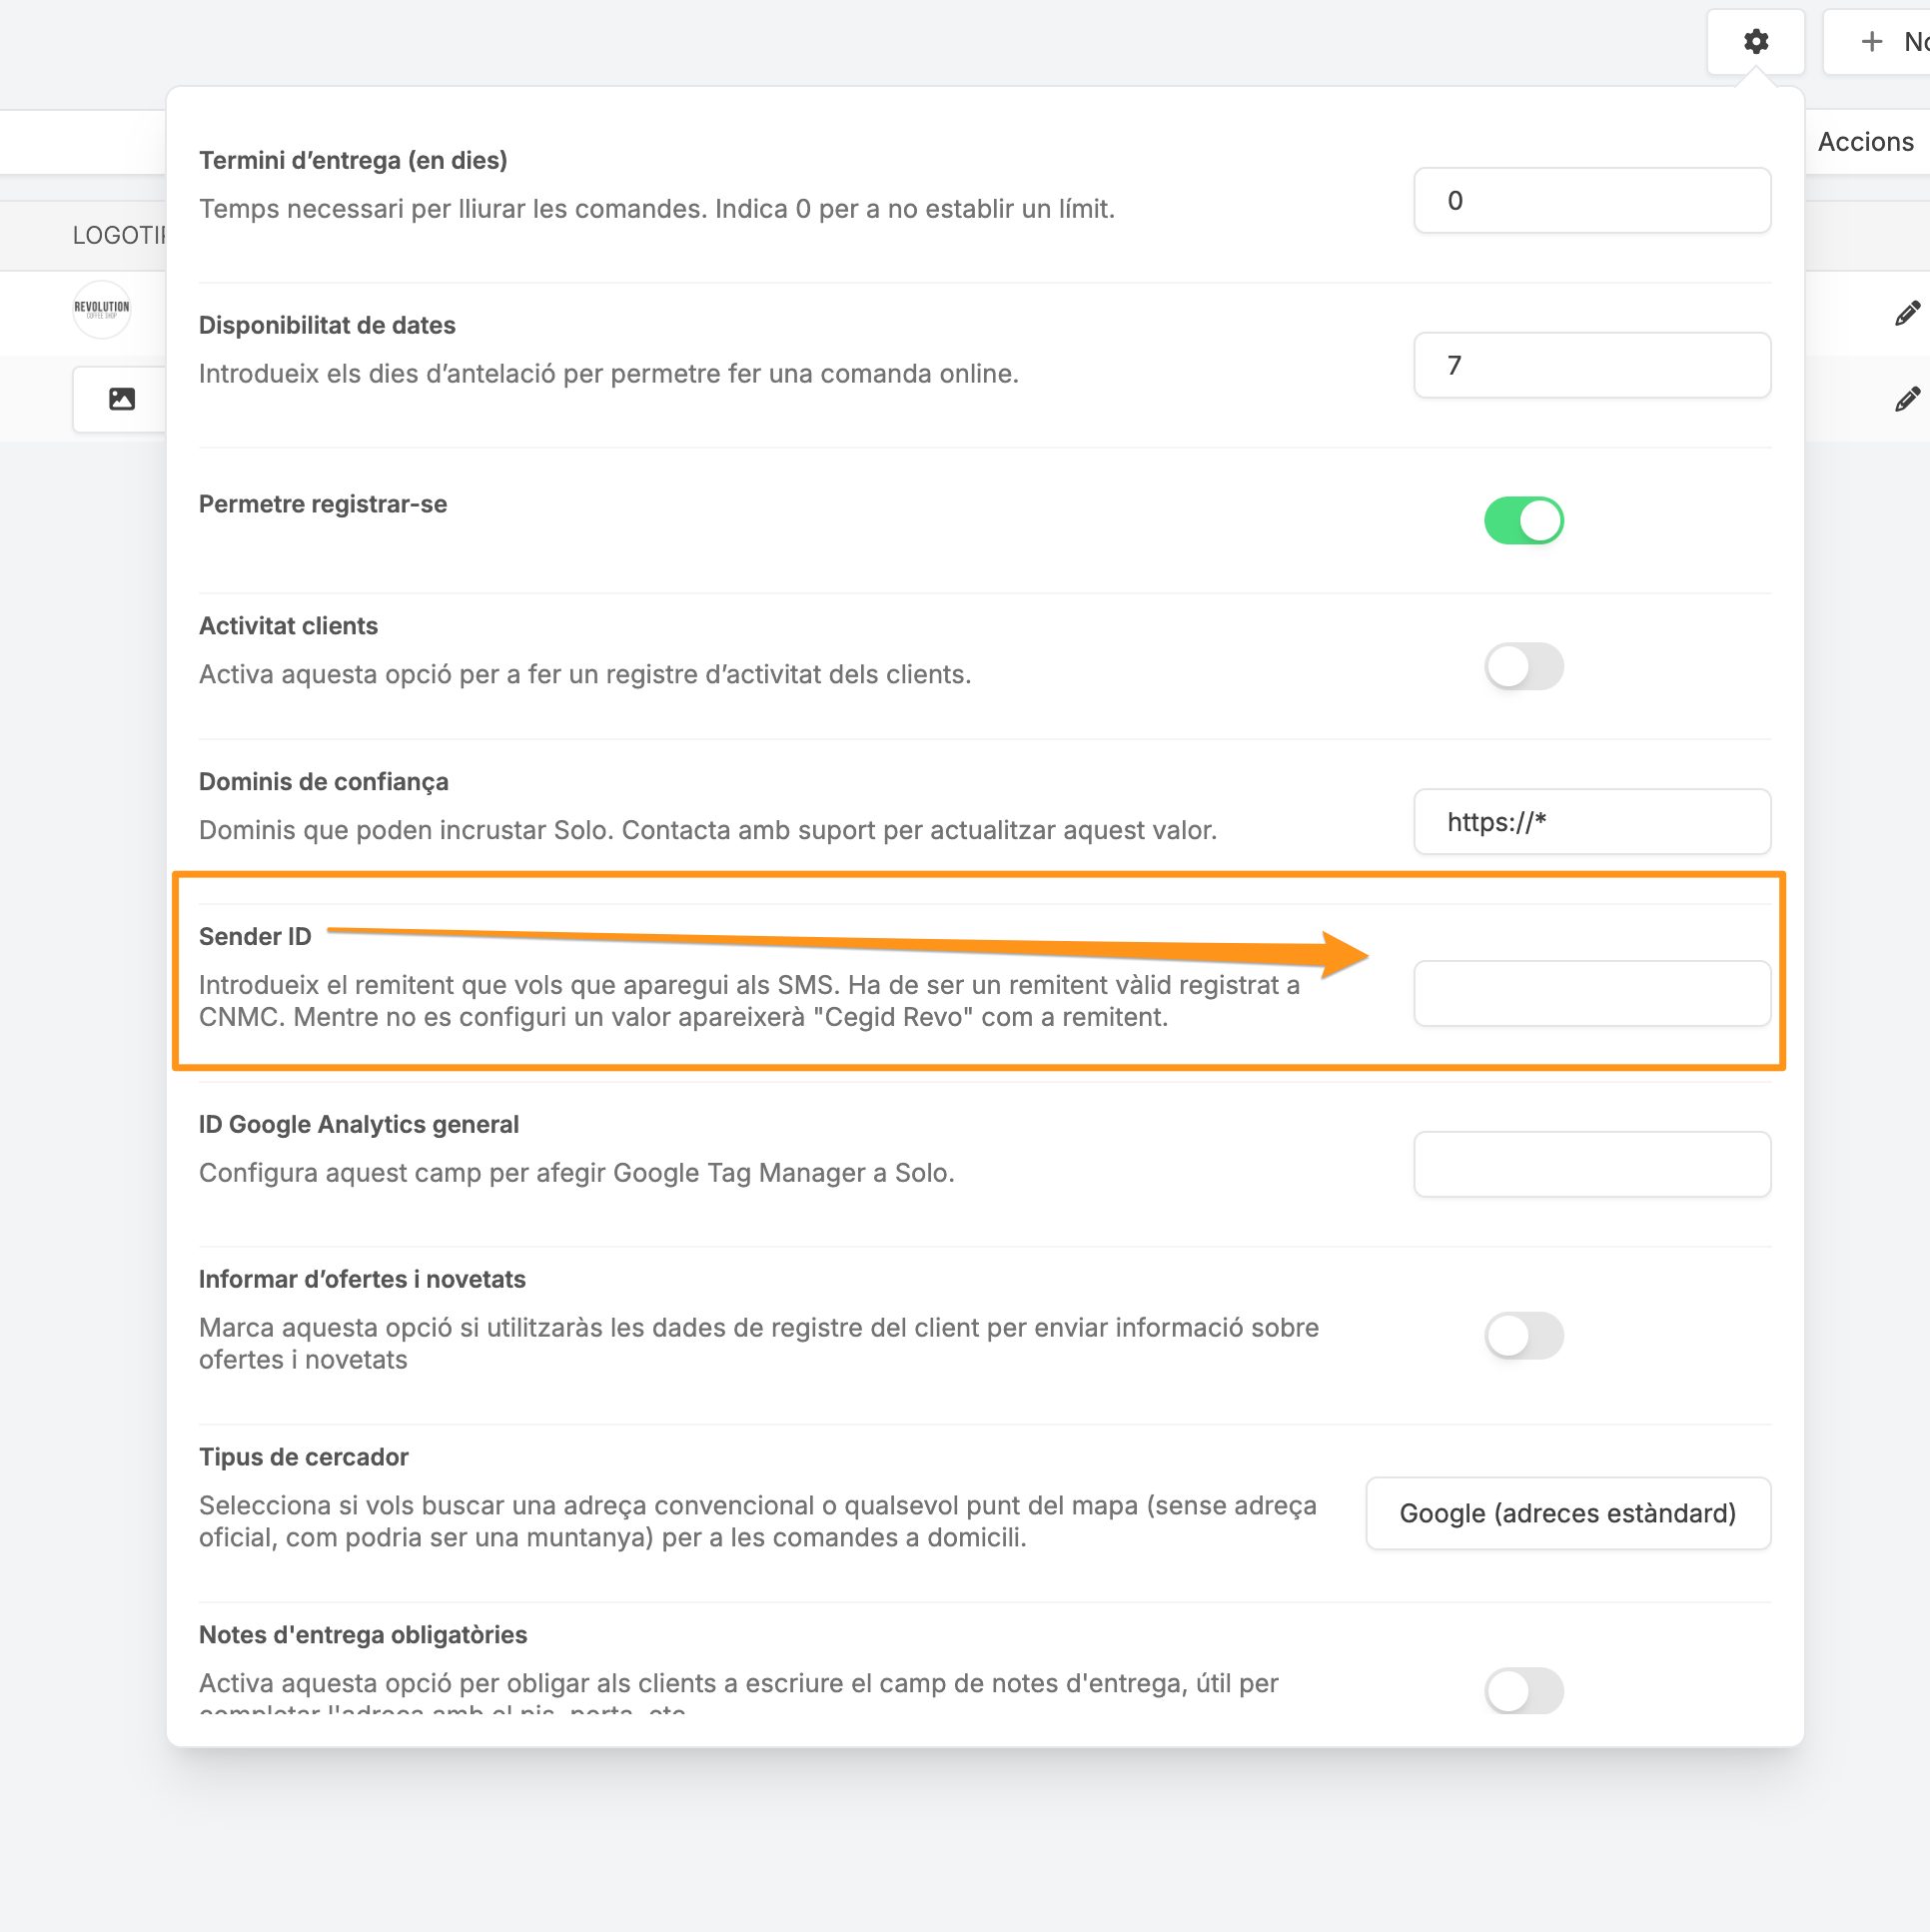
Revo SOLOIf you use Revo SOLO, access the platform at revosolo.works.
Set the Sender ID field to the registered sender.
Configuration in the Revo XEF back office
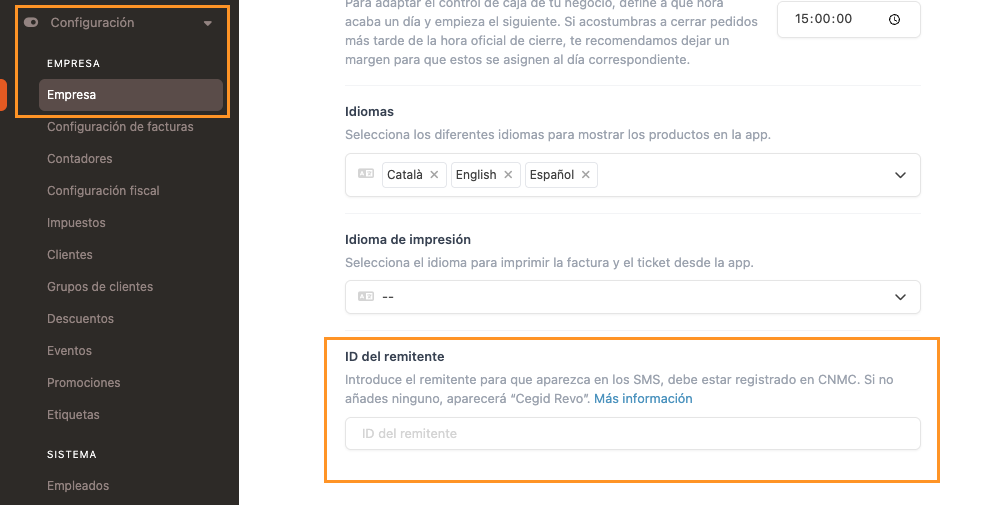
Revo XEFAccess the platform at revoxef.works.
Set the Sender ID field to the registered sender.
4. ALTERNATIVE SOLUTION
In the Revo INTOUCH back office, go to Communication and set the Sender name field to Cegid Revo.