SOLO
From the SOLO module, we can:
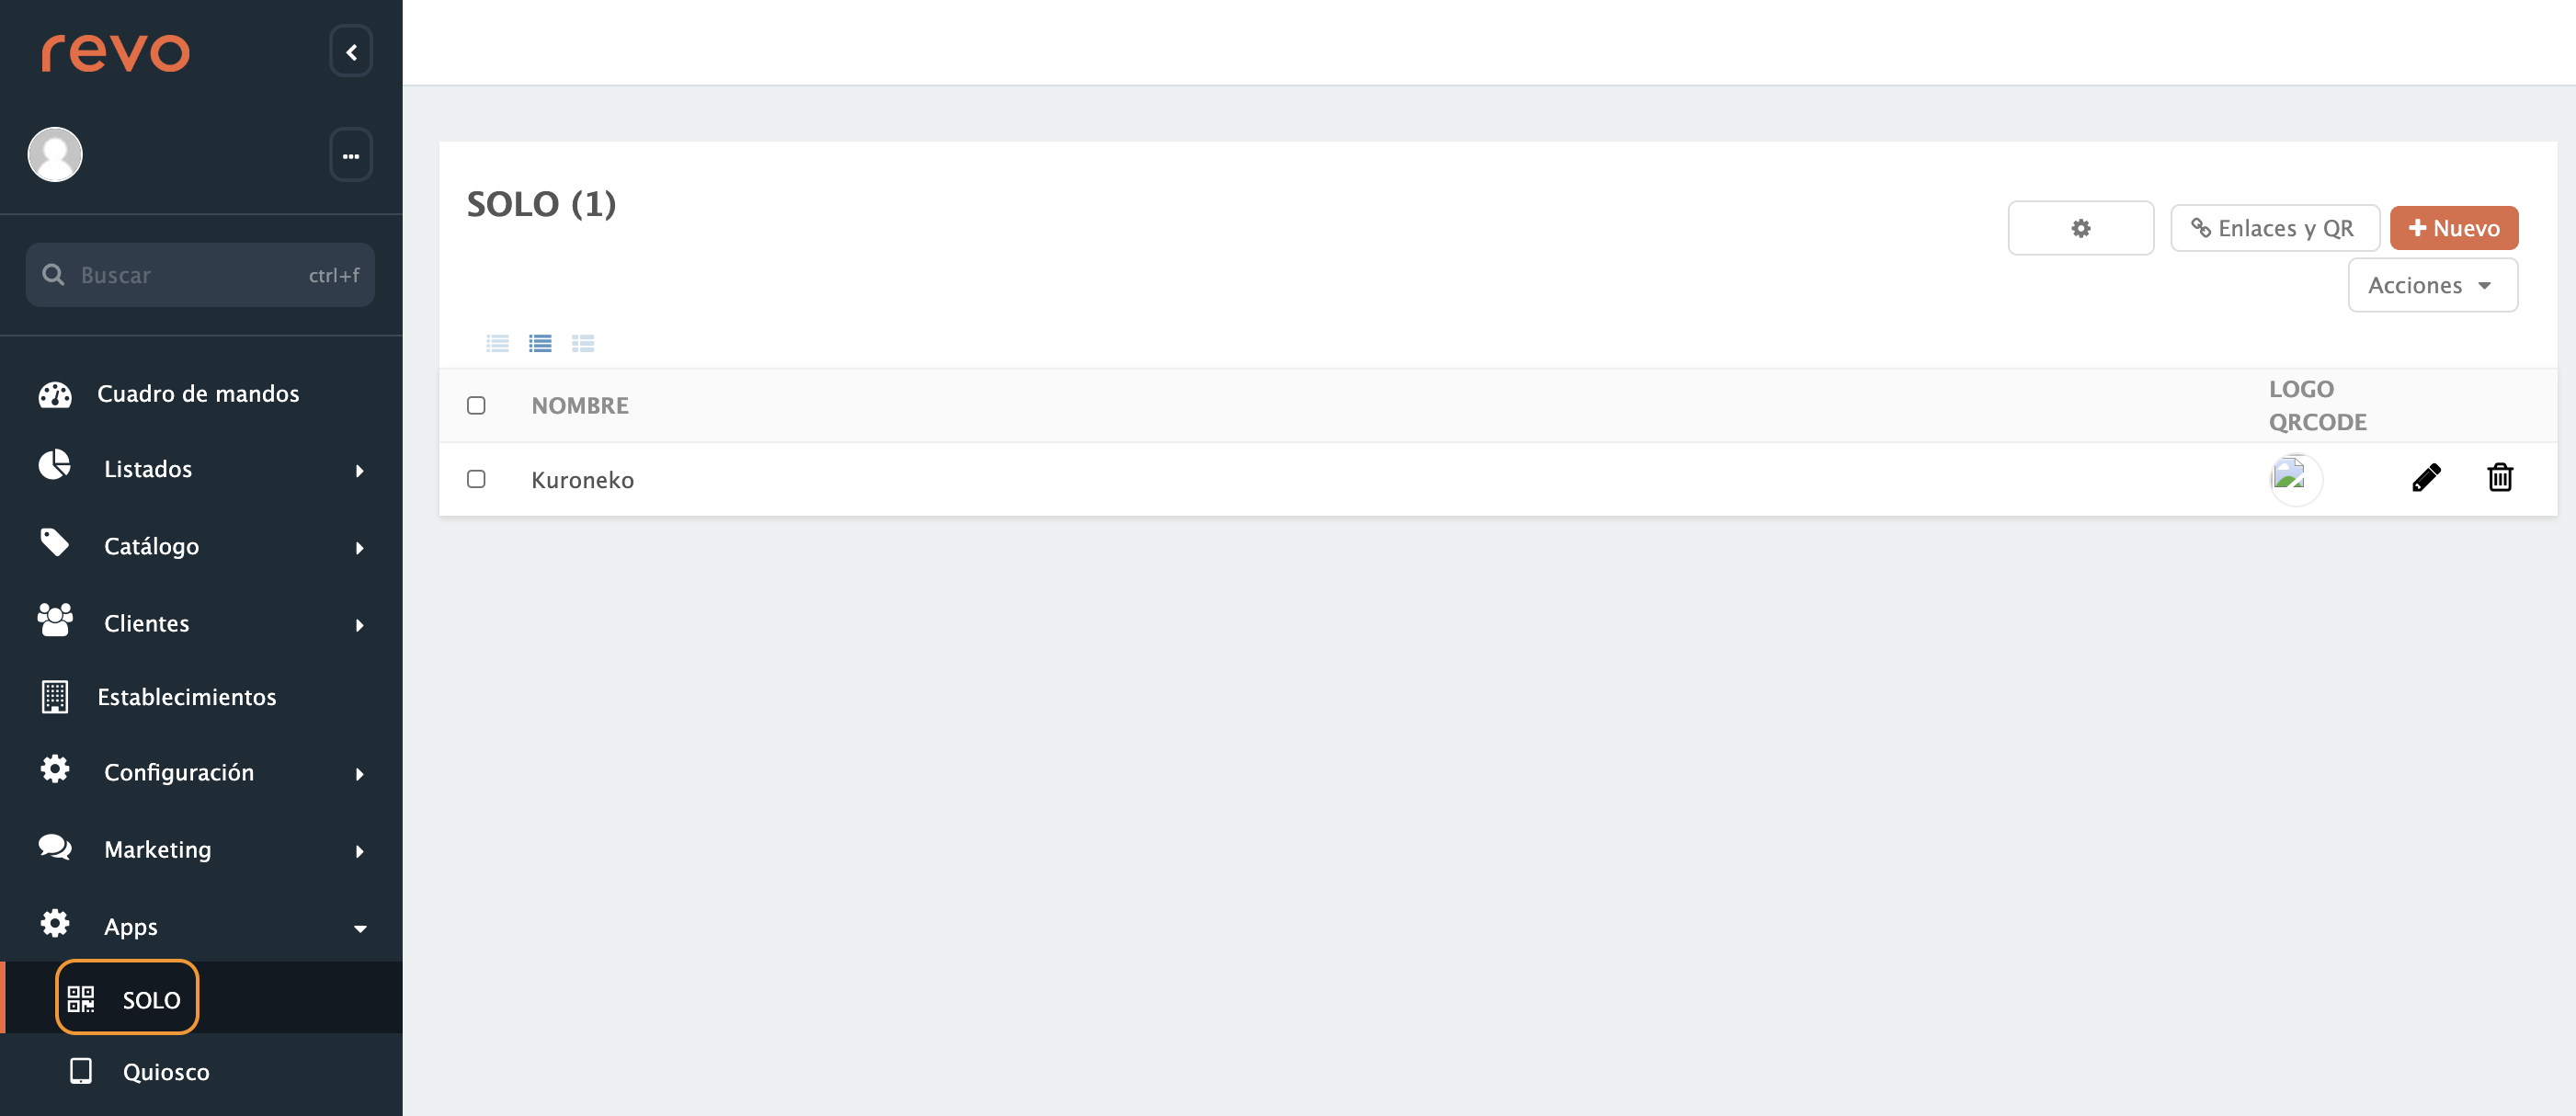
- Edit the profile preferences.
- Access the page for link options and generate QR codes for the establishment.
- +New Add a new profile.
- Add an image to the QR Code.
- Edit the profile.
- Delete the profile.
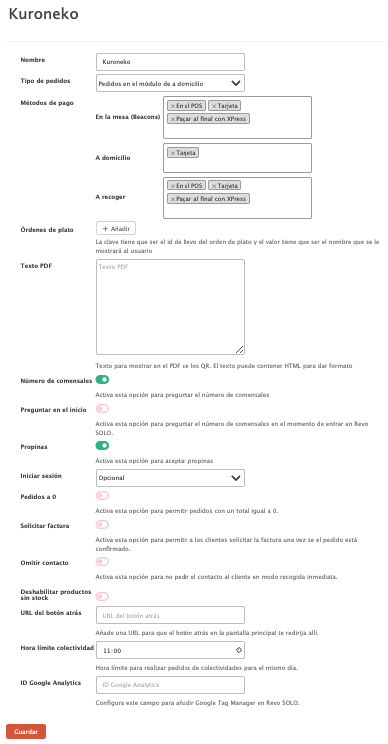
To create a new profile, we must:
1. Click on the +New button.
2. Fill in the following information:
-
Name: Name of the establishment.
-
Order Types: Select how you want orders to be received in Revo XEF, either as "Orders in the delivery module" or "Orders at the table."
-
Payment Modes: Choose from the following options:
-
Card: Using a payment gateway, at the end of the order, the customer will have the option to pay with their credit card or with Apple/Google Pay (if configured).
-
On the POS: Using the traditional method, paying in cash or with a conventional card machine.
-
Pay later with XPress: Payment can be made at any point in the process by scanning a new QR code or, using the same one used to place the order, payment can be completed.
Important: To use XPress payment, it is important to have the license and integration in place. More information here.
-
-
Dish Orders: Create the dish orders you want to show to the customer. The key must be the ID of the dish order in Revo XEF, and the value must be the name that will be displayed to the user.
-
PDF Text: Text to display in the QR PDF.
-
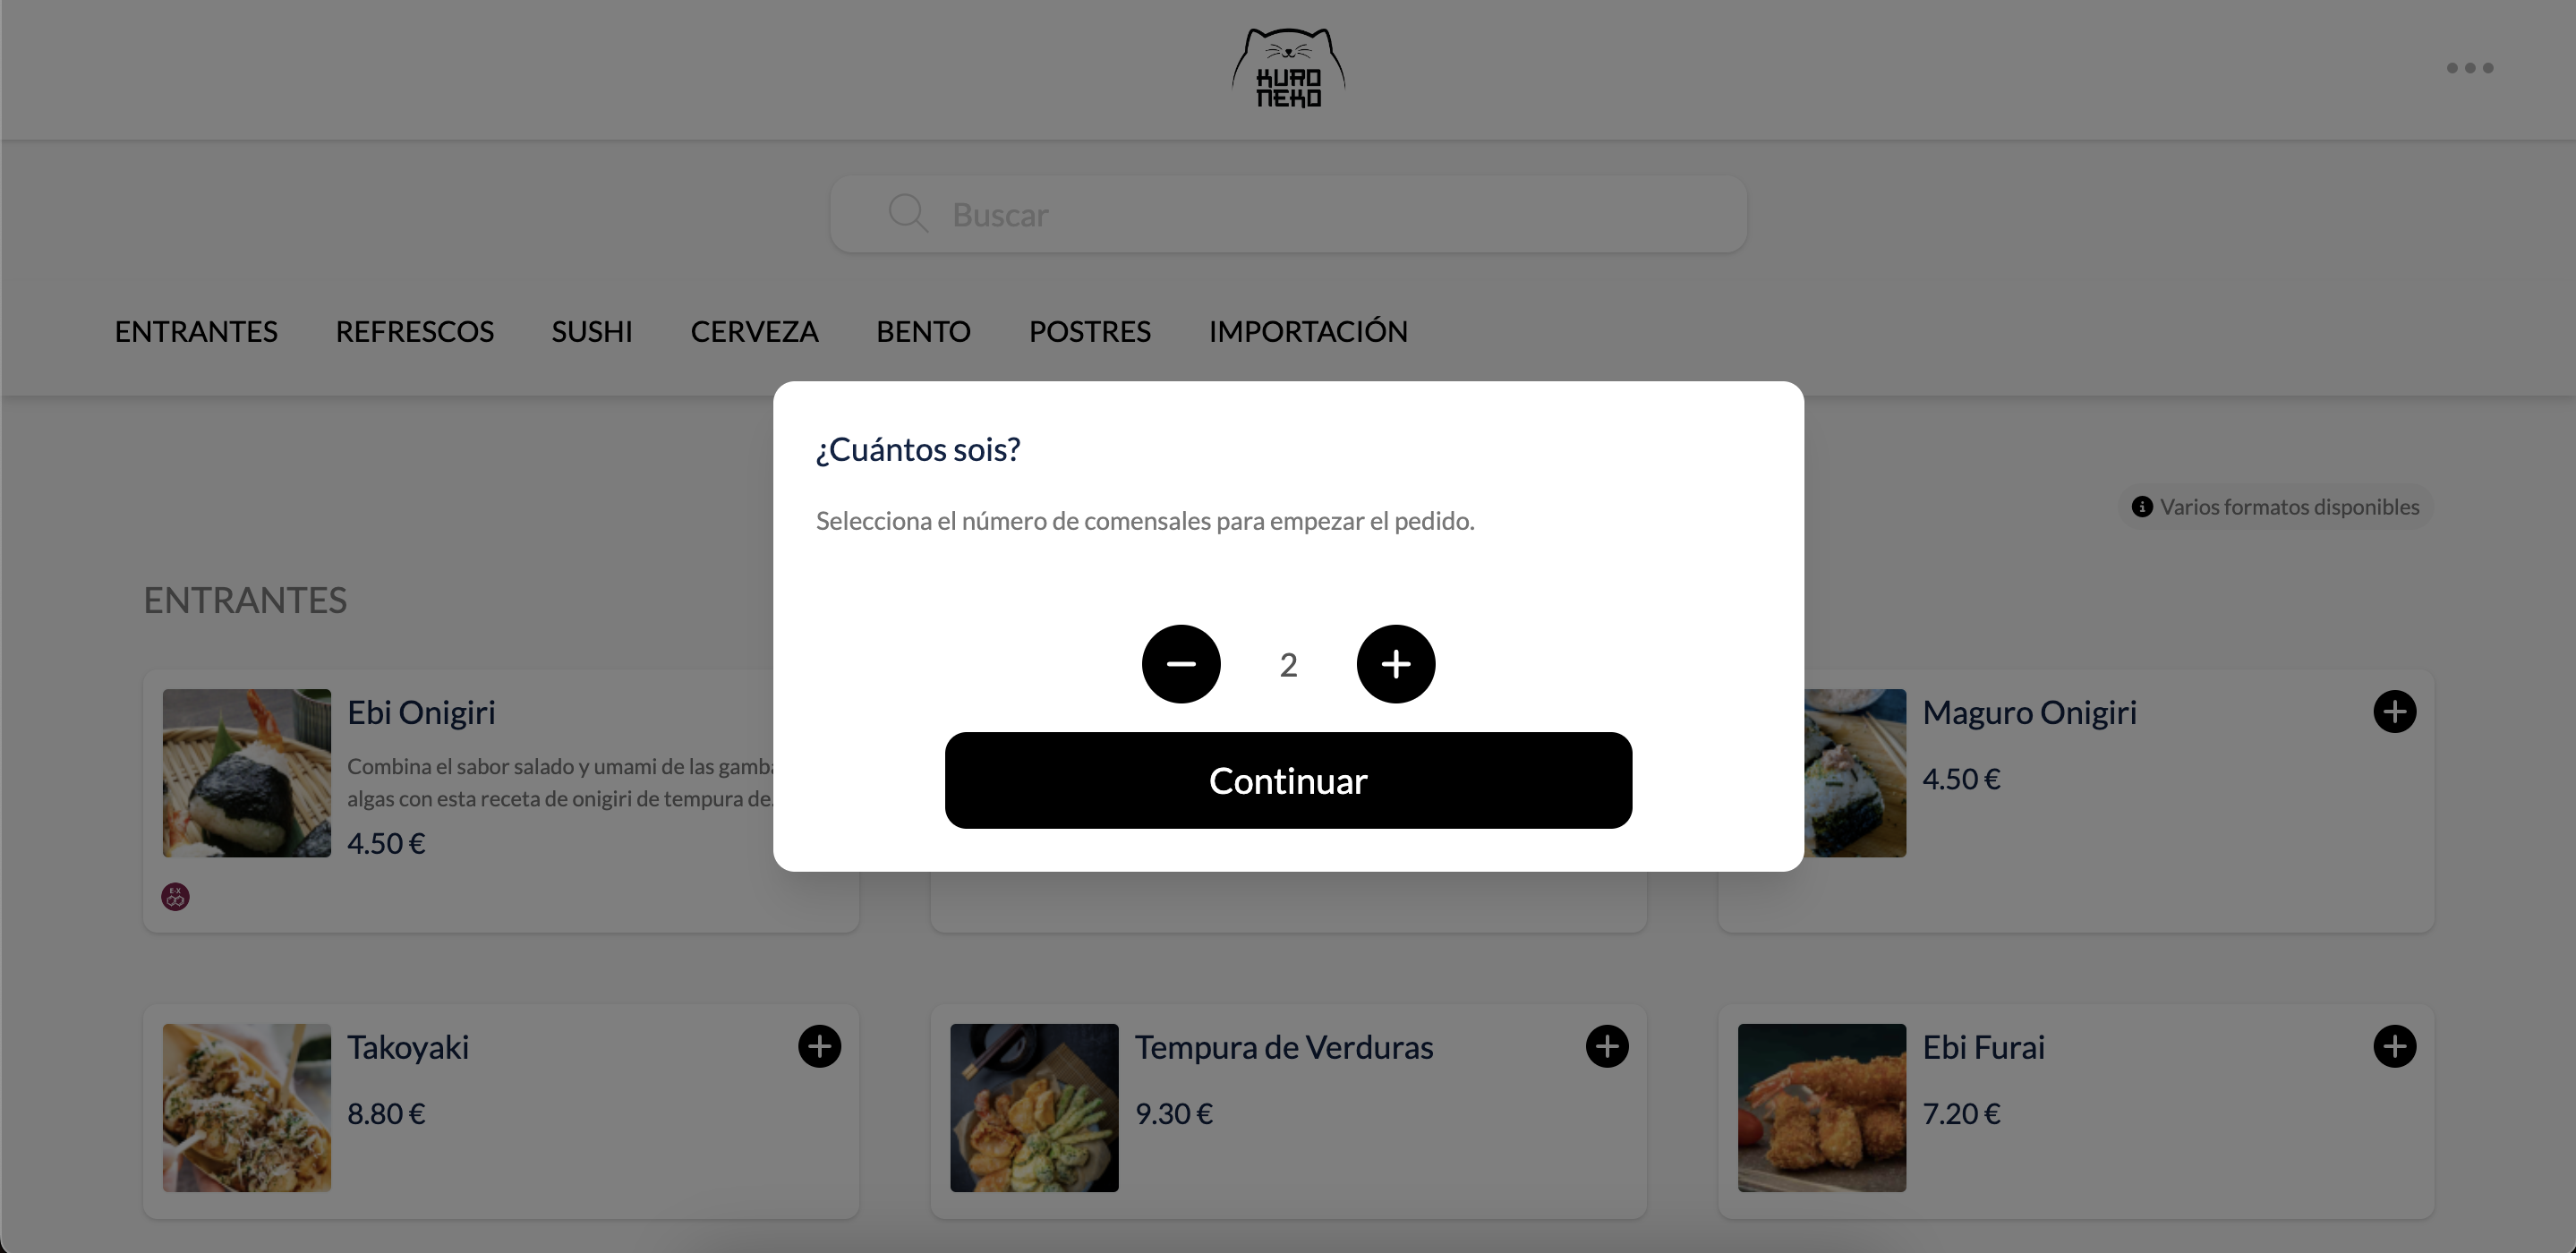
Number of Diners: Activate this option to ask for the number of diners.
-
Ask at the beginning: With the previous option enabled, this will appear to us. By activating it, it will ask us the number of diners upon entering Revo SOLO.
-
Tips: With this option enabled, tips are accepted.
-
Login: Select the option of interest from the dropdown.
-
Orders at 0: Activate this option to allow orders with a total equal to 0.
-
Request Invoice: Activate this option to allow customers to request an invoice once the order is confirmed.
-
Skip Contact: Activate this option to skip asking for contact information from the customer in immediate pickup mode.
-
Disable Out-of-Stock Products: Activate this option to disable out-of-stock products.
-
Collectivity Deadline: Enter the deadline for placing collectivity orders for the same day.
-
Google Analytics ID: Configure this field to add Google Tag Manager to Revo SOLO.
3. Finally, click on Save.
To edit profile preferences, we need to:
1. Click on the .
2. Fill in the following information:
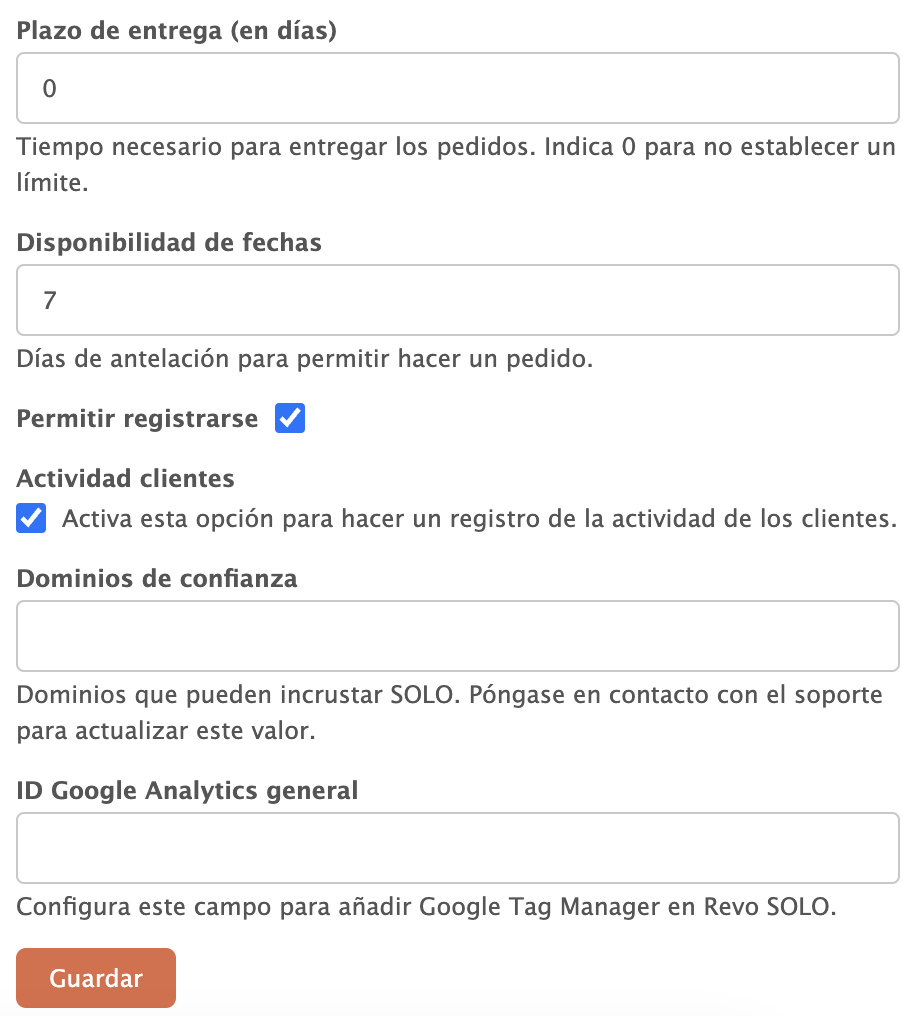
- Delivery time (in days): Time required to fulfil orders. Indicate 0 to not set a limit.
- Date availability: Days in advance to allow placing an order.
- Allow registration: Activate this option to allow registration.
- Customer activity: Activate this option to keep a record of customer activity.
- Trusted domains: Domains that can embed content only. Contact support to update this value.
- General Google Analytics ID: We configure this field to add general Google Tag Manager to Revo SOLO for all establishments.
3. Finally, click on Save.
LINK AND QR CODE OPTIONS
1. LINK OPTIONS
Here are all the options provided by the LINK:

GENERIC LINKS
There are two generic links: Delivery and Establishments. By clicking on any of them, a webpage will open where all the establishments of the account will be listed. We will be able to select the establishment we are interested in, view the menu, and place an order.
DIRECT LINKS
If we hover over the different types, an explanatory message will appear for each of them. For example, if we hover over 'Pickup', the following message will appear:
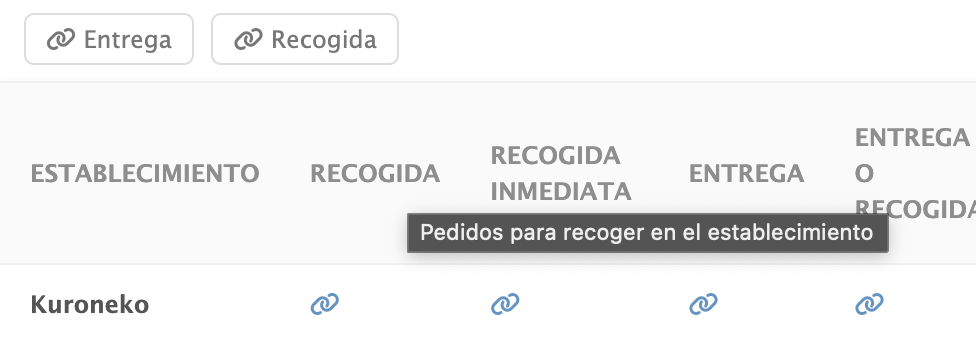
1. Pickup:
There are three options:
- To Pickup: Clicking on one of the links corresponding to the establishment will open a web page where the Pickup option is already selected. You only need to choose the day and time. Once you click continue, you'll see the menu of your establishment and can place the order.
- Immediate Pickup: Clicking on one of the links corresponding to the establishment will open the menu of your establishment, and you can place the order directly.
- Room Service: Clicking on one of the links corresponding to the establishment will open a web page where the Pickup option is already selected. You only need to choose the day and time. Once you click continue, you'll see the menu of your establishment and can place the order.
2. Delivery:
Clicking on one of the links corresponding to the establishment will open a web page where the establishment with the "Delivery" option already selected will appear. Simply specify the day and time, and you can view the menu of your establishment and place an order.
3. Pickup or Delivery:
Clicking on one of the links corresponding to the establishment will open a web page where the establishment with the option to select "Pickup" or "Delivery" will appear. You can view the menu of your establishment and place an order.
4. Link to the digital menu:
Clicking on one of the links corresponding to the establishment will allow you to view the menu of your establishment digitally. There will be no option to place an order.
DOWNLOAD LINKS
If you click on SOLO Links to the table or SOLO Links to the table or XPress, you will download a CSV with all the links.
2. QR CODE OPTIONS
Clicking on the QR code for SOLO to the table or SOLO to the table or XPress will download all the codes, not only for all the options mentioned above but also for all your tables.
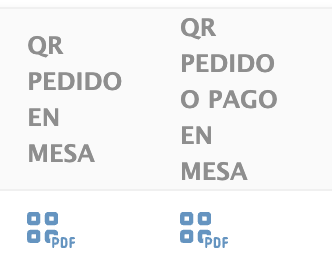
Here are all the options provided by the QR code:
1. Menu: Scanning a QR code will open a web page on the device to view the menu of the establishment digitally. There will be no option to place an order.
2. View the menu, order, and pay: Scanning a QR code will open a web page on the device that allows you to place an order and pay for it. As many QR codes will be generated as the establishment has tables. The order will already be identified with the table. This option is highly recommended for traditional service, with the difference being that the end customer will place the order from their mobile device rather than the waiter.
3. To-go: Depending on the needs of each establishment, different types of QR codes can be generated:
- Generic QR: Initially shows the option to choose which establishment to place the order and the choice of date/time.
- Direct QR: Unlike the previous option, only allows choosing date/time. The establishment will already be selected by default. Different QR codes can be generated for each of the available establishments.