1. CLIENTS
This section will allow us to add clients to our back-office. To do so:
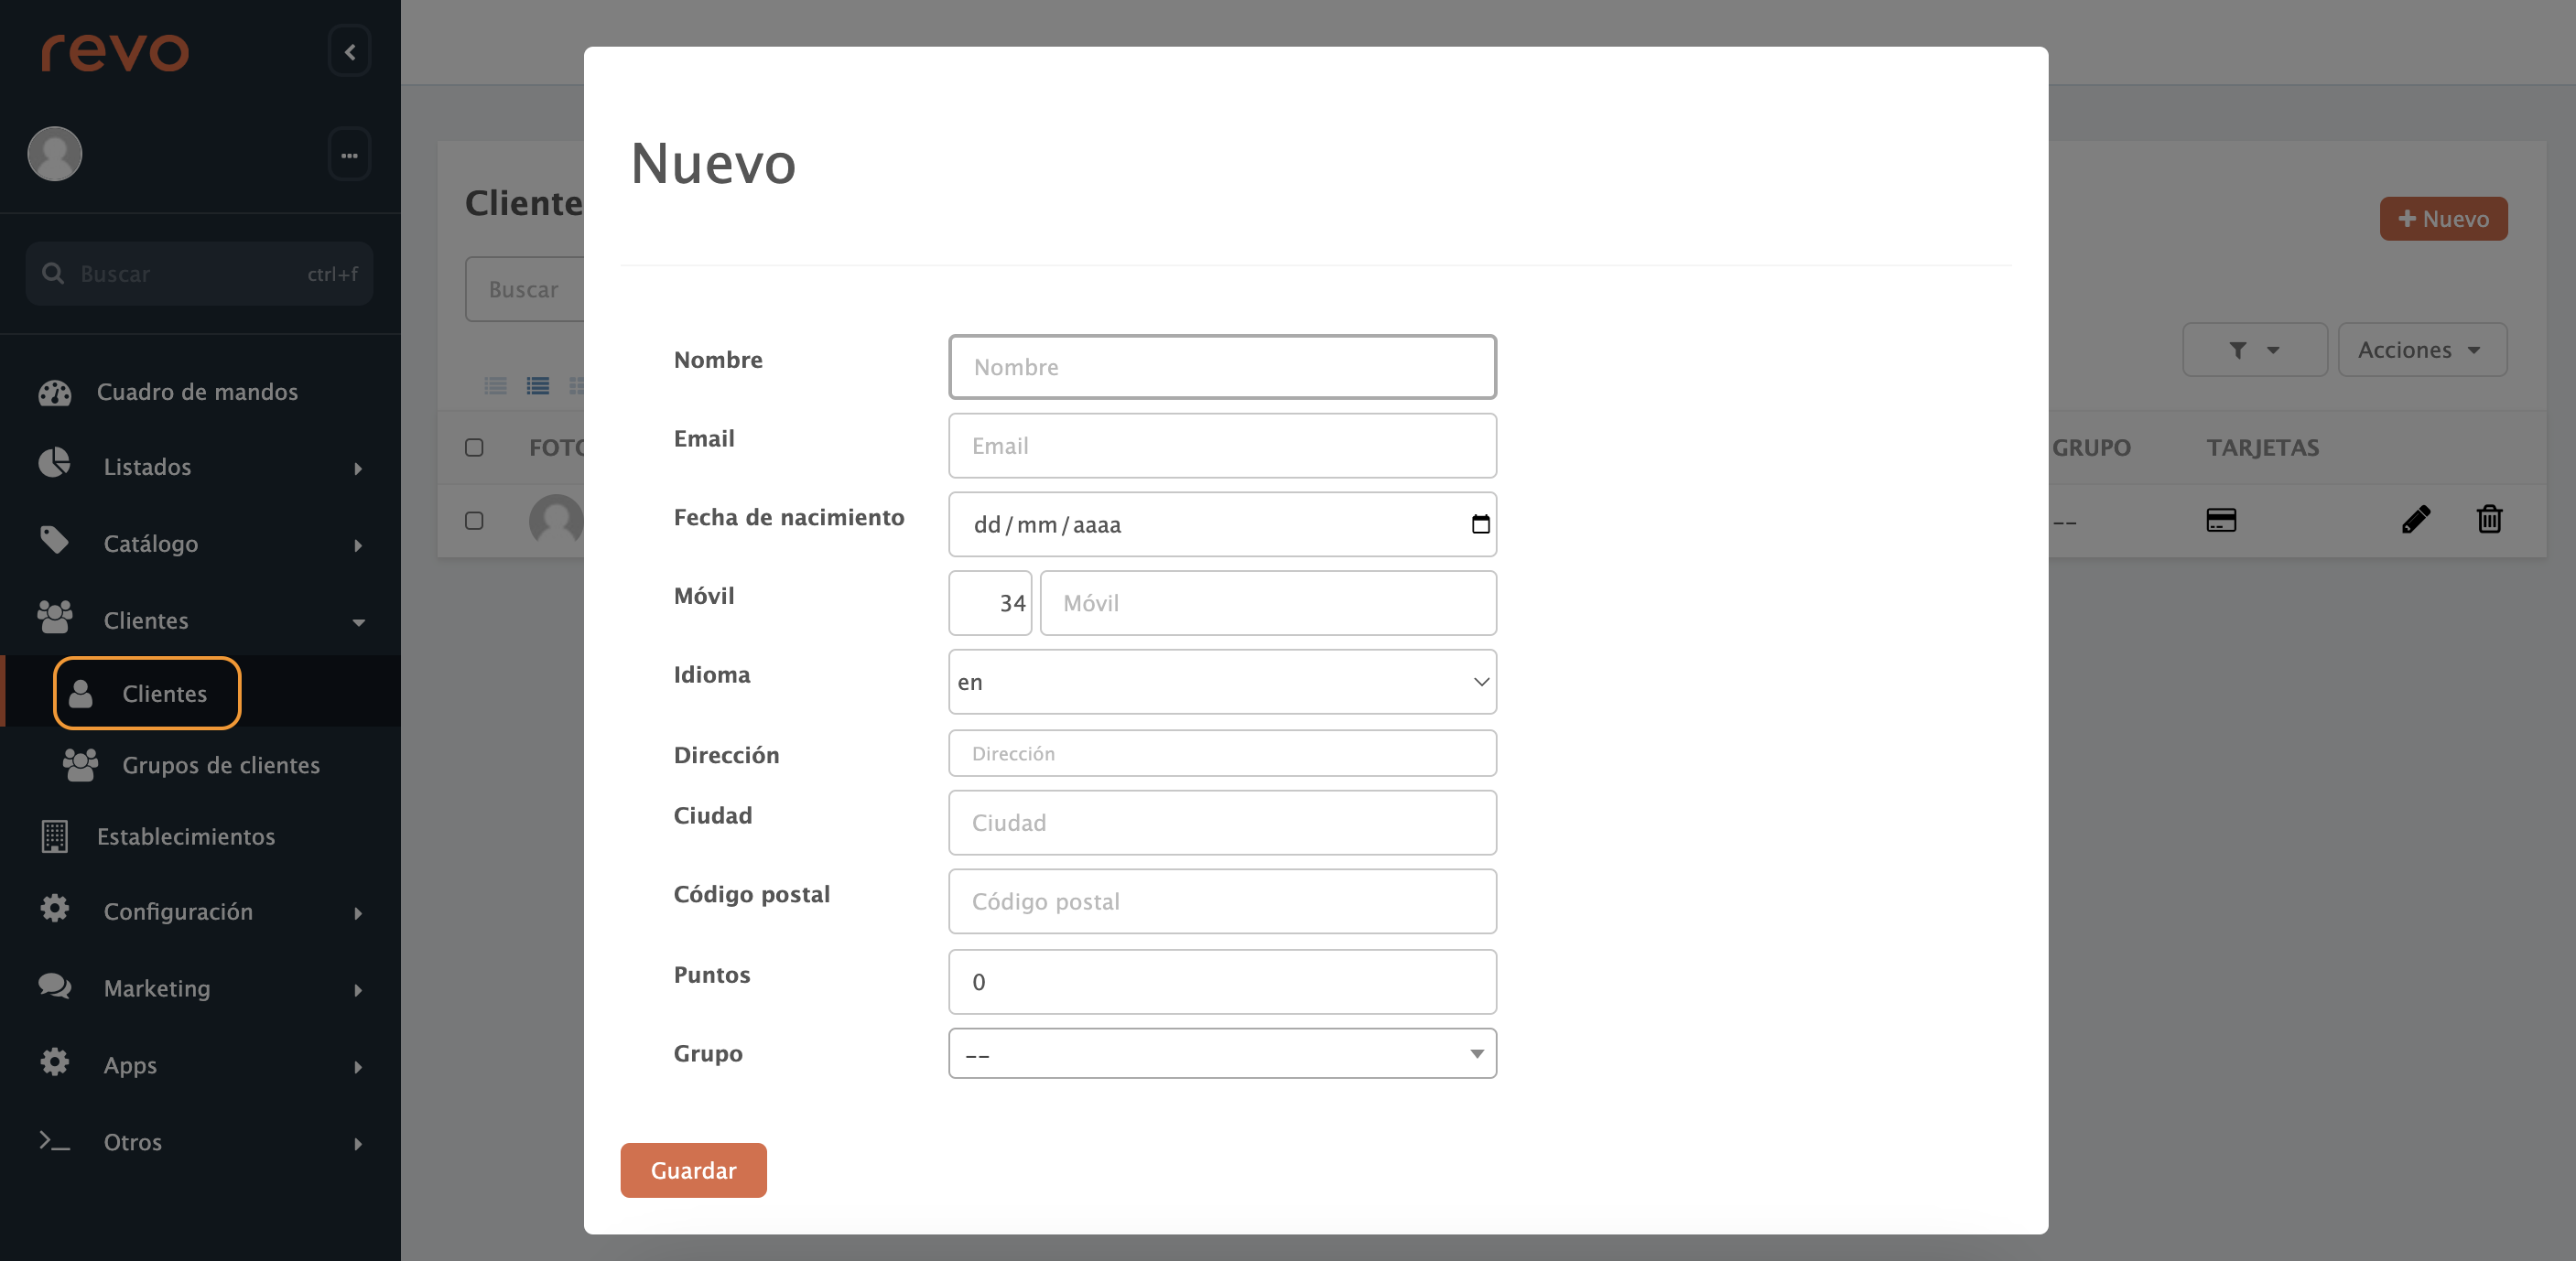
1. Access Clients / CLIENTS.
2. Click on +New:
-
Name: Enter the client's name.
-
Email: Enter the client's email.
-
Date of Birth: Enter the client's date of birth.
-
Mobile: Enter the client's phone number.
-
Language: Choose the client's language from the dropdown.
-
Address: Enter the client's address.
-
City: Enter the client's city.
-
Postal Code: Enter the client's postal code.
-
Points: Enter the client's points; we can leave it at 0.
-
Group: Select the client group from the dropdown.
3. Finally, click on Save.
Note: If we have enabled in the preferences: Notify of offers and news, we will see in the PROMOS column whether they have accepted or not to receive them.
2. CLIENT GROUPS
This section will allow us to add a client group with an associated discount. To do so:
1. Access Clients / CLIENT GROUPS.
2. Click on +New:

-
Name: Enter the group name.
-
Discount: Enter the discount percentage.
3. Finally, click on Save.
Note: Once the group is created, simply go to the client's profile and assign it.