The PRO accounts of Revo XEF have an additional feature called profiles. With them, you can configure the following:
- Printers / Printer Groups: Set up printers or printer groups for categories or products.
- Show / Hide: Decide whether to show or hide a category or product.
- Tax Change: Change the tax for a category or product.
- Rooms: Choose which rooms you want to display.
- Payment Methods: Select which payment methods you want to display.
IMPORTANT: Use only one profile to activate options. You cannot have multiple profiles selected on the same device.
PRINTERS / PRINTER GROUPS
Sometimes, you need to set up one or more profiles to print a category or product on different printers or printer groups. For example, in a restaurant with two floors or a terrace, waiters can use profiles to send drinks to the corresponding bar printer.
HOW TO CREATE A PROFILE
1. Access the back-office of Revo XEF.
2. Go to PROFILES.
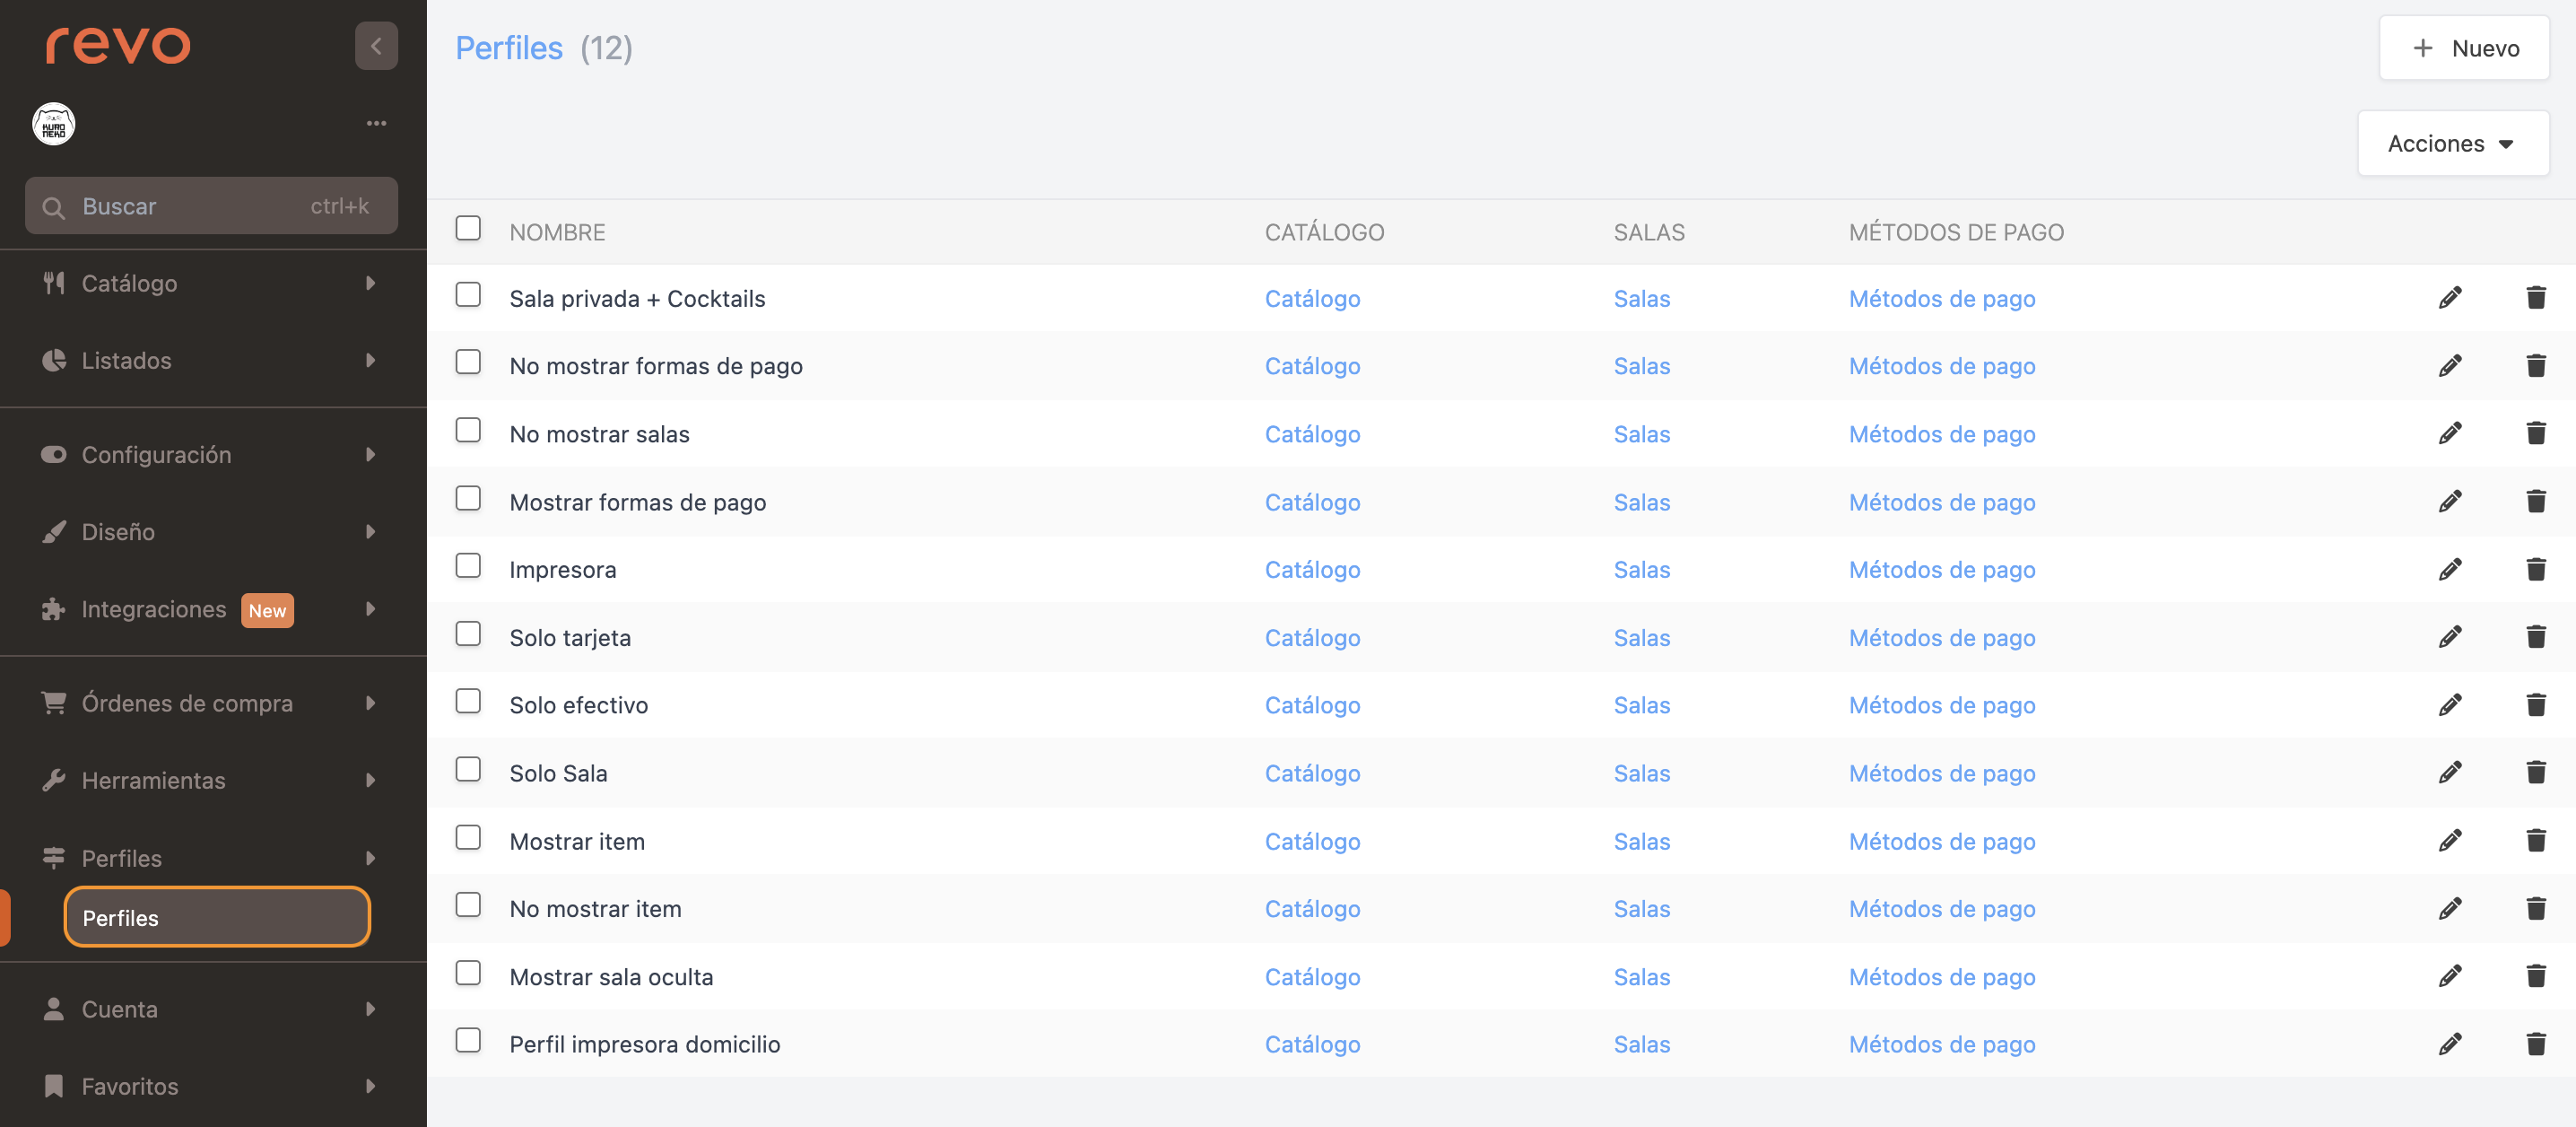
3. Create a new profile by clicking the +New button.

- Name: Enter a name.
4. Click Save.
5. Click Catalogue.
6. Select the group. Example: DRINKS.
7. Overwrite the categories you want to print on another printer. Example: Imported.
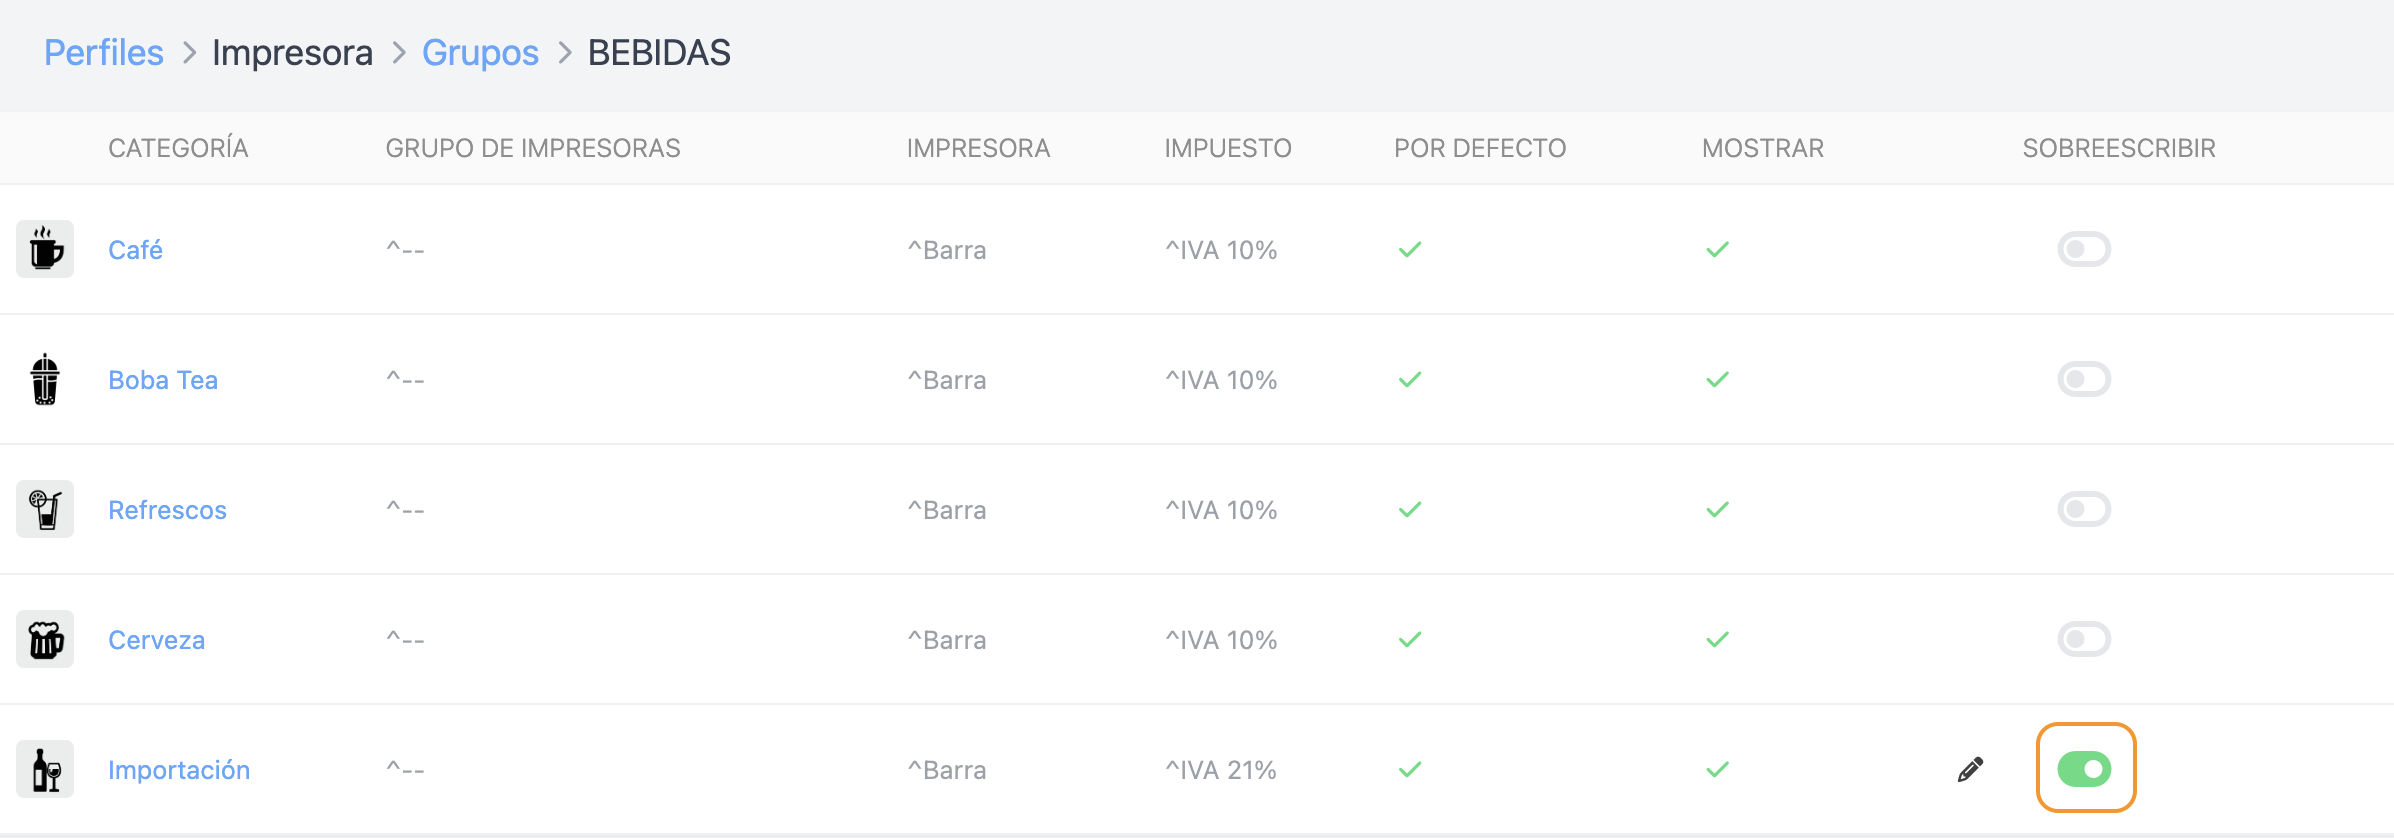
8. Click on the icon and select the printer or printer group for the category.
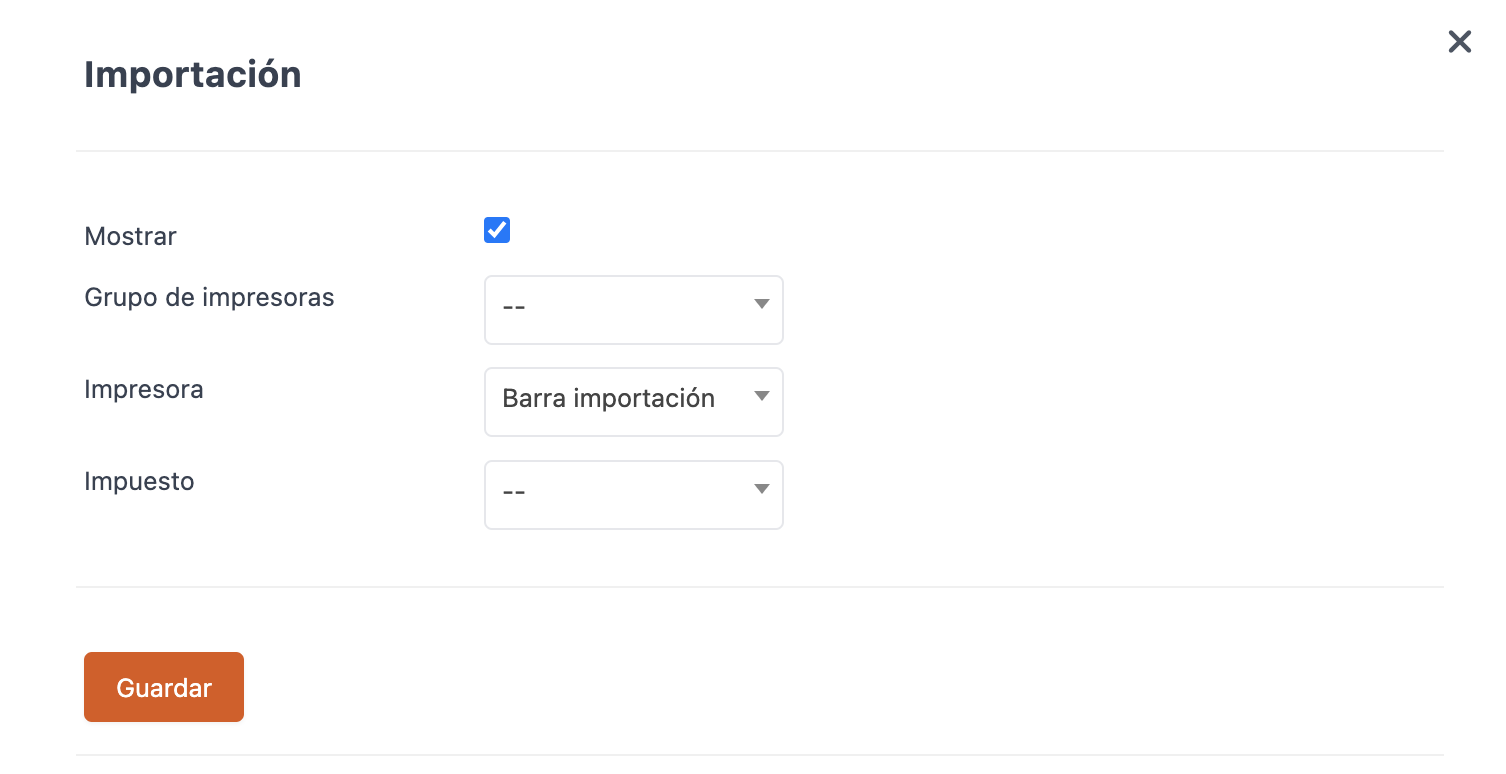
9. Click Save.
10. Repeat steps 7 to 9 for other categories.
11. If a product within a category needs a different printer, select the product and assign the corresponding printer.
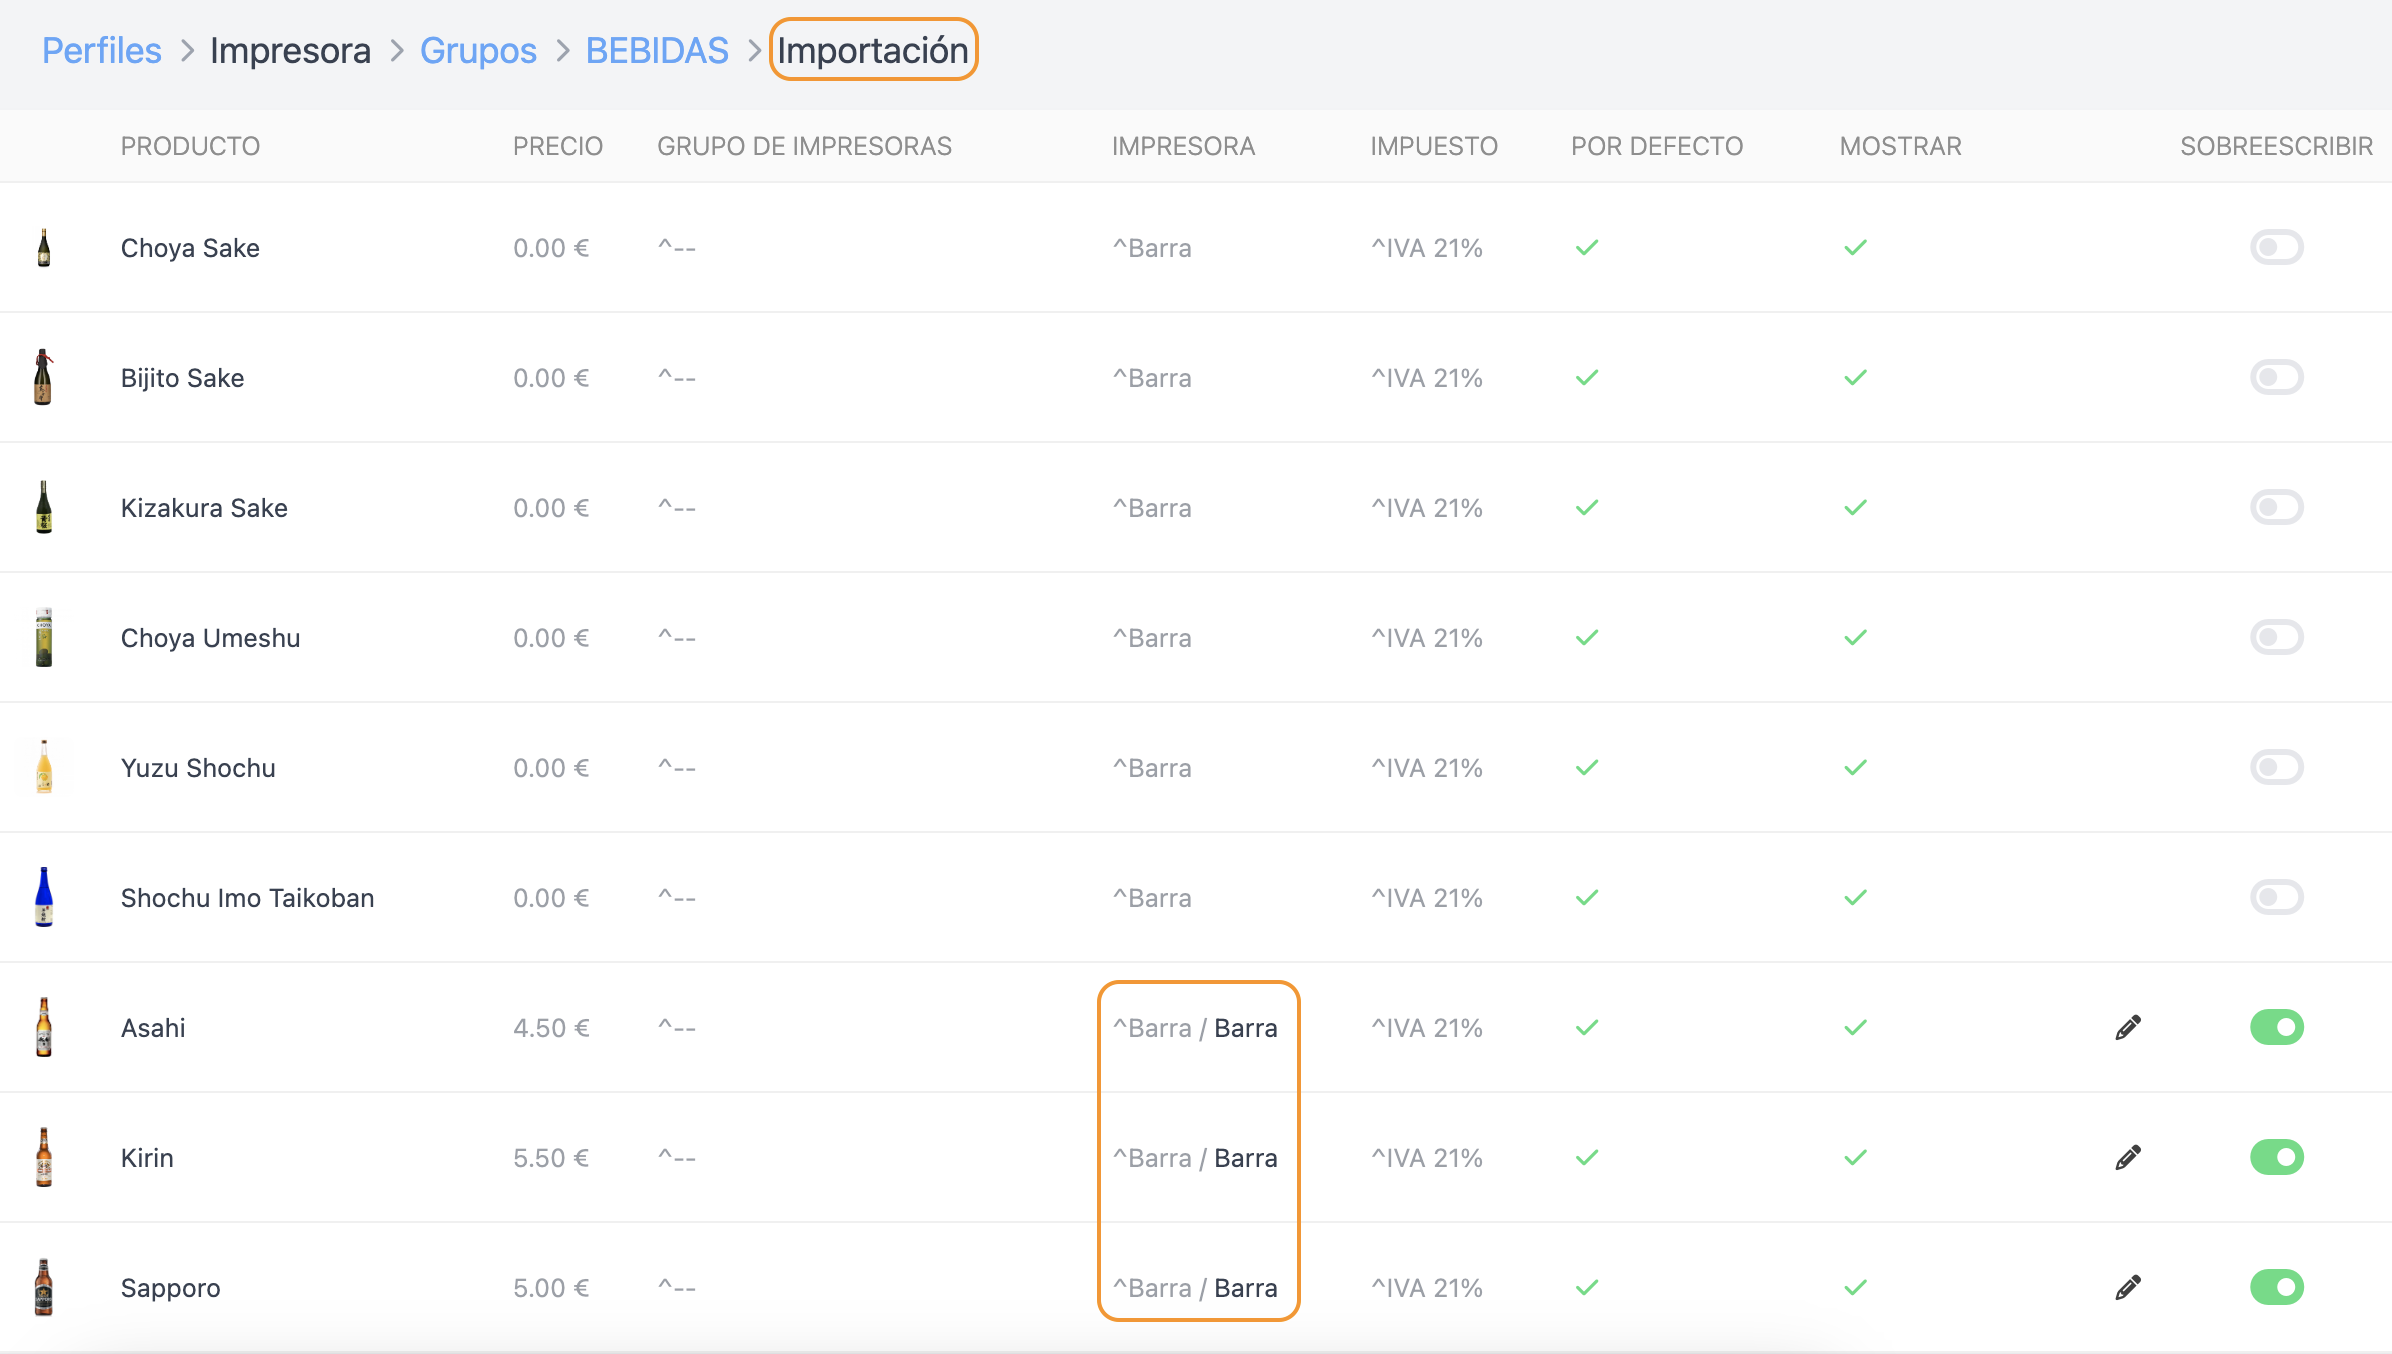
In this image, the beers have a different configuration from the imported category. The three beers would be printed on the BAR printer, not on the IMPORTED BAR printer configured in the category. The priority is: product, category, and group.
IMPORTANT: For the configuration to take effect, make sure it is activated in green.
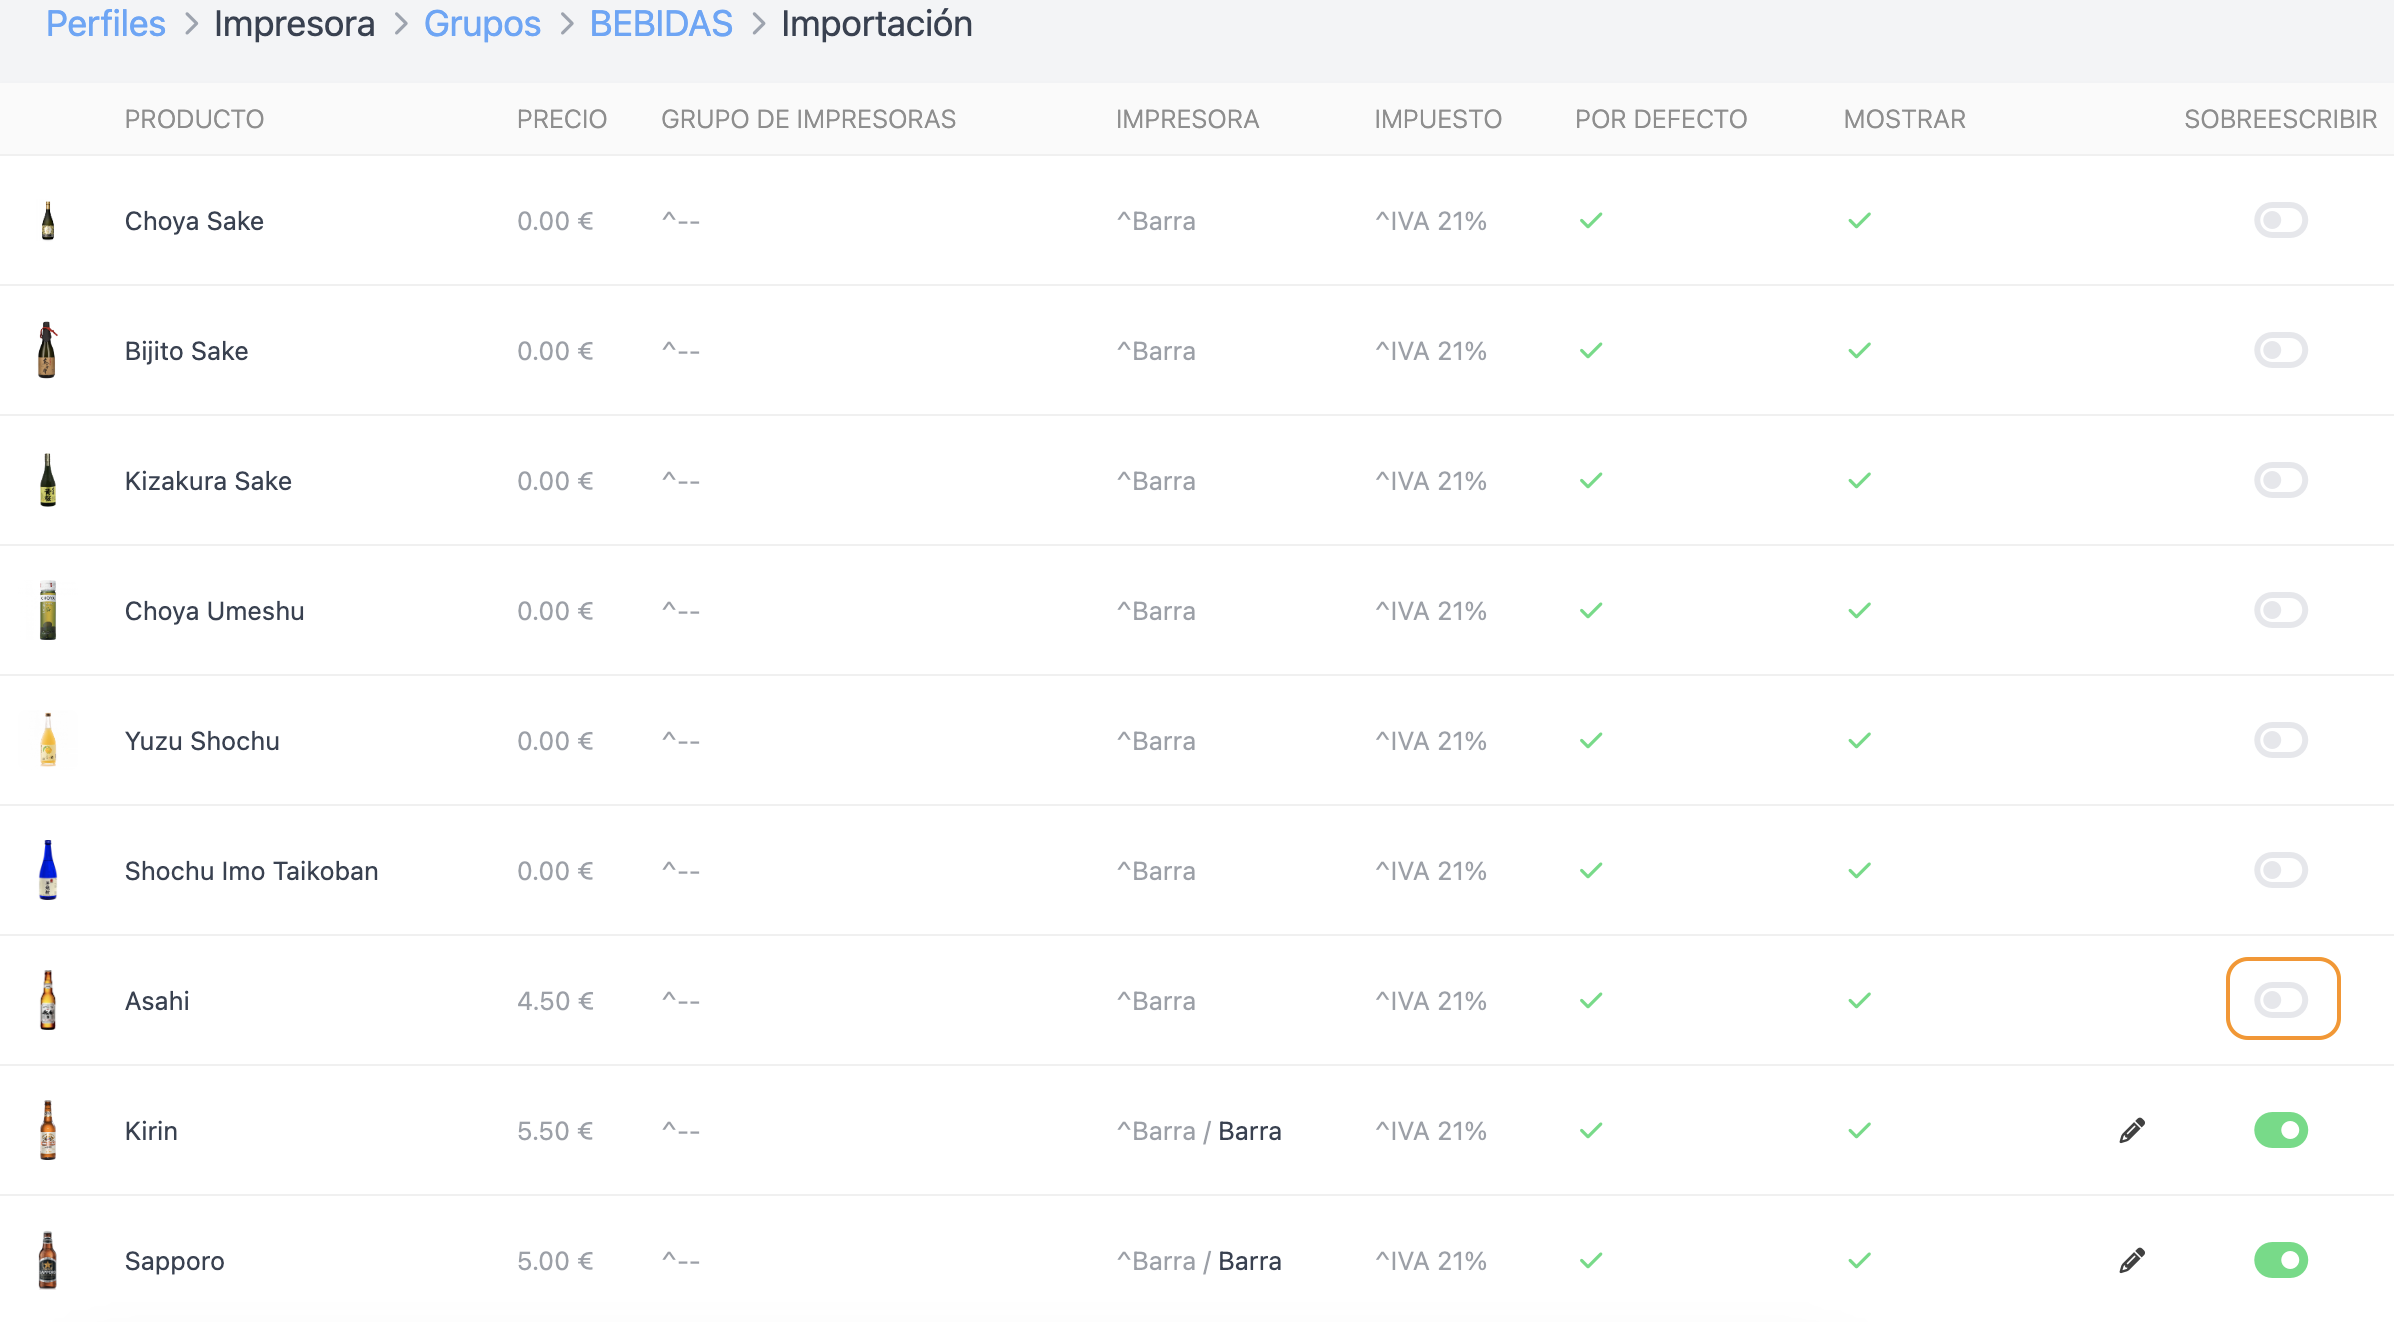
In this image, the Asahi would be printed on IMPORTED BAR because its printer is not activated, even though it was configured on BAR.
Show / Hide
This option allows you to show or hide a category or products on a device configured with the profile.
The show option is selected by default. You only need to deactivate the categories or products you do not want to display.
1. Use the previously created profile or create a new one according to your needs.
2. Go to the group. Example: Drinks.
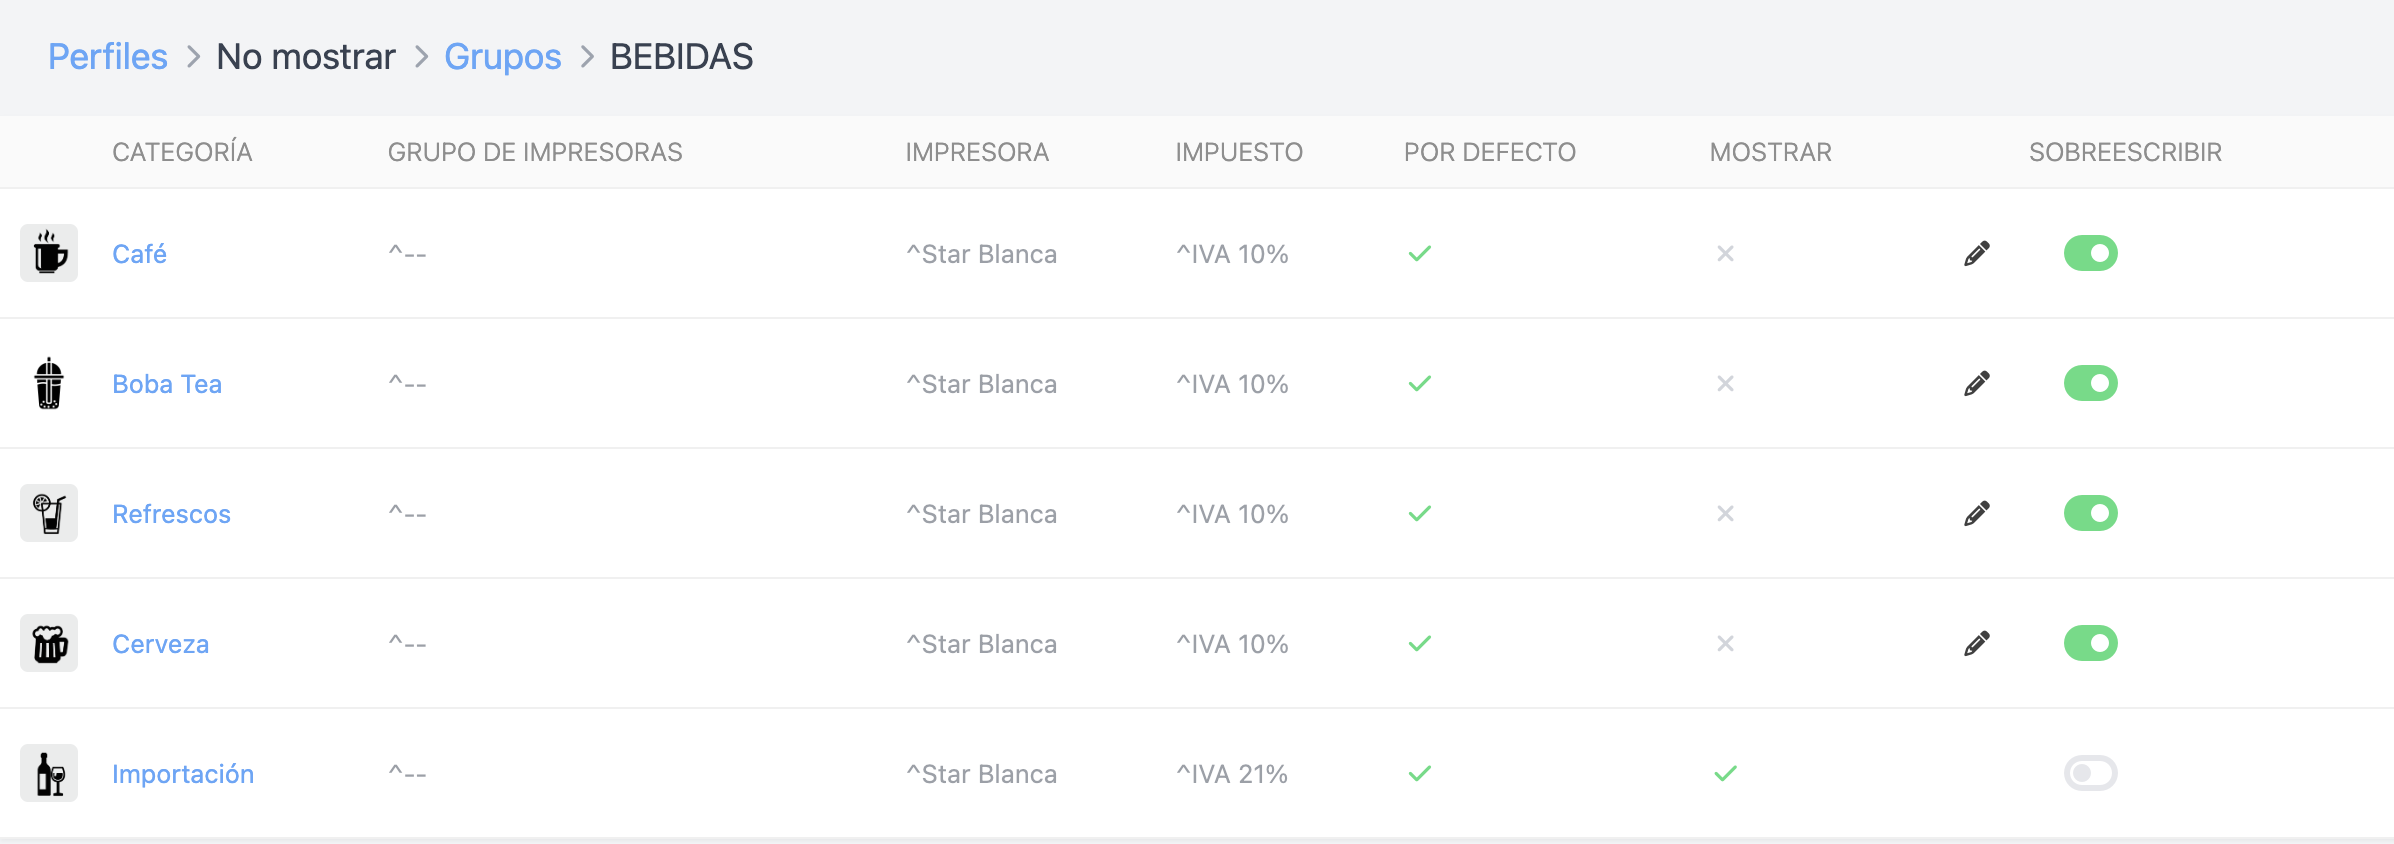
3. Activate the categories you will hide. In the example, only the "Imported" category will be visible on the device.
4. Click the icon and deactivate Show.
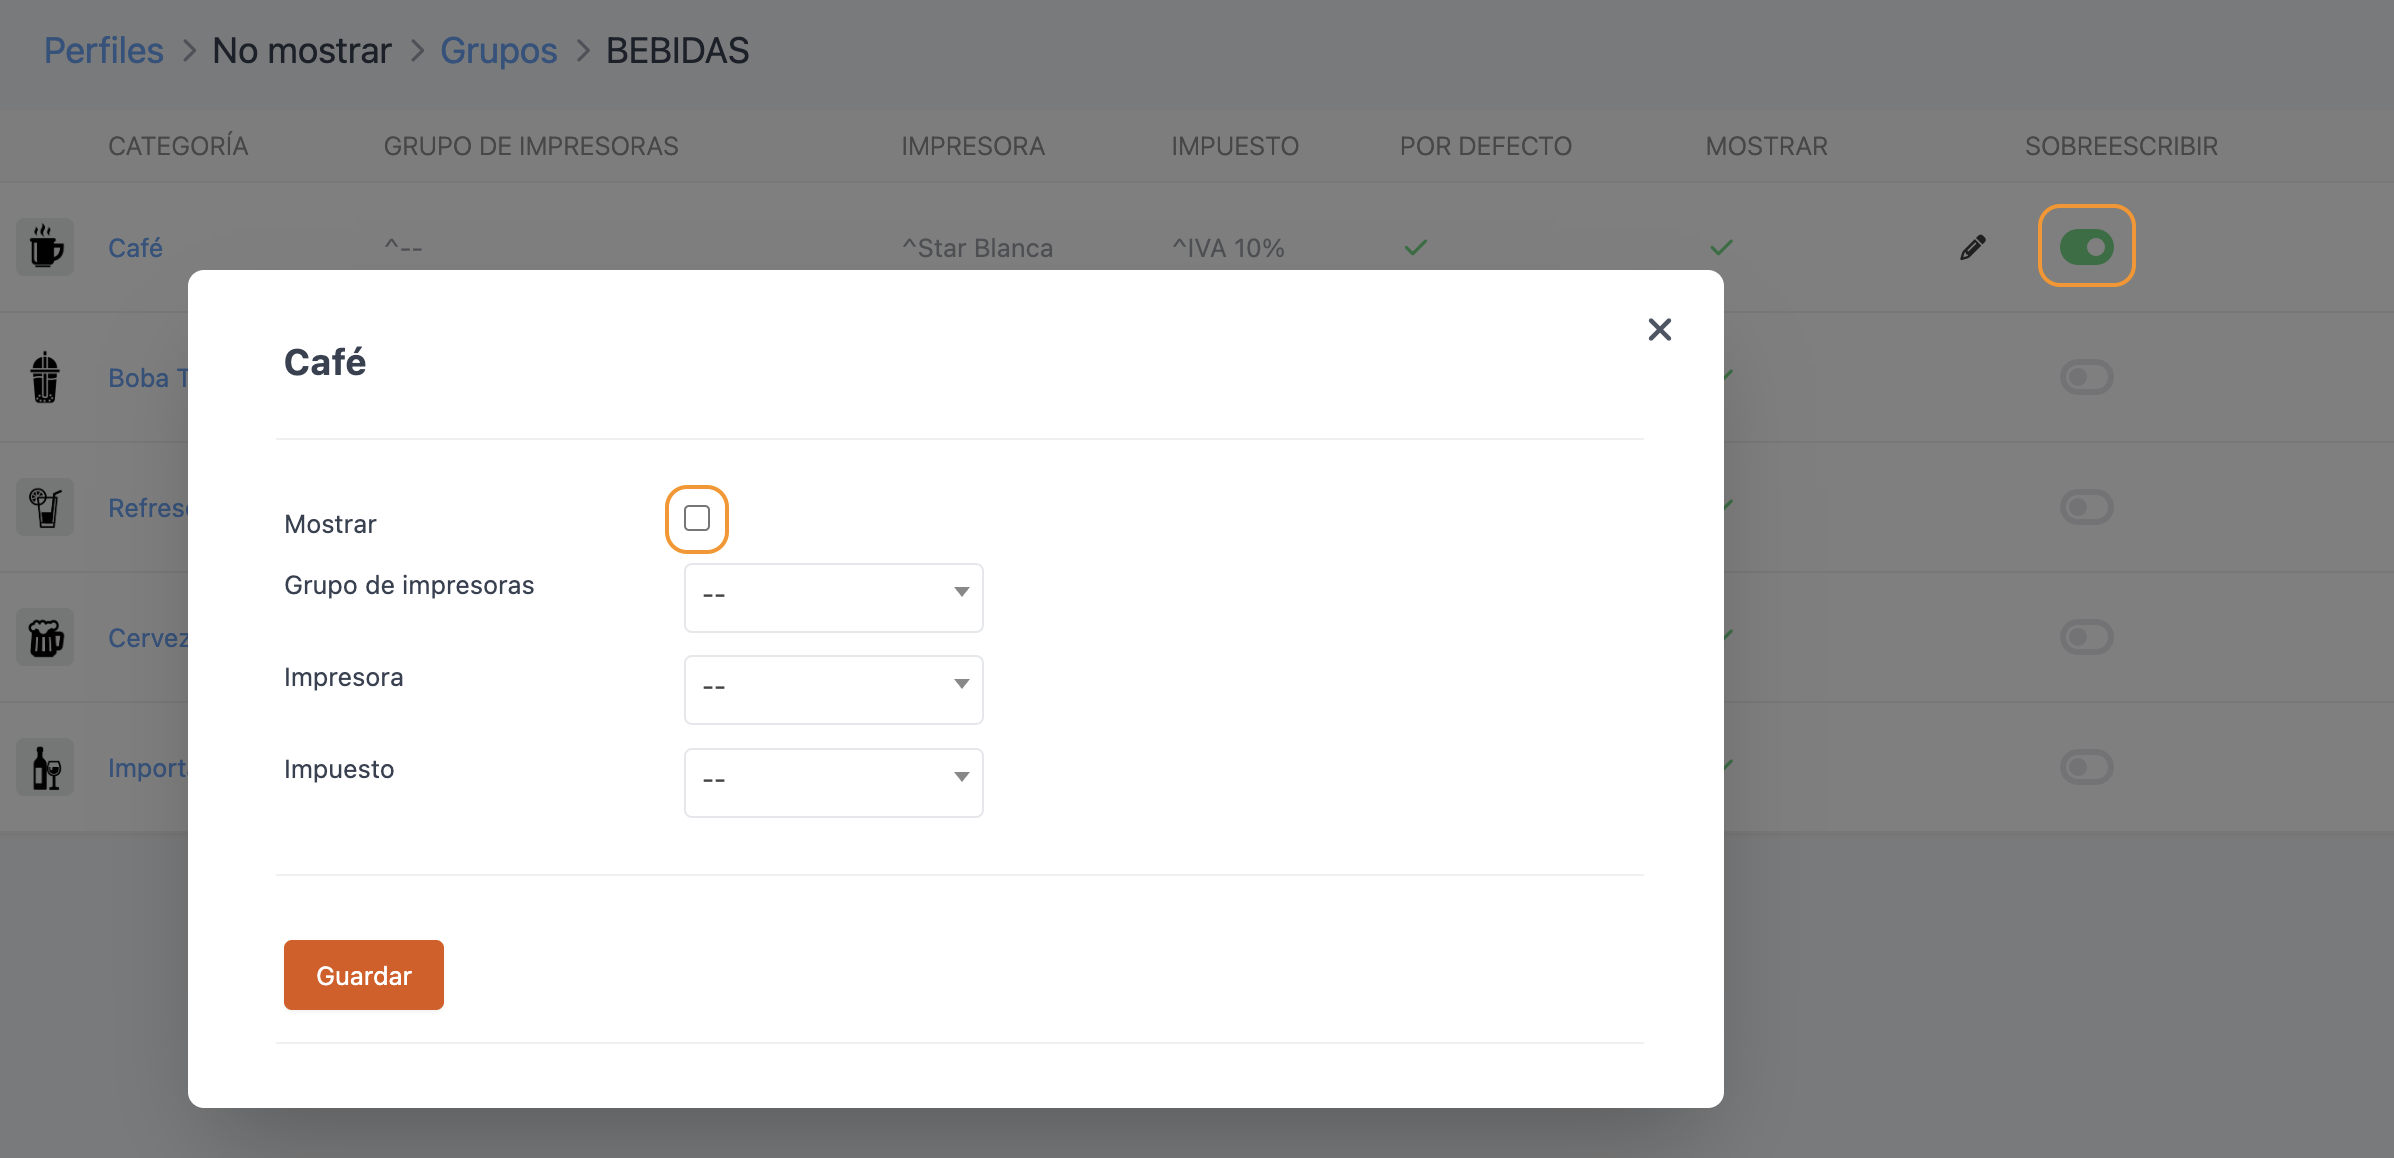
5. Click Save.
6. Repeat steps 4 and 5 for the categories you want to hide.
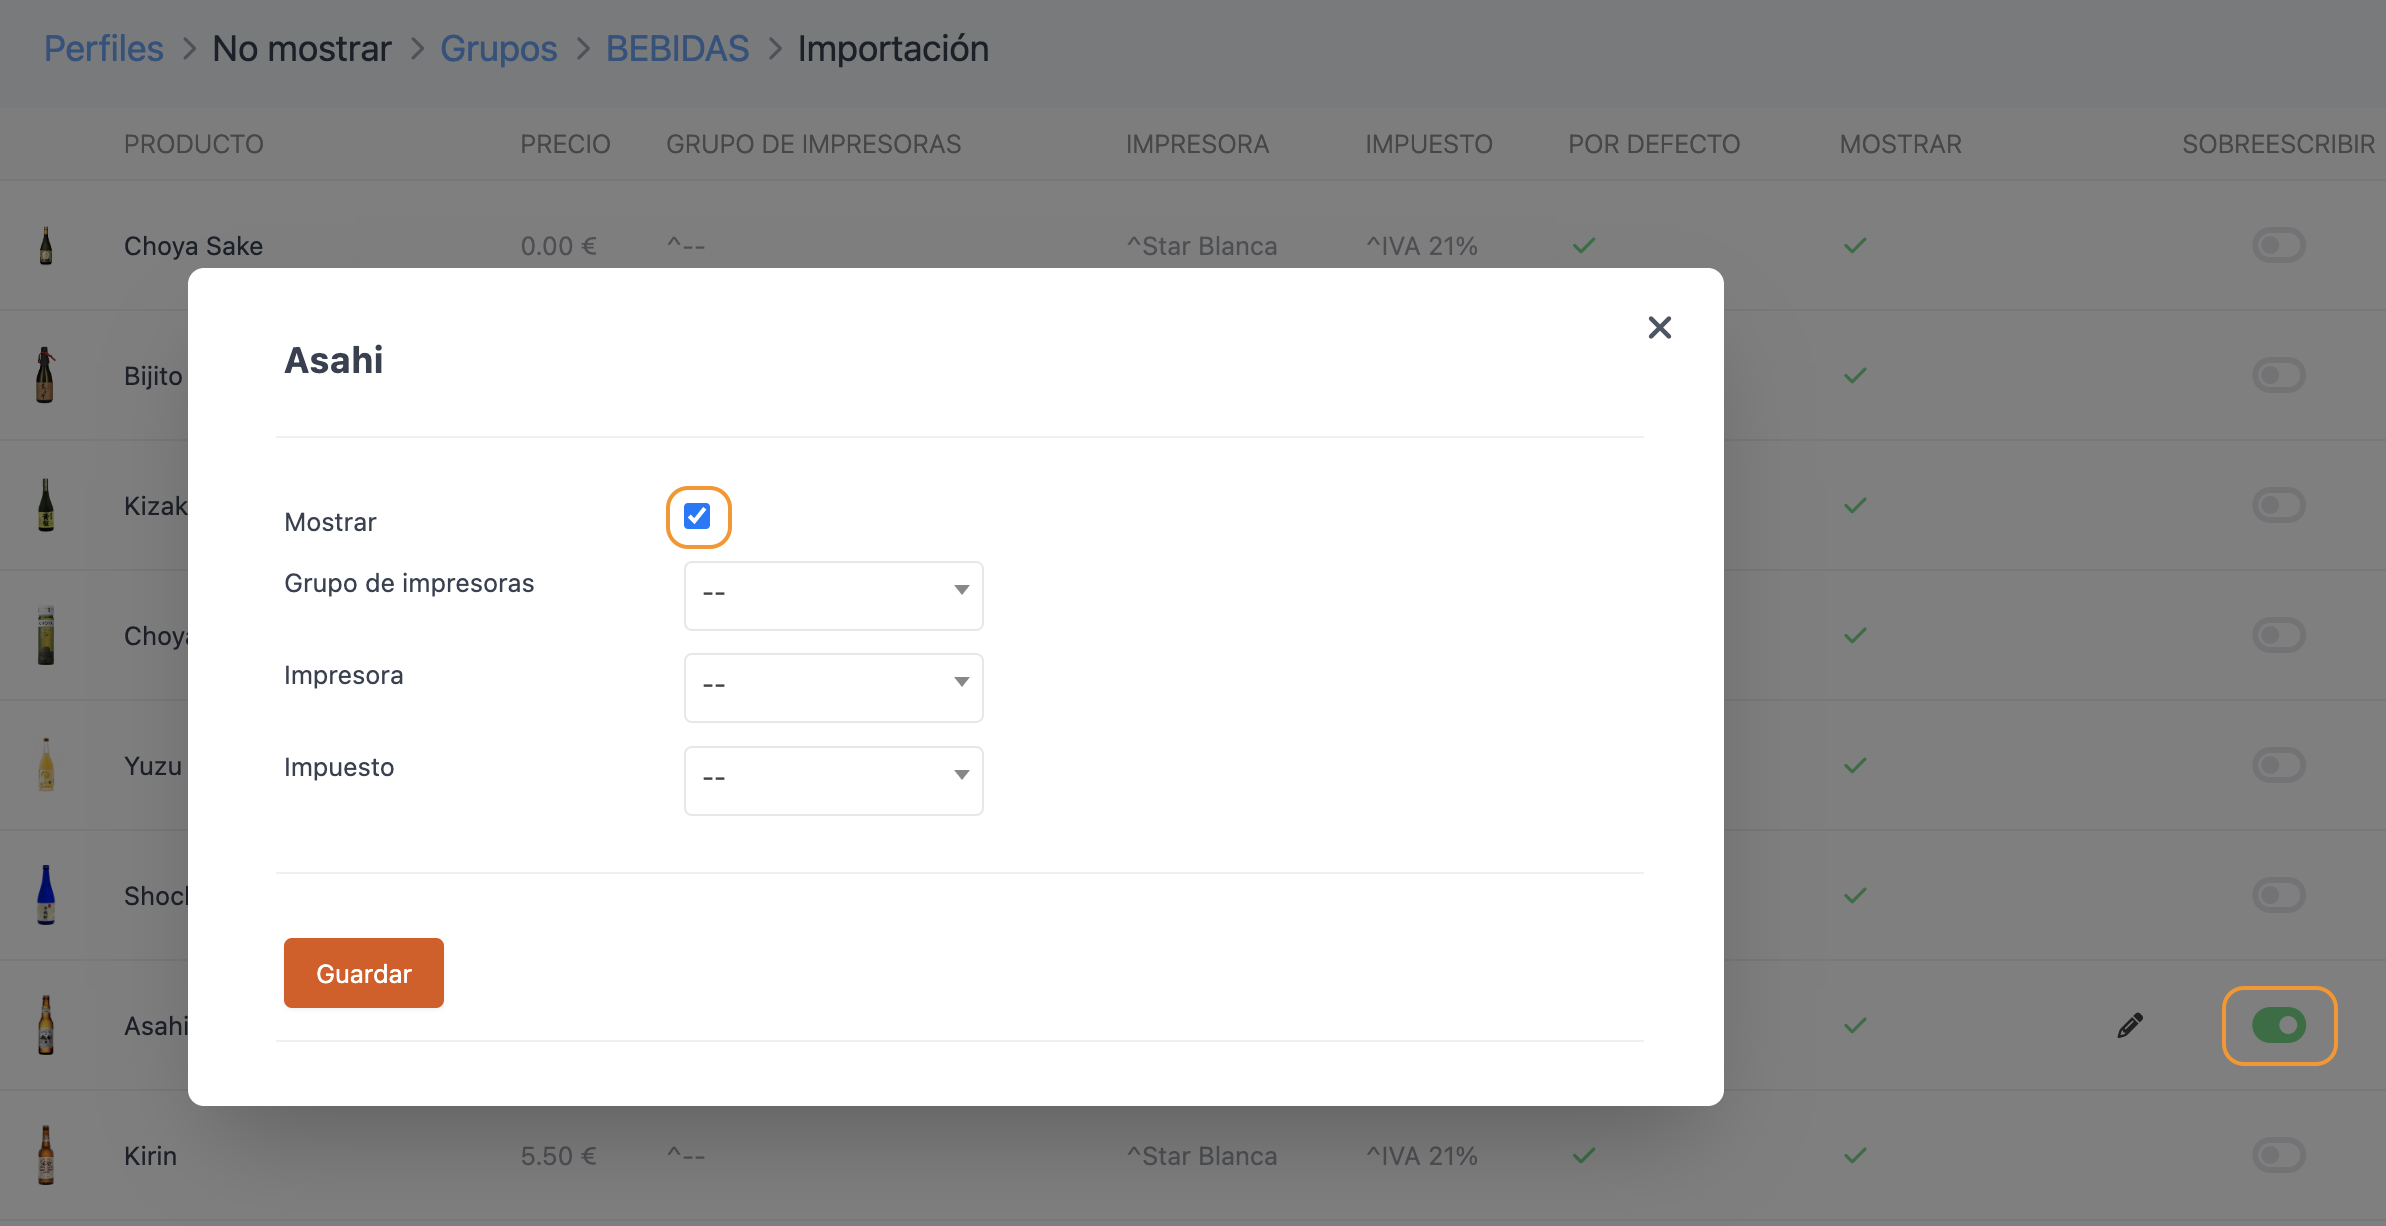
7. To hide only some products within one or more categories, activate the products, click the icon, and deactivate Show.
Tax Change
Sometimes, you might want to invoice with a VAT or tax different from the default one.
1. Create a new profile by using the + New button.
2. Enter a name and click Save.
3. Go to the group. Example: Drinks.
4. Activate the categories you want to edit. Example: Beer.
5. Click the icon and select the tax.
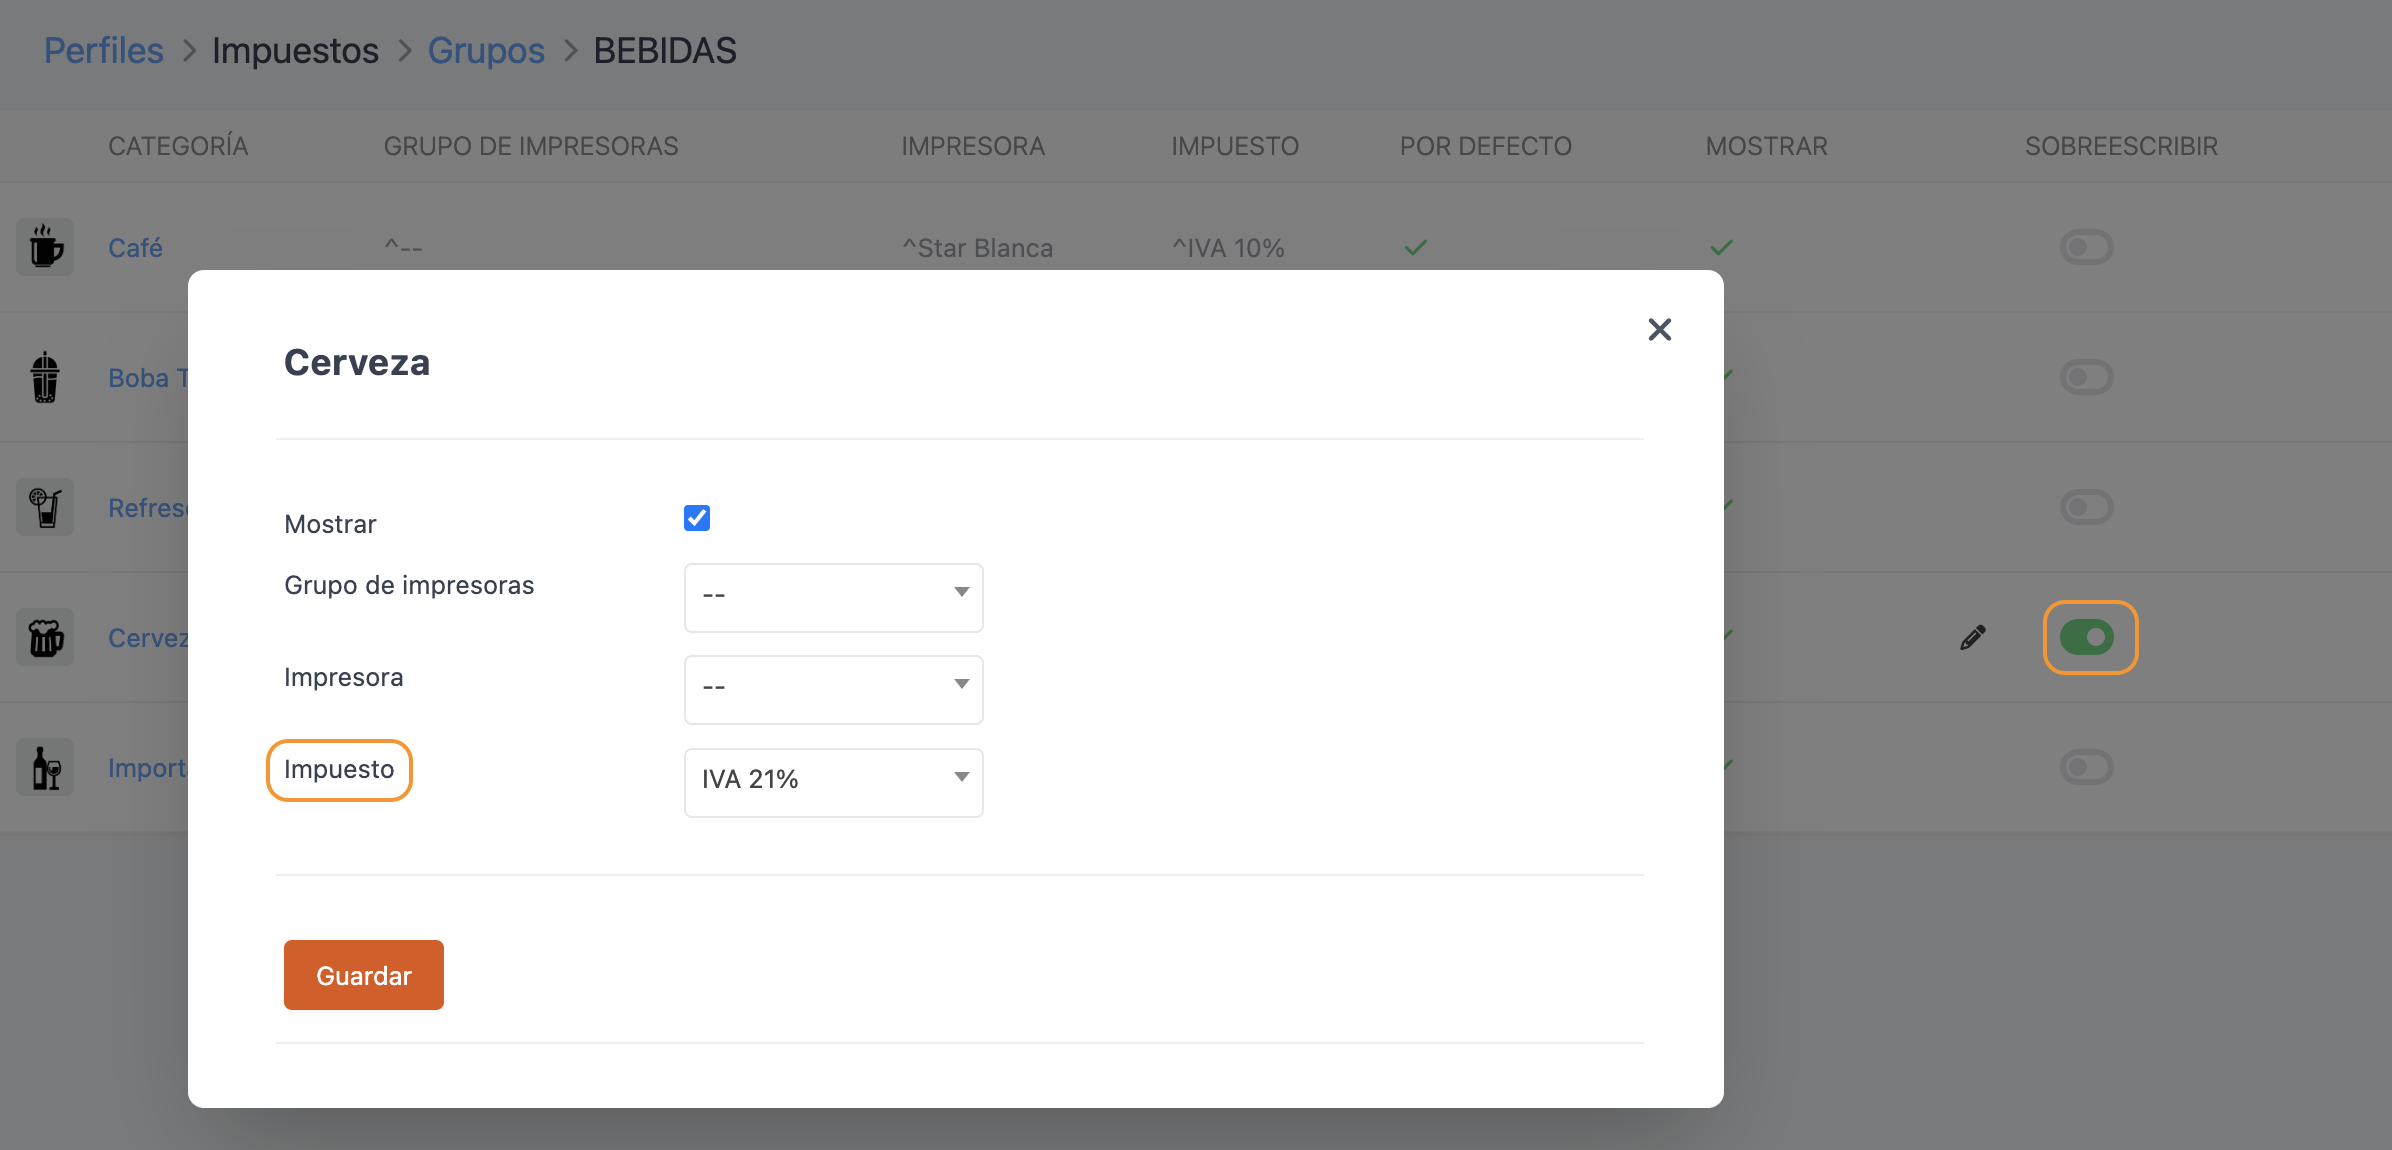
6. Click Save.
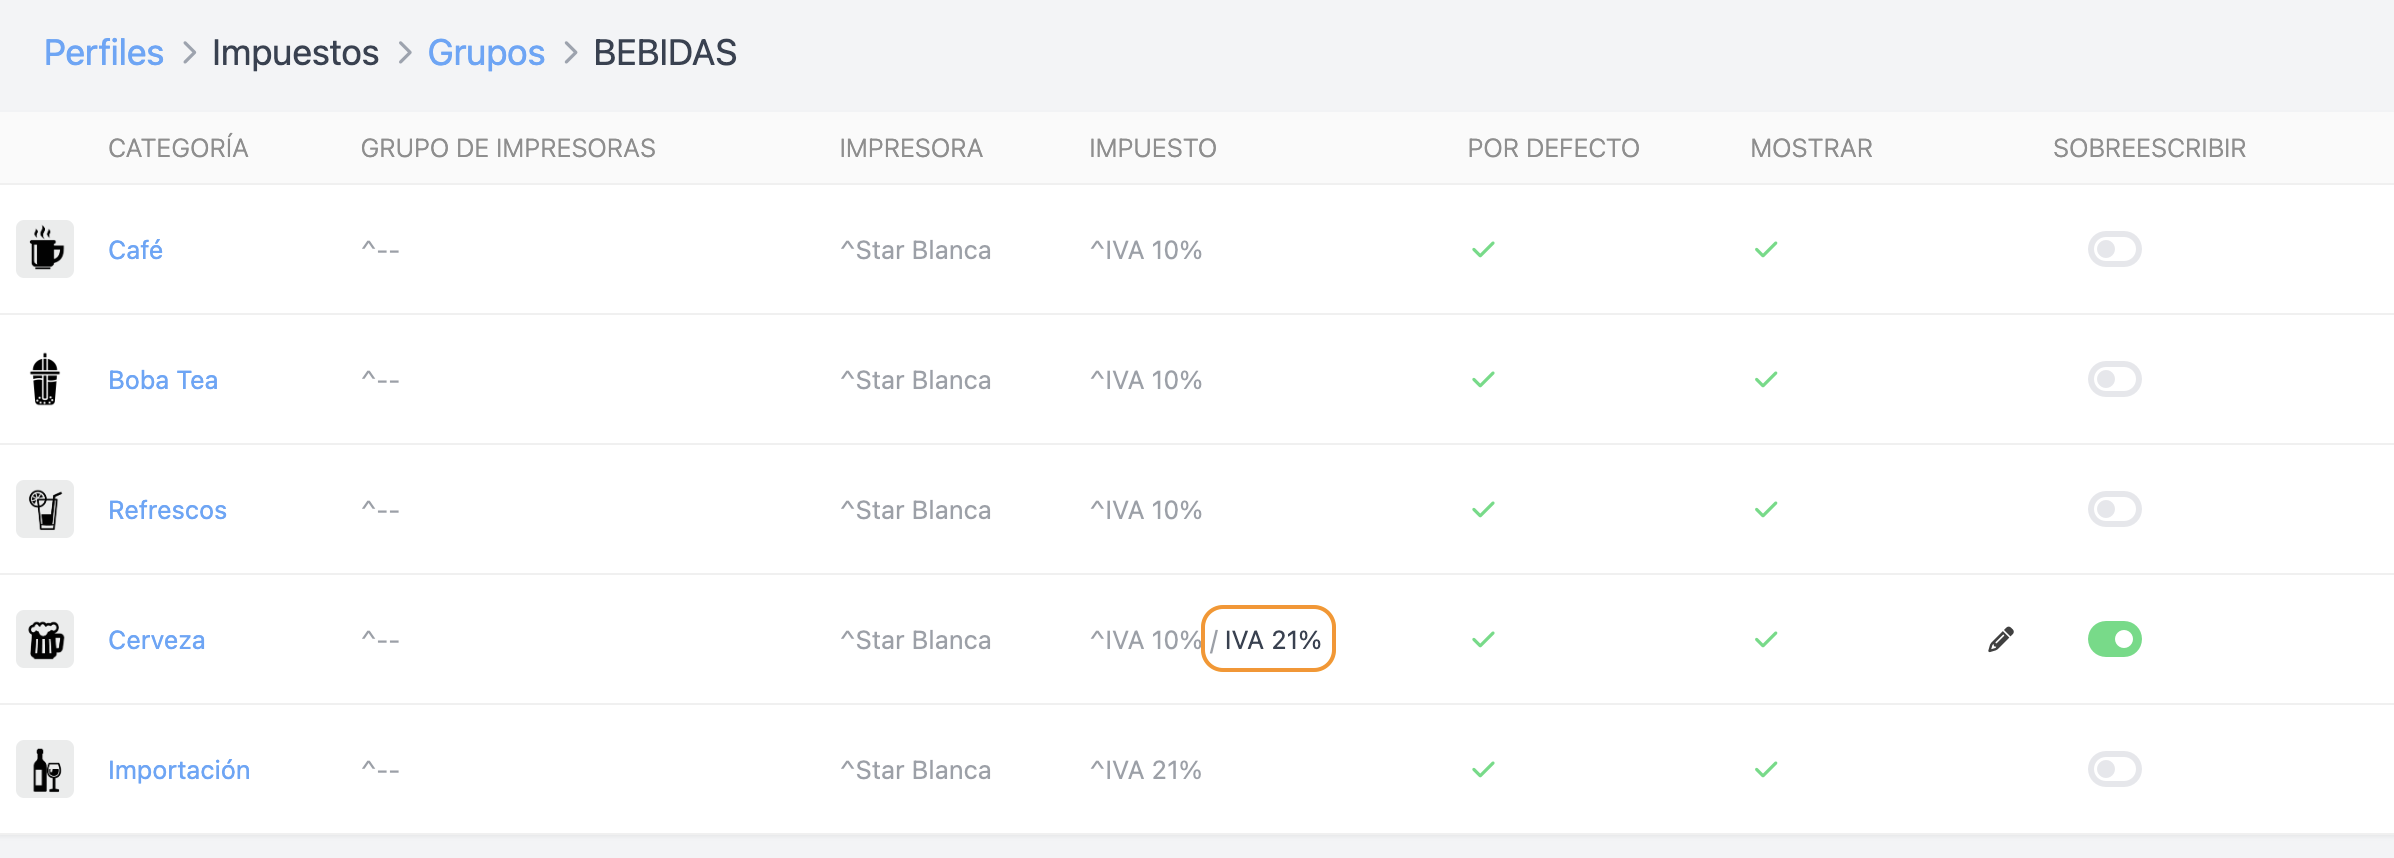
7. Repeat steps 5 and 6 for all categories or products.
8. You will see the newly applied tax in black.
Rooms
This option allows you to activate or deactivate one or more rooms on a device configured with the profile. Only activated rooms will be displayed.
The active option is selected by default. You only need to deactivate the rooms you do not want to display.
1. Use the existing profile or create a new one as needed.
2. Click Rooms.

3. Activate or deactivate the corresponding rooms.

In the image, only "Room" remains active and visible on the device.
You cannot hide only some tables of a room.
Payment Methods
This option allows you to activate or deactivate one or more payment methods on a device configured with the profile. Only activated payment methods will be displayed.
The active option is selected by default. You only need to deactivate the payment methods you do not want to display.
1. Use the existing profile or create a new one as needed.
2. Click Payment Methods.

3. Activate or deactivate the corresponding payment methods.
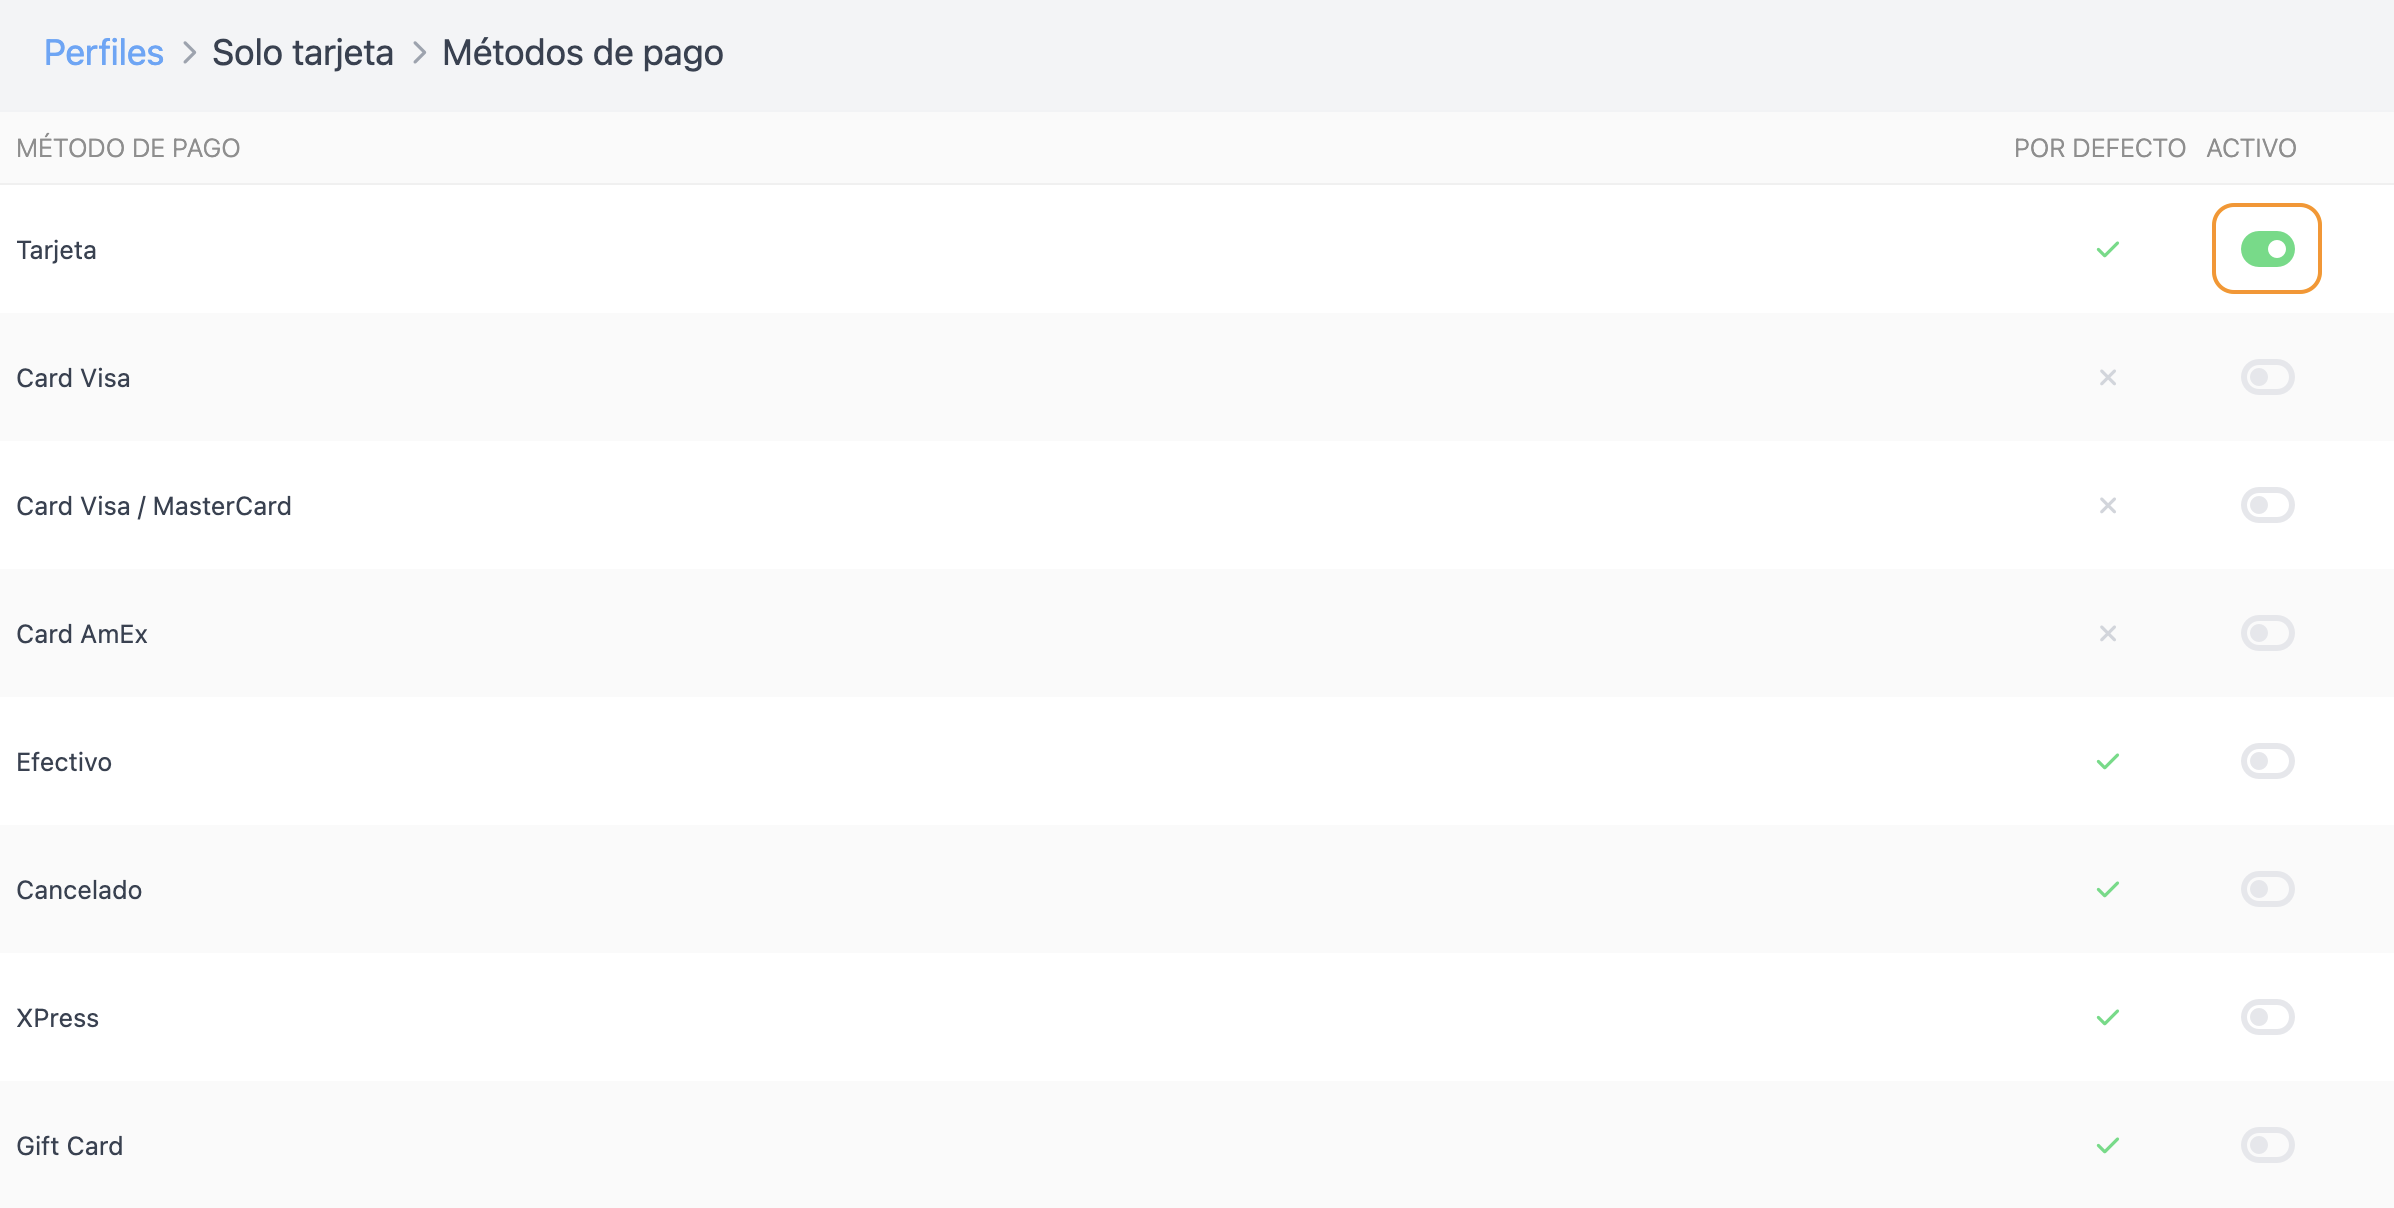
In the image, only "Card" remains active and visible on the device.
WHERE CAN PROFILES BE ASSIGNED?
1. In the room
In the configuration of a room in the back-office.
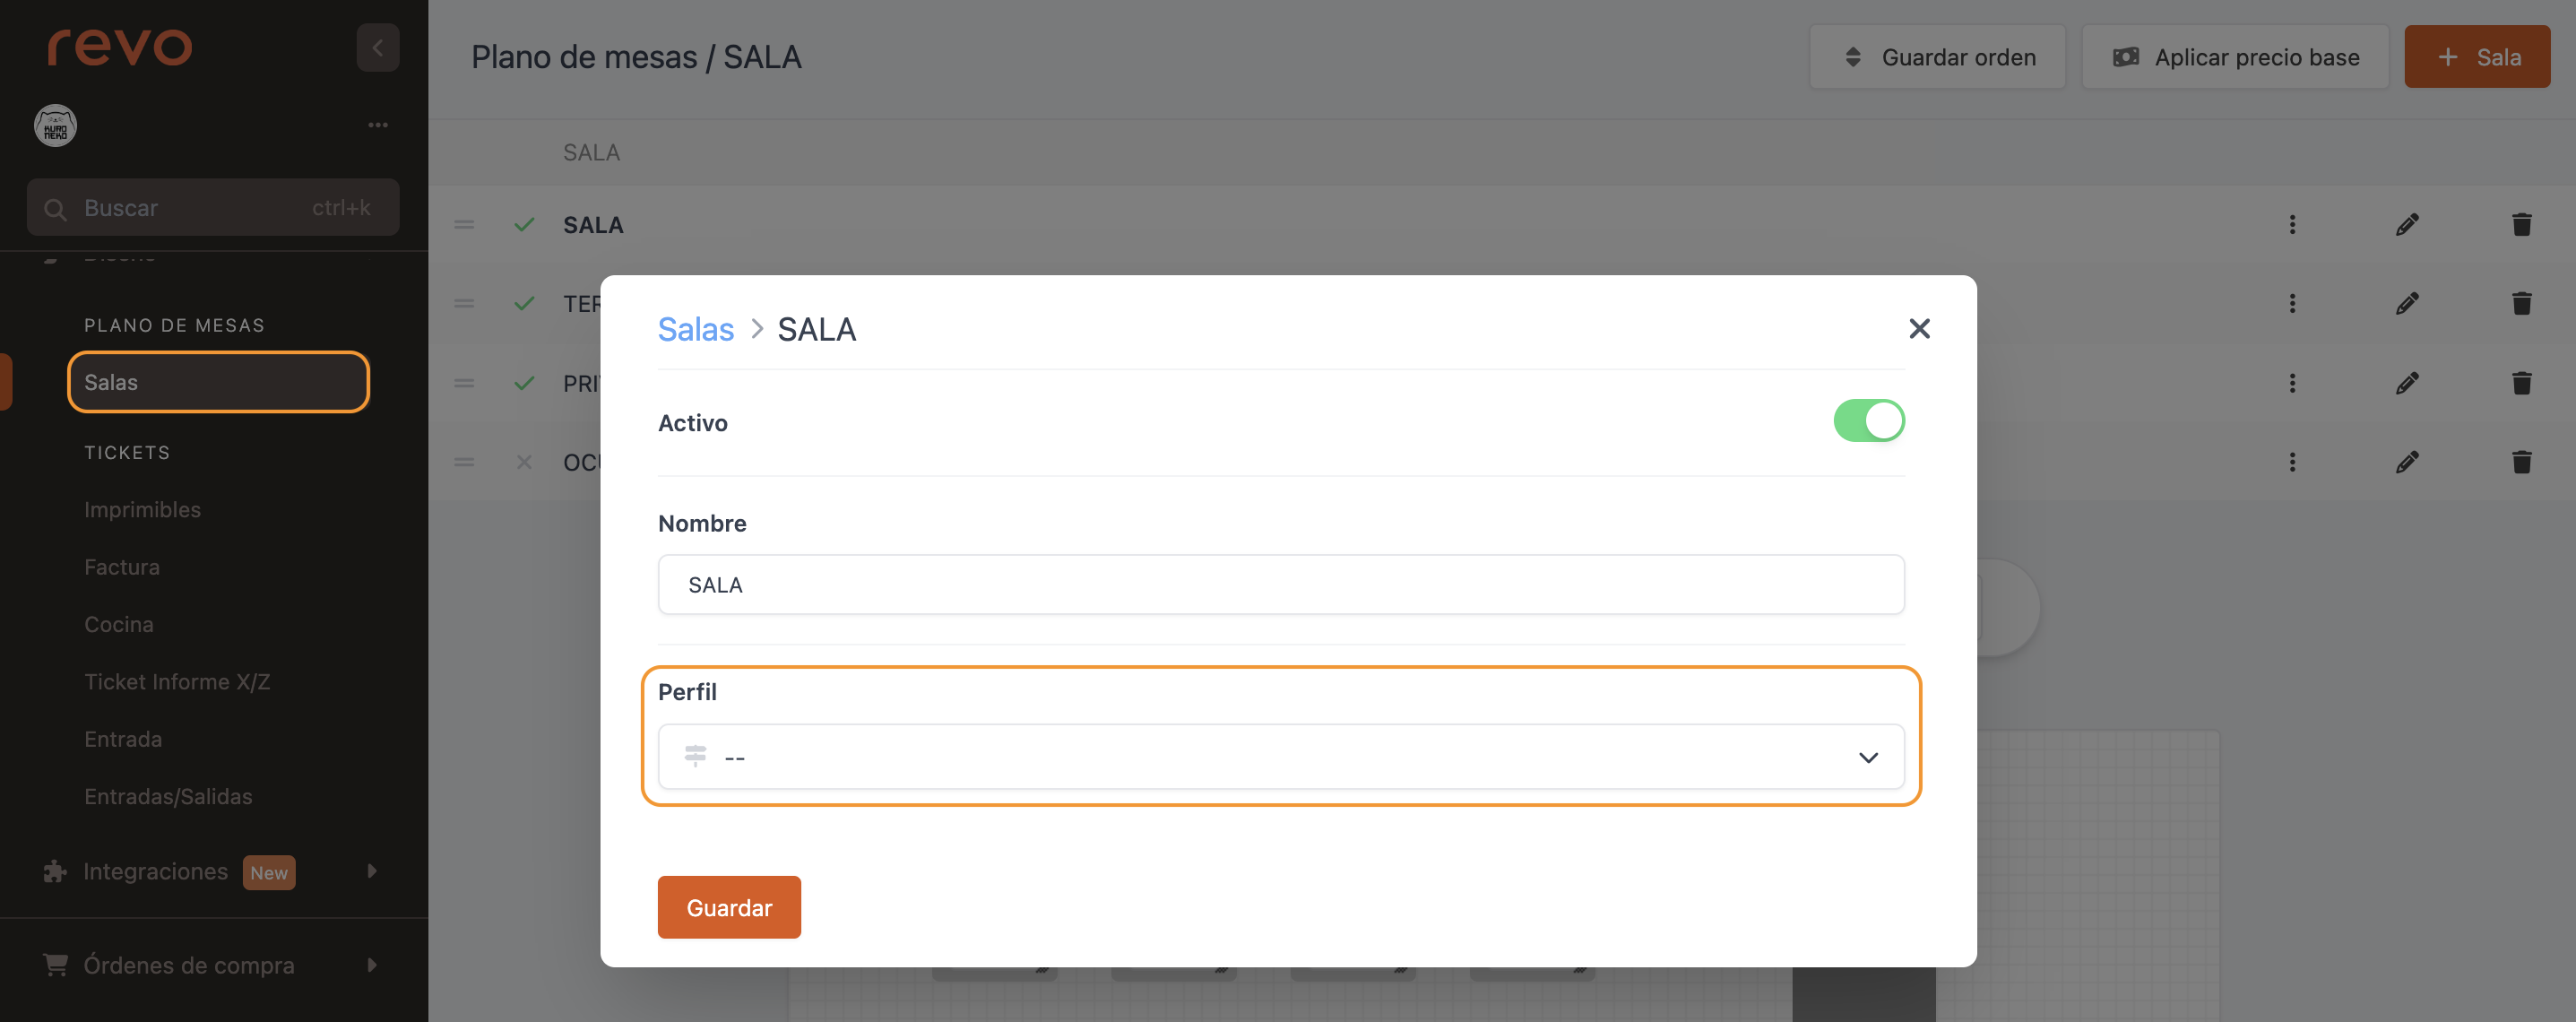
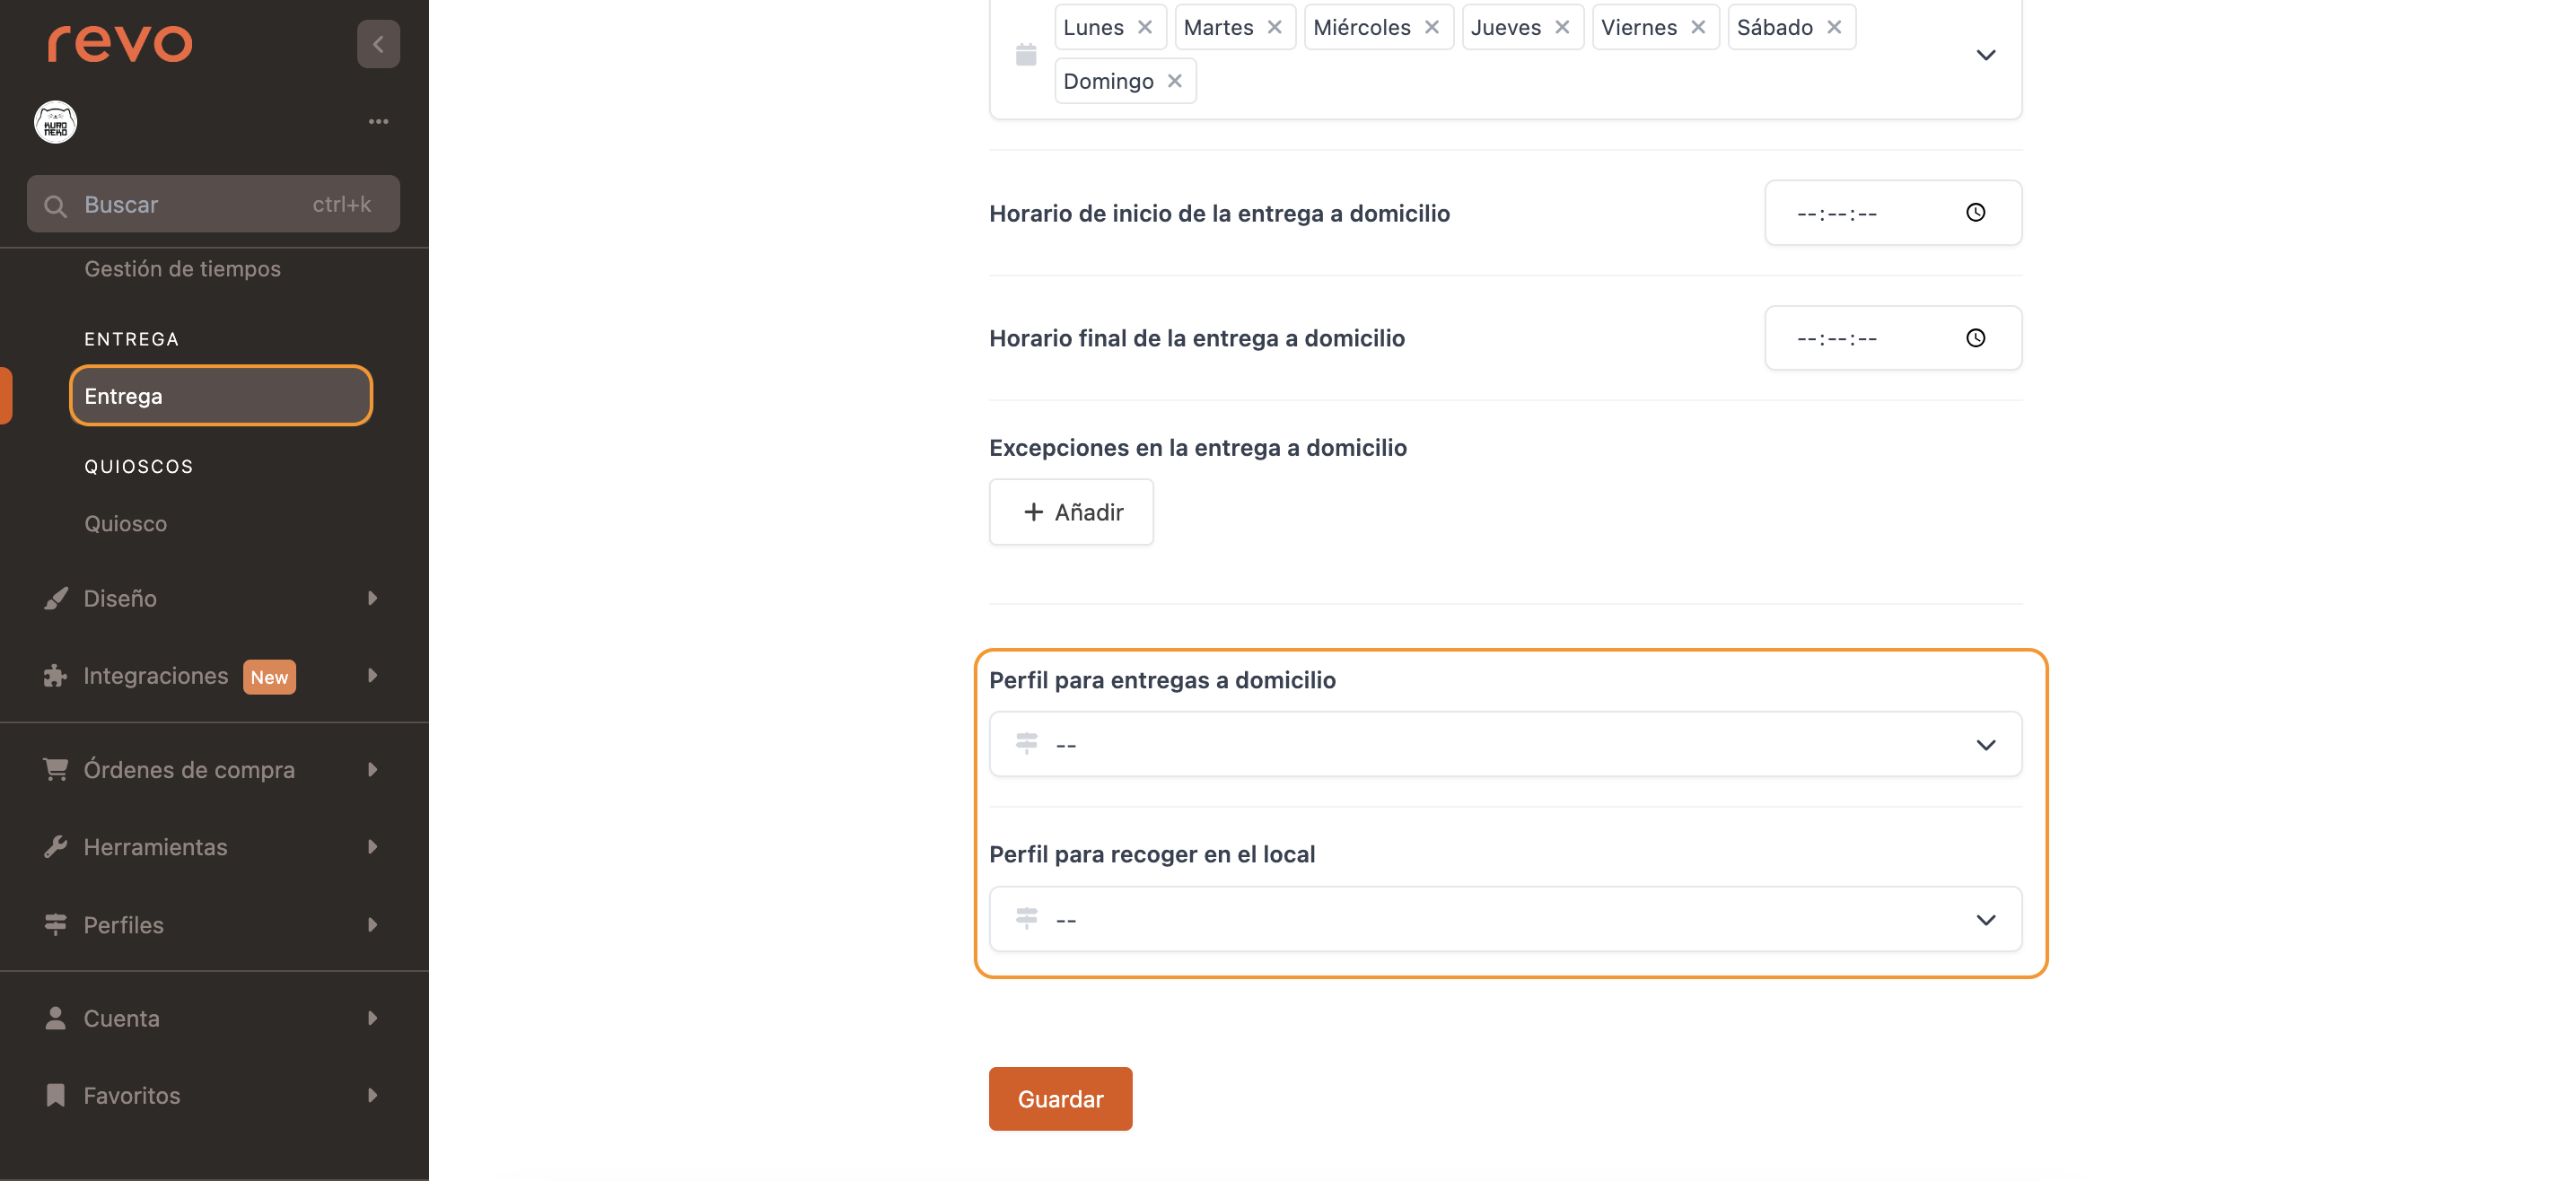
2. In delivery
In the Delivery section of the back-office.
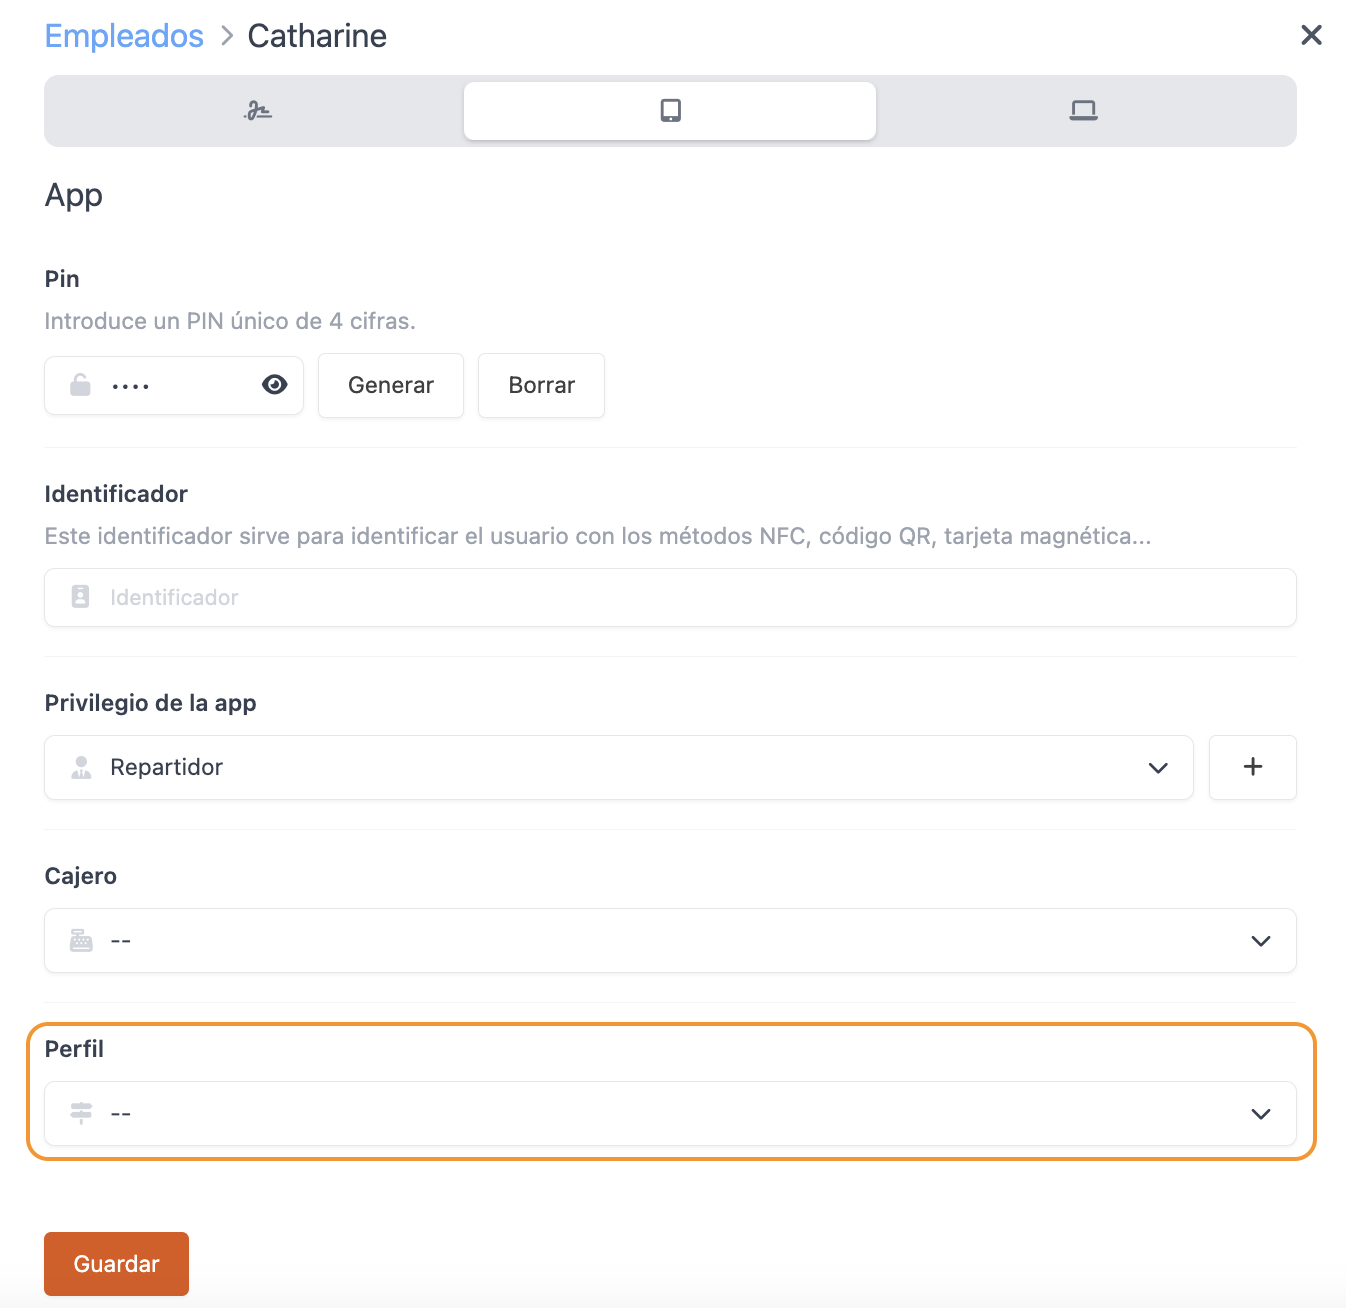
3. In the employee
In the configuration of an employee in the back-office.
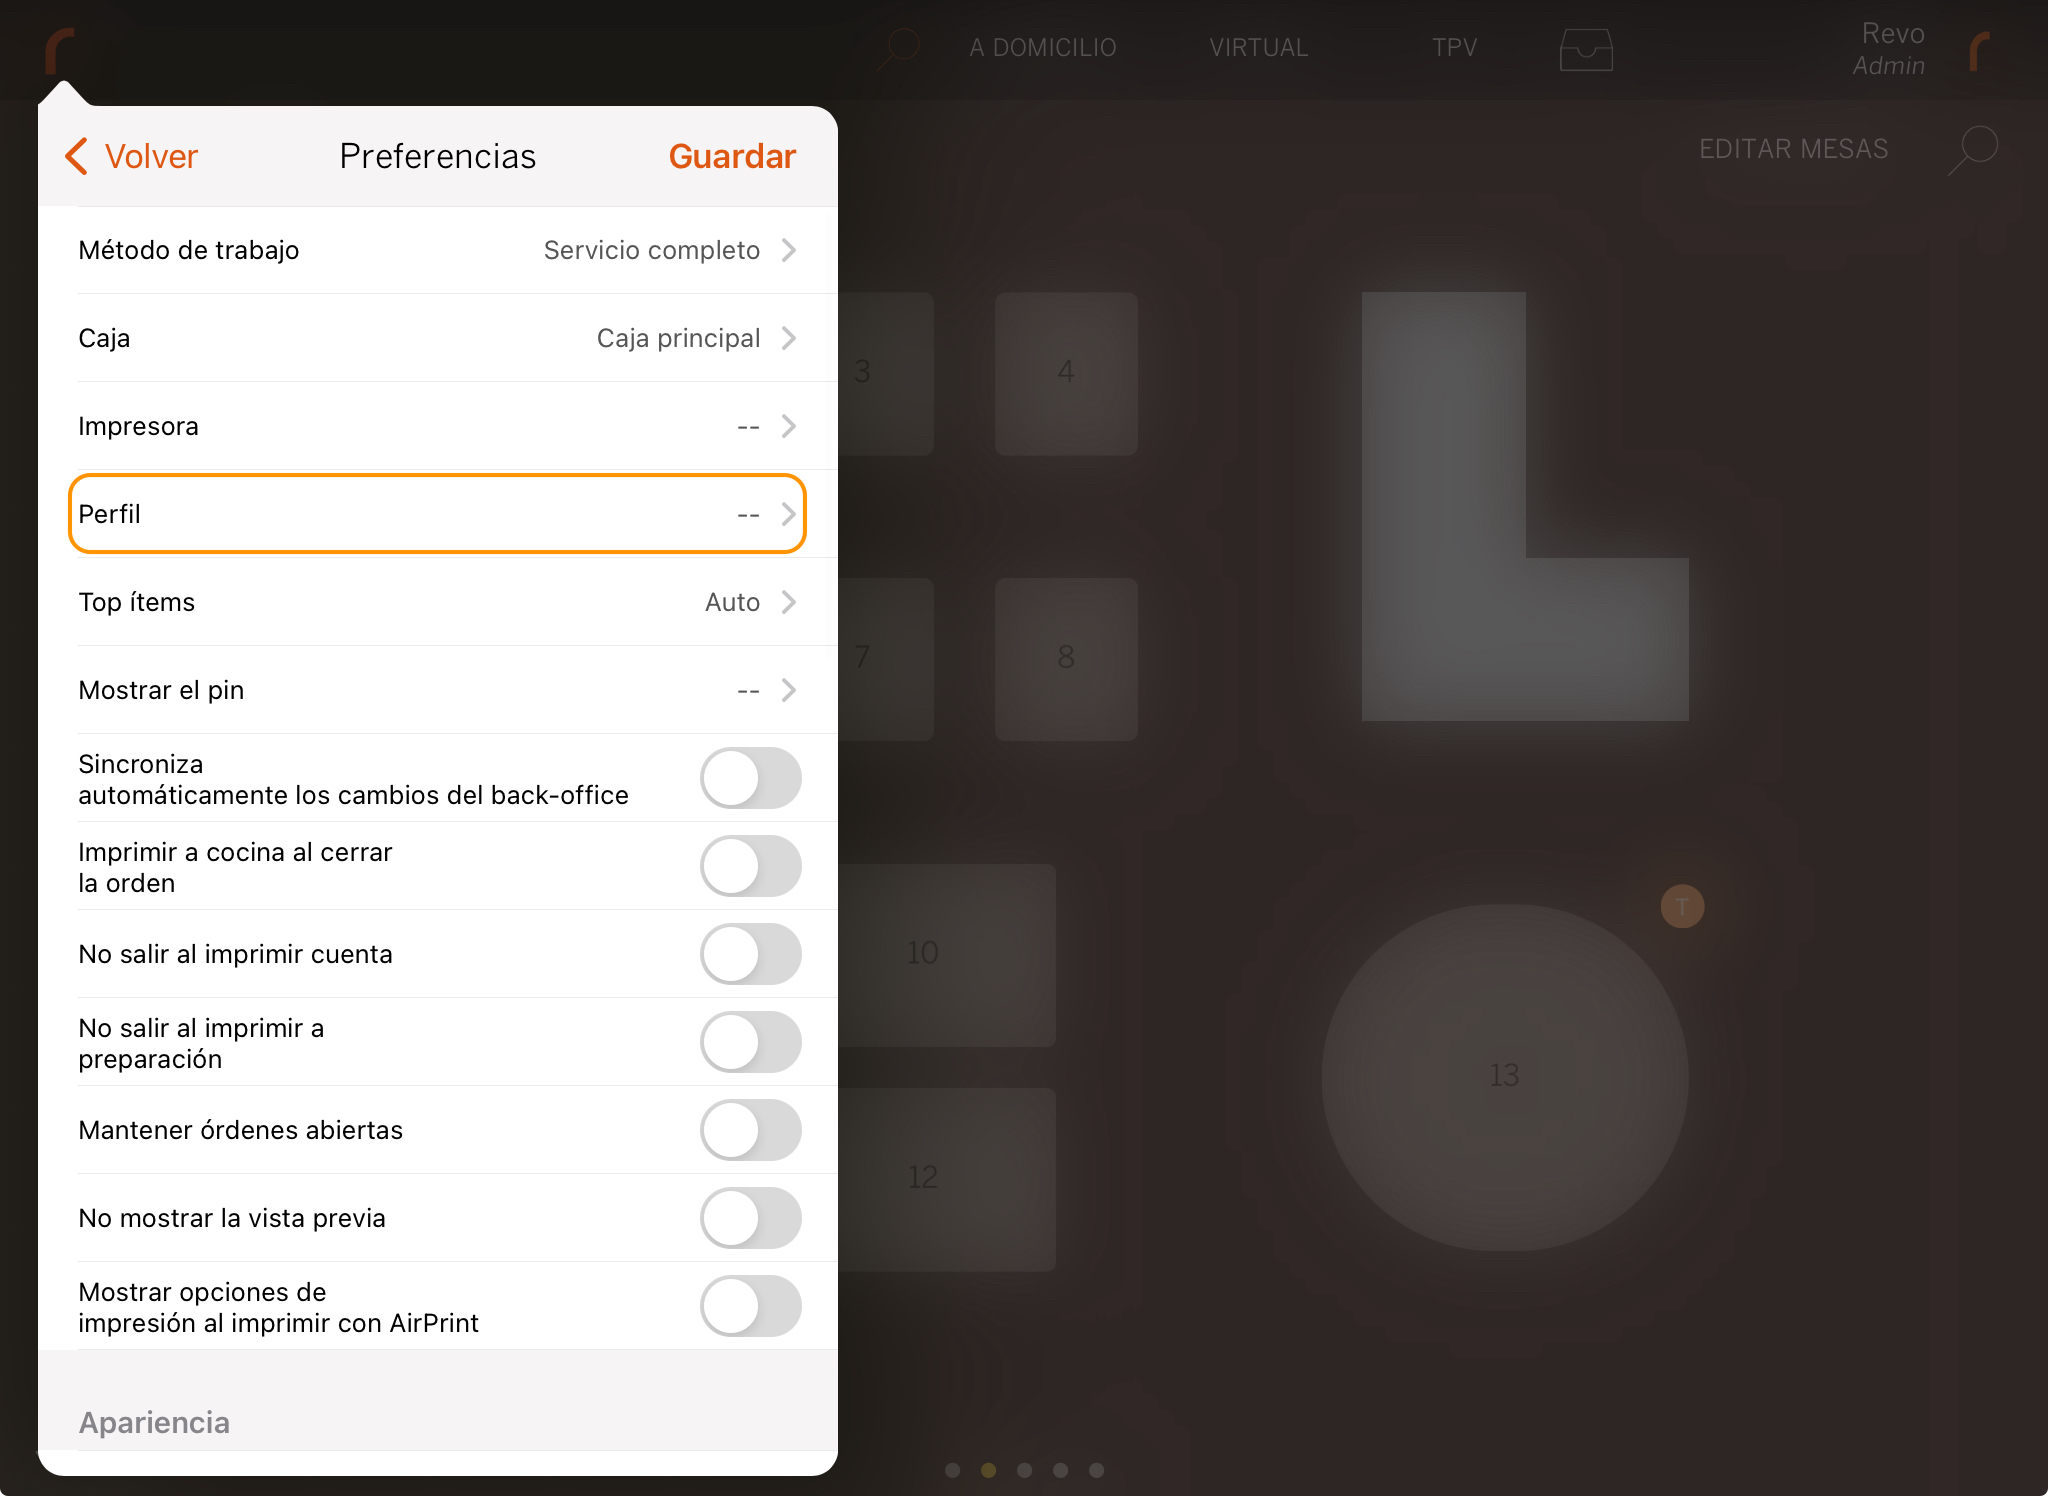
4. In the app
In the app's Preferences.
The order of profiles follows this priority.
